Table of Contents >> Show >> Hide
- What You’re Making (A.K.A. “Why Is It So Spiky?”)
- Materials and Setup
- The Quick Geometry Primer (So Assembly Makes Sense)
- Step 1: Fold One Sonobe-Style Unit (Then Repeat 29 More Times)
- Step 2: Learn the Basic Connection (Tab Into Pocket)
- Step 3: Build Your First Spike (Triangular Pyramid)
- Step 4: Make a Ring of Five Spikes (The Key Pattern)
- Step 5: Grow the Shape Like a Paper Planet
- Step 6: Close the Final “Oh No” Gap
- Troubleshooting (Because Paper Has Opinions)
- Make It Look Next-Level: Color Patterns That Pop
- Variations and Upgrades
- Care and Display
- Experiences From the Folding Trenches (An Extra of Real-World Wisdom)
- Conclusion
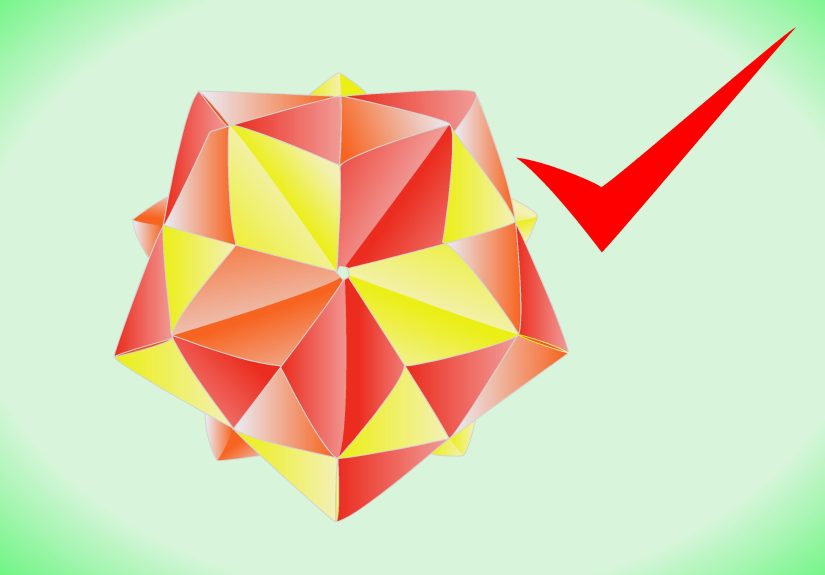
If you’ve ever looked at a spiky paper ball and thought, “That’s either a work of art or a medieval weapon,” congratulationsyou’ve found the modular origami stellated icosahedron. It’s a gorgeous, symmetrical, surprisingly sturdy polyhedron built from identical folded modules (usually a Sonobe-style unit), snapped together with nothing but friction, patience, and the occasional whispered apology to your fingertips.
In this guide, you’ll learn how to fold the modules, assemble them into the famous “spiky icosahedron” form, troubleshoot the wobbly moments, and even plan color patterns that look like you own matching socks on purpose. No glue required (though I won’t tell your art teacher if you use a tiny dab).
What You’re Making (A.K.A. “Why Is It So Spiky?”)
A regular icosahedron has 20 triangular faces, 30 edges, and 12 vertices. In the Sonobe/modular world, the “stellated” look usually comes from an elevated or augmented icosahedron: imagine gluing a small pyramid onto each triangular face. That’s why your finished model looks like a fancy sea urchin wearing geometry.
Stellated icosahedron vs. “spiky icosahedron”
In strict math language, “stellated icosahedron” can mean specific stellations (star polyhedra). In modular origami tutorials, it often refers to the spiked/elevated icosahedron made from Sonobe-style units. The build process below matches the popular modular origami version: 30 identical modules, assembled into cycles of five spikes around each vertex.
Materials and Setup
- 30 square sheets of paper (all the same size). Origami paper is ideal; printer paper works if you choose a smaller finished model or pre-crease carefully.
- Optional: bone folder or the back of a spoon (for crisp creases), tweezers (for tight pockets), and a tiny bit of glue (for “display forever” durability).
- Time estimate: 30–90 minutes depending on your folding speed and how often you stop to admire your symmetry.
Paper size: what works best?
Beginners usually have the best experience with squares around 3–4 inches (about 7.5–10 cm). Smaller paper makes sharper spikes but can get fiddly. Larger paper makes assembly easier, but the finished model can become “I need a shelf just for this” sized.
Color planning (simple, pretty, and not stressful)
You can use:
- One color for a clean, sculpture vibe.
- Two colors for a bold contrast (great for showing off the pattern).
- Six colors (5 units per color) for interlocking “bands” that look wildly intentional and very giftable.
The Quick Geometry Primer (So Assembly Makes Sense)
Modular origami is basically LEGO for people who enjoy creases. Each folded unit has pockets and tabs (points). You assemble by sliding a tab into a pocketno adhesives needed. For this model, you’ll repeatedly build:
- Triangular pyramids (“spikes”): made by linking units into a 3-edge triangle base.
- Rings of five pyramids: because at each icosahedron vertex, five triangles meet.
Once you recognize “cycles of five,” assembly stops feeling like guesswork and starts feeling like you’re quietly running a very small paper engineering firm.
Step 1: Fold One Sonobe-Style Unit (Then Repeat 29 More Times)
Below is a clear, reliable Sonobe unit flow. Your goal is a neat parallelogram-like module with pockets for assembly. The most important rule: every unit must be identical. If one unit is “freestyle,” it will absolutely announce itself during assembly.
1) Pre-crease the basics
- Start with a square, color side down (if it’s colored on one side).
- Fold in half and unfold to make a center crease.
- Fold the top edge and bottom edge to the center crease; crease well.
2) Create the diagonal corner guides
- Fold the top right corner down diagonally and crease.
- Fold the bottom left corner up diagonally and crease.
- Unfold those diagonal folds (you’re creating guide lines).
3) Form the central band
- Refold the top and bottom edges to the center crease (like you did earlier).
- As you fold, tuck the diagonal corners under the folded band so they sit neatly.
4) Shape into a parallelogram and lock the pockets
- Fold one end up (using the diagonal guide) so the shape begins to form a slanted parallelogram.
- Fold the opposite end down to complete the parallelogram.
- Tuck the loose flaps in so the unit becomes a compact “envelope” shape with two pockets.
5) Add the “extra center fold” for sharper spikes (recommended)
Many stellated/spiked assemblies work best if you add a reinforcing crease down the module’s centerline after the unit is finished. This strengthens the module and helps the pyramids pop up cleanly instead of slumping like a tired tent.
Make 30 units
Stack your finished units and check alignment. If they don’t stack neatly, fix the “odd duck” nowfuture you will be grateful.
Step 2: Learn the Basic Connection (Tab Into Pocket)
Each Sonobe unit has two tabs (pointy ends) and two pockets. Assembly is a repeating move: slide a tab from one unit into the pocket of another. The friction holds everything together.
- Pro tip: Insert tabs fully and crease the connection gently. Half-inserted tabs cause “mystery gaps” later.
- Pro tip #2: If the pocket is too tight, open it slightly with a fingernail or tweezersdon’t brute-force and tear the paper.
Step 3: Build Your First Spike (Triangular Pyramid)
The stellated look comes from repeating triangular pyramids. To make one:
- Connect three units end-to-end so they form a triangular loop (each unit becomes one edge of the triangle).
- As the third connection closes the loop, the triangle will naturally “lift” into a pyramid shape.
Congratulationsyou’ve made your first spike. It’s okay to stare at it a little. It’s basically math you can hold.
Step 4: Make a Ring of Five Spikes (The Key Pattern)
On an icosahedron, five triangular faces meet at each vertex. In this modular build, that means: you’ll keep connecting spikes until you form a cycle of five around a point.
- Build a second spike attached to the first by sharing an edge connection.
- Continue adding spikes one by one.
- When you reach five, the structure will start curving into a bowl/hemisphere shape.
If your model stays flat, one of two things happened: you accidentally built the wrong connection pattern, or your creases are too soft. Tighten tabs, sharpen creases, and make sure your spikes are truly forming pyramids.
Step 5: Grow the Shape Like a Paper Planet
After the first ring of five spikes, you’ll expand outward. Keep your guiding rule: everything clusters in cycles of five around each vertex.
A practical assembly rhythm
- Add units to complete a spike.
- Check that you’re forming a ring of five spikes around a vertex as you go.
- Let the curvature happendon’t fight it by flattening the model.
You’ll gradually build something that looks like half a spiky ball. This is a great moment to confirm stability: connections should be snug, and the structure should hold its shape when gently rotated in your hands.
Step 6: Close the Final “Oh No” Gap
The last few units are the most awkward because the model tightens as it closes. This is normal. Modular origami loves dramatic finales.
Closing tips that save your sanity
- Work slowly: insert one tab at a time and keep the nearby pockets open with a fingernail.
- Use a “zipper” approach: partially insert two tabs, then alternate pushing them fully in.
- Don’t crush spikes: hold the model by the base areas between spikes, not by the spike tips.
- If necessary: use tweezers to guide the final tab into its pocket.
Once the last connection is made, gently “massage” the modelpress edges and bases so the spikes stand evenly and the symmetry looks clean.
Troubleshooting (Because Paper Has Opinions)
Problem: My spikes look droopy
- Sharpen creases, especially the reinforcing center fold.
- Try slightly thicker paper (but not cardstock-thick unless you enjoy wrestling).
- Make sure tabs are fully seated in pockets.
Problem: The model is wobbly and gaps are forming
- One or more units may be folded inconsistentlycompare it to a “good” unit and refold if needed.
- Check that you’re building in the correct cycle-of-five pattern.
- For display pieces, a tiny dot of glue inside a few pockets can stabilize without showing.
Problem: I can’t insert the last tabs
- Open the pocket slightly before inserting.
- Reduce tension by loosening a nearby connection, then re-tighten after the tab is seated.
- Use tweezers or a toothpick (gently) to guide the paper.
Make It Look Next-Level: Color Patterns That Pop
Color is where your modular origami stellated icosahedron goes from “cool craft” to “museum gift shop centerpiece.” A popular approach is using six colors (five units per color) arranged in interlocking bands. Conceptually, each module corresponds to an edge, and each spike “borrows” color from the three edges around its base. This is why careful color placement can create sweeping stripes around the whole shape.
Easy color strategies
- Two-color swirl: alternate colors as you build each spike.
- Three-color triads: pick three colors and repeat the same order for each spike base.
- Six-color bands: fold 5 units of each color and try to keep same-color edges forming long “paths” across the model.
If you’re not aiming for a mapped design, don’t stress. Random color placement can still look fantasticlike confetti that passed geometry class.
Variations and Upgrades
Inward spikes (advanced and slightly mischievous)
Some builders reverse the orientation so pyramids point inward. It’s trickier because the structure fights you, but the result is a fascinating “caved-in” texture. If you try this, use stronger paper and accept that you’ve chosen the hard mode of paper folding.
Bigger model, same technique
The same assembly logic can scale if you use different modular systems (like edge-units designed for larger polyhedra). For the classic Sonobe-based spiky icosahedron, though, 30 units is the sweet spot: enough complexity to impress, not so many pieces that you forget what daylight looks like.
Care and Display
- Keep it away from humidity (paper + moisture = sad geometry).
- Dust with a soft brush or compressed air from a distance.
- If you’re gifting it, put it in a box with tissue paper so spikes don’t get crushed.
Experiences From the Folding Trenches (An Extra of Real-World Wisdom)
Building a modular origami stellated icosahedron is one of those projects that starts out feeling innocent“I’ll just fold a few units tonight”and ends with you surrounded by paper pieces like a tiny, polite tornado hit your desk. The first experience most people have is a brief moment of overconfidence after unit #3. “This is easy,” you say, like someone who has never met unit #17, which will be folded slightly off-angle for no apparent reason and later sabotage your assembly.
The second shared experience is discovering that modular origami has two separate hobbies hidden inside it: folding and assembling. Folding is meditativecrease, align, repeatuntil you enter a trance where every square sheet looks like it’s whispering, “I could be a module, too.” Assembly, on the other hand, is where the model develops a personality. It will cooperate for the first few spikes, letting you believe you’re in charge, and then it will suddenly become slippery and stubborn as soon as you try to close the first ring of five. That’s normal. It’s not you. It’s the physics of paper, friction, and tiny pockets that suddenly feel smaller than they did ten minutes ago.
People also tend to remember the moment the structure “turns the corner” into three dimensions. Up until then, you’re basically building flat-ish triangles. Thenalmost magicallythe form begins to curve, and you realize you’re not just making a craft; you’re assembling symmetry. This is usually followed by the very adult realization that you should stop and take a photo now, because later it will be hard to explain to someone how a pile of loose modules became a spiky globe. If you’re doing a color pattern, this is also the moment you either feel like a design genius or you start negotiating with yourself: “Okay, the colors are… abstract. Abstract is good. Abstract is modern.”
The “last units” experience is universal. The final few connections feel like they require three hands, a calm heart, and a minor in mechanical engineering. Many builders learn a surprisingly valuable life skill here: when something won’t fit, forcing it is rarely the solution. Instead, you loosen adjacent connections, widen the pocket gently, and then re-tighten everythinglike lacing a shoe. The moment the last tab clicks into place is ridiculously satisfying. It’s the paper equivalent of hearing a perfectly shut car door. You’ll probably rotate the finished model under a light source, watching shadows form around the spikes, and think, “I made this. From flat squares. I am basically a wizard.”
Finally, there’s the experience of showing it to someone else. Non-folders often react in two ways: they either assume you bought it, or they immediately ask, “How long did that take?” This is your moment to smile knowingly. You can give the honest answer (“Longer than I expected, shorter than learning the guitar”) or the dramatic answer (“Time stopped existing around unit #24”). Either way, the stellated icosahedron is a conversation piece, a desk sculpture, and proof that patience plus repetition can turn simple paper into something that looks like it belongs in a sci-fi movie.
Conclusion
Making a modular origami stellated icosahedron is equal parts craft, puzzle, and geometry flex. With 30 crisp units, a steady assembly rhythm, and the all-important “cycle of five” rule, you can build a spiky, symmetrical showpiece that’s sturdy enough to display and impressive enough to spark questions from anyone who wanders too close to your desk.


