Table of Contents >> Show >> Hide
- Before You Start: A Quick “Do This, Not That” Snapshot
- Supply Checklist (So You Don’t End Up Holding a Snail and Staring Into the Void)
- Step 1: Choose a Legal, Responsible Snail (Yes, This Matters)
- Step 2: Pick the Right Enclosure Size (Bigger Is Easier)
- Step 3: Make It Escape-Proof (Snails Are Stronger Than They Look)
- Step 4: Build a Safe Substrate Layer (The Forest Floor Starts Here)
- Step 5: Add Leaf Litter and Moss for a Real “Wild” Feel
- Step 6: Create a Humidity Plan (Moist, Not Marsh)
- Step 7: Keep Temperature Stable (No Sauna, No Fridge)
- Step 8: Add Hides and Climbing Surfaces (Snails Love Interior Design)
- Step 9: Provide Water Safely (Hydration Without the Drama)
- Step 10: Make Calcium Non-Negotiable (Shell Health = Whole Health)
- Step 11: Set Up a Natural Feeding Routine (Variety Beats “Only Cucumber Forever”)
- Step 12: Plan Maintenance Like a Calm, Responsible Forest Spirit
- Troubleshooting: What Your Snail Setup Is Trying to Tell You
- Real-World Experiences and Lessons From Snail Keepers (Extra 500+ Words)
- Conclusion: Your Snail’s “Natural Environment” Is a Set of Smart Patterns
Pet snails are basically tiny, slow-moving roommates who pay rent in vibes. But if you want them to thrive (and not go on a midnight escape mission), you’ll need more than “a box with lettuce.” A natural snail setup is about recreating a mini-ecosystem: the right moisture, safe soil, calcium for shell health, and enough hiding spots to make your snail feel like it has a mortgage.
This guide walks you through 12 practical steps to build a natural environment for land snailsone that supports normal behaviors like burrowing, climbing, foraging, and doing absolutely nothing for long stretches (a true inspiration).
Before You Start: A Quick “Do This, Not That” Snapshot
- Do aim for a habitat that’s moist like a wrung-out spongehumid, not swampy.
- Do provide constant access to calcium (your snail’s shell is not a decorative accessoryit’s their armor).
- Do use pesticide-free materials and wash anything going into the enclosure.
- Don’t put the enclosure in direct sun (you’re building a forest floor, not a solar oven).
- Don’t release pet snails outdoorsever. That’s how invasive problems start.
Supply Checklist (So You Don’t End Up Holding a Snail and Staring Into the Void)
- Secure enclosure with lid (glass or plastic)
- Substrate (coconut coir and/or organic topsoil without fertilizers)
- Leaf litter (pesticide-free) and sphagnum moss (optional but helpful)
- Hides (cork bark, half log, flowerpot on its side)
- Shallow water dish (snail-safe, easy exit)
- Calcium source (cuttlebone, plain calcium carbonate, or baked eggshell powder)
- Spray bottle + dechlorinated water
- Thermometer + hygrometer (tiny, cheap, and surprisingly life-changing)
- Food dish + tongs/spoon for cleanup
Step 1: Choose a Legal, Responsible Snail (Yes, This Matters)
Start with the right snail. In the U.S., some large species (especially giant African land snails) are prohibited and treated seriously because they can damage crops, ecosystems, and potentially carry parasites. A “cool” snail is not cool if it gets confiscated.
Natural setup tip
If you’re new, look for a species that is legal in your area and ideally captive-bred. Captive-bred snails typically adjust better to enclosure life and reduce the risk of bringing in unwanted hitchhikers.
Step 2: Pick the Right Enclosure Size (Bigger Is Easier)
Snails don’t need a mansion, but they do need enough room to explore, burrow, and find a comfortable microclimate. A common beginner win is a 5–10 gallon tank (or similar plastic tub) for a small group of garden-sized snails.
Rule of thumb
More space = more stable humidity and temperature, easier cleanup, and fewer “Why is everything moldy?” moments.
Step 3: Make It Escape-Proof (Snails Are Stronger Than They Look)
Snails can climb, wedge, and push their way out of surprisingly small gaps. Choose a lid that closes tightly and has ventilation that won’t turn your pets into little escape-artist legends.
Best practices
- Use a lid with small ventilation holes or mesh that’s not wide enough for your smallest snail.
- Add clips or latches if the lid is lightweight.
- Keep the enclosure away from shelves where a fall would crack the tank (or your confidence).
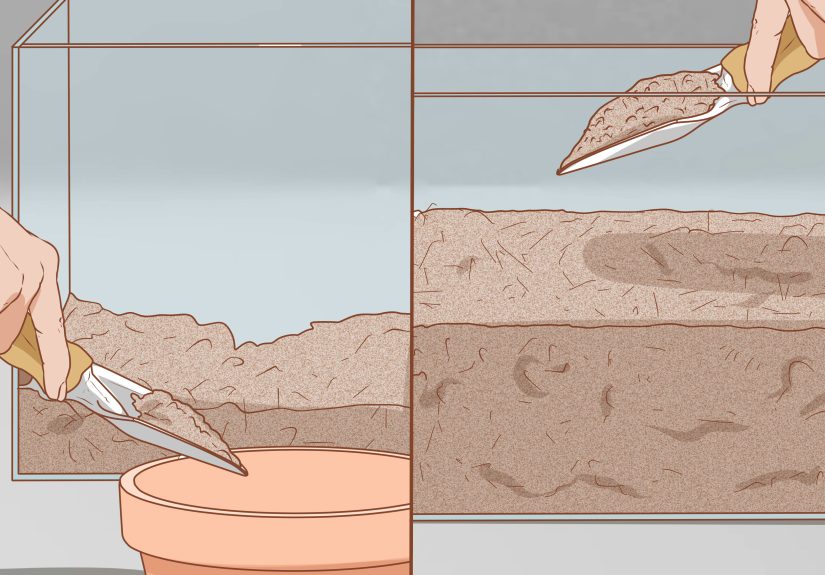
Step 4: Build a Safe Substrate Layer (The Forest Floor Starts Here)
Substrate is your foundation. It’s where snails burrow, rest, and lay eggs. A natural setup uses a soil-like base that holds moisture without becoming mud soup.
Recommended substrate options
- Coconut coir (excellent moisture retention, generally neutral)
- Organic topsoil with no fertilizers, pesticides, or perlite chunks
- A blend of the two for texture and stability
How deep?
Aim for 2–4 inches (more if you have larger snails). Snails love burrowing, and deeper substrate creates a moisture gradient: slightly drier at the top, wetter underneathmore like nature.
Step 5: Add Leaf Litter and Moss for a Real “Wild” Feel
Leaf litter isn’t just decorationit’s habitat. It provides hiding spots, reduces stress, helps stabilize humidity, and encourages natural foraging behavior.
How to do it
- Use pesticide-free leaf litter (many keepers bake or freeze it first to reduce hitchhikers).
- Add a patch of sphagnum moss in one area to act as a “humidity booster zone.”
- Keep it natural-looking, not crowdedsnails still need open paths.
Step 6: Create a Humidity Plan (Moist, Not Marsh)
Humidity is the difference between active, curious snails and snails that look like they’ve filed a complaint with management. Most land snails do best with consistently humid air and lightly damp substrate.
Targets (general)
Many common land snails thrive around 60–90% humidity, but exact needs vary by species and your local climate. That’s why a hygrometer is worth it.
How to maintain humidity
- Mist the walls and substrate with dechlorinated water (not soaking; just a fine mist).
- Use moisture-holding materials (leaf litter, moss, coir) to reduce daily swings.
- Balance ventilation: too much airflow dries the tank; too little can encourage mold.
Step 7: Keep Temperature Stable (No Sauna, No Fridge)
Most beginner-friendly land snails prefer mild, stable temperaturesthink “comfortable room” rather than “tropical meltdown.”
Practical range
A common safe zone is roughly 68–78°F for many species. Avoid direct sunlight and heat vents, which can spike temperatures quickly.
Pro tip
If your home temperature swings a lot, stability matters more than chasing a perfect number. Snails are small, but their stress is mighty.
Step 8: Add Hides and Climbing Surfaces (Snails Love Interior Design)
In nature, snails tuck under bark, in leaf piles, or against cool stones. In captivity, hides reduce stress and support normal day/night rhythms.
Great hide options
- Cork bark slabs (lightweight and mold-resistant)
- Half logs, small terracotta pots on their sides
- Curved wood pieces (properly cleaned and pesticide-free)
Climbing without chaos
Snails will climb anything. Provide textured, stable items and avoid sharp edges. If something can fall, assume it willusually at 2 a.m.
Step 9: Provide Water Safely (Hydration Without the Drama)
Snails need moisture, and many will drink droplets or soak. But deep water can be risky for small snails, and stagnant water gets gross fast.
Best setup
- Use a shallow dish with a gentle slope or textured “steps.”
- Refresh daily or whenever debris gets in it.
- Use dechlorinated or conditioned water when possible.
Step 10: Make Calcium Non-Negotiable (Shell Health = Whole Health)
Snails have a high calcium demand. Without enough calcium, shells can grow thin, chip, or deformlike trying to build a brick house with marshmallows.
Reliable calcium sources
- Cuttlebone (easy, long-lasting)
- Plain calcium carbonate (no flavoring, no additives)
- Eggshell powder (rinse, bake to dry, then grind finely)
How to offer it
Keep calcium available in the enclosure at all times (a small dish or a chunk of cuttlebone). You can also lightly dust certain foods, but don’t turn every meal into a chalk festival.
Step 11: Set Up a Natural Feeding Routine (Variety Beats “Only Cucumber Forever”)
A natural environment includes natural feeding behavior: grazing, nibbling, and exploring. Offer a rotating menu of clean, pesticide-free produce.
Staples to rotate
- Dark leafy greens (romaine, collards, dandelion greens if pesticide-free)
- Vegetables (zucchini, squash, carrot shavings, sweet potato slices)
- Occasional fruits (small amountsthink “treat,” not “daily dessert”)
What to avoid
- Salty or seasoned foods
- Processed bread/pasta/crackers (swells, spoils fast)
- Anything sprayed with pesticides or unknown “yard chemicals”
Natural behavior hack
Scatter a few bites around the enclosure (not just in one dish) so snails forage. It’s enrichmentsnail cardio, if you will.
Step 12: Plan Maintenance Like a Calm, Responsible Forest Spirit
A natural snail habitat is living and moist, which means it can also be a paradise for mold if you ignore it. The goal is gentle, consistent maintenancenot constant deep-cleaning that wipes out the “ecosystem” you built.
Daily / every-other-day
- Remove uneaten food before it turns into science.
- Spot-clean waste and wipe excess slime from surfaces if buildup is heavy.
- Check humidity and temperature.
Weekly
- Stir small sections of substrate lightly (don’t destroy tunnels everywhere).
- Rinse water dish and food dish.
- Inspect for eggs if you keep multiple snails.
Monthly (or as needed)
- Partial substrate refresh (top layer and most-soiled areas).
- Clean decor with hot water (skip harsh soaps; residues can be an issue).
Optional upgrade: “Bioactive-lite” cleanup crew
Many keepers add springtails to help manage mold and break down tiny bits of waste. This can make a natural environment more stable, but it’s not a magic spell. You still need to remove old food and keep airflow reasonable.
Troubleshooting: What Your Snail Setup Is Trying to Tell You
If humidity won’t stay up…
- Add more moisture-holding material (leaf litter, moss, coir).
- Reduce excessive ventilation (without sealing the tank airtight).
- Mist more lightly but more consistently.
If you’re seeing mold…
- Remove old food sooner and reduce overwatering.
- Increase airflow slightly.
- Consider adding springtails and topping up leaf litter.
If shells look rough or flaky…
- Confirm constant calcium access.
- Review diet variety and moisture balance.
- Check that the enclosure isn’t too dry for long periods.
If snails stay inactive all the time…
- Double-check temperature swings and humidity levels.
- Make sure there are hides and damp “comfort zones.”
- Remember many snails are naturally more active at night.
Real-World Experiences and Lessons From Snail Keepers (Extra 500+ Words)
A “perfect” snail environment on paper can still surprise you in real life, mostly because snails have opinionsquiet opinions, but opinions. One of the most common early experiences is realizing that snails do not read your plans. You might place a beautiful cork bark hide in the corner like you’re designing a luxury woodland cabin, and your snails will instead sleep upside-down on the lid like tiny, sticky bats. That’s normal. It’s also your first lesson: design for safety and stability, then let the snails vote with their feet.
Another shared experience: the humidity learning curve. New keepers often swing between two extremeseither misting so much that the enclosure becomes a swamp, or being too cautious and letting it dry out. The sweet spot feels like damp soil in a shaded garden bed: you can press it and feel moisture, but water doesn’t drip out. Many people find it helps to mist the walls rather than blasting the substrate directly. When droplets cling to the sides, snails can drink naturally, and your soil doesn’t turn into a mud pie.
Food is where comedy really happens. Plenty of keepers report starting with “safe” favorites like cucumberonly to discover cucumber can become the fast-food obsession of the snail world. If you offer it too often, some snails will ignore healthier options like leafy greens. The practical lesson: rotate foods and treat watery items like cucumber as an occasional snack, not the entire personality of the menu. A simple routine that works for many people is: greens most days, a veggie “crunch” option like carrot or sweet potato, and fruit only sometimes. The bonus: a varied diet tends to reduce picky behavior over time.
Calcium is another “aha” moment. Many keepers say the first time they put cuttlebone in the tank, they expected snails to ignore it like a weird rock. Instead, some snails go straight to it and rasp away like they’ve discovered the world’s slowest buffet. That behavior is a good signit usually means your snails are regulating what they need. Keep calcium available all the time and try not to micromanage it. The real-world trick is placement: put the cuttlebone somewhere easy to reach and not constantly soaked, so it lasts longer and doesn’t get gross.
Then there’s maintenancewhere “natural environment” becomes “natural responsibility.” Most keepers learn that the best cleaning strategy is not aggressive scrubbing; it’s small, consistent actions. Removing old food before it molds is the single biggest quality-of-life upgrade for both you and your snails. If you’re experimenting with live plants, expect snails to sample them. That’s not your snail “being naughty”; it’s being a snail. Choose hardy, pesticide-free plants, and treat plants as part of the environmentnot precious decor.
Finally, a big shared lesson: don’t underestimate reproduction. If you keep multiple snails, eggs can appear even when you didn’t plan on becoming a snail landlord. Keepers commonly build a quick habit: once a week, gently check a few areas of substrate for clusters of round eggs. The goal isn’t panic; it’s preventing accidental overpopulation and making sure you never, ever end up releasing snails outdoors. A natural snail setup is wonderfulbut it should stay contained in your home, not spread into local ecosystems.
Conclusion: Your Snail’s “Natural Environment” Is a Set of Smart Patterns
A natural pet snail habitat isn’t about fancy gadgetsit’s about consistent conditions: safe substrate, stable humidity, steady temperature, calcium access, and thoughtful maintenance. When you build those foundations, your snails will do the rest: burrow, climb, explore, and occasionally stare into the distance like tiny philosophers.
Start simple, measure humidity and temperature, and adjust in small steps. Within a week or two, you’ll notice the difference: more activity at night, healthier shells, and fewer “Why is this wet?” mysteries. And if your snail sleeps on the ceiling? Congratulations. You’ve created a home so comfy your snail feels free to be weird.


