Table of Contents >> Show >> Hide
- Why Steaming Works (and When It Beats Ironing)
- Before You Start: What You’ll Need
- Step-by-Step: How to Steam Clothes to Remove Wrinkles
- How Far Should You Hold the Steamer?
- Best Fabrics for Steaming (and Caution Zones)
- Common Steaming Mistakes (and How to Avoid Them)
- How to Maintain Your Garment Steamer
- No Steamer? Quick Wrinkle-Removal Alternatives
- Frequently Asked Questions
- Conclusion
- Experience-Based Tips and Real-World Scenarios (Extended Section)
If ironing feels like setting up a tiny wrestling ring for your shirt, a garment steamer may become your new favorite household sidekick. Steaming is fast, beginner-friendly, and often gentler on many fabrics because you’re using heat plus moisture to relax fibers instead of pressing them flat with a hot plate. In plain English: fewer wrinkles, less fuss, and fewer chances of accidentally “branding” your blouse.
This guide walks you through exactly how to steam clothes to remove wrinkles safely and effectivelyfrom setup to fabric-specific tips to common mistakes. Whether you’re working with a handheld steamer before work or touching up a dress five minutes before guests arrive, you’ll learn how to get smoother results without turning laundry day into a full-time job.
Why Steaming Works (and When It Beats Ironing)
Wrinkles form when fabric fibers get bent and cool in a creased position (thanks, laundry basket pile). Steam helps by adding heat and moisture, which relaxes those fibers so they can fall back into a smoother shape. That’s why steaming is great for quick touch-ups, travel clothes, delicate fabrics, and garments with shapes or details that are awkward to iron.
Steaming also has a practical advantage: there’s less direct contact with the fabric on many steamers, which can reduce the risk of shine marks, scorching, or crushing texture. That said, steaming is not always the best choice for a razor-sharp crease on dress pants or a crisp shirt cuff. For those, an iron still wins the “I mean business” award.
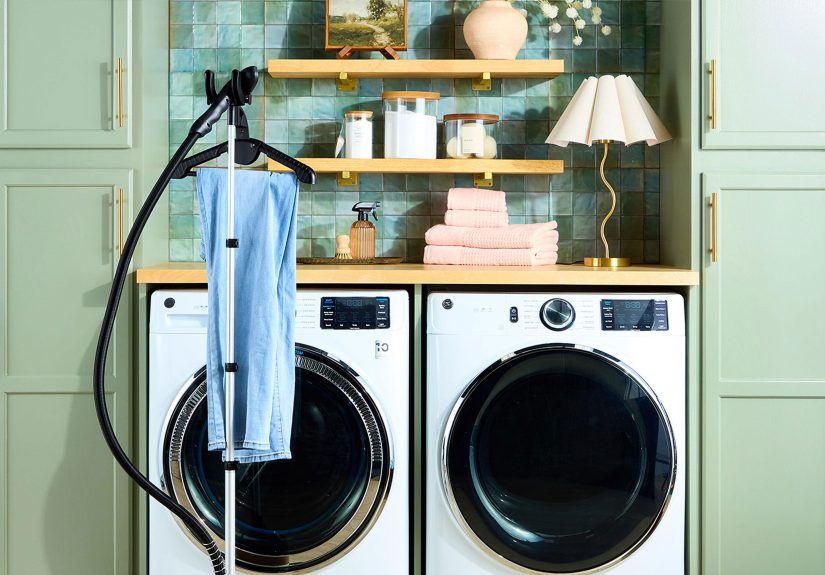
Before You Start: What You’ll Need
Essential Tools
- Garment steamer (handheld or upright)
- Clean water (follow your steamer’s manual; distilled water is often recommended to reduce mineral buildup)
- Sturdy hanger
- A place to hang the garment (rack, hook, shower rod, or door hook)
- Optional: heat-resistant glove for your non-steaming hand
Quick Safety Rules (Important, Not Boring)
- Never steam clothes while wearing them.
- Keep hands and skin away from the steam path (steam burns are no joke).
- Keep the steamer upright unless your model is specifically designed for other angles.
- Don’t add perfume, dyes, or additives to the water tank unless the manufacturer says it’s safe.
- Unplug and cool the steamer before refilling if it runs dry.
Step-by-Step: How to Steam Clothes to Remove Wrinkles
1) Read the Care Label First
This is the step most people skipand the step that saves the most regret. Check the care label for fabric type and care symbols before applying heat and moisture. If a garment is delicate, embellished, or has special care instructions, use those as your rulebook. When in doubt, test a hidden area first (inside seam, hem, or under a collar).
Pro tip: If you notice stains, treat them first. Moist heat can set some stains deeper into the fabric, which is exactly the kind of “efficiency” nobody wants.
2) Fill the Steamer and Let It Heat Up
Fill the reservoir with fresh water according to your steamer’s instructions. Many brands and laundry experts recommend distilled water because it helps reduce mineral buildup and spitting. Some steamers can use tap water, so follow your specific manufacturer guidance. Either way, use fresh water and avoid old water that’s been sitting in the tank for days.
Let the steamer heat until it produces a steady flow of steam. If it sputters at first, give it another moment. That short wait can save your shirt from random water droplets.
3) Hang the Garment Properly
Put the garment on a sturdy hanger and hang it where you can reach all sides easily. A shower rod, garment rack, or over-the-door hook works well. Hanging matters because gravity helps pull the fabric downward as the fibers relax, which helps wrinkles release more smoothly.
If the garment is large (maxi dress, jumpsuit, drapes, or a dramatic linen shirt that somehow became a map of crinkles), make sure it can hang freely without touching the floor.
4) Hold the Fabric Taut
Use your free hand to gently pull the hem or lower section of the garment downward. This light tension helps the steamer do its job and prevents you from just chasing wrinkles around in circles like a confused hairstylist with a blow dryer.
If you’re using a heat glove, this is when it earns its paycheck.
5) Steam from Top to Bottom
Start at the top of the garment and work downward in slow passes. Focus on the most wrinkled areas first. Keep the nozzle movingdon’t park it in one spot. For many fabrics, gentle downward strokes produce the cleanest results.
Technique varies by fabric and steamer design:
- Sturdier fabrics: Some steamers are designed so you can lightly brush or lightly touch the fabric with the steam head.
- Delicate fabrics: Keep more distance (especially silk and lightweight synthetics) and avoid over-saturating the material.
- Tricky wrinkles: Steam from the underside if neededthis can help relax fibers without pressing the visible side too aggressively.
6) Let the Garment Dry Before Wearing or Storing
After steaming, give the garment a few minutes to air-dry fully. Wearing, folding, or stuffing it back into a closet while still damp can re-create wrinkles. Yes, the universe can be rude like that.
How Far Should You Hold the Steamer?
There isn’t one universal distance because steamers and fabrics vary. Some brands suggest close passes for standard garments, while delicate fabrics (like silk) may need more distance. The safest approach is:
- Start farther away, then move closer if needed.
- Test a hidden spot first.
- Watch for signs of over-wetting, shine, stretching, or heat stress.
If your steamer manual gives a distance range, follow that over any general advice onlineincluding this article.
Best Fabrics for Steaming (and Caution Zones)
Great Candidates for Steaming
- Cotton shirts (for quick touch-ups)
- Linen garments (steaming helps a lot, though some linen loves wrinkling as a lifestyle choice)
- Polyester blends and synthetics
- Dresses, blouses, and flowy items
- Jackets and garments with structure that are awkward to iron flat
Use Extra Caution With
- Silk (steam at a greater distance, often inside out)
- Velvet/velour and textured fabrics (check care label first)
- Sequined, beaded, or embellished garments
- Leather, vinyl, waxed fabrics, and specialty finishes (follow care label/manufacturer guidance)
- Dry-clean-only items (confirm care guidance before using home steam)
When a garment is expensive, sentimental, or fussy enough to have its own personality, a professional cleaner is sometimes the best call.
Common Steaming Mistakes (and How to Avoid Them)
Mistake #1: Skipping the Care Label
Fix: Read it first. A two-second label check can prevent shrinkage, shine, or fabric damage.
Mistake #2: Using Additives in the Water Tank
Fix: Use water only unless your steamer manufacturer explicitly approves something else. Additives can clog or corrode internal parts.
Mistake #3: Holding the Nozzle Still
Fix: Keep it moving in slow, controlled strokes. Steaming is a glide, not a stare-down.
Mistake #4: Letting the Hose/Steamer Sit in the Wrong Position
Fix: Keep upright positioning when your model requires it. This helps condensation drain correctly and reduces spitting.
Mistake #5: Overloading the Laundry Routine
Fix: Prevention helps. Remove clothes promptly from the dryer, hang or fold them right away, and don’t cram the dryer so full that everything cools in deep creases.
How to Maintain Your Garment Steamer
A steamer that spits water everywhere is not “adding moisture for better results”it’s asking for maintenance.
Simple Maintenance Checklist
- Empty the tank after use if your manufacturer recommends it.
- Use fresh water, especially if the steamer sits for long periods.
- Clean/descale on schedule based on your water hardness and manufacturer instructions.
- Check for mineral buildup if steam output drops.
- Store the steamer safely after it cools completely.
Regular maintenance improves performance, extends the life of the appliance, and reduces the chance of surprise water spots on your “I swear this was clean” shirt.
No Steamer? Quick Wrinkle-Removal Alternatives
If your steamer is missing, broken, or currently living in a suitcase you forgot to unpack, you still have options:
1) Shower Steam Method
Hang the garment in the bathroom while taking a hot shower (away from direct spray). This can help relax light wrinkles, especially in travel situations.
2) Dryer + Damp Towel Method
Place the wrinkled garment in the dryer with a clean, damp towel (moist, not dripping) and run a short cycle. Remove the garment immediately and hang it up.
3) Wrinkle-Release Spray
Good for quick touch-ups. Always test on a hidden area first, especially with delicate or dark fabrics.
These methods are handy backups, but for regular wrinkle removal on multiple garments, a steamer is usually faster and easier.
Frequently Asked Questions
Can I steam clothes every day?
Yes, for many garments. Steaming is commonly used for frequent refreshes, but always follow the care label and avoid over-wetting delicate items.
Can steaming replace ironing completely?
For many people, almost. If you mostly want wrinkle-free clothes fast, steaming may be enough. If you need crisp creases or very sharp finishes, keep an iron for those jobs.
Why is my steamer spitting water?
Common causes include mineral buildup, incorrect positioning, condensation in the hose, or a unit that hasn’t fully heated. Check your manual, clean/descale as recommended, and keep the unit upright if required.
Should I use distilled water?
Often yesespecially to reduce mineral buildup. But some brands allow tap water. Follow your model’s instructions and avoid additives.
Conclusion
Learning how to steam clothes to remove wrinkles is one of those life upgrades that feels suspiciously easy. Once you get the basics downcare label first, garment hung properly, steamer upright, slow top-to-bottom passes, and a little patience while the fabric driesyou can smooth out shirts, dresses, and travel clothes in minutes.
The secret isn’t brute force. It’s good technique, the right amount of moisture, and treating each fabric like it has boundaries (because it does). Start slow, test hidden areas on delicate pieces, and let your steamer do the work. Your clothes look better, your mornings get easier, and your iron can finally stop acting like the main character.
Experience-Based Tips and Real-World Scenarios (Extended Section)
One of the most common experiences people have with a garment steamer is the “why did I wait so long?” moment. The first time you steam a shirt that came out of a suitcase looking like it lost a fight, it feels a little magical. You hang it up, make a few slow passes, and suddenly the fabric relaxes. The biggest lesson from that experience is that setup matters more than strengthgood hanging space and gentle tension beat aggressive steaming every time.
Another very relatable experience happens with delicate tops and dresses: users often start too close. The result is usually not disaster, but over-wettingtiny damp patches that make the garment take longer to dry. The fix is simple and worth remembering: start farther away, especially with silk-like or lightweight fabrics, and approach slowly. Experienced users tend to “read” the fabric as they go. If it softens and smooths quickly, keep going. If it gets too damp, back off and let the steam do the work from a safer distance.
Travel is where steamers really earn their reputation. A handheld steamer in a hotel room is often more practical than wrestling with a questionable iron or waiting for the bathroom shower steam trick to do the heavy lifting. People who steam while traveling often report the same winning routine: hang the outfit first, steam the most visible areas (collar, chest, front panels, sleeves), then let it dry while they finish getting ready. It’s a small habit, but it makes a packed outfit look much more polished.
There’s also the “I thought my steamer stopped working” experience, which is usually just a maintenance issue. Reduced steam, sputtering, or water droplets often show up after repeated useespecially in areas with hard water. Many users discover that cleaning or descaling the unit restores performance immediately. That experience tends to convert people into maintenance believers. A five-minute cleaning routine every so often is much easier than replacing a steamer or re-steaming clothes twice because the nozzle is spitting.
Another pattern shows up in busy households: wrinkle prevention becomes the real superpower. After using a steamer for a while, people often change their laundry habits too. They stop leaving clothes in the dryer “for later,” hang shirts sooner, and use quick refresh methods before wrinkles become deep creases. In other words, steaming doesn’t just fix wrinklesit changes how people manage clothes overall. And that’s the best kind of household tool: one that saves time now and teaches better habits for later.


