Table of Contents >> Show >> Hide
- What You’ll Learn
- Why Cleaning Your Grill Matters (Besides Impressing Your Neighbor)
- Tools You Need (And a Few You Should Break Up With)
- The Quick Clean After Every Cook (5–10 Minutes, Maximum Drama Reduction)
- Deep Clean Your Grill Correctly (The Step-by-Step That Actually Works)
- How to Clean Grill Grates (By Material, Because Not All Grates Like the Same Treatment)
- The “Hidden” Parts That Make a Big Difference
- Cleaning the Outside Without Wrecking the Finish
- A Realistic Grill Cleaning Schedule (For People With Actual Lives)
- Common Grill Cleaning Mistakes (And How to Avoid Them)
- Real-World Grill Cleaning “Experience” (Aka: Lessons Everyone Learns the Hard Way)
- Conclusion
Your grill is basically an outdoor oven that sweats bacon grease and occasionally gets baptized in barbecue sauce. Which is a poetic way of saying:
it gets gross. The good news? Cleaning it “correctly” doesn’t mean spending your Saturday with a toothbrush and a haunted look in your eyes.
It means knowing what to clean, when to clean it, and how to avoid turning your next cookout into a “why does my burger taste like last summer’s salmon?” situation.
This guide walks you through the quick after-cook cleanup, the deep-clean routine, and the little maintenance habits that keep your grill safe,
efficient, and ready to throw down at a moment’s notice. We’ll cover gas grills, charcoal grills, pellet smokers, flat-top griddles, and the
different grate materials (cast iron, stainless steel, porcelain-coated). Along the way, you’ll pick up a few shortcuts and safety tips
because nobody wants a flare-up that turns “steak night” into “call the fire department night.”
Why Cleaning Your Grill Matters (Besides Impressing Your Neighbor)
A clean grill cooks better. That’s not a motivational posterit’s physics. Grease buildup messes with airflow, heat distribution, and burner
performance. Charcoal grills can choke on ash the way you choke on a dry chicken breast (tragic, preventable). Pellet grills get cranky when
ash, sawdust, and grease start blocking the path of good combustion and good vibes.
Cleaning also improves flavor. Old carbon flakes and rancid grease can drop onto food, smoke weirdly, and turn a beautiful steak into a
mystery-meat perfume. And then there’s safety: overflowing grease trays and thick residue can contribute to flare-ups, so cleaning isn’t just
for aestheticsit’s for keeping “backyard BBQ” from turning into “backyard fire drill.”
Tools You Need (And a Few You Should Break Up With)
The “Good Decisions” Toolkit
- Grill brush or bristle-free brush (or a grill stone/coil-style scrubber)
- Grill scraper or plastic putty knife (great for cook boxes and drip trays)
- Bucket, warm water, mild dish soap
- Microfiber cloths or paper towels
- Long tongs (for wiping/oiling grates safely)
- Non-abrasive scrub pad (especially for porcelain-coated parts)
- Optional but glorious: a shop vac / wet-dry vacuum (pellet grills and charcoal grills love this)
Tools That Can Cause Problems
Wire-bristle brushes can shed bristles. That’s not “internet fear-mongering,” it’s a known hazard: bristles can dislodge, stick to grates,
and end up in food. If you use one, inspect the brush, inspect the grates, and wipe the cooking surface afterward. Better yet, go bristle-free.
Also: be cautious with harsh oven cleaners and corrosive chemicals. Some are too aggressive for grill finishes and can leave residues you
definitely don’t want “seasoning” your burgers. Mild soap, warm water, and a purpose-built grill degreaser (used correctly and rinsed well)
usually get the job done without turning your grill into a science experiment.
The Quick Clean After Every Cook (5–10 Minutes, Maximum Drama Reduction)
If you do one thing consistently, do this. The after-cook routine prevents buildup from becoming a weekend-long archaeological dig.
The key is timing: you want the grates warm enough to release gunk, but not so hot that you’re reenacting a slapstick comedy with steam and
regret.
-
Burn off residue. After you’re done cooking, close the lid and run the grill hot for 5–10 minutes. This dries and loosens
stuck-on bits so they’re easier to remove. -
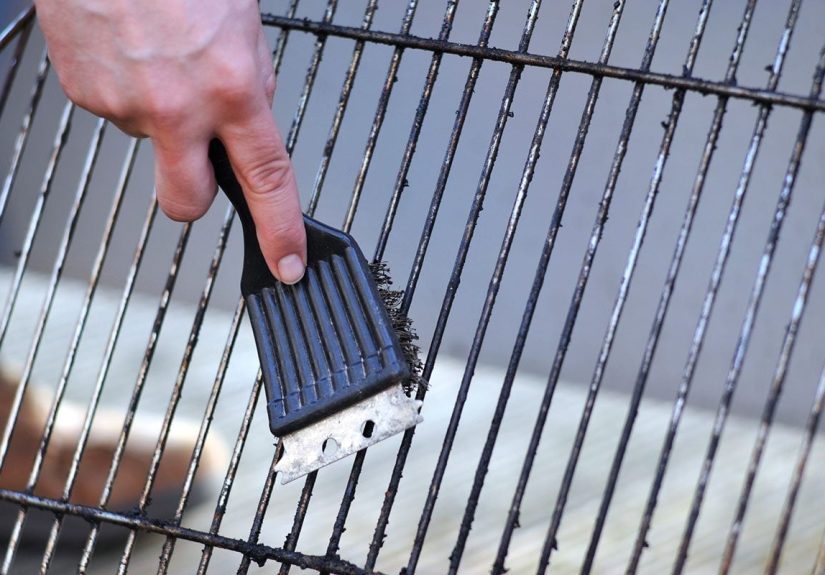
Brush the grates. Use a bristle-free brush, coil brush, or grill stone. (If you use a wire brush, inspect for loose
bristles and wipe afterward.) -
Wipe and oil (optional but smart). With tongs, wipe the grates using a folded paper towel lightly dipped in a high-smoke-point
oil. You’re not marinating the grillyou’re creating a thin protective film that helps prevent sticking and rust. -
Empty the grease cup / check the tray. If your grill has a grease cup, don’t let it become a full-time job for the fire
department.
This routine is the difference between “I love grilling” and “I only grill twice a year because cleaning is my villain origin story.”
Deep Clean Your Grill Correctly (The Step-by-Step That Actually Works)
Deep cleaning is what you do when: (1) you notice flare-ups, (2) the grill smells weird, (3) heat is uneven, or (4) you just opened the lid
and whispered, “Oh no.” For most people, a deep clean once or twice a year is plenty, with extra attention during heavy grilling seasons.
Deep Clean a Gas Grill
- Shut it down safely. Turn off burners, let the grill cool, and disconnect propane if applicable. Safety firstalways.
-
Clean the lid interior. The underside collects carbonized grease that can flake. Scrape or brush it off so it doesn’t snow
onto your next meal like gross little pepper flakes. - Remove and scrub grates. Brush, then soak in warm soapy water if needed. Rinse and dry thoroughly.
-
Clean heat plates/flame tamers (Flavorizer bars, heat tents). Brush off debris. These parts protect burners and help manage
drippingswhen they’re clogged, your grill’s heat can get moody. - Clear the cook box. Scrape built-up grease and debris down into the grease tray area. This is where flare-ups are born.
-
Check burners and ports. Brush burner tubes and make sure ports aren’t clogged. Uneven flames often trace back to blocked
ports or dirty burners. -
Inspect venturi tubes/spider guards. Insects can build homes in gas pathways. Clearing these helps prevent airflow problems
and reduces hazards. - Empty and clean the grease tray. Wash with warm soapy water (or line it with foil/liners if your grill allows).
- Reassemble, then do a quick heat test. Fire it up briefly to burn off any remaining moisture.
Deep Clean a Charcoal Grill
- Cool completely. This is not negotiable. Ash can stay hot longer than your group chat’s last argument.
-
Remove old ash. Ash buildup blocks vents, messes with temperature control, and can create a sticky, damp mess. Dump only when
fully cool. - Brush the lid and bowl. Scrape carbon flakes inside the lid; brush out debris inside the bowl.
- Clean the grates. Brush and wash with warm soapy water if needed. Dry thoroughly.
- Oil grates lightly. A thin coat helps prevent rust and keeps next cook easier.
- Check vents for freedom. Vents should open and close easily. A charcoal grill needs airflow the way you need coffee.
Deep Clean a Pellet Grill / Smoker
- Unplug and cool. Pellet grills have electrical components. Let everything cool down fully.
- Remove grates and drip tray. Soak grates if needed. Scrape grease from the drip tray and grease channels.
- Vacuum ash. Use a shop vac to remove ash from the cook box and especially the fire pot area (follow your manufacturer guidance).
- Clear the hopper and sawdust. Pellets and sawdust can accumulate; cleaning helps avoid jams and performance issues.
- Wipe down interior surfaces. Scrape heavy buildup first; then wipe with damp cloth. Avoid soaking electrical areas.
- Reassemble and run briefly. A short warm-up can help ensure everything is dry and operating normally.
How to Clean Grill Grates (By Material, Because Not All Grates Like the Same Treatment)
Stainless Steel Grates
Stainless steel is fairly forgiving. Burn off, brush while warm, and deep clean with warm soapy water when buildup gets stubborn. For really
baked-on grime, soaking helps. Dry completely to prevent water spots and weird corrosion from trapped moisture.
Cast Iron Grates
Cast iron is a diva, but it’s worth it. Avoid soaking for long periods because it can rust. Brush, wipe with a damp cloth (not a bath),
dry thoroughly, then apply a light coat of oil. Think “seasoning,” not “deep cleanse.” If you see rust, scrub it off, oil, and heat to re-season.
Porcelain-Coated Grates
Porcelain coating can chip if you go full barbarian. Use non-abrasive pads and gentler brushes. Skip metal scrapers that can gouge the coating.
Warm soapy water, careful scrubbing, and patience are the move here.
Flat-Top Griddles
Scrape while warm, add a little hot water for steam to loosen residue, wipe clean, then apply a thin layer of oil to prevent rust. The goal is a
smooth cooking surface with a maintained seasoning layerlike cast iron cookware, but outdoors and with more bragging rights.
The “Hidden” Parts That Make a Big Difference
Grease Trays, Grease Cups, and Drip Pans
These are the unsung heroes that keep grease from pooling where flames live. If they’re full, blocked, or gross, flare-ups become more likely.
Empty often, scrape when needed, and wash periodically with warm soapy water. If your grill allows liners, they can make cleanup fasterjust don’t
let a liner become a long-term storage solution for an oil spill.
Burners and Ports (Gas Grills)
If one side runs hotter than the other, or flames look weak/uneven, check burner ports for clogs. A careful brushing can restore even heat.
Avoid soaking burners unless your manufacturer recommends itburners need to be completely dry before ignition.
Venturi Tubes and Air Intakes
Spiders and insects love these tubes. Unfortunately, your grill is not a wildlife sanctuary. Periodic inspection and cleaning helps keep airflow
correct and reduces the risk of malfunctions.
Fire Pot and Ash Management (Pellet Grills)
Ash buildup can affect ignition and heat consistency. Vacuuming ash and removing sawdust helps your pellet grill run cleanly and predictablyaka,
the whole reason you bought a pellet grill in the first place.
Cleaning the Outside Without Wrecking the Finish
Your grill’s exterior doesn’t need spa-level exfoliation. Most of the time, warm water, mild dish soap, and a soft cloth handle it.
For stainless steel, a stainless-steel cleaner can help (wipe with the grain). For painted, powder-coated, or porcelain-coated surfaces, stick
with gentler soap-and-water cleaning so you don’t dull the finish.
And yes, a grill cover helpsespecially if your grill lives outdoors. Weather plus grease equals “why is my grill turning into a crusty relic?”
A Realistic Grill Cleaning Schedule (For People With Actual Lives)
- Every cook: Burn off 5–10 minutes, brush grates, empty grease cup if needed.
- Every 3–5 cooks: Wipe grates, check grease tray, quick scrape of the cook box area.
- Monthly (heavy season): Deeper grate clean, inspect burners/ports, clean heat plates/flame tamers.
- Once or twice a year: Full deep clean (lid, grates, internals, trays), inspect hoses and connections (gas grills), vacuum ash (pellet/charcoal).
If you grill constantly, bump the deep clean frequency up. If you grill once every other month, don’t overthink itjust don’t let grease and ash
become a permanent lifestyle choice.
Common Grill Cleaning Mistakes (And How to Avoid Them)
Mistake #1: Cleaning Only When It’s a Disaster
If you only clean when the grill looks like it fought a brisket and lost, you’re creating more work. The quick after-cook routine is the cheat
code. Small effort now saves big effort later.
Mistake #2: Using the Wrong Tool on the Wrong Surface
Porcelain-coated grates don’t like abrasive punishment. Cast iron doesn’t like soaking. Stainless steel can handle more, but still appreciates
a reasonable approach. Match the method to the material, and you’ll extend the life of your grill parts.
Mistake #3: Ignoring Grease Management
Flare-ups are often a grease problem. If you’re getting frequent flare-ups, don’t just “cook around it.” Clean the grease tray, scrape the cook
box, and check the areas where grease collects.
Mistake #4: Forgetting the Final Wipe
After brushing, wipe the grates with a damp cloth or paper towel (use tongs). It picks up loosened debris and helps reduce the chance of any
brush fragments ending up on food. It’s a small step with big peace-of-mind energy.
Mistake #5: Putting Everything Back Wet
Water trapped in parts encourages rust and can mess with ignition (especially for burners that must be bone-dry). Dry parts thoroughly, then do a
short heat run to finish the job.
Real-World Grill Cleaning “Experience” (Aka: Lessons Everyone Learns the Hard Way)
Let’s talk about the lived reality of grill cleaningthe part nobody brags about on Instagram. I’m going to describe the classic scenarios that
grill owners run into, because whether you’re running a shiny new propane setup or an ancient charcoal kettle that’s seen things, the patterns
are weirdly consistent.
First: the “I’ll clean it later” spiral. It usually starts innocentlymaybe you grilled burgers on a Thursday night and you’re tired, so you
close the lid and walk away. Then it’s Saturday. Then it rains. Then you grill chicken and the old burger bits become carbon confetti stuck to
the grates. Eventually, you’re scraping a crust that has the structural integrity of a driveway. The fix isn’t heroic scrubbing; it’s doing the
5-minute burn-off-and-brush routine every time. That tiny habit is basically compound interest for your sanity.
Second: the flare-up panic. A lot of people blame the food (“these burgers are too fatty”), but the truth is often sitting in the grease tray
like a villain plotting your downfall. When grease trays and drip pans are full, a hot cook can ignite the buildup. The first time it happens,
you will develop a new respect for how quickly “nice backyard hang” can become “everyone step away.” Once you’ve cleaned a grease tray that’s
been neglected, you’ll understand why regular emptying is the easiest safety upgrade you can do.
Third: the “why does my food taste off?” mystery. Sometimes it’s not your seasoning. Sometimes it’s yesterday’s fish. A grill that isn’t cleaned
can hold onto old grease and carbonized residue that smokes during the next cook, especially at high heat. People often notice it on delicate
foodsshrimp, chicken, veggiesbecause they pick up smoky weirdness fast. A quick solution is to preheat thoroughly, brush, and then wipe the
grates before cooking. That one-two punch removes leftovers you can’t always see.
Fourth: the cast iron learning curve. Cast iron grates are fantastic at holding heat, but they punish neglect. The most common mistake is washing
them like a dinner platesoaking, air-drying, then wondering why rust showed up like an uninvited guest. The better approach is simpler: brush,
wipe, dry, oil lightly. Over time, a well-maintained cast iron grate behaves like a seasoned pan: it releases food better, resists rust, and
makes you feel like you know what you’re doing (even if you’re still Googling “safe internal temp for chicken” every single time).
Fifth: the pellet grill “ash surprise.” Pellet grills are amazing, but they’re not magic. If you don’t vacuum ash and clean the fire pot area
occasionally, you can end up with inconsistent temps or ignition hiccups. People often interpret this as “my grill is broken,” when it’s really
the grill begging for a basic cleanup. The first time someone shop-vacs the ash out and the grill suddenly runs like new, it feels like you just
discovered a secret level in a video game.
The overall lesson? Cleaning your grill correctly is less about brute force and more about rhythm. A small cleanup after each cook, plus a deeper
reset once or twice a year, keeps everything safer, easier, and way more fun to use. And honestly, a clean grill is one of the few adulting
achievements that immediately rewards you with better-tasting food. That’s a rare win. Take it.


