Table of Contents >> Show >> Hide
- What Makes a Table “Farmhouse,” Anyway?
- Before You Buy Lumber: Pick a Size That Fits Real Life
- Budget Reality Check: “Under $100” Means What, Exactly?
- Materials List: A Remodelaholic-Inspired Under-$100 Build
- Tools: Keep It Simple (You Don’t Need a Celebrity Workshop)
- Step-by-Step: How to Build the Table
- Step 1: Let the wood acclimate
- Step 2: Build the base “skirt” (apron frame)
- Step 3: Add internal support braces
- Step 4: Attach the legs
- Step 5: Add leg-to-leg braces (optional but recommended)
- Step 6: Build the tabletop
- Important note on wood movement (aka: how to avoid tabletop cracks)
- Step 7: Sand like you mean it
- Step 8: Finish for real life (not just “looks good for photos”)
- A Simple Example Plan (Seats 6 Comfortably)
- Customization Ideas That Still Respect the Budget
- Common Mistakes (So You Can Skip Them)
- Conclusion: A Table That Costs Lessand Means More
- Real-World Experiences DIYers Share After Building a $100 Farmhouse Table
Farmhouse tables have a magical ability to make everything feel more “home.” Thanksgiving? Better. Tuesday night leftovers?
Suddenly it’s a vibe. The problem is that store-bought farmhouse tables often come with store-bought farmhouse prices
(aka: “Do I really need both kidneys?”).
The good news: you can build a sturdy, good-looking farmhouse-style dining table for under $100 in lumber and basic hardware
if you stick to simple joinery, off-the-shelf boards, and smart shopping. This Remodelaholic-inspired approach focuses on
practical cuts, strong framing, and beginner-friendly stepsplus finish tricks that make inexpensive wood look intentionally rustic
(instead of “I built this in a rush, because I did”).
What Makes a Table “Farmhouse,” Anyway?
A farmhouse table isn’t one single blueprintit’s more like a personality:
sturdy, simple lines, thick-looking top, and a base that can handle real life (kids, friends, board games, homework, and the occasional
“Oops, I used the table as a ladder” moment).
- Solid-looking top: usually made from wide planks or multiple boards joined edge-to-edge.
- Chunky base: square legs, turned legs, or a trestle baseanything that reads “built to last.”
- Comfortable overhang: enough space so chairs and knees don’t fight the apron every meal.
- Finish with character: stain + clear coat, paint + stain combo, or a slightly aged look.
Before You Buy Lumber: Pick a Size That Fits Real Life
The fastest way to blow your budget is building the wrong size table and then “fixing it” with extra lumber. Decide these first:
length, width, height, and leg placement (especially if you want a bench to slide under).
Practical sizing cheatsheet
- Height: Most dining tables land around 29–30 inches tall.
- Seating space: Plan roughly 24–30 inches of table edge per person so elbows aren’t having a turf war.
- Width: 34–40 inches is a sweet spot for family-style meals (plates + serving dishes without crowding).
- Overhang: About 2 inches looks balanced and feels comfortable.
If you’re building around a specific bench, copy a classic Remodelaholic tip: bring your measurements to the store and “dry lay”
the leg spacing right there. Dimensional lumber is famous for not being the dimension it claims to be, so real-world layout prevents
the dreaded “Why doesn’t the bench fit?” surprise.
Budget Reality Check: “Under $100” Means What, Exactly?
Most under-$100 builds refer to lumber + basic fasteners (screws, glue). Finish materials can add $10–$40 depending on
what you already own. If you already have stain, polyurethane, or paint, your total can stay comfortably under $100.
How to keep costs down (without building a wobbly regret table)
- Use construction lumber: 2x boards for the top, 2x4s or 1x4s for the apron, and 4x4s for legs.
- Buy the straightest boards you can find: stand them on end, sight down the length, reject twists like you’re judging a dance competition.
- Skip “premium” extras: turned legs are gorgeous, but they’re often the budget killer.
- Design for simple cuts: fewer angles = less waste, less frustration.
- Shop sales and culled piles: sometimes you can score perfectly usable boards that just have cosmetic issues.
Materials List: A Remodelaholic-Inspired Under-$100 Build
Remodelaholic’s featured under-$100 farmhouse table build used a straightforward shopping list and stayed in budget by combining
a plank-style top, a simple “skirt” (apron frame), and sturdy 4×4 legsplus a small decorative trim to hide exposed screws.
Example lumber approach (classic farmhouse look)
- Top boards: 2×10 (or 2×8 / 2×6 depending on the width you want)
- Legs: 4×4 posts
- Apron/skirt: 2×4 or 1×4 boards
- Support braces: 2×4 or 1×4 stretchers
- Optional trim: 1×2 strips to create a cleaner finished edge and hide fasteners
Hardware + consumables
- Wood glue
- 2 1/2-inch wood screws (or pocket hole screws if you’re using a pocket hole jig)
- 1 1/4-inch screws (helpful for trim)
- Sandpaper (80/120/180/220)
- Pre-stain conditioner (especially for pine)
- Stain or paint
- Clear coat (polyurethane or polyacrylic)
- Felt pads for the feet
Tools: Keep It Simple (You Don’t Need a Celebrity Workshop)
The “ideal” tool list is endless, but you can build a strong farmhouse table with the basics:
- Measuring tape + pencil + speed square
- Miter saw (or circular saw with a straightedge guide)
- Drill/driver + bits
- Clamps (the more you have, the more powerful you feel)
- Sander (orbital is great) or sanding block if you’re determined and very patient
Step-by-Step: How to Build the Table
Step 1: Let the wood acclimate
Bring your boards into the space where the table will live and let them sit for about a week if possible. Wood moves with humidity,
and letting it adjust reduces warping surprises after you build.
Step 2: Build the base “skirt” (apron frame)
Think of the skirt as a strong rectangle that supports the top and keeps the legs aligned. Decide your tabletop size first,
then build the skirt slightly smaller to create an overhang (around 2 inches is a nice target).
- Cut your long apron pieces and short apron pieces to form a rectangle.
- Pre-drill to prevent splitting (especially near board ends).
- Assemble the rectangle using glue and screws (or pocket hole joinery if you prefer a cleaner look).
- Check for square by measuring corner-to-corner diagonals; they should match.
Step 3: Add internal support braces
Support braces do two big jobs: they stiffen the base and give you solid places to attach the top.
Cut them consistently so the base stays square and the tabletop sits flat.
- Cut 2–4 braces to span the width of the skirt (even spacing is fine).
- Attach them flush with the top edge of the skirt so the tabletop will sit properly.
- Use two screws per joint (or pocket holes) for a tight connection.
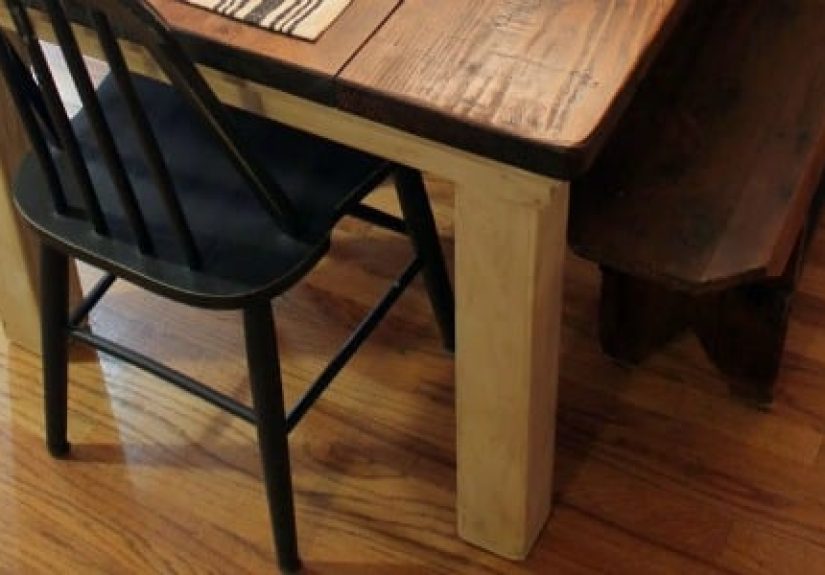
Step 4: Attach the legs
4×4 legs are the classic “farmhouse sturdy” choice. Clamp each leg in place, pre-drill, and drive long screws through the skirt into the leg.
If you want extra strength, add glue at the contact points.
Step 5: Add leg-to-leg braces (optional but recommended)
A farmhouse table should not shimmy when someone laughs too hard. Bracing between legs improves stability and can also give you more
attachment points near the ends of the tabletop.
Step 6: Build the tabletop
You’ve got two popular budget-friendly options:
- Option A (fast + rustic): screw top boards from underneath into braces (quick, strong, very “DIY farmhouse”).
- Option B (cleaner look): edge-glue boards into a panel and attach with tabletop fasteners (more “furniture build”).
If you’re going for the Remodelaholic-style speed build, you can cut your top boards to length, align them, and fasten from underneath.
For a cleaner surface, you can hide screw lines with a decorative trim skirt or focus on fasteners that allow seasonal movement.
Important note on wood movement (aka: how to avoid tabletop cracks)
Solid wood expands and contracts across the grain with seasonal humidity. If the top is locked down too rigidly, it can crack or warp.
A safer “best practice” approach is to attach the top using methods designed to allow movementlike Z-clips, figure-eight fasteners,
or slotted stretchers.
Step 7: Sand like you mean it
Start with a lower grit to level seams (especially on the top), then work your way up to 180 or 220 for a comfortable feel.
Don’t skip sanding edgesyour forearms will thank you when you’re wiping the table down later.
Step 8: Finish for real life (not just “looks good for photos”)
Cheap pine can stain blotchy, so use pre-stain conditioner if you want a more even look. For a classic farmhouse contrast, stain the top and paint the base.
Then protect it with a clear coatespecially if this table will see daily use.
- Stain: wipe on, wipe off, build color gradually.
- Paint base: two thin coats usually beat one thick coat.
- Clear coat: plan multiple coats, with light sanding between coats for a smoother finish.
A Simple Example Plan (Seats 6 Comfortably)
Here’s a beginner-friendly example size that works well for many dining rooms and still keeps the lumber list manageable:
| Tabletop | 72″ long × ~36–38″ wide |
| Height | 29–30″ |
| Overhang | ~2″ on all sides |
| Leg placement | Set to allow chair/bench clearance (measure what you own) |
Sample budget breakdown (varies by region and sales)
- Top boards (2×10 / 2×8 / 2×6): $35–$60
- 4×4 legs: $20–$35
- Apron + braces: $10–$20
- Screws + glue: $10–$20
- Estimated total: ~$75–$115 (often under $100 with sale pricing or fewer/cheaper top boards)
Customization Ideas That Still Respect the Budget
1) Add a decorative trim skirt
If you’re using underside screws and don’t want visible fasteners, a thin trim skirt can clean up the look and make the base feel more finished.
It’s also a great way to “upgrade the vibe” without upgrading your spending.
2) Give it instant character (without waiting 15 years)
Want that lived-in farmhouse look now? Light distressing works. Some DIYers tap the surface with a chain, add small dings,
or soften corners with a sander. The key is restraintthink “charming antique,” not “table survived a meteor shower.”
3) Build matching benches later
Benches can stretch your seating and your budget. You can always start with the table, then add benches once you’ve recovered emotionally
from sanding.
Common Mistakes (So You Can Skip Them)
- Not checking boards for twist: twisted top boards make a wavy tabletop that no amount of stain can hide.
- Skipping pre-drilling: screws near board ends will split lumber faster than you can say “I meant to do that.”
- Forgetting wood movement: tabletops need room to expand and contract. Plan your attachment method.
- Rushing the finish: most “bad finish” stories begin with “I touched the poly to see if it was dry.”
Conclusion: A Table That Costs Lessand Means More
A farmhouse table isn’t just furniture; it’s a daily landing pad for meals, projects, and memories. The Remodelaholic-style under-$100 build proves
you don’t need fancy tools or fancy lumber to create something sturdy and beautiful. Start with a smart size, build a square base, support the top well,
and finish it like it’s going to live a real lifebecause it will.
And when someone asks where you bought it, you get to say the most satisfying sentence in DIY history:
“Oh this? I built it.”
Real-World Experiences DIYers Share After Building a $100 Farmhouse Table
If you ask a group of DIYers what building a farmhouse table is like, you’ll get a mix of pride, laughter, and the occasional thousand-yard stareusually
triggered by the word clamps. Here are the most common “yep, that happened” moments people run into (and what they learn from them).
First: the lumber aisle is where optimism goes to be tested. On paper, “just grab a few boards” sounds easy. In reality, you’ll stand there sighting down
2x10s like you’re auditioning for a role as “person who deeply understands wood grain.” You’ll learn fast that the straightest boards are either (1) hiding,
(2) slightly more expensive, or (3) located exactly under a cart pile that looks like it was stacked by a bored raccoon. The win is worth it, thoughstarting
with straighter boards saves hours of wrestling later.
Next: measurement confidence is a journey. Many first-time builders discover that “2×4” is more of a nickname than a measurement, and that tiny differences add up.
That’s why so many people swear by bringing key measurementslike bench width or chair clearanceto the store and laying things out in real time. It feels a little
goofy until you realize it prevents the heartbreak of finishing the table and then discovering your bench can’t actually sit under it. (Ask me how I knowjust kidding.
Ask literally any DIY forum.)
Then there’s the “square” problem. A table base can look perfectly fine and still be slightly out of squareuntil you put the top on and suddenly one corner floats
like it’s trying to escape. DIYers quickly learn to measure diagonals, re-check after tightening fasteners, and clamp before committing. It’s not perfectionism; it’s
future you avoiding a wobble that will haunt every meal like a tiny poltergeist.
Finishing is where patience gets negotiated. People commonly underestimate drying time and overestimate how much they enjoy watching polyurethane cure. The table might be
structurally done in a day, but the finish schedule (multiple coats, sanding between coats, keeping dust off) turns it into a weekend project. The upside? Once the clear
coat is built up properly, the table handles daily life betterspills wipe up, homework doesn’t imprint permanently, and you’re less likely to panic every time someone
sets down a glass.
Finally, there’s the emotional payoff: that first dinner at a table you built. DIYers often describe a weirdly satisfying moment where every scuff, little tool mark, and
tiny “I can see where I fixed that” spot becomes part of the story. A farmhouse table is supposed to feel lived-in. When yours gets its first ding, you’ll probably wince…
and then you’ll realize you just fast-forwarded to the exact charm you were trying to build in the first place.


