Table of Contents >> Show >> Hide
- Why This Project Works So Well
- Best Design for a DIY Kindling Box
- Materials and Tools
- How to Build the Box
- How to Create the Burned Finish
- Best Wood Species for This Look
- Common Mistakes to Avoid
- Where to Use a Burned Finish Kindling Box
- Maintenance and Long-Term Care
- Real-World Experiences With a DIY Burned Finish Kindling Box
- Conclusion
- SEO Tags
Note: Body-only HTML, cleaned for direct web publishing and easy copy/paste.
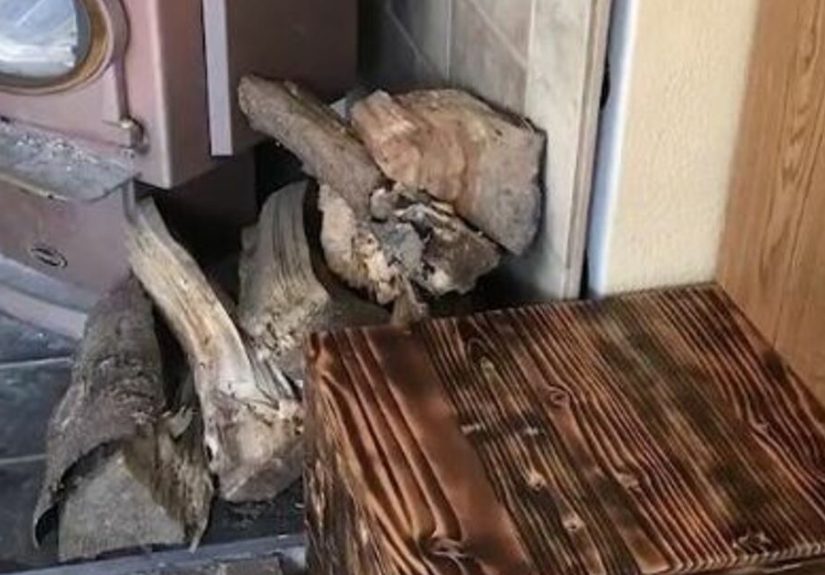
If your fireplace area looks like it was styled by a very determined squirrel, a DIY burned finish kindling box might be exactly the upgrade your hearth has been begging for. It is practical, good-looking, compact, and just rustic enough to say, “Yes, I own a hammer, and yes, I know where it is.” Better yet, this project blends smart firewood storage with the dramatic look of a charred wood finish, giving you a piece that feels custom without demanding cabinetmaker-level drama.
A kindling box is a simple container for small splits, fire starters, and those odd-shaped pieces of wood that are too useful to toss and too messy to leave scattered by the fireplace. Add a burned finish, and the box instantly looks richer, moodier, and more intentional. The char emphasizes grain, deepens color, and gives plain lumber a texture that feels more designer cabin than leftover garage shelf.
This project also hits a sweet spot for DIYers: it is small enough to build in an afternoon, forgiving enough for beginners, and stylish enough to earn compliments from people who normally only notice snacks. In this guide, you will learn how to plan, build, char, finish, and use a DIY burned finish kindling box that looks great and actually works.
Why This Project Works So Well
A burned finish kindling box succeeds because it combines three things homeowners love: storage, texture, and the illusion of being wildly organized. Functionally, it keeps tinder, kindling, and small firewood pieces in one place. Visually, it adds depth and contrast near the fireplace, especially in rooms full of neutral paint, stone, brick, or white trim.
It also solves a real problem. Firewood and kindling need to stay dry, and they look better when stored neatly rather than piled like a tiny lumber avalanche. A box gives you a defined indoor supply while encouraging you to bring in only a small amount at a time. That matters because dry wood burns better, and smaller indoor quantities help reduce the odds of inviting hitchhiking bugs to move in rent-free.
The finish is part of the appeal too. In the United States, many DIY articles call this look “shou sugi ban,” though woodworking purists will point out that yakisugi technically refers to charred cedar. For a simple home project made from oak, pine, or another common species, “burned finish” or “charred finish” is the more accurate label. Either way, the result is the same: bold grain, smoky depth, and a handmade look that feels expensive in the very satisfying way only DIY can deliver.
Best Design for a DIY Kindling Box
You can build dozens of variations, but the easiest successful version is a rectangular open-top box with solid ends, a slatted or slightly raised bottom, and a cutout handle on each side. That shape is simple to make, easy to carry, and practical near a fireplace, wood stove, or covered porch.
Recommended dimensions
A box around 18 inches long, 8 inches deep, and 10 inches high is a comfortable all-purpose size. It is large enough to hold several bundles of kindling, but small enough to move without grunting like you are in a strongman competition. If you want a chunkier look, go to 20 inches long. If space is tight, 16 inches still works well.
Smart design features
- Open top for quick access
- Handle cutouts for easy carrying
- Slightly elevated or slatted bottom for airflow
- Thicker side panels for a sturdier, furniture-like appearance
- Rubber feet or felt pads if the box will sit on finished flooring
A lid sounds fancy, but for kindling it usually adds more annoyance than value. This is not a pirate chest. It is a hardworking storage box for small wood, and simple usually wins.
Materials and Tools
Lumber choices
For a basic indoor box, use clean, dry lumber. Cedar and pine are easy to cut and easy to char, while oak creates a more dramatic grain pattern and a more furniture-like finish. If you want the most visually textured result, open-grained hardwoods such as oak tend to shine. If you want the easiest budget build, common pine boards are perfectly workable, though they burn faster and need a lighter touch with the torch.
Good material options include 1×8, 1×10, or 1×12 boards, depending on your preferred proportions. Plywood can work for painted projects, but for a burned finish, solid wood almost always looks better because the grain pattern becomes part of the design.
Basic supply list
- Wood boards for sides, ends, and base
- Wood glue
- Finish nails or screws
- Sandpaper in medium and fine grits
- Propane torch
- Stiff brush or abrasive pad
- Paste wax, hardwax oil, linseed oil, or another suitable finish
- Fire extinguisher nearby
Tools
- Miter saw or circular saw
- Drill/driver
- Jigsaw for handle cutouts
- Clamps
- Orbital sander or sanding block
- Safety glasses, hearing protection, and dust protection
How to Build the Box
Step 1: Cut the parts
Cut two long sides, two end panels, and bottom pieces. You can use a single bottom panel or two or three slats with slight gaps. Slats look more handcrafted and allow a bit more airflow, which is helpful when storing kindling.
Step 2: Mark and cut handles
On each end panel, mark a centered handle opening about 4 to 5 inches wide and 1 inch tall near the top. Drill starter holes and cut the shape with a jigsaw. Round over or sand the edges so the handles do not feel like a handshake from a cheese grater.
Step 3: Sand before assembly
Sand the boards before assembly, especially the interior faces and handle cutouts. You do not need furniture-museum perfection, but do remove machine marks, splinters, and glue-zone roughness. Burned finishes highlight texture beautifully, but they do not magically hide sloppy prep.
Step 4: Assemble the frame
Glue and fasten the long sides to the end panels. Check for square before driving all fasteners home. If you want a cleaner look, use brad nails and glue. If you prefer brute-force confidence, use countersunk screws and fill the holes later or embrace the visible hardware as part of the style.
Step 5: Install the base
Attach the bottom slats or panel slightly above the lower edge, or mount the base flush and add feet later. A recessed base can make the box look more refined, almost like a small piece of furniture rather than a utility crate.
Step 6: Final sanding and detail work
Break all sharp corners lightly with sandpaper. This helps the box feel more polished and makes it more pleasant to handle. It also reduces the risk of corners chipping or looking harsh after charring.
How to Create the Burned Finish
Now for the fun part: the flame. This is where ordinary wood starts looking moody and expensive. The key is control, not chaos. You are aiming for a charred surface, not an accidental campfire origin story.
Safety first, always
Do the burning outdoors or in a very controlled, debris-free area with excellent ventilation. Keep a fire extinguisher and water nearby. Clear away sawdust, scraps, rags, and anything flammable. Wear eye protection, and do not skip basic safety gear just because the project is small. Small projects are fully capable of creating large regrets.
Burn in steady passes
Light the torch and move it with the grain in short, overlapping passes. Keep the flame moving. Linger too long in one spot and you risk deep gouges, cupping, or a surface that looks more “dragon attack” than “artisan finish.” A light burn leaves more wood tone visible. A deeper burn creates a flatter, blacker look.
Choose your finish style
You have two main options:
- Brushed char: After the wood cools, brush off loose soot with a stiff nylon or plastic bristle brush. This reveals grain and leaves a tactile, satin-black surface.
- Full char look: Leave more of the blackened surface intact for a deeper, moodier finish. This looks dramatic but can rub off more easily if not sealed well.
Seal the surface
Once the wood has cooled completely, apply a protective finish. Wax gives a soft, low-sheen look and deepens the black. Oil can enrich the grain and reduce dustiness. For an indoor kindling box, the goal is not a thick glossy film. You want a finish that locks down loose char, enhances texture, and still looks natural.
Test on scrap first. That is not boring advice. It is the kind of advice that saves you from discovering too late that your “rich black finish” dried looking suspiciously like a barbecue briquette with ambitions.
Best Wood Species for This Look
Not all wood behaves the same under flame. If you want the prettiest result, wood choice matters.
- Oak: Excellent texture, dramatic grain, sturdy feel
- Ash: Strong, open grain, attractive char pattern
- Walnut: Rich and refined, though pricier for a storage box
- Cedar: Traditional inspiration, light and aromatic
- Pine: Affordable and easy to find, but burns quickly and can look rougher
If this is your first attempt, pine is the budget-friendly practice field. If you want the box to look like it wandered out of a high-end cabin catalog, oak is a strong choice.
Common Mistakes to Avoid
Using wet or green wood
Wet lumber is more likely to warp, burn unpredictably, and disappoint you in several languages. Use dry, stable boards.
Overbuilding the box
Remember what the box is for: kindling, not storing bowling balls. Heavy lumber can make the finished piece awkward to carry once filled.
Skipping surface prep
Burned finishes do not erase glue squeeze-out, saw marks, or rough milling. They can actually make flaws more noticeable.
Storing too much wood indoors
A kindling box should hold a reasonable indoor supply, not an entire forest chapter. Keep your main stash outside in a dry, well-ventilated setup, and bring in only what you will use soon.
Ignoring fireplace safety
The box may live near the hearth, but it should not be pressed against an active heat source. Store it where it is accessible but not in the splash zone for sparks, ash, or excessive heat. And because any fuel-burning appliance can create carbon monoxide if poorly vented, a working CO alarm is not optional just because your storage looks adorable.
Where to Use a Burned Finish Kindling Box
This project works in more places than you might think. The obvious home is beside a fireplace or wood stove, but it also looks great on a covered porch, in a mudroom, in a cabin entry, or next to an outdoor fire pit setup where you want something more stylish than a plastic tote.
Inside, pair it with black fireplace tools, leather gloves, or a simple woven rug. Outside, let it sit under cover and refill it from a larger woodpile. It also makes a nice gift for homeowners, especially the kind who already own flannel and use the phrase “fire season” in a cheerful way.
Maintenance and Long-Term Care
A charred kindling box is fairly low-maintenance, but it is not immortal. Vacuum out bark dust and wood crumbs occasionally. Wipe exterior dust with a dry cloth. If the finish starts to look dull or powdery, add another thin coat of wax or oil based on the finish you originally used.
If the box gets scratched, that is not always bad news. Minor wear can add character. If a spot really bothers you, lightly re-char the area and blend it back in. One of the nice things about this finish is that it does not demand factory-perfect touch-ups. It likes a little ruggedness.
Real-World Experiences With a DIY Burned Finish Kindling Box
One of the most interesting things about this project is how much better it tends to look after a few weeks of actual use. Fresh off the workbench, a burned finish kindling box already has personality. But once it starts living near a fireplace, catching a little dust, holding a mix of split kindling, bark, and paper starters, it begins to look like it belongs there in a way factory-made storage pieces often do not. It settles into the room.
A common experience for DIYers is surprise at how much the finish changes the wood. Plain oak can suddenly look dramatic. Basic pine, which moments earlier seemed destined for “utility project” status, can take on a smoky, textured look that feels far more custom than its price tag suggests. That transformation is part of the fun. You are not just building a box; you are upgrading humble material into something with presence.
Another thing people notice is how satisfying the size is when it is done right. A box that looked slightly small on the bench suddenly feels perfect once it is filled with kindling and carried indoors. That is because the best kindling box is not the biggest one. It is the one you can comfortably move, tuck beside the hearth, and refill without treating it like gym equipment. Many first-time builders are tempted to go oversized, then quickly realize wood gets heavy fast. Very fast. “Rustic” is wonderful. “Why is this so heavy?” is less charming.
The handle cutouts usually end up being one of the most appreciated details. They seem minor during the build, but after a few trips between the porch and the fireplace, they feel genius-level practical. The same goes for a raised or slatted bottom. It is one of those subtle design choices that does not scream for attention but helps the box behave better over time.
There is also the small but very real pleasure of containing mess. Kindling is useful, but it sheds bark, chips, and dust like it is being paid by the crumb. A dedicated box keeps that debris in one place. In everyday life, that means less sweeping, less clutter, and fewer random sticks rolling around near the hearth like they pay taxes there.
Style-wise, builders often find the box works beyond its original purpose. In warmer months, it can hold blankets, magazines, rolled-up outdoor towels, or even gardening odds and ends on a covered porch. That flexibility makes the project feel worth the effort all year, not just during fireplace season.
Perhaps the biggest takeaway from people who build one is this: the project feels approachable but still gives a strong sense of craftsmanship. It is not a giant weekend commitment. It does not require a professional shop. But it does reward care, especially during charring and finishing. And once it is done, it tends to make the surrounding area look better organized, more intentional, and a little more lived-in in the best possible way. That is a pretty excellent return for a project built from a few boards, some flame, and a healthy respect for sawdust.
Conclusion
A DIY burned finish kindling box is one of those rare woodworking projects that checks every box: useful, affordable, attractive, customizable, and beginner-friendly. It gives you a better way to store kindling, adds texture and depth to your fireplace area, and lets you experiment with a charred finish without committing to a giant wall treatment or expensive furniture piece.
Build it simple, burn it carefully, finish it thoughtfully, and keep it filled with dry kindling instead of chaos. Your fireplace corner will look better, your wood will stay tidier, and your guests may briefly assume you have your entire life together. No need to correct them.


