Table of Contents >> Show >> Hide
- Why a Fish Tank Makes an Awesome Terrarium Container
- First Decision: Open Terrarium or Closed Terrarium?
- Materials Checklist (Simple, Not Fancy)
- Step 1: Clean the Fish Tank Like You Mean It
- Step 2: Plan Your Layout (Because Gravity Is Real)
- Step 3: Build the Layers (The Part That Makes It Work)
- Step 4: Add Hardscape (Rocks, Wood, and Tiny Drama)
- Step 5: Plant It Up (Without Turning It Into a Jungle Fight)
- Plant Ideas That Usually Behave (Pick Based on Your Setup)
- Lighting and Placement (Where Terrariums Live or Die)
- Watering: The #1 Place People Mess Up
- Maintenance (Minimal, If You Stay Ahead of the Chaos)
- Troubleshooting: Fixes for Common “Uh-Oh” Moments
- Optional Upgrades That Make Your Fish Tank Terrarium Look Custom
- Two Example Builds (So You Can Picture It)
- Conclusion: Your Old Aquarium Deserves This Glow-Up
- Experiences & Lessons Learned (The “I Wish Someone Told Me” Section)
Congratulations: your old aquarium is about to get a second careerone that doesn’t involve chasing fish flakes with a net or Googling “why is my water cloudy” at 2 a.m. Turning a fish tank into a terrarium is one of the most satisfying upcycles you can do at home: big glass box, endless design options, and plants that don’t judge you for binge-watching reality TV. [1]
In this guide, you’ll learn how to build a healthy, good-looking DIY terrarium in an old fish tank step-by-stepplus how to choose the right setup (open vs. closed), pick plants that actually behave, and avoid the classic terrarium fails (mold, mush, and “why is everything damp?”). [2][3]
Why a Fish Tank Makes an Awesome Terrarium Container
Fish tanks are basically terrarium mansions: wide viewing angles, tons of headspace, and room to create slopes, paths, rocks, and mini “forests.” Unlike many jars and vases, an aquarium also lets you design in layers without feeling like you’re gardening through a keyhole. [1]
- Great visibility: clear glass = instant plant display.
- Stable environment: larger volume changes temperature and moisture more slowly than tiny containers.
- Design freedom: you can build a landscape, not just “a plant in a jar.” [2]
First Decision: Open Terrarium or Closed Terrarium?
Before you buy anything, decide what kind of climate you’re building. Your plants will either want airflow (open terrarium) or humidity (closed terrarium). Trying to mix desert succulents with rainforest moss is like putting a penguin and a lizard in the same Airbnbsomeone’s leaving a bad review. [3][10]
Option A: Open Fish Tank Terrarium (Airy + Drier)
Best for plants that prefer lower humidity and don’t want constant dampness. Since most aquariums are open at the top by default, this is the easiest routeespecially if your tank has no lid.
- Great for: succulent/cactus-style builds, or hardy houseplants that like airflow.
- Watering: more often than closed terrariums (because evaporation happens). [10]
- Big benefit: less risk of mold and “foggy glass forever.”
Option B: Closed Fish Tank Terrarium (Humid + Self-Contained)
Closed terrariums are for humidity-loving tropical plants. With a lid (glass, acrylic, or even a fitted cover), water cycles inside: plants transpire, moisture condenses on glass, and drips back down. In the right balance, it’s almost self-watering. [4][12]
- Great for: mosses, ferns, fittonia, peperomia, and other tropical minis. [2][3]
- Watering: minimal once stabilizedsometimes months. [4]
- Important: keep it out of direct sun so it doesn’t overheat (glass + sun = plant sauna). [9]
Materials Checklist (Simple, Not Fancy)
You don’t need a wizard’s cabinet of supplies. You need the basics, and you need them clean.
Must-Haves
- Old fish tank (10–20 gallons is a sweet spot, but any size works). [1]
- Drainage material: washed gravel, small stones, or similar. [2][3]
- Charcoal: horticultural charcoal or aquarium charcoal (not BBQ briquettes). [2][6]
- Separator layer: sphagnum moss or sheet moss (helps prevent soil from sinking into drainage). [2][3]
- Growing medium: quality potting mix or sterile/soilless mix depending on build style. [2][6]
- Plants suited to your setup (open vs. closed matters!). [10][12]
Nice-to-Haves
- Small hand shovel or scoop (a kitchen spoon works too). [3]
- Chopsticks/tongs for placing plants and décor neatly.
- Spray bottle/mister for gentle watering. [7]
- Hardscape: rocks, branches, cork bark (make it look like a tiny world).
- A lid (for closed terrarium): glass top, acrylic sheet, or a custom cover.
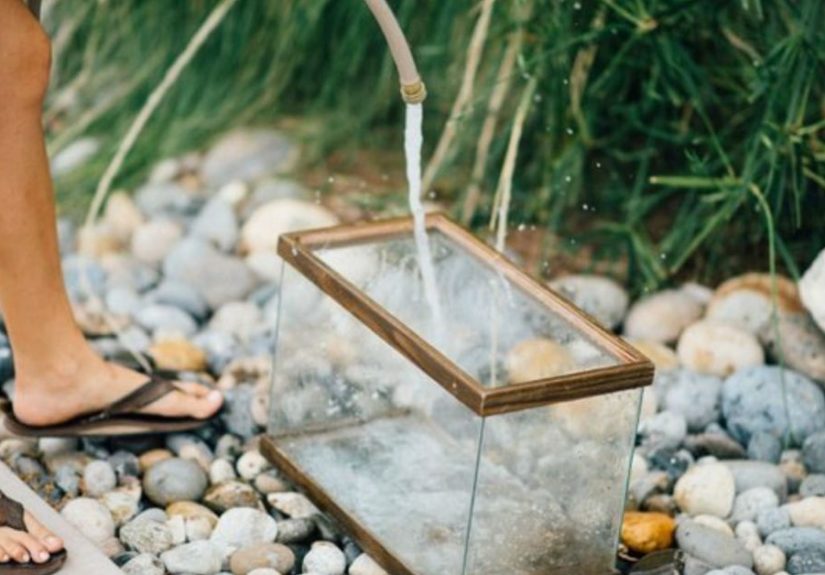
Step 1: Clean the Fish Tank Like You Mean It
Old aquariums often have mineral deposits (the chalky “hard water” look) and mystery grime. For cleaning glass, a vinegar solution is commonly recommended for breaking down mineral buildupthen rinse thoroughly and let the tank dry. [14]
- Skip perfumes and cleaners: you don’t want residues around plant roots.
- Scrape carefully: use a plastic scraper or a razor tool gently to remove stubborn scale (don’t gouge your future view).
- Rinse, rinse, rinse: and let it dry completely before building. [14]
Step 2: Plan Your Layout (Because Gravity Is Real)
A fish tank terrarium looks best when it has depth. Plan for a “back hill / front valley” slope so your taller plants sit behind shorter ones. This improves visibility and makes your mini landscape feel larger. [3][2]
Quick design trick: pick a “main character” plant (the focal point), then add supporting plants. Your terrarium will look intentional, not like you dropped plants in with your eyes closed. [2]
Step 3: Build the Layers (The Part That Makes It Work)
Terrariums usually don’t have drainage holes, so your layers manage water and keep roots from sitting in swamp conditions. Different experts describe the exact order slightly differently, but the overall goal is consistent: drainage + filtration + separation + soil. [2][3][6]
Layer 1: Drainage Layer (1–2 inches, depending on tank size)
Use clean, washed gravel or small stones. Bigger tank = thicker layer. This creates a place for excess water to collect away from roots. [2][3]
Layer 2: Charcoal (thin layer)
Add a thin layer of horticultural or aquarium charcoal to help keep things “fresh” by filtering and reducing odors. This is commonly emphasized for closed terrariums where airflow is limited. [2][6]
Charcoal tip: use horticultural/aquarium charcoalavoid anything treated for grilling. Some guides debate “activated vs. horticultural” options; the safe takeaway is: use plant/aquarium-grade charcoal and keep it thin. [10][13]
Layer 3: Separator (sphagnum moss or sheet moss)
This layer helps prevent soil from sifting down into your drainage layer. It’s like putting a screen door between your gravel “basement” and your soil “living room.” [2][3]
Layer 4: Growing Medium (usually 1.5–3 inches)
Add slightly moist (not muddy) potting medium. Many extension resources recommend clean materials and adequate soil depth so roots can establish. For most containers, you’ll want at least about 1.5 inches of soil depth, often more for larger tanks. [2][3]
If you’re building a closed terrarium, consider avoiding soils with heavy added fertilizers or moisture-retaining crystals that can make things too wet over time. [13]
Step 4: Add Hardscape (Rocks, Wood, and Tiny Drama)
Hardscape is optional, but it’s what makes your old aquarium look like a miniature world instead of “plants in a glass rectangle.” Place your stones and wood before planting so you don’t crush roots later. Aim for stabilitynobody wants an indoor rockslide.
- Create a slope for depth and better viewing. [3]
- Use a “path” of pebbles for structure and contrast.
- Leave planting pockets where roots can actually go.
Step 5: Plant It Up (Without Turning It Into a Jungle Fight)
Choose healthy, disease-free plantsespecially for closed terrariums, where plant diseases can spread quickly in warm, humid air. [2]
- Place the biggest plant first (your focal point).
- Add medium plants around it for fullness.
- Finish with small ground covers/moss for a polished look.
- Firm soil gently around roots (a pencil/chopstick helps in tight spots). [7]
Plant Ideas That Usually Behave (Pick Based on Your Setup)
Closed Terrarium Plant Picks (Humidity Lovers)
Closed terrariums excel with moisture-loving plants like mosses, ferns, peperomia, and fittonia. [2][3][4]
- Fittonia (nerve plant): compact and loves humidity.
- Small ferns: choose varieties that stay manageable.
- Peperomia: many stay small and tolerate terrarium conditions.
- Mosses: great for a forest-floor look.
Open Terrarium Plant Picks (Airflow Fans)
Open terrariums can support a wider range, but you still want plants that tolerate being in a container without drainage holesmeaning you’ll water lightly and choose plants that don’t demand soggy conditions. [10][8]
- Succulent-style build: only if your tank is truly open and placed in bright light, and you water sparingly.
- Hardy foliage plants: that don’t need constant humidity.
Lighting and Placement (Where Terrariums Live or Die)
Most terrarium plants prefer bright, indirect light. Direct sun through glass can overheat a closed terrarium quickly, essentially slow-roasting your tiny forest. Keep it near a bright window but out of harsh direct rays. [9][7]
- Best spot: bright room, indirect light.
- Avoid: direct afternoon sun, heating vents, and cold drafts.
- Rotate occasionally: for even growth and fewer “leaning plants.”
Watering: The #1 Place People Mess Up
Terrariums die from love more often than neglect. The container traps moisture, and overwatering can lead to root rot, mold, and a sad smell that says, “Something is decomposing in here.” Drainage layers help, but they don’t grant immunity. [2][3]
How to Water a Closed Terrarium
- Start with light watering (mist or small pours near roots).
- If glass is fogged all day, it’s too wetopen the lid to vent until it clears. [12]
- Once stable, many closed terrariums need very little water for long periods. [4]
How to Water an Open Terrarium
- Water more often than closed builds, but still lightlyno soggy soil.
- Check moisture with a finger test: damp is fine; wet and squishy is not.
Maintenance (Minimal, If You Stay Ahead of the Chaos)
Terrariums are low-maintenance, not no-maintenance. A little upkeep keeps them beautiful:
- Remove dead leaves: decaying material fuels mold. [2]
- Trim fast growers: your tank is not an infinite universe.
- Wipe glass: clean glass makes the whole build look sharper.
- Watch condensation: it’s your humidity gauge in closed terrariums. [12]
Troubleshooting: Fixes for Common “Uh-Oh” Moments
Mold on Soil or Leaves
- Vent the tank (open lid longer each day until moisture drops).
- Remove affected debris promptly. [2]
- Water lessmold is often a hydration issue in disguise.
Plants Turning Mushy (Root Rot)
- Stop watering immediately.
- Increase airflow (especially for closed builds).
- Consider removing the plant, trimming damaged roots, and replanting in drier medium.
Soil Smells “Sour”
Some resources highlight charcoal as a helpful layer to reduce odors, especially in closed terrariums. Make sure you used plant/aquarium-grade charcoal and that the terrarium isn’t staying overly wet. [2][3]
Glass Always Foggy
That usually means excess moisture. A healthy closed terrarium often has some condensation at times, but if it’s fogged constantly, vent it until it balances. [12]
Optional Upgrades That Make Your Fish Tank Terrarium Look Custom
Add a Simple Lid (For Closed Builds)
A fitted glass top, acrylic sheet, or custom cover helps maintain humidity for tropical setups. Just remember: even closed terrariums appreciate occasional fresh air if things get too wet. [7]
Use a Background (Instant “Wow”)
You can create a dark backdrop (even black poster board behind the tank) to make plants pop, or add natural-looking background materials. Keep it simpleyour plants are the stars.
Lighting for Dark Rooms
If your home is more “cozy cave” than “sunlit greenhouse,” a small grow light above the tank can help. Aim for gentle, consistent light rather than blasting your terrarium like it’s on stage at a rock concert.
Two Example Builds (So You Can Picture It)
Example 1: 10-Gallon Open “Desert-ish” Terrarium
Use a shallow drainage layer, a gritty potting medium, and a few small drought-tolerant plants. Keep it open and place it in bright light. Water sparingly and treat it like a minimalist sculpture that occasionally needs a sip.
Example 2: 20-Gallon Closed “Mini Rainforest” Terrarium
Build your drainage + charcoal + moss separator + soil layers, then plant fittonia, small ferns, and moss as ground cover. Add a lid, keep it out of direct sun, and water lightly at the start. Once the moisture cycle stabilizes, it can become a low-effort, high-drama little ecosystem. [4][9]
Conclusion: Your Old Aquarium Deserves This Glow-Up
A DIY terrarium from an old fish tank is the rare project that’s equal parts practical and ridiculously satisfying. You get a statement piece, a calming little plant world, and the smug joy of saying, “Oh this? I made it,” whenever someone compliments it. Start simple, respect the moisture, and let your terrarium mature into its best selflike a tiny botanical coming-of-age story, but with fewer plot twists and more moss.
Experiences & Lessons Learned (The “I Wish Someone Told Me” Section)
Here’s what people commonly experience when turning an old fish tank into a terrariumespecially the first few weeks, when everything feels like it could either become a lush paradise or a science experiment that learns to walk.
Week 1 usually feels suspiciously easy. You build the layers, tuck in the plants, mist everything, and step back like a proud landscape architect (who definitely did not spill soil on the floor). The tank looks perfect… for about 24 hours. Then you notice condensation, a leaf droops, and suddenly you’re staring through the glass like a nervous new parent: “Are you… okay in there?”
The biggest aha-moment is moisture control. Most beginners assume terrariums are thirsty because they’re inside glass. In reality, glass traps water. So the real skill is not watering, but not watering. The winning move is often doing less: fewer mists, smaller pours, more observation. If you have a closed terrarium and it looks foggy all day, your terrarium is basically waving a tiny sign that says, “Please crack the lid, I can’t breathe.”
Plants teach you who they are. A fittonia might thrive and spread like it pays rent, while a “cute little fern” turns crispy because it was actually a drama queen that wanted different light. That’s normal. Terrariums are a gentle way to learn plant preferences because you can see every reaction quickly: leaves curl, color shifts, condensation changes, growth speeds up or stalls. It’s feedback in HD.
Design-wise, negative space is underrated. Many first-time terrarium builders over-plant because the tank looks huge when it’s empty. But once plants settle in, they expand. Leaving breathing room makes the landscape look intentionaland gives you a place to see the soil line, watch the moisture level, and remove dead bits without performing hand yoga. A terrarium that’s 80% planted on day one can become 120% chaos by month two.
You’ll become weirdly invested in tiny maintenance rituals. Wiping the glass turns into a satisfying “reveal.” Trimming becomes miniature gardening. Removing one dead leaf feels heroic. And when you finally get the humidity balancedclear glass most of the day, a little misting now and thenyou’ll feel like you cracked a secret code.
And yes, you may get mold once. It happens. The trick is not panic; it’s response. Mold usually means you’re too wet or too stagnant. Vent, remove the affected material, and back off watering. Most terrariums bounce back fast once conditions improve. Think of it as your terrarium’s awkward teenage phase. It grows out of it.
The best part? An old fish tank terrarium gets better with time. Plants root in, moss fluffs up, and the whole thing looks more naturalless “I built this today,” more “this tiny forest has always existed, and I am merely its humble caretaker.” Which is a very fancy way of saying: you upcycled a glass box and now you have a living centerpiece. Nice work.


