Table of Contents >> Show >> Hide
- What “Gluten-Free” Really Means for Cookies
- The Cookie Science: Why This Recipe Works
- Easy Gluten-Free Peanut Butter Cookies Recipe (Flourless)
- The 3-Ingredient “Emergency Cookie” Option
- How to Choose Peanut Butter for the Best Texture
- Troubleshooting: Fix the Usual Peanut Butter Cookie Drama
- Easy Variations (Because Cookie Joy Is a Spectrum)
- Storage and Freezing Tips
- Frequently Asked Questions
- of Real-World Cookie Experiences (The Stuff That Actually Happens)
- Conclusion
Peanut butter cookies have been showing up to parties uninvited for decadesthen casually becoming everyone’s favorite guest.
The best part? The simplest versions don’t need wheat flour at all, which means they’re naturally gluten-free
(as long as your ingredients are truly gluten-free and your kitchen isn’t playing “gluten hide-and-seek”).
This guide gives you an easy gluten-free peanut butter cookies recipe that’s fast, forgiving, and reliably delicious,
plus the “why it works” baking logic, swap ideas, and troubleshooting so you can bake like you meant to do that on purpose.
What “Gluten-Free” Really Means for Cookies
A classic peanut butter cookie can be made flourless, relying on peanut butter, sugar, and egg to create structure.
That’s why so many “3-ingredient peanut butter cookies” recipes are naturally gluten-free.
But “gluten-free” in real life isn’t just about skipping flour. If you bake for someone with celiac disease or strict gluten avoidance,
you’ll also want to think about cross-contactshared scoops, dusty flour on the counter, and that one wooden spoon
that has seen things.
Quick gluten-free kitchen safety checklist
- Check labels on peanut butter, vanilla, chocolate chips, sprinkles, and any add-ins.
- Use clean equipment and wipe down surfaces before baking.
- If you share a kitchen with gluten baking, consider separate baking sheets/parchment and dedicated utensils for strict needs.
The Cookie Science: Why This Recipe Works
These cookies are a tiny engineering project that tastes like a hug. Here’s the short version of what each ingredient does:
Peanut butter = flavor + fat + body
Peanut butter brings fat for tenderness and rich flavor, plus enough proteins/solids to give the dough shape. The type matters:
“no-stir” creamy peanut butter (the classic supermarket style) tends to be more consistent for baking.
Natural peanut butter can work, but it’s often oilier or drier depending on the jarso your results can swing from “perfectly chewy”
to “why did my cookies become peanut brittle?”
Sugar = sweetness + structure
Sugar doesn’t just sweetenit helps create crisp edges, browning, and structure. Granulated sugar gives cleaner snap and spread.
Brown sugar adds moisture and chew because of the molasses content. A blend often tastes the most “bakery-style.”
Egg = glue (in the best way)
Egg binds everything together and adds moisture. It’s also a big reason flourless cookies don’t crumble into sand.
If you change the egg situation (size, substitutes, extra yolk), you change the cookie texture.
Baking soda, salt, vanilla = the “small things” that taste big
A little baking soda encourages spread and browning, salt sharpens the peanut flavor, and vanilla makes everything taste more like “cookie”
and less like “I mixed peanut butter with sugar… which is still not a bad life choice.”
Easy Gluten-Free Peanut Butter Cookies Recipe (Flourless)
This is the “upgrade” version of the famous 3-ingredient cookie: still easy, but a little more balanced in sweetness and flavor.
If you want the ultra-minimal version, you’ll see the 3-ingredient option right after the main recipe.
Ingredients
- 1 cup creamy peanut butter (no-stir style recommended)
- 1/2 cup packed light brown sugar
- 1/4 cup granulated sugar
- 1 large egg
- 1 teaspoon vanilla extract
- 1/2 teaspoon baking soda
- 1/4 teaspoon fine salt (skip or reduce if peanut butter is very salty)
- Optional: 1/2 cup gluten-free chocolate chips, or 1/3 cup chopped peanuts
Directions
- Preheat oven to 350°F. Line a baking sheet with parchment paper.
-
In a medium bowl, mix peanut butter, brown sugar, and granulated sugar until smooth.
(A sturdy spoon works; a mixer works faster; your biceps also work.) - Add egg and vanilla; mix until glossy and fully combined.
- Stir in baking soda and salt. Fold in chocolate chips or nuts if using.
-
Scoop into 1 to 1 1/2 tablespoon balls and place 2 inches apart.
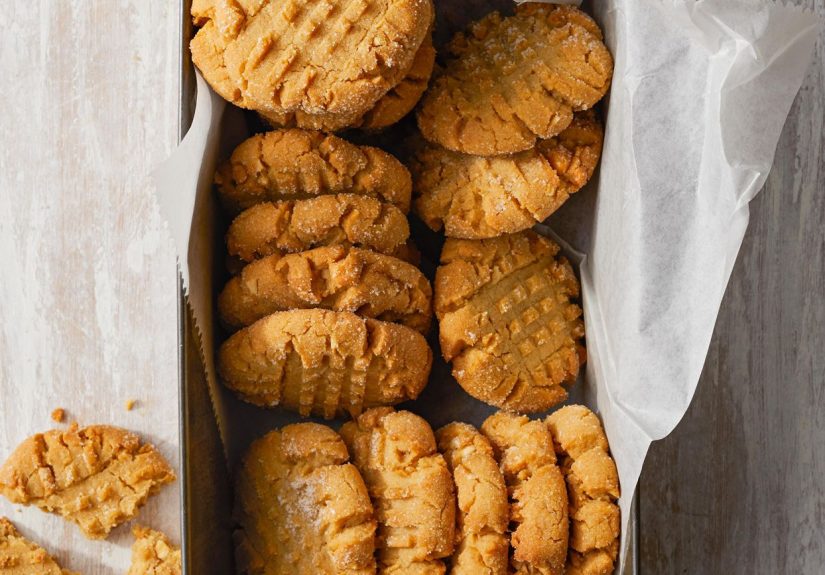
For the classic look, press a fork into the top, then again in the opposite direction to make a crisscross. -
Bake 8–11 minutes, until the edges look set and lightly golden.
The centers should look slightly underdonethis is how you get chew instead of cardboard. -
Cool on the baking sheet for 10 minutes (important!), then transfer to a rack to cool completely.
They firm up as they cool.
Yield
About 18–22 cookies, depending on scoop size (also depending on how often “one for quality control” happens).
The 3-Ingredient “Emergency Cookie” Option
If you truly want the simplest version, this one is famous for a reason. It’s naturally gluten-free and fast.
The texture tends to be crisp-edged and sweet.
- 1 cup peanut butter
- 1 cup sugar
- 1 egg
Mix, scoop, crisscross, bake at 350°F for ~9–10 minutes. Cool on the pan so they don’t fall apart.
If you want a little more chew, try 3/4 cup sugar instead of 1 cup.
How to Choose Peanut Butter for the Best Texture
“No-stir” creamy peanut butter (most consistent)
This style usually gives the most predictable cookie: chewy center, tidy spread, classic flavor.
If you want cookies that look like the mental picture in your head, start here.
Natural peanut butter (doable, but pay attention)
Natural peanut butter varies by brand and jar. If it’s very oily, the cookies may spread more.
If it’s dry or stiff, cookies can turn crumbly.
- If it’s oily/runny: chill the dough 20–30 minutes before baking.
- If it’s dry/crumbly: add 1–2 tablespoons peanut butter, or an extra egg yolk (not the whole egg) for richness.
- Always stir thoroughly so oil is evenly distributed.
Troubleshooting: Fix the Usual Peanut Butter Cookie Drama
“My cookies spread into one giant cookie continent.”
- Dough was warm or peanut butter was very oily. Chill dough 20–30 minutes.
- Use parchment and a cool baking sheet (hot pans encourage extra spread).
- Try slightly smaller scoops for better shape control.
“They’re crumbly and dry.”
- Cookies may be overbakedpull them when centers still look a bit soft.
- Natural peanut butter can run dry. Add 1–2 tablespoons peanut butter next time.
- Measure carefully: packing brown sugar too tightly can throw off texture.
“They’re too soft to pick up.”
- Let them cool longer on the pan. Flourless cookies firm as they cool.
- Make sure your oven is truly at 350°F (an oven thermometer helps).
Easy Variations (Because Cookie Joy Is a Spectrum)
Chocolate chip gluten-free peanut butter cookies
Add 1/2 cup gluten-free chocolate chips. Sprinkle flaky salt on top for the “fancy bakery” vibe.
PB&J thumbprints
Make dough balls, press a small indent with your thumb, fill with 1/2 teaspoon jam, and bake.
You’ll feel like a genius who discovered peanut butter and jelly all over again.
Extra-crunchy edges
Roll dough balls in granulated sugar before crisscrossing. More sparkle, more crunch, more compliments.
Nut-free swap (sunflower seed butter)
If you need to avoid peanuts, sunflower seed butter works 1:1 in many recipes.
One funny twist: with baking soda, sunflower butter cookies can sometimes turn green inside as they cool.
It’s a harmless reaction, but it can surprise people (and delight kids who want “science cookies”).
Egg-free options (texture will change)
For egg-free baking, many bakers use alternatives like aquafaba (chickpea liquid) or applesauce.
Expect a softer, slightly different bite than the egg version.
Storage and Freezing Tips
- Room temp: Store in an airtight container for about 4–5 days.
- Freeze baked cookies: Freeze up to 2–3 months. Thaw at room temp.
- Freeze dough balls: Freeze on a tray, then bag them. Bake from frozen, adding 1–2 minutes.
Frequently Asked Questions
Are these cookies really gluten-free if they don’t use flour?
The recipe itself is flourless, but gluten-free depends on your ingredient labels and avoiding cross-contact in prep.
If you’re baking for someone with medical gluten intolerance, be extra careful with surfaces and add-ins.
Can I use crunchy peanut butter?
You can, but the cookies often crumble more because the dough is less uniform.
If you want crunch, consider folding in chopped peanuts instead.
Why do you underbake slightly?
Because cookies keep cooking on the hot pan. Pulling them when the edges are set helps keep the centers chewy.
Overbaking flourless cookies is the fastest way to turn them into “peanut-flavored coasters.”
of Real-World Cookie Experiences (The Stuff That Actually Happens)
If you’ve ever made peanut butter cookies, you already know there are two phases: the “this is so easy” phase and the
“why do my cookies look like abstract art?” phase. The good news is that flourless, gluten-free peanut butter cookies are
surprisingly forgivingonce you recognize the few common moments where reality tries to prank you.
Experience #1: the peanut butter jar mystery. One day it’s silky and cooperative. The next day it’s a split-layer science project:
oil on top, peanut cement underneath. If you scoop from the top without stirring, your dough gets extra oil and the cookies can
spread like they’re trying to cover the entire baking sheet for warmth. Stirring thoroughly (and I mean thoroughly) is the difference
between tidy little rounds and cookies that merge into a single cookie “quilt.”
Experience #2: the deceptive bake time. Flourless cookies love to look underdone in the middle. That’s not failurethat’s strategy.
The first instinct is often to bake “just two more minutes” until the tops look fully set. Then you cool them and discover you’ve created
the peanut butter equivalent of a desert hiking trail: dry, sturdy, and not what you meant. The better move is to trust the edges:
when the edges are set and lightly golden, you’re done. Cooling on the pan is the secret handshake. Skip it and the cookies may crumble
because they haven’t finished setting.
Experience #3: the fork crisscross that makes you feel like you’re officially baking. It’s not only for looks. Peanut butter dough is dense,
and flattening helps it bake evenly. You can make the crisscross deep for thinner, crispier cookies, or keep it gentle for thicker, chewier ones.
Either way, it’s oddly satisfyinglike giving the cookie a little waffle-knit sweater before it goes into the oven.
Experience #4: the add-in temptation spiral. You start with “just chocolate chips,” and suddenly you’re debating pretzel pieces, coconut flakes,
and whether espresso powder is a personality trait. Add-ins are greatbut they also change the structure. A small handful is usually safe.
If you go big, the cookies can crumble because the dough has less “glue” per bite. The sweet spot is choosing one main add-in (chips or nuts)
and letting peanut butter remain the star.
And finally, experience #5: the cookie confidence boost. These cookies are often the recipe people make when they’re nervous about gluten-free baking.
The win is immediate: a simple ingredient list, quick mixing, no fancy flour blends, and a result that tastes like a classic American cookie.
Once you’ve nailed a batch, you’ll start thinking, “Waitif that was easy, what else have I been overcomplicating?” (Answer: probably everything.
But at least cookies won’t be one of them.)
Conclusion
Easy gluten-free peanut butter cookies are proof that baking doesn’t have to be complicated to be impressive.
With the right peanut butter, a sensible bake time, and a little respect for cooling, you get cookies with crisp edges,
chewy centers, and big peanut flavorno wheat flour required. Keep this recipe in your back pocket for quick desserts,
potlucks, lunchbox treats, or anytime you want an “I totally had my life together today” moment.


