Table of Contents >> Show >> Hide
- Why Refinish a Dresser Instead of Replacing It?
- The “Before”: How to Evaluate an Old Dresser
- Tools and Supplies for a Refinished Dresser
- Step-by-Step: How to Refinish a Dresser
- Step 1: Remove Drawers and Hardware
- Step 2: Clean the Dresser Thoroughly
- Step 3: Repair Scratches, Dents, and Chips
- Step 4: Sand the Surface
- Step 5: Choose Paint, Stain, or a Two-Tone Finish
- Step 6: Prime if Painting
- Step 7: Apply Paint or Stain
- Step 8: Seal the Finish
- Step 9: Reattach Hardware and Style the Dresser
- Gorgeous Before-and-After Design Ideas
- Common Mistakes to Avoid
- How Much Does a Dresser Refinishing Project Cost?
- Experience Section: What Refinishing a Dresser Really Teaches You
- Conclusion
- SEO Tags
Note: This article is written for web publishing in standard American English, with practical refinishing guidance, real-world examples, and SEO-friendly structure.
A refinished dresser has a special kind of magic. One minute, it is sitting in the corner of a garage looking like it lost a wrestling match with time, dust, and three decades of mystery scratches. The next, it becomes the statement piece everyone asks about when they walk into the room. That is the beauty of a gorgeous before and after: a refinished dresser can turn forgotten furniture into something stylish, useful, and deeply personal.
Whether you found a thrift-store dresser with good bones, inherited a vintage piece from family, or simply want to rescue your bedroom furniture from the land of “fine, but boring,” refinishing can make a dramatic difference. The best part? You do not need to be a professional furniture restorer to achieve a beautiful result. You need patience, prep work, the right products, and the emotional strength not to panic when the first sanding pass makes everything look temporarily worse. That part is normal. Think of it as the dresser’s awkward middle-school phase.
In this guide, we will walk through how a tired dresser becomes a polished showpiece, from assessing the original condition to cleaning, repairing, sanding, painting, staining, sealing, and styling. We will also cover common mistakes, design ideas, and practical experience from real refinishing projects so your own before-and-after moment feels less intimidating and more like a creative weekend victory.
Why Refinish a Dresser Instead of Replacing It?
Refinishing a dresser is not only about saving money, although that is a very nice bonus. It is also about preserving quality, reducing waste, and creating a piece that fits your style instead of settling for whatever flat-packed furniture happens to be on sale. Many older dressers were built with solid wood, dovetail joints, sturdy drawer boxes, and design details that are hard to find in inexpensive new furniture.
A refinished dresser also gives you complete creative control. Want a deep walnut stain with matte black hardware? Go for it. Dreaming of a soft sage green paint color with brass pulls? Absolutely. Prefer a two-tone look with painted sides and a natural wood top? That combination is popular for a reason: it looks custom without requiring a custom furniture budget.
There is also something deeply satisfying about seeing the transformation happen under your own hands. You are not just decorating a room; you are rescuing a piece, giving it a second life, and possibly developing a mildly dangerous habit of slowing down every time you pass a curbside dresser.
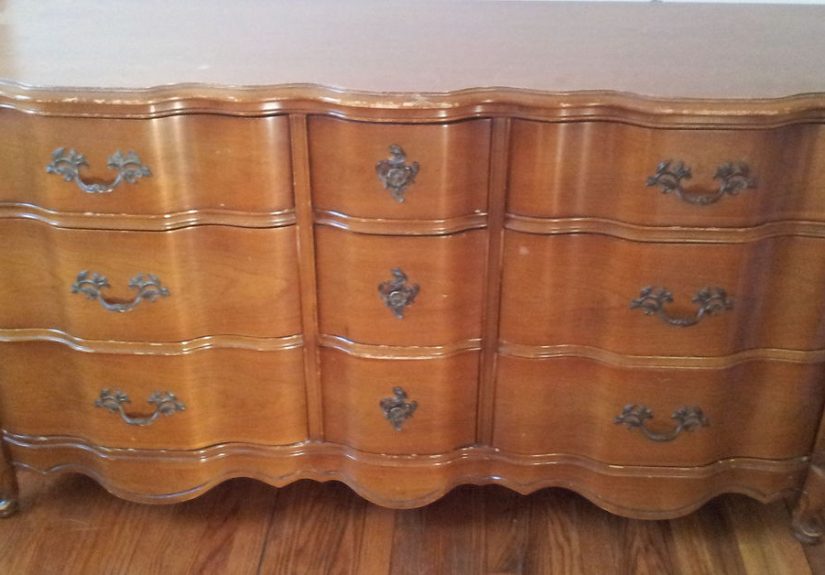
The “Before”: How to Evaluate an Old Dresser
Before you grab sandpaper and start attacking the dresser with heroic energy, take a close look at what you are working with. A gorgeous before and after begins with understanding the “before.” Is the dresser solid wood, veneer, laminate, or a combination? Are the drawers sliding smoothly? Is the top stained, chipped, warped, or covered in water rings from someone’s ancient houseplant? Is the hardware original, missing, rusty, or charmingly weird?
Check the Structure
Open and close every drawer. A dresser that looks rough but has sturdy construction is often worth refinishing. A dresser with broken frames, severe water damage, or drawers that refuse to cooperate may still be salvageable, but it will require more repair work. Tighten loose screws, inspect the legs, and check whether the back panel is secure.
Look for Veneer Damage
Veneer is a thin layer of real wood attached to a base material. Many vintage dressers use veneer, especially on drawer fronts and tops. Light veneer damage can be repaired with wood filler or adhesive, but deep peeling, bubbling, or missing sections may influence your finish choice. If the veneer is too damaged to stain beautifully, paint may be the better route.
Consider Safety Before Sanding
If the dresser is very old and has existing paint, be careful. Pieces painted before lead restrictions may require special handling. Do not aggressively sand unknown old paint indoors. Use a lead test kit when appropriate, work with proper ventilation, and consider professional help for high-risk pieces. A beautiful dresser is lovely; lead dust is not part of the aesthetic.
Tools and Supplies for a Refinished Dresser
You do not need a warehouse full of tools, but having the right basics makes the project smoother. At minimum, gather screwdrivers, cleaning cloths, mild soap or degreaser, wood filler, putty knife, painter’s tape, sanding sponges or an orbital sander, tack cloth, primer if painting, stain if staining, paint or topcoat, brushes, foam rollers, gloves, eye protection, and a dust mask or respirator.
For stain projects, consider a pre-stain wood conditioner, especially on woods that can absorb color unevenly. For painted projects, choose a primer that suits the surface and finish. If the dresser will be used daily, a durable protective topcoat is worth the extra time. Dressers work harder than people think. They deal with jewelry trays, coffee cups, folded laundry, perfume bottles, and the occasional “I’ll put this here for now” pile that remains for six months.
Step-by-Step: How to Refinish a Dresser
Step 1: Remove Drawers and Hardware
Start by removing every drawer and taking off the knobs or pulls. Place hardware in a labeled bag so you do not spend the final hour of the project crawling around the floor looking for one tiny screw. If you plan to reuse the original hardware, clean it separately. Brass, bronze, and vintage metal pulls can often be revived with gentle cleaning and a little patience.
Step 2: Clean the Dresser Thoroughly
Cleaning is not glamorous, but it is one of the most important steps. Furniture collects oils, wax, dust, and residue that can prevent paint, stain, or topcoat from bonding properly. Wipe the entire dresser with a mild cleaner or degreaser, then let it dry completely. Pay attention to corners, trim, drawer edges, and carved details where grime likes to hide like it owes rent.
Step 3: Repair Scratches, Dents, and Chips
Use wood filler for small dents, chips, and old hardware holes. Let it dry fully, then sand it smooth. If you are staining rather than painting, choose a stainable wood filler and test it first. Filler can absorb stain differently than surrounding wood, so do not assume it will disappear like a magician in a furniture apron.
Step 4: Sand the Surface
Sanding prepares the dresser for the new finish. If you are painting over a smooth existing finish, you may only need to scuff-sand with fine-grit sandpaper so primer can grip. If you are removing old finish for stain, you will need a more thorough sanding process. Work with the grain whenever possible, move gradually from coarser to finer grits, and avoid pressing so hard that you damage veneer.
After sanding, remove dust with a vacuum, tack cloth, or slightly damp cloth. Dust left behind can ruin an otherwise beautiful finish, creating bumps that look suspiciously like the dresser developed goosebumps.
Step 5: Choose Paint, Stain, or a Two-Tone Finish
This is where the design personality comes in. Paint is excellent for damaged surfaces, bold makeovers, and modern color updates. Stain is ideal when the wood grain is attractive and worth showing off. A two-tone finish offers the best of both worlds: painted body, stained top, natural drawer fronts, or a mix of color and wood warmth.
For a classic look, try warm walnut stain with simple black or antique brass hardware. For a cottage-style dresser, consider creamy white, dusty blue, or sage green paint. For a dramatic before and after, deep navy, charcoal, forest green, or black can turn a plain dresser into the furniture equivalent of a tailored blazer.
Step 6: Prime if Painting
If you are painting, primer helps with adhesion and coverage. It is especially useful on glossy finishes, dark wood, knotty wood, or surfaces that may bleed through paint. Apply thin, even coats and let the primer dry according to product directions. Sand lightly after primer if the surface feels rough.
Step 7: Apply Paint or Stain
For paint, use a quality brush for edges and details, then a foam roller or smooth brush for flat surfaces. Apply thin coats rather than one thick coat. Thick paint may look efficient at first, but it can lead to drips, brush marks, and drying issues. Thin coats are the quiet overachievers of furniture refinishing.
For stain, stir the product well, apply it evenly, and wipe away excess according to the instructions. Always test the stain on a hidden area first. Wood species, sanding level, and previous finishes can all change how the color appears. The same stain can look golden on one dresser and moody brown on another, because wood apparently enjoys keeping us humble.
Step 8: Seal the Finish
A protective topcoat helps preserve the makeover. Polyurethane, polycrylic, wax, lacquer, and furniture sealers all have different looks and durability levels. For a dresser that will see daily use, a water-based or oil-based clear coat is often a practical choice. Apply thin coats, brush with the grain, allow proper drying time, and sand lightly between coats if the product recommends it.
Step 9: Reattach Hardware and Style the Dresser
Once the finish has cured, reattach the hardware. This is the moment when the dresser finally looks dressed for the party. New hardware can completely change the mood of the piece. Brass pulls add warmth, matte black knobs bring modern contrast, glass knobs create vintage charm, and leather pulls feel casual and contemporary.
Style the finished dresser with a mirror, lamp, artwork, books, a tray, or a small plant. Keep the top balanced but not overcrowded. After all that work, the dresser deserves to be seen, not buried under receipts, tangled chargers, and one sock without a clear life plan.
Gorgeous Before-and-After Design Ideas
The Modern Black Dresser
A dated orange-toned dresser can become sleek and sophisticated with black paint, a satin topcoat, and brass hardware. This style works beautifully in modern bedrooms, entryways, and dining rooms used as storage zones. The contrast between dark paint and warm metal gives the piece a designer feel.
The Natural Wood Revival
If the wood grain is beautiful, strip or sand the old finish and apply a rich stain or clear coat. This approach works especially well on midcentury dressers, oak pieces, walnut veneer, and vintage furniture with clean lines. The result feels timeless, warm, and expensive without shouting for attention.
The Painted Cottage Makeover
A scratched dresser with dated hardware can become soft and charming with a muted paint color, lightly distressed edges, and vintage-style knobs. Colors like cream, pale gray, powder blue, and sage green are popular because they feel calm and livable.
The Two-Tone Beauty
Paint the frame and stain the top or drawer fronts for a balanced look. This method is perfect when some wood areas are worth saving and others need coverage. A white painted body with a walnut-stained top is a classic combination, while navy with natural wood adds a more dramatic twist.
Common Mistakes to Avoid
The biggest refinishing mistake is rushing the prep. Skipping cleaning, sanding, or priming can cause peeling, uneven stain, rough texture, and a finish that does not last. Another common issue is applying products too thickly. Thick coats may seem like a shortcut, but they often create drips, tackiness, bubbles, or an uneven sheen.
Do not forget to test colors. Paint and stain can look different under bedroom lighting than they do in the garage or store aisle. Also, respect drying and curing time. A piece may feel dry to the touch before the finish is fully hardened. If you place heavy decor on top too soon, you may leave marks in your brand-new finish, which is a special kind of DIY heartbreak.
How Much Does a Dresser Refinishing Project Cost?
The cost depends on what you already own and how dramatic the makeover will be. A simple painted dresser may require cleaner, sandpaper, primer, paint, and a topcoat. A stained dresser may require stripper, sanding supplies, stain, conditioner, and polyurethane. Hardware can range from budget-friendly knobs to premium pulls that cost more than the dresser did, because home improvement has a sense of humor.
In many cases, refinishing is still less expensive than buying a comparable new solid-wood dresser. It also gives you a custom result. Even if the total supply cost is not tiny, the finished piece can look far more high-end than its humble beginning.
Experience Section: What Refinishing a Dresser Really Teaches You
Refinishing a dresser teaches you very quickly that furniture makeovers are equal parts creativity, patience, and problem-solving. The first lesson is that the “before” photo is often more dramatic than you expect. A dresser may look hopeless at first glance, especially when the finish is cloudy, the hardware is outdated, and the drawers smell faintly like a basement that has been keeping secrets. But once you remove the hardware, clean the surface, and see the actual shape of the piece, possibilities start to appear.
One of the most valuable experiences is learning how much prep matters. Beginners often want to jump straight to the pretty part: the color, the stain, the hardware, the big reveal. But the real success happens before the first coat goes on. Cleaning removes years of invisible residue. Sanding smooths rough areas and gives the new finish something to grip. Filling dents makes the final surface look intentional instead of “well, I tried.” Once you understand that prep is not wasted time, your results improve dramatically.
Another important lesson is that every dresser has its own personality. Some pieces accept stain beautifully, showing off grain you did not even know was there. Others turn blotchy, stubborn, or strangely orange, as if they are auditioning to become a pumpkin. That is when flexibility matters. A plan to stain may become a plan to paint. A plan to replace hardware may become a decision to restore the original pulls. A scratched top may become the perfect place for a darker stain or a painted finish. The best refinishing projects leave room for adjustment.
You also learn to respect drying time. This is difficult because by the final coat, excitement is high and patience is low. The dresser looks finished, the hardware is waiting, and you want the satisfying before-and-after photo immediately. But finishes need time to cure. Giving the piece extra time before heavy use helps prevent dents, smudges, sticky drawers, and surface marks. Waiting is not glamorous, but neither is ruining the top with a lamp base before the finish has hardened.
Hardware can be surprisingly emotional. New knobs or pulls often create the “after” moment. The same painted dresser can look farmhouse, modern, vintage, or glam depending on the hardware. Measuring carefully is essential if you are replacing pulls, especially when existing holes are already drilled. If the new hardware does not fit the old spacing, you may need to fill and redrill holes. That small detail can turn a quick update into a mini engineering project, so measure twice and avoid muttering into a drawer front later.
Finally, refinishing teaches you that imperfections are not always failures. A tiny brush mark, a slightly darker corner, or a repaired chip can become part of the story. Handmade projects have character. The goal is not to make the dresser look like it rolled out of a factory; the goal is to make it beautiful, useful, and loved again. A refinished dresser carries history and personality in a way new furniture rarely does. When you stand back and compare the before and after, the transformation feels bigger than paint or stain. It feels like proof that good things can be restored with attention, effort, and maybe one extra trip to the hardware store.
Conclusion
A gorgeous before and after refinished dresser is more than a weekend project. It is a creative transformation that combines design, repair, patience, and practical skill. With careful cleaning, smart sanding, thoughtful color choices, and a durable protective finish, an old dresser can become one of the most beautiful pieces in your home.
Whether you choose paint, stain, or a two-tone finish, the secret is to respect the process. Do not rush prep work. Test products before committing. Apply thin coats. Let the finish cure. Choose hardware that completes the look. Most importantly, enjoy the transformation. Few home projects deliver such a satisfying visual payoff from such a humble starting point.
The next time you see a scratched, dated, or forgotten dresser, look twice. Under the worn finish may be a gorgeous makeover waiting patiently for sandpaper, color, and a little imagination.


