Table of Contents >> Show >> Hide
- Why Proper Shower Caulking Matters
- Tools & Materials You’ll Need
- Where You Should (and Shouldn’t) Caulk
- How to Caulk a Shower Enclosure in 14 Steps
- Step 1: Inspect the Existing Caulk
- Step 2: Choose the Right Caulk
- Step 3: Gather Tools & Prep the Area
- Step 4: Dry the Shower Thoroughly
- Step 5: Remove the Old Caulk
- Step 6: Clean and Degrease the Joint
- Step 7: Mask Off for a Perfect Bead
- Step 8: Cut the Nozzle the Right Way
- Step 9: Practice on Scrap (Optional but Smart)
- Step 10: Apply a Smooth, Continuous Bead
- Step 11: Tool and Smooth the Bead
- Step 12: Remove the Tape
- Step 13: Let It Cure (Seriously, Don’t Rush This)
- Step 14: Inspect, Touch Up, and Maintain
- Aftercare: Keeping That Bead Looking New
- Real-World Tips & Experiences (Extra of Hard-Earned Wisdom)
- Conclusion
Tired of that grimy, cracked line around your shower enclosure that looks like it’s plotting against your drywall?
Good news: caulking (or re-caulking) your shower is one of those rare DIY jobs that’s cheap, fast, oddly satisfying,
and can save you from expensive water-damage horror stories. In this step-by-step guide, we’ll walk through exactly
how to caulk a shower enclosure like a pro in 14 clear steps, with practical tips, pro habits, and visual cues
you can easily turn into pictures for your tutorial-style content.
Why Proper Shower Caulking Matters
Every shower enclosure is basically a controlled splash zone. Anywhere water sneaks behind tile, glass tracks, or
panels, it can quietly rot framing, stain ceilings, grow mold, and ruin finishes. A clean, continuous bead of the
right bathroom caulk seals those gaps, keeps moisture where it belongs, and makes your shower look fresh instead of
“before photo in a renovation ad.”
Tools & Materials You’ll Need
- 100% silicone or “kitchen & bath” caulk (mold- and mildew-resistant, labeled for tubs & showers)
- Caulk gun (smooth-rod or dripless for better control)
- Utility knife or caulk removal tool
- Plastic scraper or old store card
- Bathroom cleaner and/or mild degreaser
- Isopropyl alcohol and clean rags or paper towels
- Painter’s tape (blue or similar, low tack)
- Caulk-smoothing tool or your finger (plus a small bowl of soapy water)
- Vacuum or brush for debris
- Fan or dehumidifier (optional but very helpful)
Where You Should (and Shouldn’t) Caulk
In most framed or frameless shower enclosures, caulk is used along vertical corners, where the enclosure meets the
shower base or tub, along the outer edge of metal tracks, and around fixed glass panels. Do not seal
over weep holes in metal frames or any intentional drainage openings those let trapped water escape instead of
flooding your walls.
How to Caulk a Shower Enclosure in 14 Steps
Below is the full process broken into clear, photo-ready steps. Each step can easily match one illustrative picture.
Step 1: Inspect the Existing Caulk
Look closely along every seam: base of the enclosure, corners, glass tracks, and where walls meet the shower pan or
tub. If you see cracks, gaps, peeling, or mold stains that don’t scrub off, it’s time to remove and replace the
caulk instead of patching over it.

Step 2: Choose the Right Caulk
For wet areas, reach for a high-quality 100% silicone or a premium kitchen & bath sealant labeled waterproof and
mold-resistant. Avoid basic painter’s acrylic in the shower it won’t last under constant moisture. Pick clear,
white, or a color that blends with your tile and base so the bead disappears instead of screaming for attention.
Step 3: Gather Tools & Prep the Area
Clear out shampoo bottles, caddies, and random half-empty products from 2017. Turn on the bathroom fan or open a
window for ventilation. Lay down an old towel to catch debris. This is a small job: having everything within reach
keeps you from juggling a caulk gun with soapy hands.
Step 4: Dry the Shower Thoroughly
New caulk will not bond to a damp surface. Wipe down all joints with a towel, then let the enclosure dry use a
fan or dehumidifier if needed. Pay attention to corners, under tracks, and around the base where water lingers.
Step 5: Remove the Old Caulk
Score along both edges of the old bead with a sharp utility knife or caulk removal tool, then peel it away in
strips. Use a plastic scraper or old card to lift stubborn bits without scratching acrylic, fiberglass, or tile
glaze. Take your time here: any leftover residue is where new caulk will fail first.

Step 6: Clean and Degrease the Joint
Wash the area with bathroom cleaner to remove soap scum and body oils. Rinse, then wipe with isopropyl alcohol to
strip any remaining residue. If there was mold, clean it thoroughly and let it dry completely before proceeding.
No dust, no slime, no excuses.
Step 7: Mask Off for a Perfect Bead
Run painter’s tape above and below each joint, leaving a gap where the caulk will go typically 1/8 to 1/4 inch
wide. This simple step gives you magazine-worthy lines even if your hands are fueled by caffeine and optimism.

Step 8: Cut the Nozzle the Right Way
Cut the caulk tube tip at a 45° angle with a small opening smaller than you think. You can always cut bigger, but
you can’t put plastic back. Puncture the inner seal if required, then load the tube into your caulk gun.
Step 9: Practice on Scrap (Optional but Smart)
On a piece of cardboard or in an unseen corner, squeeze out a test bead. Adjust your trigger pressure and speed
until you can lay a smooth, even line without blobs. This 30-second rehearsal saves you 20 minutes of cleanup.
Step 10: Apply a Smooth, Continuous Bead
Hold the gun at about 45° and run a steady bead along the gap. Move in one continuous motion where possible. Aim to
push caulk into the joint (moving the gun toward the direction of the tip) so it fully fills the space,
rather than just sitting on top.

Step 11: Tool and Smooth the Bead
Immediately smooth the fresh caulk using a caulk tool or your finger dipped in soapy water. Light pressure is
enough: you’re pressing the bead into the joint and shaping a rounded, even finish. Wipe excess onto a rag as you
go instead of smearing it down the wall.
Step 12: Remove the Tape
While the caulk is still wet, gently peel away the painter’s tape at a 45° angle, pulling away from the joint.
You’ll reveal a crisp, clean line that looks suspiciously like you knew exactly what you were doing.
Step 13: Let It Cure (Seriously, Don’t Rush This)
Check the caulk tube for cure time. Many bathroom silicones are water-ready in 24 hours; some fast-cure types are
quicker, others slower. Err on the side of patience: using the shower too soon can bubble, wash out, or split the
bead, and nobody wants to recaulk the “fresh caulk” you just bragged about.
Step 14: Inspect, Touch Up, and Maintain
Once cured, inspect under bright light. Fill tiny gaps with a small dab of caulk if needed. Going forward, keep the
enclosure clean and as dry as practical squeegee glass, wipe puddles, and deal with early discoloration before it
turns into a full redo.
Aftercare: Keeping That Bead Looking New
Treat your new caulk like a long-term relationship:
- Ventilate during and after showers to reduce humidity.
- Squeegee walls and glass to cut down on soap scum and mildew.
- Clean gently with non-abrasive cleaners so you don’t erode the bead.
- Check annually for cracks, gaps, or mold that won’t clean off that’s your cue to recaulk.
Real-World Tips & Experiences (Extra of Hard-Earned Wisdom)
Once you’ve caulked a few shower enclosures or fixed a few disasters you start to see the same patterns. The
difference between a bead that fails in six months and one that quietly does its job for years usually comes down to
small habits, not special gear.
First: people underestimate drying. Showers get used daily, and moisture sneaks into every seam. If you recaulk on a
damp surface, the bond is weak from day one. Many pros will have the family avoid that shower for a full day before
they even start, run a fan, towel-dry, then hit seams with alcohol. It feels excessive until you compare how
tightly that bead clings versus one slapped over a “mostly dry” surface.
Second: overcutting the nozzle is the classic rookie mistake. A giant opening looks like it’ll go faster, but it
just dumps too much caulk, slumps, and makes smoothing a mess. Experienced DIYers tend to cut smaller than
the printed marks, then open up only if the joint truly needs it. That gives cleaner control, especially along
glass tracks and corners where a fat bead screams “panic.”
Third: tape is training wheels and that’s a compliment. A lot of “I don’t need tape” bravado ends with smeared
silicone on textured tile. Using painter’s tape creates a sharp visual target: you aim for the channel, smooth once,
pull the tape, and you’re done. It’s also ideal content-wise: each taped joint and each peel moment makes a perfect
step photo for tutorials, before/after shorts, or product pages.
Color also plays a bigger role than people expect. White is classic but shows every speck of mildew or shampoo tint.
Clear can disappear nicely around glass but may look messy if the gap is wide or irregular. Subtle grays or beiges
can hide grime and blend with modern tile, giving your bead some aesthetic forgiveness. Matching caulk to grout or
trim creates a seamless, “factory finish” look a small detail that photographs beautifully.
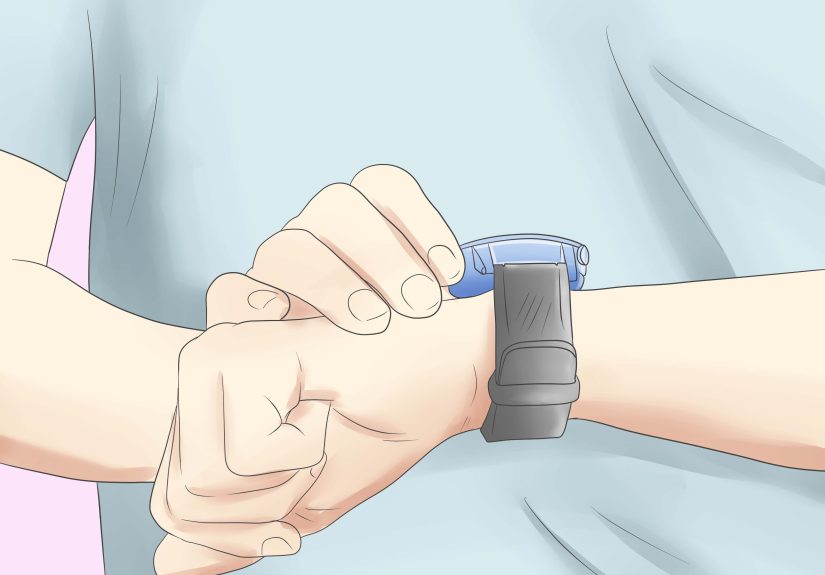
Another pro habit: don’t fight the caulk guide it. Rest part of your hand or wrist against the enclosure as you
move so the gun glides at a consistent angle. Many seasoned caulkers “push” the bead so the tip slightly presses
into the joint, forcing material in and smoothing simultaneously. It feels awkward the first time but produces a
denser, longer-lasting seal.
Finally, understand that good caulking is maintenance, not a one-time life event. In real homes with kids, hot
showers, and imperfect ventilation, even premium silicone has a life span. When you start seeing hairline cracks or
stubborn mold at the edges, don’t wait until water stains show up downstairs. Recaulking early takes under an hour
and keeps your shower content and your actual bathroom firmly in the “after” category.
Put all that together thorough prep, the right product, deliberate application, smart color choice, and regular
checkups and your “How to Caulk Shower Enclosures: 14 Steps (with Pictures)” guide won’t just look good on the
web. It will actually help people get pro-level results on the first try.
Conclusion
Caulking a shower enclosure is less about brute skill and more about patience, cleanliness, and control. With these
14 steps, clear visuals, and experience-backed tips, your readers can stop leaks, fight mold, and upgrade the look
of their bathroom in one straightforward project. One tube of silicone, one steady hand big impact.
SEO Summary & Metadata
sapo:
Learn exactly how to caulk shower enclosures like a pro with this detailed 14-step guide. From removing old caulk and
choosing the right waterproof sealant, to taping, smoothing, curing, and long-term maintenance, you’ll see how small
details prevent leaks, mold, and costly repairs. Packed with real-world tips, photo-ready steps, and expert-level
techniques, this is the go-to tutorial for anyone who wants a clean, durable, and professional-looking shower seal
without calling a contractor.


