Table of Contents >> Show >> Hide
- Before You Start: Safety and a Simple Supply List
- The 5-Minute Steam Clean (The Method You’ll Actually Keep Using)
- Tackling Stubborn, Baked-On Messes
- Clean the Parts People Forget (And Then Wonder Why It Still Smells)
- If You Have an Over-the-Range Microwave: Filters Matter
- How to Deodorize a Microwave (Including Burnt Smells)
- How Often Should You Clean a Microwave?
- Prevent the Next Mess (Because You Deserve Peace)
- of Real-Life Microwave Cleaning Experience (So You Feel Less Alone)
- Conclusion
Learning how to clean a microwave is one of those grown-up skills nobody teaches youright up there with “how to fold a fitted sheet” and “how to stop tomato sauce from exploding at 11:58 PM.” The good news: you don’t need fancy cleaners, a hazmat suit, or a deep emotional conversation with your appliance. With a little steam and a few pantry staples, you can get your microwave clean, deodorized, and back to looking like it hasn’t been through three popcorn emergencies and a curry incident.
This guide covers quick daily upkeep, a fast steam-clean method (hello, vinegar and lemon), deep-clean tricks for stuck-on gunk, and the “often ignored but wildly important” partslike the turntable, door edges, and filters on over-the-range models. Let’s make your microwave less “crime scene” and more “respectable kitchen citizen.”
Before You Start: Safety and a Simple Supply List
Safety first (because microwaves are helpful, not harmless)
- Unplug the microwave (or switch it off at the breaker if it’s built-in) before deep cleaning the exterior, vents, or filters.
- Let the turntable cool before washing. Hot glass + cold water = heartbreak.
- Skip abrasive scrubbers (steel wool, harsh scouring pads). They can scratch the interior and make future cleaning harder.
- Don’t spray cleaner directly into the microwaveespecially near vents, seams, or the control panel.
What you’ll need
- Microwave-safe bowl or large measuring cup
- Water
- White vinegar or a lemon
- Dish soap
- Baking soda (for stubborn messes and smells)
- Microfiber cloths or soft sponges
- An old toothbrush or soft detail brush (optional, but great for corners)
- Oven mitts (for removing hot bowls safely)
The 5-Minute Steam Clean (The Method You’ll Actually Keep Using)
If your microwave looks like it’s storing evidence, steam is your best friend. Steam softens dried splatters and loosens grease so you can wipe it away without scrubbing like you’re sanding a deck.
Option A: Clean a microwave with vinegar and steam
- Fill a microwave-safe bowl with about 2 cups of water.
- Add 2 tablespoons of white vinegar.
- Microwave on high for 3–5 minutes, until the window looks steamy.
- Keep the door closed for 5 minutes so the steam can keep working (this is the lazy partenjoy it).
- Carefully remove the bowl with oven mitts.
- Wipe the interior top, sides, bottom, and door with a damp cloth or sponge.
Pro tip: Start with the ceiling of the microwave. Gravity is undefeated, and you don’t want drips landing on your freshly cleaned bottom like a gross little encore.
Option B: Clean a microwave with lemon (less vinegar smell, more “fresh kitchen” energy)
- Slice a lemon in half (or into a few chunks).
- Squeeze the juice into a bowl with 1–2 cups of water, then toss the lemon pieces in.
- Microwave on high for 2–4 minutes until steamy.
- Let it sit with the door closed for 3–5 minutes.
- Remove the bowl carefully and wipe everything down.
Why this works (the quick science-y explanation)
Steam loosens dried-on food by rehydrating itbasically turning “microwave concrete” back into something your cloth can lift. Vinegar’s mild acidity can help cut light grease and odors. Lemon does a similar job with citric acid while leaving a brighter scent. The result is less scrubbing, fewer tears, and a microwave that doesn’t smell like last week’s fish.
Tackling Stubborn, Baked-On Messes
Steam gets you 80–90% of the way there. For the remaining 10%the stuff that’s been “aging” in the corner like a fine wineuse targeted methods. Translation: don’t go full aggressive scrub mode immediately. Be strategic.
Baking soda paste for stuck-on splatters
- Mix 2 parts baking soda with 1 part water to make a thick paste.
- Spread it on stubborn spots (especially the corners and the bottom).
- Let it sit for 5–10 minutes.
- Wipe with a damp cloth. Rinse the cloth and wipe again to remove residue.
Baking soda is gently abrasive, so it helps lift grime without scratching most microwave interiors. It’s also a champion odor-absorber, which is a nice bonus when your microwave has been hosting “popcorn smoke” as a permanent houseguest.
Dish soap “degrease boost”
If your microwave mess is more oily than crusty (think bacon splatter or butter explosions), add dish soap to your approach:
- After a steam clean, put a drop or two of dish soap on a damp sponge and wipe greasy areas.
- Follow with a clean, damp cloth to remove soap film.
- Dry with a towel to prevent streaks.
A gentle warning about “miracle” scrubbers
Melamine “magic” sponges can work on tough marks, but use them carefully: they’re mildly abrasive. Test a small hidden spot first, and don’t grind away at coatings or painted surfaces. When in doubt, stick with steam + baking soda paste. Your microwave does not need a full facial peel.
Clean the Parts People Forget (And Then Wonder Why It Still Smells)
1) Turntable and roller ring
- Remove the glass turntable and the roller ring (if your model has one).
- Wash with warm, sudsy water and a soft sponge.
- Many turntables are dishwasher safe, but check your manual if you’re unsure.
- Dry completely before putting them back.
Why it matters: gunk hides underneath. Also, crumbs under the ring can cause annoying noises and uneven rotation. If your microwave has been making a sound like a tiny shopping cart wheel, this is often why.
2) Door edges, seals, and window
- Wipe the door perimeter and the frame where the door closes. This area collects grease and mystery smudges.
- Clean the window on both sides with a damp cloth and mild soap if needed.
- Use a toothbrush or soft brush to gently clean seams and corners.
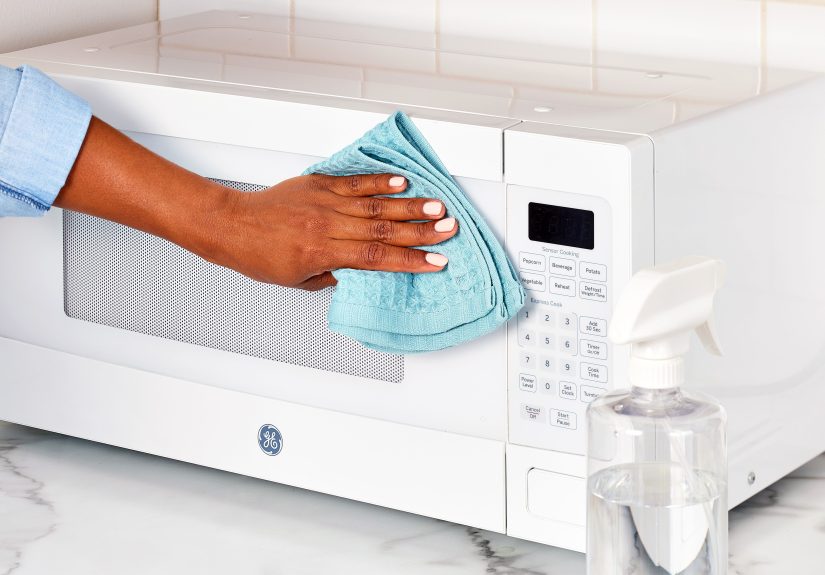
3) Control panel and exterior (especially if it’s stainless steel)
- Use a soft, damp cloth on the control panel. Avoid spraying liquid directly on it.
- For the exterior, use mild dish soap and water, then wipe dry.
- If your microwave is stainless steel, wipe with the grain to reduce streaks.
This is the part people skip because “the inside is what matters.” But the handle and keypad are high-touch zones. Cleaning them is basically being kind to Future-You and anyone else who opens the microwave without washing their hands after handling a snack.
If You Have an Over-the-Range Microwave: Filters Matter
Over-the-range microwaves often double as a vent hood, which means they have filters designed to trap grease and manage odors. If you cook regularly, these filters can get gross fastand a dirty filter can reduce ventilation performance.
Grease filter: clean it monthly (or at least regularly)
- Turn off the microwave and make sure everything is cool.
- Remove the grease filter from the underside (usually it slides or pops out).
- Soak it in hot water + dish soap for at least 10 minutes.
- Scrub gently with a soft brush or sponge. For heavy grease, add a little baking soda to the soak.
- Rinse well and let it dry completely before reinstalling.
Charcoal filter: don’t wash itreplace it
Some models (especially recirculating setups) use a charcoal filter to absorb odors. These generally can’t be cleaned effectively and should be replaced on the schedule recommended in your owner’s manual. If your kitchen keeps smelling like last night’s stir-fry even when the fan is on, that filter may be begging for retirement.
How to Deodorize a Microwave (Including Burnt Smells)
Sometimes the microwave looks clean but smells like a sad concession stand. Here’s how to get rid of lingering odors without perfume-bombing your food.
Baking soda overnight (the “set it and forget it” fix)
- Place a small plate or bowl with about 1/2 cup baking soda inside the microwave.
- Leave it overnight (or at least 8 hours).
- Remove it before using the microwave again.
Lemon steam (fast and cheerful)
Do the lemon steam method above. It helps reduce odors and leaves a fresh, clean scent that doesn’t scream “industrial cleaner.”
Coffee grounds or charcoal (for stubborn funk)
If smells are really entrenched, an open container of dry coffee grounds or activated charcoal left in the microwave for several hours can help absorb odors. This is especially useful after something smoky (like burnt popcorn) has declared itself the official scent of your household.
How Often Should You Clean a Microwave?
The “right” schedule depends on how often you use it, what you cook, and whether your microwave has been forced to endure spaghetti sauce volcanos. Here’s a realistic routine that keeps grime from becoming a lifestyle:
- Daily or after messy use: Wipe splatters while they’re fresh.
- Weekly: Do a quick steam clean (vinegar or lemon) and wipe down the door and handle.
- Weekly-ish: Wash the turntable if it’s getting cloudy or sticky.
- Monthly (over-the-range models): Clean the grease filter.
- As needed: Deodorize for burnt smells and check any charcoal filter replacement schedule.
Prevent the Next Mess (Because You Deserve Peace)
Prevention is not glamorous, but it’s the difference between “a quick wipe” and “an afternoon spent scraping dried oatmeal off the ceiling.” Try these habits:
- Cover food with a microwave-safe lid or splatter guard.
- Stir halfway through heating saucy foods to reduce eruptions.
- Use a lower power level for splatter-prone items (like sauces and soups) so they heat more gently.
- Don’t run the microwave empty. It’s not a fun party trick and can stress components.
- Don’t slam the door. Your microwave is not a car trunk.
- Use the exhaust fan when cooking greasy or smoky foods if you have an over-the-range unit.
of Real-Life Microwave Cleaning Experience (So You Feel Less Alone)
If you’ve ever opened your microwave and thought, “Wow, this is… not what I meant to create,” welcome to the club. The first time I truly respected microwave cleaning was after a bowl of marinara sauce went full Old Faithful. One minute it was gently bubbling, the next it looked like a crime scene in a spaghetti western. I did what many people do: I waited. I told myself I’d clean it later. And later turned into “a week,” which turned into “this might be part of the microwave now.”
Here’s what I learned: fresh messes wipe up easily, but dried splatters become a stubborn, crusty personality trait. When sauce dries on the ceiling of the microwave, it doesn’t just sit there politelyit hardens, darkens, and becomes the kind of stain that makes you question your life choices. Steam cleaning is what saved me. I ran the vinegar-and-water method, let the steam sit, and suddenly the “permanent” mess turned into a wipeable situation. Not effortless, but dramatically less dramatic than scrubbing dry crust with sheer rage.
Another moment of truth: burnt popcorn. Burnt popcorn smell has range. It clings to your microwave, your kitchen, and possibly your soul. Steam helped, but baking soda was the true hero. Leaving a bowl of baking soda inside overnight felt almost too simplelike the cleaning equivalent of drinking water and taking a walkbut it worked. The next day, the smell was noticeably lighter. (And yes, I also learned to stay near the microwave when making popcorn, because “I’ll just answer one email” is how burnt popcorn is born.)
The most underrated part of microwave cleaning, though, is the stuff underneath. The turntable comes out, sure, but the real magic is cleaning the roller ring and the bottom surface beneath it. That’s where drips hide. That’s where crumbs gather. And that’s where weird sticky spots live rent-free. The first time I cleaned under the ring, I felt like I’d discovered a secret basement in my own house. Washing the ring and wiping the base made the microwave run quieter and look instantly betterlike it got a small but meaningful life upgrade.
Finally: the outside matters more than we admit. The handle and keypad are high-touch zones, and they collect fingerprints, oils, and whatever residue comes with cooking and snacking. A quick wipe with a damp microfiber cloth (not a spray-and-pray cleaner attack) makes the whole appliance look newer. It’s one of those tiny chores that pays off fastlike making your bed, except your bed can’t reheat leftovers.
The best cleaning “hack” I’ve found isn’t a hack at all: do a mini steam clean once a week. It takes minutes, prevents build-up, and keeps you from ever having to schedule a deep-clean session that feels like a kitchen-themed endurance sport.
Conclusion
A clean microwave is mostly about two things: steam (to loosen grime) and consistency (to keep messes from becoming artifacts). Start with a simple vinegar or lemon steam clean, wipe down the interior, and don’t forget the turntable, door edges, and exterior touch points. If you have an over-the-range microwave, keep filters on your radarclean grease filters regularly and replace charcoal filters as directed by your manual. Do that, and your microwave will stay fresher, work better, and stop smelling like “burnt popcorn memories.”


