Table of Contents >> Show >> Hide
- Why Build a Raised Planting Bed?
- Plan First: The “Measure Twice, Dig Once” Phase
- Materials: What to Build With (and What to Avoid)
- Tools and Supplies Checklist
- A Simple Build Example: The Classic 4×8 Raised Planting Bed
- Step-by-Step: How to Construct a Raised Planting Bed
- Step 1: Mark the Footprint and Prep the Ground
- Step 2: Level the Base (Your Future Self Will Thank You)
- Step 3: Build the Frame
- Step 4: Add Bracing (Especially for Long Sides or Tall Beds)
- Step 5: Install the Bed in Place
- Step 6: Add a Pest and Weed Defense Layer (Optional, Often Worth It)
- Step 7: Calculate Soil Volume (So You Don’t Buy “One Million Bags”)
- Step 8: Fill the Bed With a Soil Mix That Actually Works
- Step 9: Top It Off With Mulch and Plant
- Step 10: Water Smarter (Raised Beds Dry Out Faster)
- Pro Tips for a Bed That Lasts
- Common Mistakes (So You Don’t Have to Learn Them the Hard Way)
- Conclusion
- Experience Notes From Real Backyards (Extra )
A raised planting bed is basically a garden wearing platform shoes: it stands taller, drains better, warms up faster,
and politely asks you to stop stepping on the soil like it owes you money. Whether you’re growing tomatoes, zinnias,
or that one herb you swear you’ll use this year, a raised bed gives you controlover soil quality, weeds, and how
much bending your back has to endure.
This guide walks you through planning, picking materials, building a sturdy frame, filling it with the right soil,
and keeping it productive for years. You’ll also get real-world, experience-driven tips at the endbecause nothing
teaches faster than the moment you realize you built a beautiful bed… directly on top of a colony of weeds with a PhD.
Why Build a Raised Planting Bed?
Raised beds aren’t just “in-ground gardening, but with walls.” They solve real problems and make good gardens easier:
- Better drainage in heavy clay or compacted yards.
- Earlier planting because raised soil warms faster in spring.
- Fewer weeds when you smother what’s underneath and control what goes inside.
- Healthier roots because you avoid soil compaction by keeping feet out of the bed.
- More comfortespecially if you build it tall enough to save your knees from filing a complaint.
Plan First: The “Measure Twice, Dig Once” Phase
Pick the Right Location
Most vegetables and sun-loving flowers want plenty of direct sun. Aim for a spot that gets a solid chunk of daylight,
and avoid low areas where water puddles. If your site is slightly sloped, you can still build a bedbut plan to level
the base or terrace the area so your soil doesn’t slowly migrate downhill like it’s late for work.
Choose Smart Dimensions
The most common “starter size” is 4 feet wide because you can reach the center from either side
without climbing into the bed. That’s the sweet spot for access and for keeping soil fluffy instead of stomped flat.
Length is flexible6 to 8 feet is manageable and uses standard lumber efficiently.
Height depends on what you’re growing and how much you like bending. Many beds work well at 10 to 12 inches.
If you’re growing deep-rooted crops (tomatoes, peppers, squash) or your native soil is terrible, going 16 to 24 inches
can be worth it. Taller beds also dry out faster, so height is always a tradeoff between comfort and watering.
Leave Room to Walk Like a Human
Don’t cram beds together like you’re trying to win a garden-shaped game of Tetris. Plan paths wide enough for a
wheelbarrow and your knees. A comfortable path often lands around 3 to 4 feet, especially in busy
gardens where you’ll haul mulch, compost, and dreams.
Materials: What to Build With (and What to Avoid)
Best Woods for Raised Beds
- Cedar: Rot-resistant, widely recommended, and looks great.
- Redwood: Excellent durability (often pricier depending on where you live).
- Cypress: Naturally resistant in many regions.
- Untreated pine: Budget-friendly, but shorter lifespan (still workable if you’re okay rebuilding later).
Pressure-Treated Lumber: The Practical Truth
Older pressure-treated wood (the kind associated with arsenic concerns) is not the same as modern treatments sold for
many residential uses today. If you’re cautious, choose naturally rot-resistant wood (like cedar) and skip the debate.
If you’re building on a budget and considering pressure-treated lumber, focus on current, approved treatments and follow
best practices: avoid burning scraps, use gloves when cutting, and consider placing a barrier between soil and boards if desired.
Other Great Options
- Galvanized metal beds: Long-lasting, fast to assemble, modern look, can warm soil quickly.
- Concrete blocks or retaining wall blocks: Sturdy and modular (make sure anything you use is intended for landscape use).
- Composite or recycled plastic lumber: Durable, low maintenance, sometimes higher upfront cost.
Tools and Supplies Checklist
You can build a simple raised bed with basic tools. Here’s a practical list that covers most builds:
- Measuring tape, pencil/marker, and a square
- Shovel and rake (for leveling and prep)
- Drill/driver and exterior-rated screws
- Saw (or have lumber cut at the store)
- Level (helpful, especially on slopes)
- Optional: landscape staples, hardware cloth, rebar or stakes, weed barrier cardboard, and mulch
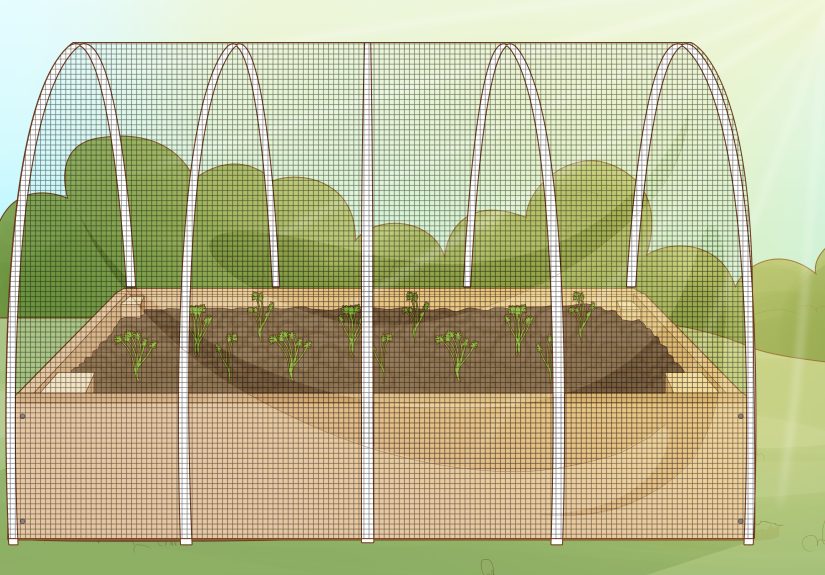
A Simple Build Example: The Classic 4×8 Raised Planting Bed
If you want a no-drama, reliable design, build a 4×8 bed. It fits many spaces, uses common lumber lengths, and gives
you enough room to grow a meaningful amount of food or flowers without needing a tractor.
Recommended Lumber (Two Popular Height Options)
| Bed Height | Typical Boards | Best For |
|---|---|---|
| ~10–12 inches | One layer of 2×10 or 2×12 | Most veggies, herbs, flowers, easy starter build |
| ~16–24 inches | Stacked boards (e.g., two 2×12s) + extra bracing | Deep roots, poor native soil, less bending |
Step-by-Step: How to Construct a Raised Planting Bed
Step 1: Mark the Footprint and Prep the Ground
Mark your bed outline with stakes and string (or spray paint if you want to feel official). Remove rocks and large debris.
If grass or weeds are present, you have two strong options:
- Dig it out (more work now, fewer surprises later).
- Smother it with overlapping layers of cardboard or paper, then wet it thoroughly before placing the bed frame on top.
The smother method is popular because it blocks light and helps kill weeds underneath while breaking down over time.
The key is overlapno gapsbecause weeds treat tiny openings like VIP entrances.
Step 2: Level the Base (Your Future Self Will Thank You)
A slightly uneven bed still works, but a level bed is easier to water and looks cleaner. Use a shovel and rake to knock down high
spots and fill low spots. If your yard slopes a lot, consider building the bed in a terraced area or creating a level pad first.
Step 3: Build the Frame
Assemble the rectangle (or square) on a flat surface if possible. For a 4×8 bed, you’ll typically have:
- Two long boards (8 feet) and two short boards (4 feet), or cut to your desired dimensions.
- Corner posts or stakes (optional but helpful for rigidity).
- Exterior-rated screws (coated or galvanized) to prevent rust.
Make it square: Measure diagonally from corner to corner in both directions. If the measurements match, your frame is square.
If they don’t, nudge the frame until they do. This tiny step prevents the classic DIY tragedy where nothing lines up later.
Step 4: Add Bracing (Especially for Long Sides or Tall Beds)
Soil is heavy, and it pushes outwardslowly, relentlessly, and with the patience of a glacier. If your bed is long (6–8 feet),
tall, or you’re using thinner boards, install braces:
- Mid-span braces on long sides to prevent bowing.
- Corner posts anchored into the ground for stability.
- Rebar or stakes driven alongside walls for extra hold (common with timber builds).
Step 5: Install the Bed in Place
Move the frame onto your prepared site. Check for level again. If needed, shim with soil under low corners and tamp gently.
Once it’s positioned, secure corner posts/stakes (if used) so the frame doesn’t wander.
Step 6: Add a Pest and Weed Defense Layer (Optional, Often Worth It)
If burrowing pests are common in your area, lay hardware cloth (wire mesh) at the bottom before filling with soil.
Staple it to the inside of the frame so it stays put. For weeds, cardboard under the bed is usually enoughespecially when overlapped well.
Step 7: Calculate Soil Volume (So You Don’t Buy “One Million Bags”)
Use the formula: Length × Width × Soil Depth (in feet) = cubic feet. To convert to cubic yards, divide cubic feet by 27.
- Example: 8 ft × 4 ft × 1 ft (12 inches) = 32 cu ft
- 32 ÷ 27 ≈ 1.19 cubic yards
Buying in bulk (by the cubic yard) is often cheaper than buying bags. If you do buy bags, do the math first so your driveway doesn’t become a soil warehouse.
Step 8: Fill the Bed With a Soil Mix That Actually Works
Raised beds thrive when the soil is loose, well-drained, and rich in organic matter. Here are proven approaches you can mix and match based on what’s available:
- Simple and effective: roughly 1:1 compost and quality topsoil/garden soil.
- Lightweight blend: compost + soilless growing mix (about 1:1), with topsoil added in deeper beds.
- Balanced “loamy” goal: about 1/2–2/3 topsoil and 1/3–1/2 plant-based compost (adjust if your topsoil is clay-heavy).
After filling, water the bed thoroughly to settle air pockets. Expect some settling over the first few weeks. That’s normalyour bed isn’t collapsing,
it’s just getting comfortable.
Step 9: Top It Off With Mulch and Plant
Mulch (like shredded leaves, straw, or wood chips around ornamentals) helps retain moisture and reduces weeds. Then plant based on spacing and sun.
If you’re going for edible gardening, group plants with similar water needs and leave room to reach everything without stepping into the bed.
Step 10: Water Smarter (Raised Beds Dry Out Faster)
Because raised beds drain well, they also dry fasterespecially in summer and windy spots. Many gardeners use drip irrigation or drip tape
laid along rows to deliver water right where roots need it. Even a simple soaker hose can be a game-changer if you hate hauling watering cans like it’s a
fitness challenge you didn’t sign up for.
Pro Tips for a Bed That Lasts
- Use exterior-rated screws and avoid indoor fasteners that rust quickly.
- Brace long sides so boards don’t bow after a season of soil pressure.
- Skip lining the interior with plastic unless you have a specific reasontrapped moisture can speed up rot in wood frames.
- Refresh fertility yearly by adding compost to the top and letting it work in over time.
- Keep paths mulched to reduce weeds and mud, and to make harvesting pleasant instead of slippery.
Common Mistakes (So You Don’t Have to Learn Them the Hard Way)
- Making the bed too wide and then performing circus-level stretching to weed the center.
- Underestimating soil cost for tall bedsdeep beds are wonderful, but they can get expensive fast.
- Filling with “random dirt” that compacts like concrete. Raised beds need a mix that stays airy.
- Ignoring bracingstraight boards today can become belly-shaped boards by midseason.
- Building where water pools or where sunlight is limited, then blaming the tomatoes for having standards.
Conclusion
Constructing a raised planting bed is one of the highest-return garden projects you can do: it improves drainage, boosts soil quality,
reduces compaction, and makes planting and harvesting easier. The best results come from smart sizing (easy reach), sturdy materials,
proper bracing, and a soil mix built for rootsnot for filling potholes. Build it well once, maintain it lightly each year, and your raised
bed can produce for seasons with less effort and more fun.
Experience Notes From Real Backyards (Extra )
If you ask a group of gardeners what they’d do differently on their first raised bed, you’ll hear the same themes over and overbecause
raised beds are simple, but they’re also honest. They immediately reveal whether you planned the location, built the frame to handle soil pressure,
and filled it with something plants can actually live in.
First, the “4-foot rule” feels boring until you break it. Many people build a bed 5 or 6 feet wide thinking, “I’m tall, I can reach.”
Then the plants grow, the mulch goes down, the tomatoes sprawl, and suddenly the center of the bed becomes a no-man’s-land that only a pair of salad tongs
can access. Gardeners who downsized to 3–4 feet wide almost always say it made weeding and harvesting dramatically easierand it kept them from stepping into the bed,
which is the fastest way to compact your lovingly mixed soil.
Second, soil settles more than you expect. Fresh mixes have air pockets. Cardboard underneath breaks down. Compost continues decomposing.
A bed can drop a couple inches after the first few deep waterings, and it can drop again after the first season. Experienced gardeners plan for that by keeping
a small stash of compost (or at least knowing where they’ll buy it) and topping off in spring. The good news is that this settling is part of what makes the bed
fertileyour organic matter is becoming plant food. The bad news is that the bed doesn’t refill itself, no matter how nicely you ask.
Third, watering changes when you garden “above ground.” Raised beds drain well, which is great for roots, but it also means they dry out faster.
Many gardeners report that switching from hand-watering to a simple drip line, drip tape, or soaker hose was the upgrade that made raised beds feel effortless.
The biggest “aha” is consistency: instead of drowning plants every few days, steady moisture helps prevent issues like split tomatoes, bitter greens, and stressed herbs.
Add mulch on top, and you’ll often cut watering needs noticeably.
Fourth, bracing is not optional once you’ve seen bowing happen. Long, unbraced boards can start to bulge outward after a season or two,
especially with tall beds and wet soil. Gardeners who added a mid-span brace (or two) later often say they wish they’d installed it from the start because it’s
easier to brace an empty frame than one packed with soil and plant roots. The same goes for corner posts: anchoring the corners makes the whole bed feel solid,
especially in regions with freeze-thaw cycles.
Finally, the best raised beds evolve. Many gardeners start with a basic rectangle and then add “comfort features” as they learn:
a wider path on the sunny side, a simple trellis for cucumbers, a corner planted with flowers for pollinators, a compost bucket nearby, or a stepping stone in the
path where they naturally stand to harvest. Over time, the raised bed stops being a project and becomes part of how the garden works. And that’s the real win:
you build one sturdy structure, then spend the rest of the seasons enjoying the harvest instead of constantly battling the soil.


