Table of Contents >> Show >> Hide
- The “Why” Behind Great Mushrooms (So You Don’t Fight Your Food)
- Pick the Right Mushroom for the Job
- How to Prep Mushrooms: Cleaning, Cutting, and Drying
- Method 1: Sautéed Mushrooms (The Bistro Gold Standard)
- Method 2: Roasted Mushrooms (Hands-Off, Big Flavor)
- Method 3: Grilled Mushrooms (Smoky, Juicy, and Actually Impressive)
- Method 4: Air Fryer Mushrooms (Fast Crisp Edges)
- Method 5: Braised Mushrooms (Silky, Saucy, and Weeknight Fancy)
- Seasoning Mushrooms Like You Mean It
- Common Mushroom Mistakes (and How to Fix Them)
- How to Store Mushrooms So They Don’t Turn Slimy
- Quick Meal Ideas (So Mushrooms Don’t Become “That Ingredient” You Forget)
- Final Takeaway: The 60-Second Mushroom Checklist
- Real-World Cooking Experiences: What Usually Happens (and What to Do Next)
Mushrooms are the ultimate kitchen shapeshifters: they can play “crispy,” “buttery,” “meaty,” “luxuriously saucy,” or
“accidentally rubber eraser” depending on how you treat them. The good news? Cooking mushrooms well isn’t about fancy
chef magicit’s about one simple reality: mushrooms are basically tiny flavor sponges filled with water.
In this guide, you’ll learn how to cook mushrooms on the stovetop, in the oven, on the grill, and even in an air fryerplus
the key techniques that keep them golden-brown instead of gray-and-sad. We’ll also cover cleaning, cutting, seasoning,
and quick meal ideas so you can turn a humble box of mushrooms into something that tastes like it came from a bistro
where the server says “earthy” with a straight face.
The “Why” Behind Great Mushrooms (So You Don’t Fight Your Food)
Here’s the big idea: mushrooms contain a lot of water. If that water doesn’t evaporate, your mushrooms steam in their own
juices and stay pale, soft, and kind of squeaky. If that water does evaporate, the mushrooms finally get a chance to
brown (hello, deep savory flavor).
So most successful mushroom cooking follows a two-phase plan:
- Phase 1: Release moisture (steam/sweat/cook off water)
- Phase 2: Brown and season (sear/roast/crisp, then add aromatics + finishing flavors)
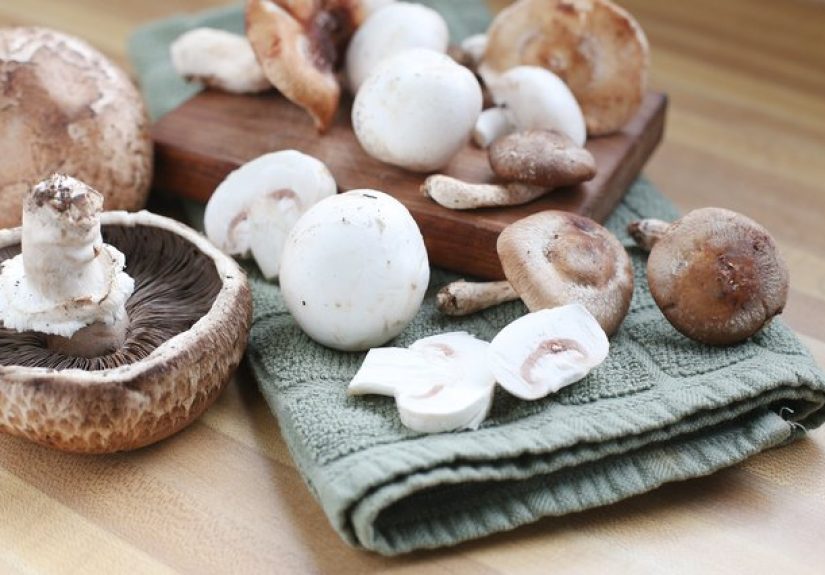
Pick the Right Mushroom for the Job
You can cook almost any common store-bought mushroom using the methods below, but each type has a “best life.”
Button, Cremini, Portobello
These are the everyday workhorses. Button mushrooms are mild, cremini are a little deeper, and portobellos are the big,
dramatic cousins that show up like, “I am the entrée now.” Best for sautéing, roasting, grilling, soups, and sauces.
Shiitake
Bold and savory, excellent for stir-fries, ramen, rice bowls, and sauces. The stems can be tough, so many cooks remove
them and save for stock.
Oyster and King Oyster
Tender, slightly sweet, and great for high-heat searing. King oysters slice into “scallop-like” coins or shred into
“pulled mushroom” textures.
Maitake (Hen of the Woods)
Frilly edges that crisp beautifully. Perfect for roasting and hard searing until the edges go golden and snackable.
Special note on wild mushrooms
If you didn’t buy it from a trusted store or source, don’t eat it unless it’s been identified as edible by a qualified expert.
“It looks like the one on TikTok” is not a food-safety plan.
How to Prep Mushrooms: Cleaning, Cutting, and Drying
Should you wash mushrooms?
You’ll hear a lot of opinions, because mushrooms inspire passionate debateslike sports teams, but with more butter.
Practically speaking: you can quickly rinse mushrooms or wipe/brush them clean. The key is what happens next:
dry them well. Wet mushrooms + heat = steaming, not browning.
- Quick clean: Rinse briefly under cool water or swish quickly, then drain.
- Dry thoroughly: Spread on a towel or paper towels; blot until they feel dry to the touch.
- Don’t soak cultivated mushrooms “just because.” Extended soaking adds unnecessary moisture.
How to cut mushrooms (for the texture you want)
- Thick slices (¼-inch-ish): meatier bite, better browning, less shrinkage.
- Halves/quarters: great for roasting; more surface area, still hearty.
- Torn pieces: good for rustic sautéing; craggy edges brown nicely.
- Whole small mushrooms: cute, bouncy, and great for roasting or skewers.
Whatever you do, aim for similar sizes so everything cooks evenly. One tiny slice will burn while a giant chunk
is still thinking about cooking.
Method 1: Sautéed Mushrooms (The Bistro Gold Standard)
If you want mushrooms that taste like they belong on steak, pasta, toast, and basically your entire personality, sautéing is
your move. The trick is letting moisture evaporate before you go heavy on butter and aromatics.
Option A: Classic high-heat sauté (best for small-to-medium batches)
- Heat the pan: Use a wide skillet (12-inch is ideal). Heat over medium-high until hot.
- Add fat: Add oil (or a mix of oil + butter). Oil helps prevent butter from scorching too fast.
- Add mushrooms: Spread in a single layer if possible. Let them sit undisturbed for 2–3 minutes to brown.
- Stir strategically: Stir, then let them sit again. Repeat until the moisture cooks off and edges brown.
- Season: Salt and pepper once you see color (or earlier if you’re prioritizing faster moisture release).
- Finish flavors: Add minced garlic or shallots in the last 30–60 seconds, plus herbs (thyme, parsley) and
a small splash of acid (lemon, vinegar, or wine) at the end.
Option B: “Steam-then-sear” sauté (best for big piles without babysitting)
This method sounds backwards, but it works brilliantly: you let mushrooms steam briefly so they dump their water quickly,
then you uncover and let that water evaporate, and only then do you brown deeply.
- Start with mushrooms in the pan: Add mushrooms to a large skillet (dry or with a small splash of water).
- Cover for a few minutes: Cook over medium to medium-high until mushrooms shrink and release lots of liquid.
- Uncover and evaporate: Remove the lid and raise heat to drive off liquid until the pan looks dry again.
- Brown: Add oil/butter, then sauté until richly browned.
- Flavor: Finish with aromatics and acid as above.
Flavor combo ideas (pick one):
- Steakhouse: butter + garlic + thyme + black pepper + splash of Worcestershire
- Italian-ish: olive oil + rosemary + balsamic + Parmesan shower
- Japanese-inspired: butter + soy sauce + mirin (or a pinch of sugar) + scallions
- Bright & briny: olive oil + lemon + capers + parsley
Method 2: Roasted Mushrooms (Hands-Off, Big Flavor)
Roasting concentrates flavor and gives you caramelized edges with almost no effortjust don’t overcrowd the pan, or you’ll
steam your way into disappointment.
Basic roasted mushrooms (sheet-pan method)
- Preheat: 425–450°F.
- Prep: Quarter or halve mushrooms; keep sizes consistent. Pat dry if they’re damp.
- Season: Toss with oil, salt, pepper. Add hardy herbs (thyme/rosemary) now.
- Spread out: One layer, with a little breathing room between pieces.
- Roast: 15–25 minutes, tossing once halfway, until browned and tender.
- Finish: Add garlic near the end (last 5 minutes) so it doesn’t burn. Finish with lemon, vinegar, or a
pat of butter for gloss.
Pro move: If a lot of mushroom liquid collects, carefully drain it into a cup and save it. That stuff is pure
savory gold for soups, rice, pan sauces, and gravy.
Method 3: Grilled Mushrooms (Smoky, Juicy, and Actually Impressive)
Grilling works best with larger mushrooms (portobellos, large cremini, king oysters) that won’t fall through the grates
like a tiny tragic frisbee.
Quick grill plan
- Marinate (10–20 minutes): oil + salt + pepper + garlic + a splash of soy or balsamic.
- Cook hot: Medium-high grill. Oil grates lightly.
- Grill: 3–6 minutes per side (depends on size) until tender and char-marked.
- Finish: Lemon zest, chopped herbs, or a drizzle of good olive oil.
Method 4: Air Fryer Mushrooms (Fast Crisp Edges)
Air fryers excel at browning, but mushrooms still release moistureso don’t overload the basket.
- Heat: 375–400°F.
- Toss: mushrooms + oil + salt + pepper (keep it light; too much oil can make them greasy).
- Cook: 8–12 minutes, shaking halfway, until browned.
- Finish: add herbs, grated cheese, chili flakes, or a squeeze of lemon.
Method 5: Braised Mushrooms (Silky, Saucy, and Weeknight Fancy)
Braising mushrooms in a flavorful liquid turns them into something you could spoon over polenta, mash, rice, noodles,
or toast and call it dinner.
Simple braised mushrooms in 15–25 minutes
- Brown first: Sauté mushrooms until they get color (don’t skip thisbrowning = depth).
- Add aromatics: shallot/garlic for 30–60 seconds.
- Deglaze: splash of wine or broth; scrape browned bits.
- Simmer: add more broth, a thyme sprig, and simmer until glossy and reduced.
- Finish: butter for richness, vinegar/lemon for balance, herbs for freshness.
Seasoning Mushrooms Like You Mean It
Mushrooms love flavors that make them taste even more like… mushrooms (aka umami). Use these to build depth without
drowning them in sauce.
Umami boosters
- Soy sauce or tamari (a little goes a long way)
- Miso (stir into butter or broth)
- Worcestershire (classic steakhouse vibe)
- Parmesan or pecorino (finish, don’t burn)
- Tomato paste (brown it briefly for richness)
Herbs & aromatics that work
- Thyme + garlic (the greatest hits album)
- Rosemary (use sparingly; it’s powerful)
- Parsley (bright finishing touch)
- Shallots (sweet-savory backbone)
Acid (the secret to “restaurant flavor”)
Mushrooms are rich. A tiny splash of vinegar or lemon at the end makes them taste more alivelike they just got a
haircut and a job interview.
Common Mushroom Mistakes (and How to Fix Them)
- “My mushrooms are soggy.” Pan too crowded or heat too low. Use a bigger pan, cook in batches, or try steam-then-sear.
- “They’re gray.” Not enough evaporation time. Keep cooking until the pan dries out and browning starts.
- “They’re rubbery.” Often under-browned or rushed. Give them time; mushrooms can handle longer cooking than you think.
- “The garlic burned.” Add garlic near the end, not at the beginning.
- “They absorbed all my oil.” Normal at first. Once they release water, the texture changes and they brown better.
How to Store Mushrooms So They Don’t Turn Slimy
Mushrooms dislike sealed plastic and excess moisture. For best texture and flavor:
- Store in the fridge in a paper bag or a container lined with paper towels.
- Avoid washing before storing; clean right before cooking.
- Use within about a week for best quality (sooner is better).
- If you want to freeze mushrooms, cook them first, then freezeraw frozen mushrooms tend to get sad and watery.
Quick Meal Ideas (So Mushrooms Don’t Become “That Ingredient” You Forget)
1) Mushroom toast that feels expensive
Sauté mushrooms with butter, thyme, and a splash of vinegar. Pile onto toast with ricotta or cream cheese, finish with
black pepper and lemon zest.
2) Weeknight mushroom pasta
Brown mushrooms hard, then add garlic, a splash of pasta water, and Parmesan. Optional: stir in a spoon of miso or a
dash of soy for extra depth.
3) Sheet-pan mushrooms for bowls
Roast mushrooms at 450°F with olive oil, salt, pepper, and thyme. Serve over rice with a fried egg, scallions, and a drizzle
of soy-butter sauce.
4) Stir-fry mushrooms that don’t get watery
Sear mushrooms first until browned, then add veggies. Add sauce near the end so everything stays punchy, not soupy.
5) Vegetarian “piccata-style” mushrooms
Brown mushrooms, then make a quick pan sauce with lemon, capers, butter, and parsley. Serve with mashed potatoes,
pasta, or polenta.
Final Takeaway: The 60-Second Mushroom Checklist
- Dry mushrooms = better browning.
- Wide pan + high heat = less steaming.
- Cook until the liquid is gone before you expect deep color.
- Add garlic late, acid at the end.
- Save the mushroom liquid if you roastit’s liquid umami.
Real-World Cooking Experiences: What Usually Happens (and What to Do Next)
Most people’s first mushroom attempt goes something like this: you slice them, toss them in a pan with butter, stir
constantly like you’re afraid they’ll feel ignored, and then… a puddle forms. The mushrooms shrink, turn beige, and you
wonder if mushrooms are secretly a prank ingredient.
What’s actually happening is totally normal: mushrooms dump water as they heat up. If your pan is crowded or your heat is
low, that water hangs around and the mushrooms simmer instead of brown. The fix is surprisingly simpleand it feels like
cheating when you see it work. Use a bigger pan, crank the heat up to medium-high, and give the mushrooms quiet time
(a couple minutes) to make contact with the surface and start browning. That “leave them alone” moment is where the magic
begins.
Another common experience: you rinse mushrooms, chop them, and immediately cook themthen wonder why they won’t brown.
The missing step is drying. Think of it like trying to toast bread while it’s still wet. If mushrooms feel damp, blot them
before cooking. Even 30 seconds of towel time makes a difference.
Then there’s the seasoning debate you’ll run into in real kitchens: “Salt early or salt late?” If you salt early, mushrooms
release water soonerwhich can be helpful if you’re using the steam-then-sear approach or you’re trying to get them to
collapse quickly for a soup base. If you salt late, you may get a slightly better initial sear in some setups. In practice,
the biggest factor isn’t the saltit’s heat and space. If you cook mushrooms until the pan dries out and they start to brown,
you’re going to win either way.
A very relatable moment: you add garlic at the beginning because garlic is delicious and you want more delicious sooner.
But garlic cooks fast, and it can burn before mushrooms finish releasing moisture. The “adult” move is adding garlic near
the endwhen the mushrooms are already brownedso the garlic perfumes everything without turning bitter.
Finally, you’ll notice mushrooms have a “soundtrack.” Early on, they hiss and sizzle, then they start to sound more wet as
they release liquid, and later the sizzling returns as the pan dries and browning begins. Listening is weirdly useful. If the
pan sounds like soup, you’re still in moisture-release mode. If it sounds like a steady sizzle again, you’re back in browning
territory. Once you learn that rhythm, mushrooms get dramatically easierand you’ll start cooking them on purpose instead
of as an afterthought.


