Table of Contents >> Show >> Hide
- What Is a Section Break in Word?
- Why You Might Want to Delete a Section Break
- Before You Delete Anything, Know This Important Rule
- How to Show Section Breaks in Word
- How to Delete a Section Break in Word: Step by Step
- What If Deleting the Section Break Messes Up Formatting?
- How to Handle a Blank Page Caused by a Section Break
- Section Break vs. Page Break: Know the Difference
- What If Word Will Not Let You Delete the Break?
- Extra Troubleshooting Tips for Stubborn Layout Problems
- Best Practices Before Removing Section Breaks
- Conclusion
- Real-World Experiences: What People Usually Learn the Hard Way
- SEO Tags
If Microsoft Word had a personality, it would absolutely be the friend who says, “I didn’t touch anything,” while secretly moving all your furniture. One minute your document looks polished and professional. The next minute, page numbers restart, headers change personalities, margins go on vacation, and a random blank page appears like it pays rent. In many cases, the culprit is a section break.
Learning how to delete a section break in Word is one of those tiny skills that saves a ridiculous amount of time. It can help you fix strange layout issues, remove blank pages, restore consistent formatting, and stop arguing with your document at 11:47 p.m. This guide walks you through the process step by step, explains what section breaks actually do, and shows you how to clean them up without wrecking the rest of your file.
Whether you are editing a school paper, polishing a report, cleaning up a resume, or trying to tame a very dramatic legal or business document, this tutorial will help you remove section breaks with confidence.
What Is a Section Break in Word?
A section break is a formatting divider in Microsoft Word. It splits a document into sections so each part can have its own layout settings. That means one section can have different margins, page orientation, columns, headers, footers, or page numbering than another.
In plain English, a section break tells Word, “Everything after this point may follow different rules.” That is incredibly useful when you want one page in landscape mode, different headers for a chapter, or Roman numerals in a front matter section. It is less fun when you inherit a file from someone else and discover that the document contains enough section breaks to qualify as modern art.
Common types of section breaks
- Next Page: Starts the new section on the next page.
- Continuous: Starts the new section on the same page.
- Odd Page: Starts the next section on the next odd-numbered page.
- Even Page: Starts the next section on the next even-numbered page.
These options are powerful, but they can also create layout surprises. For example, a Next Page, Odd Page, or Even Page section break may create what looks like an unnecessary blank page. So before you start deleting things like a formatting vigilante, it helps to know what the break is doing.
Why You Might Want to Delete a Section Break
There are plenty of good reasons to remove a section break in Word. Maybe you inserted one by accident. Maybe a downloaded template has too many. Maybe someone before you decided that every small formatting change deserved its own section. Bold choice. Not a good one, but bold.
Here are the most common reasons people delete section breaks:
- To remove a blank page in the middle or at the end of a document
- To make headers and footers consistent again
- To fix page numbering issues
- To restore uniform margins, columns, or orientation
- To simplify a document before printing or sharing
- To clean up a file that has too many formatting layers
Before You Delete Anything, Know This Important Rule
Here is the big gotcha: when you delete a section break, Word combines the text before and after that break into one section. Then it usually applies the formatting from the section after the break to the text before it.
That means deleting a section break can change:
- Headers and footers
- Page numbering
- Margins
- Columns
- Page orientation
- Section-specific layout settings
So yes, you can remove the break. But you should also be ready to check the formatting afterward. Think of it like pulling one thread from a sweater. Sometimes everything stays neat. Sometimes the sweater starts telling a different story.
How to Show Section Breaks in Word
You cannot reliably remove what you cannot see. Section breaks are formatting marks, which means they are usually hidden unless you turn on Word’s nonprinting characters.
To show section breaks
- Open your Word document.
- Go to the Home tab.
- In the Paragraph group, click the Show/Hide button, which looks like this: ¶.
Once that setting is on, Word will display formatting marks, including paragraph symbols, spaces, page breaks, and section breaks. The section break will usually appear as a labeled dotted line such as Section Break (Next Page) or Section Break (Continuous).
On many Windows versions of Word, you can also use the keyboard shortcut Ctrl + Shift + 8 to toggle formatting marks on and off.
How to Delete a Section Break in Word: Step by Step
Now for the part you actually came for.
Method 1: Delete one section break manually
- Turn on Show/Hide so the section break is visible.
- Click directly just before the section break line.
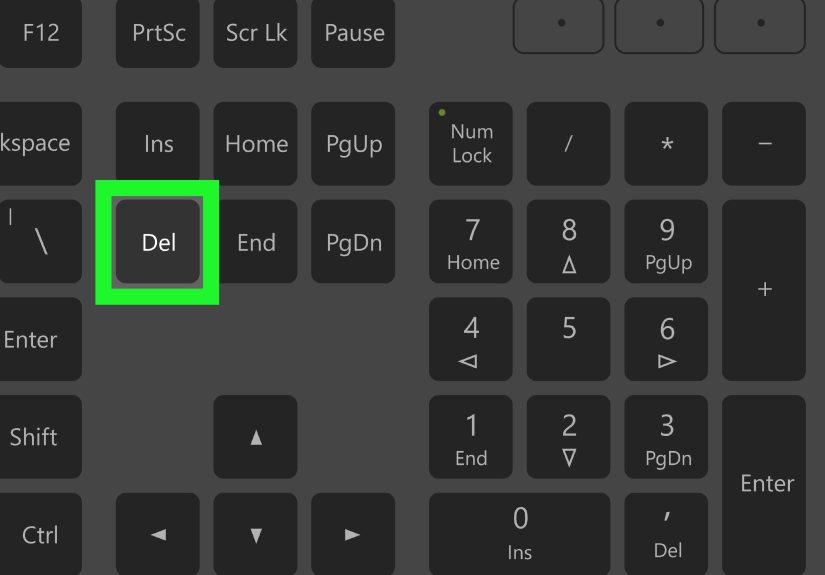
- Press the Delete key on your keyboard.
That is the simplest method and usually the fastest. In some versions of Word, you may also be able to select the section break itself and press Delete or place the cursor after it and press Backspace.
What to do next
After removing the break, scroll through the surrounding pages and check:
- Did the page numbers restart or disappear?
- Did the header or footer change?
- Did a landscape page switch back to portrait?
- Did margins or columns change?
- Did a blank page vanish or did a new formatting issue appear?
If everything looks right, congratulations. Word has chosen peace today.
Method 2: Delete multiple section breaks with Find and Replace
If your document is packed with section breaks, removing them one at a time can feel like trimming a lawn with eyebrow scissors. Use Find and Replace instead.
- Press Ctrl + H to open Find and Replace.
- Click More if the full options are not already visible.
- Click Special.
- Select Section Break. Word will place ^b in the Find what box.
- Leave the Replace with box empty.
- Click Find Next and Replace to remove breaks one by one, or click Replace All if you are absolutely sure you want to remove every section break.
This method is efficient, but it also deserves a warning label. If your document uses section breaks for page numbering, headers, footers, columns, or orientation changes, a mass deletion can create a formatting avalanche. Save a backup copy first.
What If Deleting the Section Break Messes Up Formatting?
This is one of the most common frustrations with Word, and honestly, it is not your fault. Section breaks control layout, so removing one can cause the following section’s formatting to spill backward.
Try these fixes
1. Use Undo immediately
If the document suddenly looks cursed, press Ctrl + Z. This restores the break and gives you a chance to try a safer solution.
2. Match the formatting before deleting
If you want two sections to become one, make sure their settings already match first. Check margins, orientation, columns, page numbering, and headers or footers. Once both sections are formatted the same way, deleting the break is much less risky.
3. Change the section break instead of deleting it
If the break is causing a blank page or awkward layout, switching it to a Continuous section break may solve the problem without removing the section structure entirely. This is especially useful when you still need separate formatting zones, just not a forced page jump.
4. Use Link to Previous for headers and footers
If your main goal is to make the header or footer match the earlier section, you may not need to delete the section break at all. Instead, open the header or footer and use Link to Previous. That lets sections remain separate while sharing the same header or footer content.
How to Handle a Blank Page Caused by a Section Break
Sometimes the real issue is not the break itself but the blank page it creates. This happens often with Next Page, Odd Page, and Even Page section breaks.
If you see a mysterious blank page at the end of the document or between sections, try this:
- Turn on Show/Hide.
- Look for a section break right before the blank page.
- If you no longer need that separate section, place the cursor before the break and press Delete.
- If you still need separate formatting, consider changing it to Continuous instead.
Another handy trick is switching to Draft view, which can make section breaks easier to spot in complicated documents.
Section Break vs. Page Break: Know the Difference
This is where many Word problems begin. A page break and a section break are not the same thing.
- Page break: Moves content to the next page, but does not create a new formatting section.
- Section break: Creates a new section that can have different formatting settings.
If you only want to start content on a new page, a page break is usually cleaner. If you want different margins, columns, numbering, headers, or orientation, a section break is the right tool.
Using a section break when you only needed a page break is like bringing a bulldozer to hang a picture frame. Technically possible. Slightly excessive.
What If Word Will Not Let You Delete the Break?
If the section break refuses to disappear, check these common issues:
- Track Changes is on: In some cases, Word handles break deletion oddly when tracked edits are active. Temporarily turn off Track Changes and try again.
- The document is protected: Restricted editing can prevent layout changes.
- You are in Word for the web: Some section break editing tasks are easier, or only possible, in the desktop version of Word.
- You are actually dealing with an automatic page break: Those are controlled through paragraph settings rather than deleted like manual breaks.
Extra Troubleshooting Tips for Stubborn Layout Problems
Check paragraph pagination settings
If content keeps jumping pages even after you remove a break, select the affected paragraph, open the Paragraph dialog box, and review the Line and Page Breaks settings. Options like Keep with next, Keep lines together, Page break before, and Widow/Orphan control can affect page flow.
Review page numbering carefully
If page numbers restart or change format after deleting a section break, open the header or footer, then go to Page Number > Format Page Numbers. You may need to adjust whether numbering continues from the previous section or starts at a new number.
Look at headers and footers separately
Headers and footers can be linked or unlinked independently. So if the page numbers look right but the footer text is wrong, or vice versa, check both areas individually.
Best Practices Before Removing Section Breaks
- Save a backup copy before making bulk layout changes.
- Turn on formatting marks first so you know exactly what you are deleting.
- Check whether the break controls orientation, numbering, or headers.
- Try changing the break type before removing it entirely.
- Use Replace All only when you are sure the document does not rely on section-specific formatting.
Conclusion
Deleting a section break in Word is simple once you know where to look. Turn on Show/Hide, place the cursor before the break, press Delete, and then inspect the formatting that follows. That is the short version.
The smarter version is this: section breaks are not just spacing marks. They are layout controls. They affect headers, footers, page numbers, margins, columns, and page orientation. So the best approach is not just deleting them, but understanding what they are doing first.
Once you get comfortable with that logic, Word becomes much less mysterious. It may still be dramatic from time to time, but at least now you know where the hidden switches are.
Real-World Experiences: What People Usually Learn the Hard Way
Let’s talk about the part no one mentions in quick tutorials: deleting a section break often feels easy right up until the moment your document turns into a tiny formatting soap opera.
A very common experience goes like this. Someone is finishing a report and notices an annoying blank page between the table of contents and the first chapter. They click around, hit Delete a few times, nothing happens, and frustration rises. Then they turn on the paragraph marks and suddenly see it: Section Break (Odd Page). Mystery solved. They delete it, the blank page disappears, and for one glorious second they feel like a productivity wizard. Then they scroll up and realize the page numbering changed from Roman numerals to regular numbers three pages too early. Word, once again, has entered its trickster era.
Another frequent scenario happens with resumes and business documents. A person uses section breaks to create a special header on the first page, then forgets they are there. Months later, they update the file and try to “clean up extra spaces.” After deleting the wrong break, the second page inherits the first page’s header, the footer vanishes, and the spacing shifts just enough to make the document look strangely off. Not broken enough to be obvious. Just broken enough to be irritating.
Students run into this too, especially when combining different pieces into one file. They copy text from several documents, each with its own hidden formatting, and Word quietly imports those section breaks like uninvited party guests. Suddenly, one page is landscape, another has different margins, and the references section seems to live by its own laws. In that situation, showing formatting marks and removing section breaks one by one is usually far safer than using a giant Replace All command and hoping for the best.
The biggest lesson people learn is that section breaks are not “bad.” They are useful. The real problem is invisible formatting you forgot was there. Once you get into the habit of checking Show/Hide before making major layout edits, Word becomes much easier to manage. You stop guessing. You stop rage-clicking. You stop blaming your laptop for crimes committed by hidden formatting marks.
So if you are dealing with a stubborn document, take a breath, turn on the invisible marks, and inspect the page like a detective at a very nerdy crime scene. Most of the time, the answer is right there. And once you fix it, you will feel absurdly powerful for something that took about ten seconds and one well-aimed Delete key.


