Table of Contents >> Show >> Hide
- What Does “Develop Photos at Home” Actually Mean?
- Why Learn to Develop Photos at Home?
- What You Need to Develop Photos at Home
- How to Set Up a Simple Home Workspace
- How to Develop Black-and-White Film at Home: Step by Step
- How Color Film Development at Home Is Different
- How to Print Photos at Home After Developing the Negatives
- Common Mistakes Beginners Make
- Is Developing Photos at Home Worth It?
- Real-World Experiences With Developing Photos at Home
- Conclusion
If “developing photos at home” sounds like something that requires a haunted basement, a red bulb, and the soul of a 1970s art professor, good news: it’s much more doable than that. In most cases, you do not need a fully built darkroom to get started. You need a light-tight way to load film, a few chemicals, a little patience, and the emotional resilience to not panic the first time your reel feels like a tiny plastic octopus.
This guide focuses on what most photographers mean when they say develop photos at home: processing film negatives yourself, then either scanning them or making prints. The easiest entry point is black-and-white film development at home. It is simpler, more forgiving, and less fussy than color. Once you get comfortable, you can move into C-41 color film, and if you really catch the bug, you can set up a basic home darkroom for printing. That is when your bathroom starts thinking it got promoted into an art lab.
What Does “Develop Photos at Home” Actually Mean?
In film photography, your camera records a latent image on film. That image is invisible until chemistry makes it visible. Home development is the process of turning that exposed roll into usable negatives. After that, you have two choices: scan the negatives into digital files or print them in a darkroom.
So, if you have been searching for how to develop film at home, here is the plain-English version:
You load the exposed film onto a reel in complete darkness, seal it inside a light-tight tank, then run a sequence of chemicals through the tank. The chemistry develops the image, stops development, fixes the film so it is no longer light-sensitive, and prepares it for washing and drying. Once the film is dry, you can cut it into strips, store it in sleeves, scan it, or print it.
Why Learn to Develop Photos at Home?
Because control is addictive in the best possible way. When you develop your own film, you control timing, temperature, agitation, drying conditions, and the overall look of your negatives. You also learn more about exposure because the negative becomes less mysterious. It stops being “the thing the lab handles” and starts becoming part of your creative process.
There is also the practical side. If you shoot film regularly, home film developing can save money over time, especially for black-and-white. It can also save time. Instead of mailing rolls out and refreshing your inbox like a caffeinated raccoon, you can process a roll yourself and see the results the same day.
The catch is simple: it takes a small upfront investment, a little space, and respect for chemical handling. It is not hard, but it does reward consistency. Film is romantic. Chemistry is not. Chemistry wants you to read the instructions.
What You Need to Develop Photos at Home
Essential gear for beginners
A basic film developing kit for black-and-white usually includes a developing tank, reels, a thermometer, measuring containers, a timer, clips for hanging film, scissors, and bottles for storing mixed chemistry. You also need a changing bag or a room that can be made completely dark for loading the film.
Essential chemistry
For black-and-white film, the standard lineup is developer, stop bath, fixer, and optionally a wetting agent. Some photographers also use a hypo clearing agent to shorten washing time, but it is not required for a simple beginner setup. The chemistry can come as liquid concentrate or powder, and each product has its own mixing instructions and shelf life.
Helpful extras
Disposable gloves, a notebook, storage sleeves for negatives, distilled water for final rinses, and a dust-controlled drying area will make your life easier. None of these are glamorous, but neither is spending an evening spotting water marks off a favorite frame.
If you want to print at home
Developing negatives and making prints are related, but they are not the same step. If you want traditional photo printing at home, you will also need a safelight, trays, photo paper, and either an enlarger or a contact-print setup. If you are brand-new, it is often smarter to learn negative development first, then add printing later.
How to Set Up a Simple Home Workspace
A kitchen or bathroom can work beautifully. In fact, those spaces are popular because they usually have water, power, and a flat work surface. The trick is to organize the space like a grown-up and not like someone making midnight cereal.
Keep your wet side and dry side separate. Use one area for chemicals and washing, and another for film, negatives, paper, and anything that should stay dry. Clean the surface before you start. Dust is the sworn enemy of good negatives. A bathroom shower or a clean corner with clips can be an excellent place to dry film because it is easy to keep relatively dust-free.
Ventilation matters. Gloves matter. Labeling bottles matters. Also, keep chemistry away from kids, pets, and food-prep areas. That should be obvious, but history suggests it is worth repeating. Used fixer also needs attention. Do not treat disposal as an afterthought. Follow local hazardous-waste guidance for spent chemistry, especially fixer.
How to Develop Black-and-White Film at Home: Step by Step
1. Mix your chemistry and get organized
Start by reading the instructions for your developer, stop bath, and fixer. For black-and-white film developing, 68°F (20°C) is the common baseline temperature for chemistry. Set out your bottles, timer, thermometer, and tank before you touch the film. This is not the time for improvisation. Improvisation is for jazz, not silver halides.
2. Load the film onto the reel in total darkness
This is the one part that actually needs complete darkness. Open the film canister, trim the leader, and feed the film onto the reel. Then place the reel in the tank and seal it. Once the tank is closed properly, you can turn the lights on and breathe like a regular person again.
Pro beginner move: practice with a junk roll in daylight first. Reel loading feels weird until it suddenly doesn’t. The first time, your hands may feel like they belong to someone else. That is normal.
3. Develop the film
Pour in the developer and follow the recommended time and agitation pattern for your exact film-and-developer combination. This part is not universal. One film stock may need a different time than another, even if they are both black-and-white. Consistency matters more than heroics. Agitate the same way every time and keep your temperature steady.
4. Stop development
When the developer time is done, pour it out and add stop bath, or water if your process allows that. The point here is to halt development quickly so the negative does not keep cooking. Overdevelopment is not “extra artistic.” It is just overdevelopment wearing a beret.
5. Fix the film
Fixer removes the remaining light-sensitive material so the film becomes stable. After the film is properly fixed, you can open the tank in normal room light. This is usually the first magical moment of home development: you open the lid, and there it is, actual images, hanging out like they knew you could do it all along.
6. Wash thoroughly
Wash the film according to your chemistry instructions. Some photographers use continuous running water. Others use an inversion wash method to reduce water usage. Either way, the goal is the same: remove residual chemistry so the negatives stay clean and archival.
7. Use a final rinse and hang to dry
A final rinse with wetting agent helps reduce drying marks. Hang the film in a clean, dust-controlled space with a clip at the top and another at the bottom to keep it straight. Then leave it alone. Wet film scratches easily. This is not the moment to inspect it every 90 seconds like a nervous parent at a school recital.
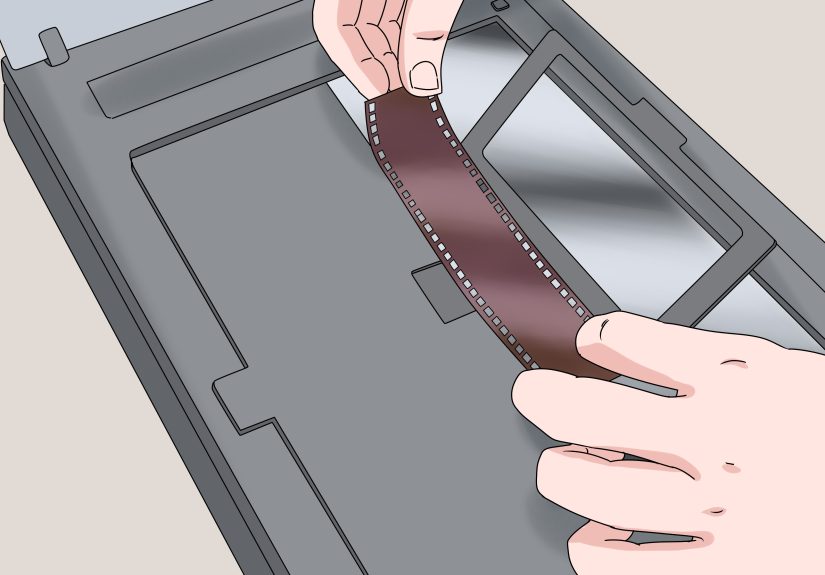
8. Cut, sleeve, scan, or print
Once dry, cut the negatives into strips and place them in archival sleeves. From there, you can scan them at home, send them out for scanning, or make prints in a darkroom. A lot of beginners choose a hybrid workflow: develop the film at home, scan the negatives, then edit and print digitally. That is still real film photography. Nobody from the analog police is coming.
How Color Film Development at Home Is Different
Color film development at home is absolutely possible, but it is less forgiving about temperature. Black-and-white is the friendly teacher. C-41 is the teacher who says, “Please show your work.”
Most home C-41 workflows bring chemistry to around 102°F and move faster than black-and-white. The process is more standardized, which is nice, but temperature control matters more. Many photographers use warm-water baths or sous vide tools to stabilize temperature. Once you get the rhythm, it is not terrifying, but it does demand focus.
If you are completely new, start with one or two black-and-white rolls first. Learn the tank, the reels, the habit of labeling chemicals, and the discipline of timing. Then move into color. You will enjoy it more, and you will make fewer expensive mistakes.
How to Print Photos at Home After Developing the Negatives
If your dream is not just to develop film but to hold a silver-gelatin print in your hands and feel like a wizard, traditional darkroom printing is the next step. To do that, you need a room that can be made light-tight for paper, a safelight, trays for chemistry, photo paper, and either an enlarger or a contact-print setup.
Contact prints are the simplest place to start. You place the negatives directly against the paper and expose them with a light source. Enlarging lets you make prints larger than the negative and gives you more creative control. That is also when words like “dodging,” “burning,” and “test strip” start entering your vocabulary like you joined a very niche club.
For many beginners, the smartest route is this: develop black-and-white negatives at home, scan them for fast sharing, then gradually build a small printing setup later. It keeps the learning curve manageable and your living space from looking like a chemistry exam collided with a flea market.
Common Mistakes Beginners Make
Rushing the reel-loading step
Most beginner frustration happens before the developer ever touches the film. Practice loading a sacrificial roll until the motion becomes muscle memory.
Ignoring temperature
Temperature control is not optional. It affects contrast, density, and consistency. If your negatives look wildly different roll to roll, temperature is one of the first suspects.
Contaminating chemistry
Do not let fixer wander into developer bottles or tools. Cross-contamination can ruin chemistry fast. Keep separate funnels or rinse thoroughly between steps.
Drying film in a dusty space
You can do everything right and still end up with lint, cat hair, or mystery specks if your drying area is dirty. Clean, calm air wins.
Expecting perfection on roll one
Your first successful negatives may not look lab-perfect, and that is okay. Home development is a skill, not a party trick. Each roll teaches you something.
Is Developing Photos at Home Worth It?
Yes, for the right person. If you love the process, want more control, and shoot enough film to justify the setup, it is deeply worth it. If you only run one roll every six months and hate cleanup, a lab may still be the better choice.
What home development gives you is not just savings. It gives you intimacy with your work. You begin to understand how exposure, development, scanning, and printing all connect. That knowledge makes you better at shooting film in the first place.
And honestly, there is something uniquely satisfying about turning a strip of exposed plastic into a finished image at your own sink. It feels part science experiment, part craft, part tiny miracle. Messy miracle, yes. But still miracle.
Real-World Experiences With Developing Photos at Home
One of the most common experiences beginners report is that the idea feels harder than the reality. Before the first roll, everything seems dramatic: darkness, chemicals, timing charts, ominous words like “fixer.” Then you actually do it, and the surprise is that the process is mostly simple repetition. Mix. Pour. Agitate. Wait. Pour again. The mystery starts dissolving almost immediately.
The very first hurdle is usually loading the film onto the reel. Almost everyone fumbles here at least once. The film catches. Your hands get clumsy. You wonder whether you were overconfident, underprepared, or simply betrayed by plastic engineering. Then, eventually, something clicks. The reel starts turning smoothly, the film feeds in, and suddenly you feel like you have unlocked a secret handshake.
Another common experience is the strange mix of panic and boredom during development. For a few seconds, it feels like everything is happening too fast. Then you are standing there with a timer, gently inverting a tank every so often, wondering whether chemistry has always been this quiet. It is not glamorous, but it is weirdly calming. Many people end up loving this part because it slows photography down in a good way. You are not swiping, tapping, or spraying dozens of frames. You are paying attention.
Then comes the unforgettable moment: opening the tank after fixing. If the roll worked, you see negatives for the first time and it feels ridiculous how exciting that is. They are tiny, backward, and wet, but they are real. The image exists. You made it appear. That moment is the reason many photographers get hooked. It feels earned.
Drying the film is where patience gets tested again. You hang the strip up in a shower, closet, or clean corner, and suddenly time becomes suspiciously slow. Every beginner wants to touch the film too early. Every beginner knows they should not. Many do it anyway at least once and learn immediately why fingerprints and scratches are such legendary villains.
There is also a practical emotional arc that repeats from roll to roll. The first roll is fear. The second is relief. The third becomes experimentation. You start noticing how different developers affect contrast, how more careful agitation improves consistency, and how a cleaner drying area saves editing time later. The process shifts from “Can I do this?” to “How good can I get at this?” That is when home development becomes more than a cost-saving trick. It becomes part of your photography identity.
Some people eventually stay hybrid, developing at home and scanning negatives. Others fall down the full darkroom rabbit hole and start hunting for enlargers, trays, timers, and safelights like treasure hunters with very specific taste. Both paths are valid. The shared experience is this: once you have watched your own negatives appear for the first time, film stops feeling like a black box. It becomes personal. And that is usually the moment when “I just wanted to try this once” quietly turns into “I guess I live like this now.”
Conclusion
If you want to learn how to develop photos at home, start simple. Begin with black-and-white film, a tank, a thermometer, a timer, and a clean workspace. Learn consistency before complexity. Once you can load a reel without performing a full emotional opera, the rest of the process becomes surprisingly manageable.
Home development is not about chasing perfection on day one. It is about building a repeatable workflow, understanding your negatives, and getting closer to the craft of photography. The reward is not just the finished image. It is the feeling that you made the image all the way through, from shutter click to drying strip to final print or scan.
That is hard to beat. Also, it makes your bathroom sound much cooler in conversation.


