Table of Contents >> Show >> Hide
- Do This First: The “First 60 Seconds” Rescue Plan
- Why the Rice Trick Is a Bad Idea (Sorry, Internet)
- The Safest Drying Method: Airflow + Time (The Unsexy Hero)
- Silica Gel: The Simple Upgrade That Actually Helps
- Big “Don’ts” That Can Make Water Damage Worse
- What If It Was Salt Water, Pool Water, Soda, or Coffee?
- If You See the “Liquid Detected” Alert
- When Is It Safe to Turn It Back On and Charge?
- When to Stop DIY and Get Professional Help
- Preventing the Next Splash (Because Life Loves Sequels)
- Conclusion
- Real-World Experiences and Lessons (The Extra )
Your iPhone is wet. Your heart is racing. Your brain is screaming, “RICE! RICE! RICE!”
Take a deep breath and step away from the pantry. The safest way to dry out a wet iPhone isn’t
a mystical grain ritualit’s a calm, quick sequence of smart moves: power off, remove what you can,
wick away what you see, then give the phone airflow and time.
This guide walks you through what to do in the first minute, what to avoid (some popular “hacks” can
make damage worse), and how to know when it’s actually safe to charge againwithout turning your
charging port into a tiny science fair volcano.
Do This First: The “First 60 Seconds” Rescue Plan
The goal is simple: stop electricity from meeting water, and stop water from traveling deeper.
Do these steps in order:
1) Get it out of the liquidand away from power
- If it’s in water (sink, toilet, pool, puddle), grab it quickly.
- If it’s plugged in, unplug the cable from the phone first. (Don’t keep charging “to see if it works.”)
- If liquid is on your hands, dry them before handling the phone and cables.
2) Power it off (yes, even if it “seems fine”)
If the phone is still on, turn it off. Water can bridge connections inside the phone and cause short circuits.
A phone that looks okay now can fail later from corrosion, so this is not the moment for optimism experiments.
3) Strip it down: case off, accessories off
- Remove the case, pop socket, wallet attachment, or anything that traps moisture.
- Take off any wet screen protector if it’s holding water around the edges.
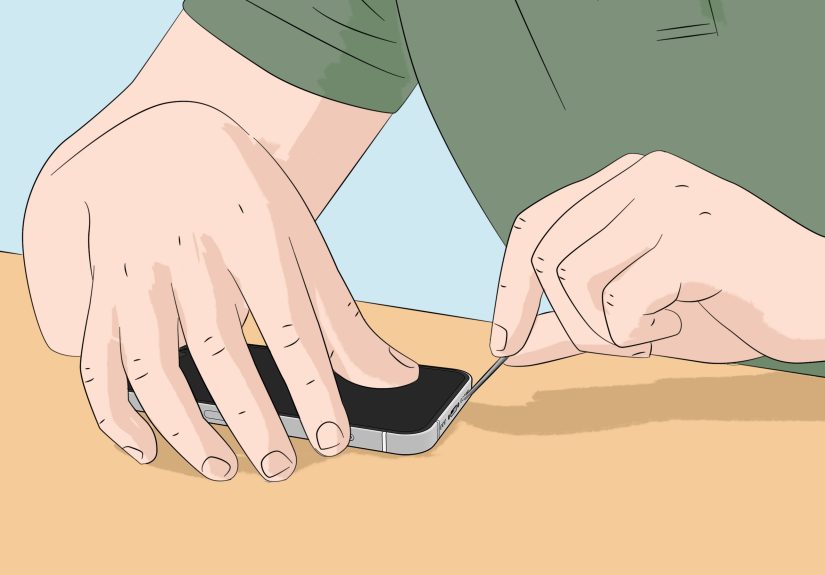
4) Wipe and draingently
- Use a soft, lint-free cloth (microfiber is ideal) to blot the outside.
- Hold the iPhone so the charging port faces down and lightly tap it against your hand to encourage liquid to fall out.
- Don’t shake it like a maraca. Aggressive shaking can push water into places it wouldn’t reach on its own.
5) Remove the SIM card tray (optional but helpful)
If your model has a SIM tray, eject it and set the tray and SIM aside to dry. This can add a little airflow path and
helps you check for moisture signs. (If you use eSIM only, you can skip this.)
Why the Rice Trick Is a Bad Idea (Sorry, Internet)
The rice trick is popular for one big reason: it’s easy. But “easy” and “effective” aren’t always best friends.
Rice may absorb some moisture in the air, but it’s not great at pulling water out of a sealed phone quicklyand
it can leave dust or tiny particles in ports and seams. That’s a terrible souvenir.
If you want a simple rule: if it can crumble, shed, or leave grit, keep it away from your charging port.
Your iPhone has enough problems right now. It doesn’t need seasoning.
The Safest Drying Method: Airflow + Time (The Unsexy Hero)
For most real-life splashes and quick dunks, the safest “dry it out” approach is:
keep it off, keep it open to air, and wait.
Set up a smart drying station
- Place the iPhone on a dry towel in a room-temperature area.
- Position it so ports face downward or sideways (not upward like a little cup waiting to collect more moisture).
- Use gentle airflow if you canlike a fan blowing cool air across the phone.
How long should you wait?
Timing depends on how wet the phone got and where the liquid went. As a safe baseline:
- Wait at least a few hours before even thinking about charging (and longer if the port was wet).
- If the charging port got wet, plan on overnight drying for best odds.
- If it was fully submerged, assume you may need 24–48 hours and possibly professional help.
Pro tip: patience is cheaper than repairs. Waiting feels annoying, but it’s often the difference between
“it’s fine” and “why does my iPhone smell like regret?”
Silica Gel: The Simple Upgrade That Actually Helps
If you want something more effective than “hope and vibes,” use silica gel packets (the little “DO NOT EAT”
packets that come with shoes, vitamins, electronics, and basically everything except your dignity).
How to use silica gel safely
- Make sure the iPhone is powered off.
- Wipe the outside again with a lint-free cloth.
- Place the iPhone in an airtight container or zip-top bag.
- Add several silica gel packets around it (more is better).
- Seal it and leave it alone for 24–48 hours.
Silica gel works by lowering humidity in the sealed space, encouraging moisture to migrate out over time.
It’s not magicit’s just physics doing its job without sprinkling carbs into your ports.
Big “Don’ts” That Can Make Water Damage Worse
A wet iPhone is vulnerable. Some common moves can push liquid deeper, damage components, or speed corrosion.
Avoid these:
- Don’t use a hair dryer, oven, radiator, or heat gun. Heat can warp seals and harm internal parts.
- Don’t blast compressed air. It can drive moisture farther inside the phone.
- Don’t stick cotton swabs, paper towels, or tools into the charging port. You can bend pins or leave fibers.
- Don’t charge by cable while the port is wet. This is how corrosion turns into permanent port failure.
- Don’t keep turning the phone on “to check.” Repeated power-ups can increase the chance of shorting.
What If It Was Salt Water, Pool Water, Soda, or Coffee?
Fresh water is the “best” kind of bad luck. Salt water and chlorinated pool water are harsher because they
leave conductive residue that encourages corrosion. Sugary drinks add stickiness, and coffee can leave oils.
Translation: you want to remove residue from the outside as soon as you safely canwithout re-soaking the phone.
Safer approach for messy liquids
- Power the phone off and remove the case immediately.
- Blot, don’t rub, especially around speakers and seams.
- Use a slightly damp (not wet) lint-free cloth to wipe exterior residue, then dry with a clean cloth.
- Focus on the outside surfacesavoid pushing moisture toward openings.
If your iPhone took a real dunk in salt water or soda, treat it like a “professional inspection” situation.
Even if it powers on later, corrosion can quietly develop over days or weeks.
If You See the “Liquid Detected” Alert
Many newer iPhones can detect moisture in the Lightning or USB-C connector and will block charging/accessories
to protect the phone. If you see a liquid-detection warning:
- Disconnect the cable or accessory immediately.
- Hold the iPhone with the connector facing down and tap it gently against your hand to remove excess liquid.
- Leave it in a dry place with airflow.
- Wait at least 30 minutes before trying again.
- If the alert keeps returning, keep dryingsome ports can take up to a full day to clear.
If you absolutely must charge in an emergency, wireless charging can sometimes work if the back of the iPhone
is dry. But for normal life? Waiting is safer than forcing a charge through a damp connector.
When Is It Safe to Turn It Back On and Charge?
Use this checklist. You want as many “yes” answers as possible:
- The outside is fully dry (no foggy camera lens, no damp seams).
- The charging port looks dry and clean (no droplets, no visible moisture).
- You’ve waited several hourslonger if the phone was submerged.
- No heat, swelling, or odd smell is coming from the phone.
- You’re not getting a liquid-detection alert when connecting a cable.
Start gently: power on first, use it a bit, then charge. If anything seems offrandom restarts, no audio,
Face ID issues, or weird screen behaviorstop and consider a repair shop evaluation.
When to Stop DIY and Get Professional Help
DIY drying is great for splashes and shallow accidents. But there are clear “don’t mess around” moments.
Seek help if:
- The iPhone was submerged for more than a quick moment.
- It got hot, emitted smoke/steam, or the screen went black immediately.
- It won’t power on after 24–48 hours of proper drying.
- Buttons, cameras, speakers, or charging act unreliable after drying.
- The phone was exposed to salt water, chlorinated water, or sugary liquids.
Repair pros can open the phone safely, assess corrosion, and help prevent “it worked yesterday” failures.
If your data matters, don’t gambleget it checked.
Preventing the Next Splash (Because Life Loves Sequels)
Quick habits that pay off
- Back up regularly (iCloud or computer). The best water-damage fix is not needing one.
- Keep silica gel packets in a drawer. Future-you will call you a genius.
- Use a bathroom rule: phone stays away from sinks/tubs unless it’s in a waterproof pouch.
- Consider coverage like AppleCare+ or a protection plan if you’re accident-prone (no shamejust strategy).
Conclusion
Drying out a wet iPhone is mostly about doing less, but doing it right: power off, remove the case, blot,
let gravity and airflow help, and give it time. Skip rice, skip heat, and don’t poke around in the charging port.
If the phone was submerged or hit with salt/sugar/chlorine, professional help is the smart movebecause corrosion
loves to show up late, like an uninvited guest who brings drama.
Real-World Experiences and Lessons (The Extra )
People usually meet water damage in the least glamorous ways: the kitchen sink, a rainy pocket, a gym bottle leak,
or the classic “I leaned over the toilet for one second.” And what most real-world stories have in common is this:
the phones that survive aren’t always the ones that got the least wetthey’re often the ones that got the best
first response.
Scenario 1: The quick sink splash. This is the “best case” disaster. The phone gets splashed,
maybe the bottom edge dips in for a second, and the screen still works. The people who do well here tend to power
the phone off anyway, remove the case, wipe thoroughly, and wait before charging. The people who do poorly are the
ones who think, “It’s fine,” and immediately plug it inthen spend the next day wondering why the charging port
is acting like it’s allergic to electricity.
Scenario 2: The pool party dunk. Pool water is sneaky because it feels like “just water,” but
chlorine and minerals can leave residue. The best outcomes usually come from turning the phone off right away,
removing the case, blotting the outside, and then committing to a longer dry time (overnight at minimum).
A lot of “my phone was fine… then it died a week later” stories start here, because corrosion doesn’t always
announce itself on day one. If the phone took a deep dunk or stayed under for a while, the smartest move people
report is getting a pro inspectioneven if it boots up afterward.
Scenario 3: The beach incident. Salt water is the villain with a cape. When phones survive this,
it’s usually because owners resist the urge to “test everything” and instead focus on shutting down and drying
immediately. The lesson from beach stories is simple: salt residue plus time equals corrosion. If you’ve ever seen
metal get crusty near the ocean, you already understand what can happen inside a phone. In these cases, many users
say a repair shop check was worth it for peace of mind.
Scenario 4: The coffee spill. Sticky liquids add a second problem: gunk. The best experiences here
come from carefully wiping the exterior residue (without flooding openings), then drying patiently. The worst ones
often involve heat (hair dryer “to speed things up”) or charging too early. People also mention that cases can trap
liquid along the edgesso removing the case quickly matters more than you’d think.
Scenario 5: The “Liquid Detected” alert panic. A lot of users describe this as the moment they
spiral. The ones who get the best result treat it like a stop sign: unplug, tap the phone connector-side down,
and walk away for a while. The ones who struggle are the ones who keep trying different cables, different chargers,
and different angles every five minutesbasically turning their afternoon into a moisture-detection stress test.
The biggest lesson from these stories: the alert is annoying, but it’s also your iPhone protecting itself.
If there’s one takeaway from all these experiences, it’s this: speed helps, but patience saves.
Quick action reduces the chance of short circuits, and waiting reduces the chance of corrosion and connector damage.
Keep the phone off, avoid heat and “port poking,” use airflow, and bring in professionals when the exposure was
serious. Your future self (and your photos) will thank you.


