Table of Contents >> Show >> Hide
- Why Fabric-Covered Beats Plain Cork
- Materials and Tools
- Step-by-Step: The Classic Fabric-Wrap Method
- Step 1: Pick the right fabric (and do the math)
- Step 2: Prep the board surface
- Step 3: Add batting (optional, but it’s a glow-up)
- Step 4: Iron your fabric and center it
- Step 5: Staple in the middle first, then work out
- Step 6: Fold corners neatly (the “present-wrapping” moment)
- Step 7: Trim, cover the back (optional), and add bumpers
- Young House Love–Inspired Build: Cork Tiles + Fabric (Great for Custom Sizes)
- Adhesive vs. Staples: Which Method Should You Use?
- Design Tips That Make It Look Expensive
- Installation: Hang It Like You Mean It
- Common Problems (and the Fixes)
- Conclusion: A Pretty Board That Actually Gets Used
- Extra: of Real-World Experience (a.k.a. Lessons From the Bulletin Board Trenches)
A plain cork bulletin board is basically the beige minivan of home organization: reliable, practical, and not exactly something you want starring in your
living room. A fabric-covered bulletin board fixes that in an afternoon. You still get the “pin it and forget it” usefulness, but now it looks like you
meant to hang it thereon purposelike an adult with a plan.
This DIY has been floating around for years for a reason: it’s simple, forgiving, budget-friendly, and wildly customizable. You can go
“Young House Love” style with cork tiles and a pretty fabric remnant, or scale it up into a big, framed pinboard for a home office or command center.
Either way, the end result is a board you’ll actually use… because it’s cute enough to deserve attention.
Why Fabric-Covered Beats Plain Cork
A fabric-covered bulletin board does three things at once: it organizes your life, softens a wall visually (cork can look a little “teacher supply closet”),
and acts like décor. It’s great for:
- Home office inspiration (mood board, swatches, notes, timelines)
- Family command center (calendars, school papers, permission slips)
- Kids’ art display (without tape destroying your paint)
- Renter-friendly “wall function” when you can’t build custom built-ins
Materials and Tools
The exact supply list depends on whether you’re wrapping fabric around an existing board or building your own backing and cork surface from scratch.
Below is the “build it or upgrade it” master listpick what matches your plan.
Core materials
- Bulletin board base: a store-bought cork board, cork tiles, or cork sheet/roll
- Backing board (optional): plywood, MDF, or hardboard (helpful for custom sizes)
- Fabric: quilting cotton, linen blends, canvas, light upholstery fabricavoid super-stretchy knits
- Batting (optional): thin quilt batting for a softly padded look
- Adhesive (optional): spray adhesive or strong bonding adhesive for attaching cork and/or batting
- Frame (optional): a thrifted frame, DIY wood trim, or picture frame molding
Tools
- Staple gun and staples (choose a length that won’t poke through)
- Scissors + a sharp utility knife (for clean trimming)
- Measuring tape + pencil
- Iron (seriouslywrinkle-free fabric is half the “wow”)
- Optional: painter’s tape (for crisp lines if painting a frame)
- Optional: hanging hardware (D-rings, French cleat, picture wire)
Step-by-Step: The Classic Fabric-Wrap Method
This is the most popular approach because it’s fast and doesn’t require perfection. You’re basically upholstering a flat surface: pull fabric tight,
staple on the back, admire yourself.
Step 1: Pick the right fabric (and do the math)
Measure the front face of your board, then add extra on all sides so the fabric can wrap to the back. A good rule:
add 3–4 inches per side for a small board, and 4–6 inches per side for larger boards or thicker frames.
Choose a fabric that’s woven and not too slippery. If your fabric is heavy upholstery, it looks luxe but can be bulky at corners.
If it’s thin cotton, it’s easy to work with but can show the color and texture underneathso batting may help.
Step 2: Prep the board surface
Remove any plastic corners, clips, or a flimsy outer frame that gets in the way. If your board has a chunky frame you like, keep it.
If it’s cracked, dated, or giving “1998 office cubicle,” consider removing it and adding your own frame later.
Step 3: Add batting (optional, but it’s a glow-up)
If you want a soft, upholstered look, lay thin batting over the front of the board and wrap it to the back. You can staple it lightly in a few spots,
or use a light mist of adhesive to keep it from shifting. Batting helps hide texture, adds dimension, and makes pins slide in nicely.
Step 4: Iron your fabric and center it
Iron the fabric first. Wrinkles don’t magically disappear on a bulletin board; they just move in and invite their friends.
Lay the fabric face-down on a clean surface, place the board face-down on top, and center it so the pattern looks balanced.
If your fabric has a big motif (flowers, geometrics), take a moment to position itthis is the difference between “DIY” and “designed.”
Step 5: Staple in the middle first, then work out
Start on one long side: pull the fabric snug (not “tear a hole” tight, just smooth) and place a staple in the center.
Go to the opposite side, pull evenly, staple the center. Repeat for the two short sides.
Now work outward from each center point, alternating sides like tightening lug nuts on a tire. This keeps tension even and prevents wonky ripples.
Step 6: Fold corners neatly (the “present-wrapping” moment)
Corners are where bulletin boards go to reveal your patience level. The cleanest method is a simple fold:
- Pull one side over and staple it close to the corner.
- Fold the adjacent side like a gift wrap edge so the front corner looks sharp.
- Staple the fold securely on the back.
If fabric is thick, trim excess bulk on the back (don’t cut too close to the staple line). You want “flat enough to hang” without turning the back into a fabric mountain range.
Step 7: Trim, cover the back (optional), and add bumpers
Trim any extra fabric. For a cleaner finish, you can cover the back with kraft paper or thin felt using double-sided tape or staples.
Add adhesive bumper dots at corners so the staples don’t scratch the wall and the board sits nicely.
Young House Love–Inspired Build: Cork Tiles + Fabric (Great for Custom Sizes)
If you want something more customizable than a store-bought boardespecially if you’re going for a grid of cork squares or a bigger displaybuild from
a backing board and attach cork tiles. This is the approach that makes you feel like you should be wearing safety goggles and saying “measure twice”
in a dramatic voice.
Step 1: Choose your size and backing
Decide where the board will live and what it needs to do. A small board near a desk might be 18×24 inches. A family command center could be 24×36 inches
or larger. Cut plywood/MDF/hardboard to size (many hardware stores can cut sheets down).
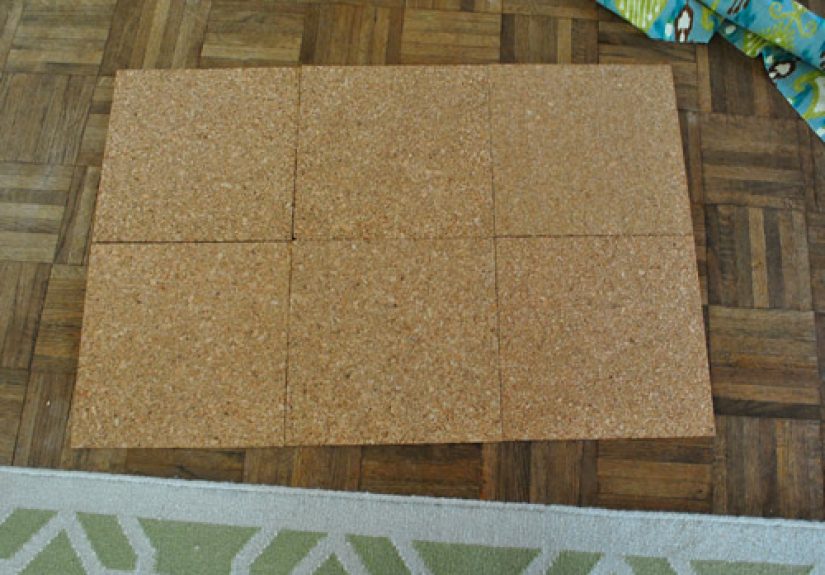
Step 2: Attach cork tiles
Arrange cork tiles on your backing board to check fit and seams. Then attach them using an appropriate adhesive method (some tiles are self-adhesive;
others need spray adhesive or a bonding adhesive). Press firmly across the surface so everything lays flat and holds.
Step 3: Add batting and fabric on top
Once the cork is set, apply batting (optional) and wrap with fabric using the same staple method as above. You’ll get the pin-friendly cork feel with the
fabric look on top. This layered approach can also help prevent thin cork from feeling too “flimsy” under pushpins.
Step 4: Frame it for a finished look
A frame takes the board from “craft project” to “I bought this at a boutique that sells artisanal candles.” Options include:
- Thrifted picture frame: fit your board into the opening (you may need to adjust thickness)
- DIY trim frame: miter corners with simple wood trim and paint or stain
- Floating frame look: add a thin border that sits proud of the fabric surface
Adhesive vs. Staples: Which Method Should You Use?
Both work. The best choice depends on your board style and how often you might redo it.
Staples (best for most people)
- Strong hold, easy to adjust while you work
- Great for thicker boards and padded looks
- Easy to remove and re-cover later
Spray adhesive (best for “no-wrap” or thin frames)
- Useful when fabric needs to sit flush inside a frame opening
- Helpful for lightweight fabrics that shift while stapling
- Can be messier; requires ventilation and careful tack-time handling
Many successful DIYers use a hybrid: a light adhesive layer to keep the fabric smooth on the front, and staples on the back for strength.
Design Tips That Make It Look Expensive
Pick a pattern scale that fits the board
Tiny patterns can look busy on a big board; huge patterns can look chopped up on a small board. If you’re unsure, mid-scale prints and classic textures
(linen-look solids, small geometrics) are safe bets.
Use a “pin color palette”
It sounds silly, but pins are visual clutter. If you’ll keep the board in a public space (kitchen, entry, office), choose pins in one or two finishes
(black, brass, white, clear) so your board looks curated even when your life is not.
Add simple sections without shouting
You can create subtle zones for “To Do,” “To Pay,” “School,” and “Fun Stuff” using thin ribbon, decorative tape, or just a mental map.
The goal is structurenot turning your wall into a spreadsheet with feelings.
Installation: Hang It Like You Mean It
A small board can hang with standard picture hooks. A large, heavy board (especially with plywood + frame) deserves sturdier hardware.
For big boards, a French cleat is a clean, secure option that keeps the board level and snug to the wall.
If it’s going above a desk, consider the height: you want it reachable without having to stand on your chair like you’re recreating a dramatic movie scene.
Common Problems (and the Fixes)
Problem: The fabric looks wrinkled or bubbly
Fix: Start by ironing the fabric. Then staple from the center outward and keep tension even. If you already stapled it and it’s still rippled,
pull a few staples and restretch that sectionno shame in a redo.
Problem: Staples poke through the front
Fix: Use shorter staples, or add a thicker base layer (batting or a sturdier board). Thin cork boards can be surprisingly “see-through” to staples,
especially if your staple gun is enthusiastic.
Problem: Pins don’t stay put
Fix: If you built the board, make sure cork thickness is adequate. If fabric is very thick upholstery, switch to sharper pushpins or slightly longer pins.
A thin batting layer can also help stabilize fabric while staying pin-friendly.
Problem: Spray adhesive feels like it’s not sticking
Fix: Many spray adhesives require a short wait until tacky before bonding. Apply evenly, allow proper tack time, then press firmly across the surface.
Also: ventilate well, protect surfaces, and avoid overspraying unless you want your worktable to become permanently “crafty.”
Conclusion: A Pretty Board That Actually Gets Used
A fabric-covered bulletin board is one of those rare DIY wins: low cost, high payoff, and it makes your space feel more pulled-together instantly.
Whether you’re copying the classic Young House Love vibe with cork tiles and a favorite fabric, or going full custom with a framed, oversized pinboard,
you’ll end up with something functional that doesn’t look like it came from the “miscellaneous office supplies” aisle.
And if anyone asks where you got it, you get to say the magic words: “Oh, I made it.” Then casually walk away like the DIY wizard you are.
Extra: of Real-World Experience (a.k.a. Lessons From the Bulletin Board Trenches)
The first time you make a fabric-covered bulletin board, it feels almost suspiciously easylike you’re forgetting a step, or the DIY universe is setting
you up for a dramatic twist. In my experience, the twist usually arrives in one of three forms: corners, wrinkles, or staples that behave like tiny metal
surprises.
Let’s start with the classic: I once thought, “I don’t need to iron the fabric. It looks fine.” That was adorable of me. The moment the fabric stretched
over the board, every crease turned into a permanent personality trait. Ironing takes five minutes. Re-stapling an entire board takes… longer than your
optimism will survive. Now I iron first, and I pretend it’s not because I learned the hard way.
Corners are the second rite of passage. On your first board, you will fold a corner and think, “That’s fine; nobody will notice.” You will notice. Every
time you walk by. Your eyes will lock onto that corner like it owes you money. The trick that finally helped me was slowing down and treating corners like
gift wrap: fold neatly, keep the front edge crisp, and staple the bulk where it can’t be seen. If the fabric is thick, trimming excess on the back feels
scaryuntil you realize the alternative is a lumpy board that won’t sit flat on the wall.
Staples are their own adventure. If your board is thin, long staples can poke through the front, which is both annoying and slightly threatening.
(Nothing says “welcome to my home office” like a tiny staple spike.) The fix is simple: shorter staples, a sturdier base, or a padding layer that gives
the staples something to bite into without blasting through. I’ve also learned to keep a small flathead screwdriver nearby for staple removal, because
“I’ll just pull that staple out with my fingers” is a lie you tell right before you regret everything.
Spray adhesive can be amazing, but it has two moods: “perfectly smooth” and “why is everything sticky forever.” I use it sparingly and only when it solves
a specific problemlike keeping fabric from shifting on a large surface or when the fabric needs to sit flush inside a frame. The biggest lesson? Let it
get tacky before bonding, press firmly, and protect the surrounding area like you’re prepping a crime scene. Overspray is real.
The best unexpected outcome, though, is how much you actually use the board once it looks good. A pretty bulletin board becomes a magnet for helpful
habits: pinning receipts before they disappear into the void, keeping a school calendar visible, collecting paint chips and fabric swatches for a future
project. It’s organization you don’t have to hidewhich, honestly, is the only kind that consistently works in a real house with real people.


