Table of Contents >> Show >> Hide
- Why Make Your Own Coffee Pods?
- What Type of Coffee Pod Are You Making?
- Supplies You Need to Make Your Own Coffee Pods
- Best Coffee Grind Size for DIY Coffee Pods
- How Much Coffee Should You Put in a Reusable Pod?
- How to Make Your Own Coffee Pods for a Keurig-Style Machine
- How to Make Refillable Espresso-Style Capsules
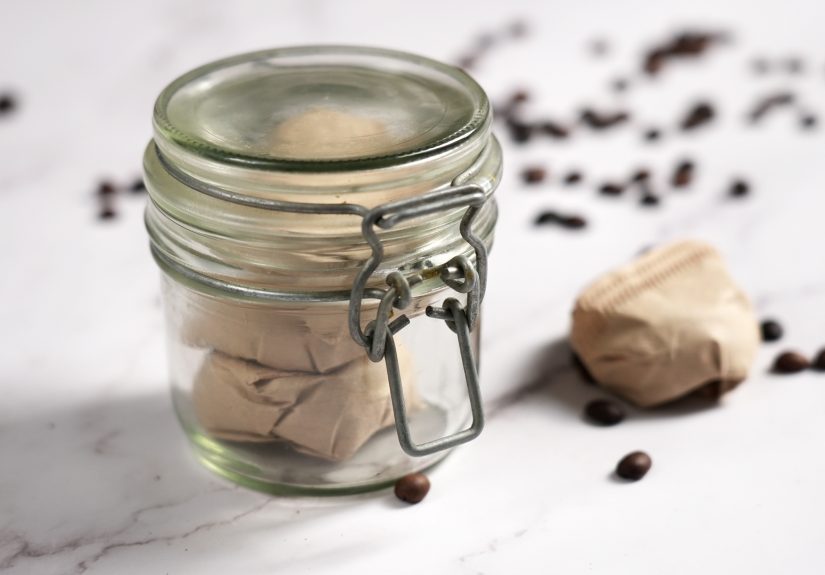
- How to Make Soft Coffee Pods with Paper Filters
- Best Coffee to Use for Homemade Pods
- How to Store Coffee for DIY Pods
- Can You Prep Homemade Coffee Pods Ahead of Time?
- Common Mistakes When Making Your Own Coffee Pods
- Troubleshooting Homemade Coffee Pods
- How to Clean Reusable Coffee Pods
- What to Do with Used Coffee Grounds
- Are Homemade Coffee Pods Worth It?
- Experience Notes: What Making Your Own Coffee Pods Teaches You
- Conclusion
Making your own coffee pods is one of those small kitchen upgrades that feels oddly powerful. One minute you are staring at a box of expensive single-serve pods, wondering how ten tiny cups of coffee somehow cost as much as lunch. The next minute, you are filling your own reusable pod with your favorite ground coffee like a caffeinated wizard with a budget spreadsheet.
The good news? DIY coffee pods are simple, affordable, customizable, and far less wasteful than tossing a plastic or aluminum capsule every morning. Whether you use a Keurig-style brewer, a reusable capsule for a Nespresso-compatible machine, or paper filter-style pods for a soft-pod coffee maker, the basic idea is the same: choose the right coffee, grind it correctly, fill the pod without overpacking, seal it properly, brew, rinse, repeat, and accept applause from your wallet.
Why Make Your Own Coffee Pods?
Store-bought coffee pods are convenient, but convenience has a habit of charging rent. Making your own coffee pods lets you keep the quick single-cup routine while gaining more control over flavor, freshness, roast level, strength, and cost. You can use locally roasted beans, organic coffee, decaf, flavored blends, espresso-style roasts, or that mysterious bag someone gifted you that smells like chocolate, toasted nuts, and ambition.
DIY coffee pods also help reduce everyday waste. Disposable pods can be difficult to recycle because they often combine coffee grounds, plastic or aluminum, foil lids, filters, and adhesive. Even when a pod is technically recyclable, it may need to be emptied, cleaned, separated, and accepted by your local recycling program. Reusable pods skip most of that drama. You brew, dump the grounds into compost or trash, rinse the pod, and move on with your day.
Main Benefits of Homemade Coffee Pods
- Lower cost per cup: Ground coffee usually costs less than prefilled pods.
- Better flavor control: You choose the beans, roast, grind, and strength.
- Less waste: Reusable pods can replace hundreds of disposable capsules.
- More variety: Try small-batch roasters, seasonal blends, or decaf options.
- Convenience: Prep several pods ahead for busy mornings.
What Type of Coffee Pod Are You Making?
Before you start scooping coffee like a joyful little barista, identify your machine type. Not every reusable pod fits every brewer, and forcing the wrong capsule into a machine is a fast way to turn “morning coffee” into “morning appliance betrayal.”
1. Reusable K-Cup Style Pods
These are designed for Keurig-style single-serve coffee makers. They usually have a plastic or stainless steel mesh basket and a hinged lid. You fill the basket with ground coffee, close the lid, place it in the brewer, and brew as usual. For most users, this is the easiest and most practical way to make your own coffee pods at home.
2. Refillable Espresso Capsules
Refillable capsules are commonly made for Nespresso-style systems. They may be stainless steel capsules with reusable lids, silicone tops, or single-use foil seals. These require more precision because capsule espresso-style brewing uses pressure, and grind size matters a lot. Too coarse and the coffee tastes weak. Too fine and the machine may struggle, sputter, or produce a bitter shot.
3. DIY Soft Coffee Pods
Soft pods are round paper filter pouches filled with ground coffee. They are used in certain pod coffee makers, not Keurig machines. You can make them with coffee filters, a scoop of ground coffee, and careful folding or heat-sealing. They are less common now, but still useful for specific brewers.
Supplies You Need to Make Your Own Coffee Pods
You do not need a laboratory, a coffee certification, or a countertop covered in chrome gadgets. The essentials are simple.
Basic Supplies
- A reusable coffee pod or refillable capsule compatible with your machine
- Fresh whole bean or ground coffee
- A burr grinder, if using whole beans
- A small spoon or coffee scoop
- A tamper or the back of a spoon for capsules that need light pressing
- A dry towel or paper towel for wiping the pod rim
- An airtight container for storing coffee
Optional but Helpful Tools
- A small digital scale for consistent coffee amounts
- Reusable foil lids for certain capsule systems
- Paper filters made for reusable K-Cup baskets
- A small brush for cleaning mesh filters
- Labels if you prep different roasts ahead of time
Best Coffee Grind Size for DIY Coffee Pods
Grind size is the secret handshake of good homemade coffee pods. Water moves through coffee differently depending on how fine or coarse the particles are. A finer grind slows water flow and creates a stronger, more concentrated cup. A coarser grind allows water to pass faster, often making the coffee lighter or weaker.
For reusable K-Cup style pods, a medium grind usually works best. Think regular drip coffee, not powdery espresso and not chunky French press. If the grind is too fine, sediment can slip through the mesh or clog the pod. If the grind is too coarse, your coffee may taste watery.
For refillable espresso-style capsules, use a fine to medium-fine grind, but avoid turning the coffee into dust. A powdery grind can block water flow and make the machine work too hard. The best grind depends on your capsule, machine, roast, and taste preference, so expect a little experimenting.
Simple Grind Guide
- Keurig-style reusable pod: Medium grind
- Nespresso-style refillable capsule: Fine to medium-fine grind
- Soft paper coffee pod: Medium grind
- If coffee tastes weak: Try a slightly finer grind or add a little more coffee
- If coffee tastes bitter or flows slowly: Try a slightly coarser grind or pack less tightly
How Much Coffee Should You Put in a Reusable Pod?
The right amount depends on the pod design, but the golden rule is simple: fill the pod without overfilling it. Coffee needs room for water to move through the grounds. If you pack the pod like you are preparing it for space travel, the water may channel, clog, overflow, or extract unevenly.
A typical reusable K-Cup style pod often holds around 2 tablespoons of ground coffee, though some models hold more or less. Many refillable espresso capsules hold a smaller amount, often around 4 to 6 grams, depending on the capsule size and system. Larger reusable capsules or Dolce Gusto-style pods may hold more.
If your reusable pod has a “max fill” line, respect it. That line is not decorative. It is the pod’s polite way of saying, “Please do not make me explode grounds into your machine.”
How to Make Your Own Coffee Pods for a Keurig-Style Machine
Reusable K-Cup pods are the easiest starting point for most home coffee drinkers. Here is the step-by-step method.
Step 1: Check Compatibility
Make sure your reusable pod fits your exact brewer model. Some coffee makers require a specific reusable filter, while others accept universal pods. If the pod does not sit correctly, do not force it.
Step 2: Grind Your Coffee
Use a medium grind. If you buy pre-ground coffee, choose coffee labeled for drip coffee makers. For the freshest taste, grind whole beans right before brewing.
Step 3: Fill the Pod
Add ground coffee to the reusable pod, usually up to the fill line. Do not mound coffee above the rim. A level scoop gives the water space to flow evenly.
Step 4: Do Not Tamp Hard
For K-Cup style pods, avoid pressing the coffee firmly. A gentle shake or light tap on the counter is enough to settle the grounds. Hard packing can slow the brew and make the coffee taste harsh.
Step 5: Wipe the Rim and Close the Lid
Brush loose grounds off the rim before closing. A clean rim helps the pod seal correctly and prevents gritty surprises in your cup.
Step 6: Brew a Smaller Cup for Stronger Flavor
If your machine offers cup-size options, try a 6-ounce or 8-ounce brew first. Larger cup settings push more water through the same amount of coffee, which can make the cup taste thin.
Step 7: Empty and Rinse
After brewing, let the pod cool for a moment, then empty the grounds. Rinse the pod thoroughly and allow it to dry before the next use.
How to Make Refillable Espresso-Style Capsules
Refillable espresso capsules require a bit more patience, but they reward you with greater control. They are ideal if you enjoy shorter, stronger coffee and like experimenting.
Step 1: Choose the Correct Capsule
Buy a capsule designed for your machine line. Original-style and Vertuo-style systems are different, and capsules are not interchangeable.
Step 2: Use a Fine or Medium-Fine Grind
Start with a grind slightly coarser than espresso powder. If the coffee runs too fast and tastes sour or weak, go finer. If it drips slowly or tastes bitter, go coarser.
Step 3: Fill in Small Layers
Add coffee gradually. Tap the capsule lightly to settle the grounds. This helps reduce air pockets and uneven extraction.
Step 4: Tamp Lightly
Use light to medium pressure. You are not building a sidewalk. Press just enough to create a flat, even coffee bed.
Step 5: Seal the Capsule
Depending on your capsule, attach the reusable lid, silicone cap, or foil seal. Make sure the top is smooth and secure.
Step 6: Brew and Adjust
Taste the result. If it is weak, use a slightly finer grind or a little more coffee. If it is bitter, harsh, or slow, use a coarser grind or tamp more gently.
How to Make Soft Coffee Pods with Paper Filters
Soft coffee pods are less popular than reusable K-Cups, but they are still useful for certain machines. You can make them with basket-style coffee filters.
Simple Soft Pod Method
- Place a small round object, such as a measuring cup, over a coffee filter to shape it.
- Add 1 to 2 tablespoons of medium-ground coffee to the center.
- Fold the filter edges over the grounds to create a compact pouch.
- Press the pod gently so it sits flat.
- Use immediately, or store in an airtight container for short-term convenience.
Soft pods work best when they are evenly shaped. If the pod is too thick, the machine may not close properly. If it is too loose, water may rush through and produce weak coffee.
Best Coffee to Use for Homemade Pods
The best coffee for homemade pods is coffee you actually enjoy. That sounds obvious, but many people start with whatever old bag is hiding in the pantry and then blame the reusable pod when the cup tastes like cardboard with trust issues.
For a Classic Morning Cup
Choose a medium roast with chocolate, nutty, or caramel notes. These flavors tend to work well in single-serve brewers and are forgiving if your grind is not perfect.
For Strong Coffee
Use a dark roast or a blend labeled bold. Brew on a smaller cup setting to keep the flavor concentrated. Avoid overfilling the pod; strength comes from balance, not brute force.
For Iced Coffee
Use a bold medium-dark roast and brew over a small amount of ice, or brew a concentrated cup and pour it over fresh ice. A weak pod plus a mountain of ice equals coffee-flavored sadness.
For Decaf
Homemade pods are excellent for decaf because you are not limited to whatever decaf pods your grocery store carries. Choose fresh decaf beans and grind them as needed.
How to Store Coffee for DIY Pods
Fresh coffee makes better pods. Coffee loses aroma and flavor when exposed to air, light, heat, and moisture. Store beans or grounds in an opaque, airtight container in a cool, dry cabinet. Avoid placing coffee near the oven, dishwasher, sunny windows, or any spot that turns your beans into tiny roasted raisins.
Whole beans usually stay fresher longer than ground coffee, so grinding right before brewing is ideal. If you prefer convenience, grind enough for a few days and store it tightly sealed. For best flavor, avoid making weeks of pods in advance unless convenience matters more to you than peak freshness.
Can You Prep Homemade Coffee Pods Ahead of Time?
Yes, you can prep DIY coffee pods ahead of time, but there is a trade-off. Pre-filled pods save time, yet ground coffee begins losing freshness after grinding. If you want the best flavor, fill each pod right before brewing. If your mornings are chaotic and you regularly pour orange juice into your cereal by accident, prep a few pods the night before.
Store pre-filled pods in an airtight container away from heat and light. Use them within a few days for better taste. Label different roasts if you make multiple types. Nobody wants to discover they brewed extra-dark espresso roast at 9 p.m. unless the plan is to alphabetize the garage until sunrise.
Common Mistakes When Making Your Own Coffee Pods
Mistake 1: Using the Wrong Grind Size
If the coffee tastes watery, your grind may be too coarse. If it tastes bitter or the machine struggles, your grind may be too fine. Adjust gradually.
Mistake 2: Overfilling the Pod
More coffee does not always mean better coffee. Overfilling blocks water flow and can create a messy brew.
Mistake 3: Packing Coffee Too Tightly
Hard tamping can cause clogging. Most reusable K-Cup pods need loose, level grounds. Refillable espresso capsules may need light tamping, but not aggressive pressure.
Mistake 4: Brewing Too Much Water
A 12-ounce brew setting may dilute the flavor. Try a smaller cup size first, especially with reusable pods.
Mistake 5: Forgetting to Clean the Pod
Coffee oils build up over time and can taste stale. Rinse after each use and deep-clean regularly according to the manufacturer’s instructions.
Troubleshooting Homemade Coffee Pods
Why Is My Coffee Weak?
Use a slightly finer grind, add a little more coffee, choose a darker roast, or brew a smaller cup. Also check whether your reusable pod is designed for strong extraction; some mesh baskets let water pass quickly.
Why Are Grounds Getting Into My Cup?
Your grind may be too fine, the filter mesh may be damaged, or the pod may not be sealed correctly. Try a medium grind and inspect the pod for cracks or gaps.
Why Is My Machine Brewing Slowly?
The pod may be overfilled, packed too tightly, or filled with coffee ground too fine. Empty it and try again with less coffee and a coarser grind.
Why Does My Coffee Taste Bitter?
Bitter coffee often comes from over-extraction. Use a coarser grind, brew a shorter cycle, avoid hard tamping, or try a lighter roast.
How to Clean Reusable Coffee Pods
Cleaning is simple, but it matters. After brewing, remove the pod carefully because it may be hot. Knock the used grounds into compost or trash. Rinse the pod under warm water, paying attention to the mesh and lid. Let it air-dry fully before storing.
Once a week, give the pod a deeper clean. Soak it in warm water with a small amount of mild dish soap, then scrub gently with a soft brush. Rinse thoroughly so no soap flavor remains. If your pod is dishwasher-safe, place it on the top rack, but always check the manufacturer’s instructions first.
What to Do with Used Coffee Grounds
Used coffee grounds can often be composted along with other organic material. Composting helps turn food scraps and yard waste into a soil amendment for plants. Coffee grounds should be mixed with other compost materials rather than dumped in thick layers, because wet grounds can compact.
You can also use cooled coffee grounds in small amounts around the garden, but do not treat them like magical plant glitter. A little can be useful; too much can affect soil texture and moisture. When in doubt, compost first and garden later.
Are Homemade Coffee Pods Worth It?
For many coffee drinkers, yes. Homemade coffee pods are worth it if you want lower costs, less waste, and more control over your daily cup. They are especially useful if you already own a single-serve machine and like the convenience but dislike being locked into one brand’s pod selection.
The only real downside is that DIY pods require a tiny bit more effort. You have to fill, empty, and clean the pod. But once the routine becomes automatic, the process takes less than a minute. That is a fair trade for better coffee freedom.
Experience Notes: What Making Your Own Coffee Pods Teaches You
The first thing you learn when making your own coffee pods is that coffee is more sensitive than it looks. It sits there in the bag acting casual, but the second you change the grind size, cup size, or fill level, the flavor reacts. A reusable pod turns your coffee maker from a push-button appliance into a tiny brewing experiment. Thankfully, it is the fun kind of experiment, not the “why is there foam coming out of the dishwasher” kind.
One of the best experiences is discovering how much the same coffee can change. A medium roast brewed in a disposable pod may taste fine, but when you grind fresh beans and place them in a reusable pod, the aroma often feels brighter and more personal. You notice the difference between a nutty breakfast blend, a smoky dark roast, and a fruity light roast. Suddenly coffee stops being just “hot brown energy” and becomes something you can adjust.
The second lesson is that small details matter. A pod filled slightly below the rim may brew beautifully, while an overstuffed pod can produce a slow, bitter cup. A medium grind may taste balanced, while an espresso-fine grind can leave grit in the cup. A 6-ounce setting may taste rich, while a 12-ounce setting may taste like the coffee waved at the water from across the room. These tiny changes teach you how extraction works without needing a barista textbook.
Another real-world benefit is convenience with personality. You can prep a few pods for the next morning: one bold roast, one decaf, one flavored coffee for a weekend treat. It feels like building a tiny coffee menu for your future self. Morning-you, who may not be fully human yet, will appreciate the effort.
There is also a satisfying environmental rhythm to the process. Instead of tossing a pod into the trash, you empty the grounds, rinse the pod, and use it again. It is not a dramatic lifestyle overhaul. No one will mistake you for a forest monk. But it is a practical habit that reduces single-use waste while keeping the convenience that made pod machines popular in the first place.
The biggest tip from experience is to start simple. Buy one compatible reusable pod, use coffee you already like, choose a medium grind, and brew a smaller cup. Do not change five variables at once. If the coffee is weak, adjust the grind or amount. If it is bitter, loosen the pack or go coarser. Keep notes for a few days if you enjoy precision, or just trust your taste buds if you prefer a more relaxed approach.
Making your own coffee pods is not about chasing perfection. It is about making everyday coffee cheaper, fresher, and more flexible. Once you get the hang of it, the reusable pod becomes as normal as grabbing a mug. And when you realize you are no longer stuck buying expensive pod boxes in flavors like “office lobby hazelnut,” the whole process feels like a small but meaningful kitchen victory.
Conclusion
Learning how to make your own coffee pods is a smart move for anyone who loves single-serve convenience but wants better control over flavor, cost, and waste. The process is simple: choose a compatible reusable pod, use the right grind size, fill it properly, avoid overpacking, brew on the right cup setting, and clean the pod after each use.
The best homemade coffee pods come from fresh coffee, a little experimentation, and a willingness to adjust. Once you find your preferred roast, grind, and fill level, your morning routine becomes faster, cheaper, and much more satisfying. Your coffee maker still does the work, but now you are the one calling the shots.


