Table of Contents >> Show >> Hide
- What Counts as a Masonry Wall?
- Tools and Materials You May Need
- Step 1: Inspect the Wall Before Painting
- Step 2: Clean the Masonry Surface Thoroughly
- Step 3: Repair Cracks, Holes, and Weak Areas
- Step 4: Apply the Right Masonry Primer
- Step 5: Paint Masonry Walls with Two Durable Coats
- Common Mistakes to Avoid When Painting Masonry Walls
- Best Paint Types for Masonry Walls
- How Long Does Masonry Paint Last?
- Real-World Experience: Lessons from Painting Masonry Walls
- Conclusion
- SEO Tags
Painting masonry walls sounds simple until the wall starts acting like a giant sponge with commitment issues. Brick, concrete, stucco, cement block, and stone do not behave like drywall. They breathe, absorb moisture, shed mineral salts, collect dust in tiny pores, and occasionally punish rushed painters with peeling paint that looks like a sunburn after a beach vacation.
The good news? Once you understand the surface, painting masonry walls is completely manageable. The secret is not magic paint, a lucky roller, or whispering kind words to your cinder block. The secret is preparation. Clean the wall, repair damage, control moisture, choose the right primer, and apply masonry paint in steady, patient coats.
This guide walks you through how to paint masonry walls in five practical steps, with real-world advice for interior and exterior surfaces. Whether you are refreshing a basement wall, brightening a garage, updating a garden wall, or giving an old brick surface a cleaner look, this process will help your finish last longer and look sharper.
What Counts as a Masonry Wall?
A masonry wall is made from mineral-based materials such as brick, concrete block, poured concrete, stucco, stone, or cement render. These surfaces are strong, but they are also porous. That means they can absorb water, hold dust, and release moisture vapor. Regular wall paint may look fine for a few weeks, but on masonry it can bubble, flake, or peel if the surface is not prepared correctly.
Masonry paint, concrete paint, elastomeric coatings, and masonry primers are designed to handle these challenges. Many are breathable, alkali-resistant, and better at bonding to rough or porous surfaces. Think of them as work boots for your wall, while regular interior paint is more like wearing slippers to a construction site.
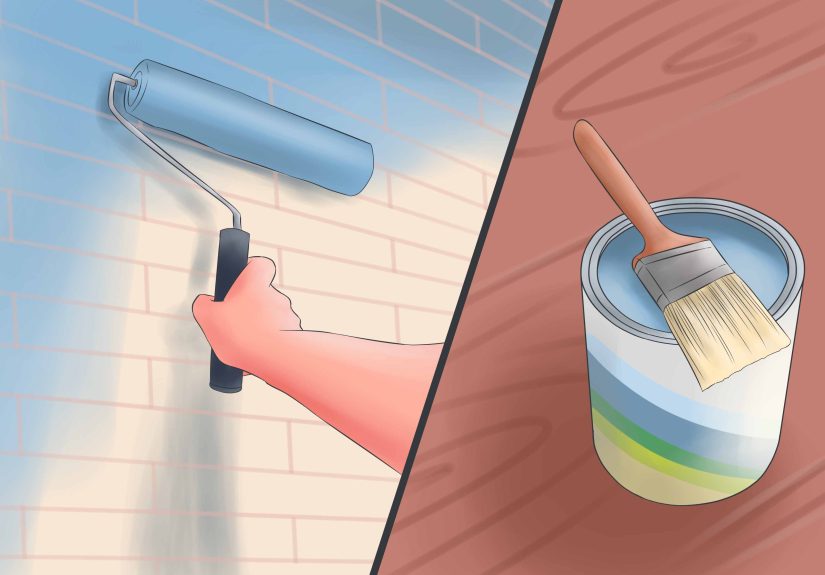
Tools and Materials You May Need
Before you begin painting masonry walls, gather your supplies. You do not need a Hollywood-level renovation trailer, but having the right tools nearby will save you from making five emergency trips to the hardware store while wearing one paint-covered glove.
- Masonry cleaner, mild detergent, or concrete degreaser
- Stiff brush or wire brush for loose debris and efflorescence
- Scraper or putty knife
- Patch material, hydraulic cement, or masonry repair compound
- Acrylic caulk for gaps around trim, windows, and doors
- Masonry primer or concrete bonding primer
- Masonry paint, acrylic latex exterior paint, or elastomeric masonry coating
- Paintbrush for cutting in edges and mortar joints
- Thick-nap roller for rough surfaces
- Drop cloths, painter’s tape, gloves, goggles, and a dust mask or respirator when appropriate
For older homes, especially those built before 1978, be cautious with scraping or sanding old paint. Lead-based paint may be present, and disturbing it can create hazardous dust. In that situation, a lead-safe certified professional is the smarter choice.
Step 1: Inspect the Wall Before Painting
Start with a slow inspection. A masonry wall will usually tell you what it needs, although not in words, because that would be alarming. Look for cracks, peeling paint, damp patches, chalky residue, mildew, crumbling mortar, greasy stains, and white powdery deposits called efflorescence.
Check for Moisture Problems
Moisture is the villain in many failed masonry painting projects. If water is pushing through the wall from the outside or rising from the ground, paint alone will not solve the problem. It may temporarily hide the stain, but the moisture will eventually return like an unpaid bill with better timing.
For basement walls, check whether the wall feels damp after rain. For exterior masonry, look for failed gutters, poor drainage, cracks, or soil sloping toward the foundation. For garden walls, check whether sprinklers are constantly soaking the surface. Fixing moisture issues before painting is essential for a durable finish.
Look for Efflorescence
Efflorescence is a white, chalky, or crystalline deposit that appears when moisture moves through masonry and brings mineral salts to the surface. It may look harmless, but painting over it is a mistake. The salts interfere with adhesion and can push paint away from the wall.
Remove efflorescence with a stiff brush or a masonry-safe cleaning product. If it keeps returning, the wall may still have an active moisture problem. In that case, do not race ahead with paint. Your future self, holding a scraper and muttering at peeling paint, will not appreciate the shortcut.
Step 2: Clean the Masonry Surface Thoroughly
Paint sticks best to a clean, dry, and sound surface. Dirt, dust, oil, mildew, loose paint, and chalky residue all create a weak layer between the wall and the coating. If that layer fails, your beautiful paint job fails with it.
Cleaning Interior Masonry Walls
For interior concrete block or brick walls, vacuum loose dust first. Then wash the surface with mild detergent and water, or use a concrete and masonry cleaner if grease or heavy grime is present. Scrub with a stiff brush, rinse well, and allow the wall to dry completely.
If mold is present, do not simply paint over it. Painting over mold is like putting sunglasses on a raccoon and calling it a houseguest. The problem is still there. Fix the moisture source, clean the affected area safely, and dry the wall before painting.
Cleaning Exterior Masonry Walls
Exterior masonry often needs more muscle. Remove loose paint with a scraper or brush. Sweep away cobwebs, dirt, and plant debris. A pressure washer can be useful on sound exterior masonry, but use caution. Too much pressure can damage mortar, force water into cracks, or make the wall too wet to paint for days.
After washing, let the wall dry. Drying time depends on weather, wall thickness, shade, temperature, and humidity. Masonry can look dry on the surface while still holding moisture inside. When in doubt, give it more time. Paint does not reward impatience; it invoices it later.
Step 3: Repair Cracks, Holes, and Weak Areas
Once the wall is clean, repair visible damage. Paint can improve appearance, but it is not a structural repair product. It will not magically bridge major cracks, rebuild loose mortar, or convince a crumbling block to get its life together.
Patch Small Cracks and Holes
Use a masonry patching compound for small cracks, chips, and holes. Open narrow cracks slightly with a scraper if needed so the patch can bond properly. Remove dust from the crack before filling it. Smooth the patch so it sits level with the wall, then allow it to cure according to the product label.
For deeper cracks or active water leaks in basement masonry, a specialized repair product such as hydraulic cement may be needed. If cracks are wide, spreading, stair-stepped through blocks, or accompanied by bowing walls, call a foundation or masonry professional before painting.
Repair Loose or Flaking Paint
If the wall was painted before, remove loose, peeling, or blistering paint. Feather the edges of remaining sound paint so the transition is smoother. Glossy old coatings should be dulled by sanding or scuffing, but remember: if the building may contain lead-based paint, avoid dry sanding and get professional guidance.
Seal Gaps Around Trim
On exterior masonry, use paintable exterior-grade acrylic caulk around windows, doors, trim, and small gaps where water might sneak in. Do not caulk weep holes in brick walls. Those tiny openings exist to let moisture escape, and sealing them can create bigger problems inside the wall.
Step 4: Apply the Right Masonry Primer
Primer is not always glamorous, but on masonry it is often the difference between a long-lasting finish and a peeling wall that looks like it gave up halfway through the season. Masonry primer helps seal porous surfaces, improves adhesion, evens out absorption, and can help protect the topcoat from alkalinity in concrete or mortar.
When Primer Is Essential
Use primer on bare concrete, brick, stucco, cement block, patched areas, chalky surfaces, and highly porous masonry. Primer is also helpful when you are changing from a dark color to a light color or when the surface has uneven absorption. If one part of the wall drinks paint like a marathon runner and another part barely absorbs it, primer helps create a more uniform finish.
Choose a Masonry-Specific Product
Look for a concrete and masonry bonding primer, an alkali-resistant masonry primer, or a primer recommended by the paint manufacturer. For exterior brick or stucco, breathable masonry systems are usually preferred because they allow trapped vapor to escape. For basement walls, a masonry waterproofer may be appropriate when the wall has minor dampness, but it should not be treated as a cure for major water intrusion.
Apply Primer Carefully
Cut in edges, corners, and mortar joints with a brush. Then use a thick-nap roller to cover the field of the wall. Work the primer into pores and texture instead of skating lightly over the surface. Rough masonry needs more pressure and more patience than smooth drywall.
Allow the primer to dry for the recommended time before applying paint. Do not guess. Product labels exist for a reason, and that reason is usually “someone learned this the hard way.”
Step 5: Paint Masonry Walls with Two Durable Coats
Now comes the satisfying part: color. Choose a masonry paint, high-quality acrylic latex exterior paint approved for masonry, concrete wall paint, or elastomeric masonry coating depending on the wall type and location. For interiors, choose a coating suitable for masonry and the room’s moisture level. For exteriors, choose weather-resistant paint designed for brick, stucco, concrete, or block.
Use the Right Roller Nap
Rough masonry needs a thicker roller nap than smooth walls. A 3/4-inch to 1-inch nap roller is often useful for textured block, brick, or stucco. Smooth concrete may need less. A brush is still necessary for edges, corners, mortar joints, and areas the roller cannot reach.
Work in Manageable Sections
Paint one section at a time. Start at the top and work down to catch drips as you go. Push paint into pores, mortar lines, and textured spots. Do not overload the roller so much that paint runs down the wall like it is trying to escape the project.
Apply Two Coats
Most masonry walls look better and last longer with two coats. The first coat builds coverage and bonds to the prepared surface. The second coat evens the color, improves durability, and gives the finish a more professional look. Follow the recommended recoat time on the paint label.
Avoid painting exterior masonry in direct hot sun, rain, strong wind, freezing temperatures, or high humidity. Ideal painting weather is mild, dry, and boring. Boring weather is a gift. Accept it.
Common Mistakes to Avoid When Painting Masonry Walls
Painting Over Damp Masonry
Damp masonry is one of the top reasons paint fails. Moisture trapped under paint can cause blistering, peeling, staining, and mildew growth. If the wall is damp, find the cause before you paint.
Skipping Surface Prep
Cleaning and patching may feel less exciting than rolling on a fresh color, but preparation is the real paint job. The topcoat is just the victory lap.
Using Regular Interior Paint Outdoors
Regular interior wall paint is not designed to handle rain, sunlight, freeze-thaw cycles, or masonry alkalinity. Use a coating designed for the specific surface and environment.
Ignoring Efflorescence
White mineral deposits are not decorative snow. Remove them and address moisture before painting.
Applying Paint Too Thick
Thick coats dry unevenly and may crack or sag. Two properly applied coats are usually better than one heroic blob of paint.
Best Paint Types for Masonry Walls
The best paint depends on where the wall is located and what it needs to resist. For exterior brick, stucco, and concrete block, acrylic latex masonry paint is a common choice because it offers durability and breathability. Elastomeric masonry paint is thicker and more flexible, making it useful for certain stucco or exterior surfaces with hairline cracks, but it must be applied correctly and may not be right for every wall.
For basement walls, masonry waterproofing paint may help manage minor seepage on bare masonry, but it is not a substitute for drainage repairs, foundation repairs, or fixing leaks. For garage walls, concrete wall paint or acrylic masonry coatings often provide a clean, durable finish. For historic brick, think carefully before painting at all. Once brick is painted, returning it to its original look can be difficult and expensive.
How Long Does Masonry Paint Last?
A well-prepared masonry paint job can last several years, but longevity depends on weather, moisture, surface condition, product quality, and application. Exterior walls exposed to heavy rain, harsh sun, salt air, or freeze-thaw cycles may need maintenance sooner than protected walls. Interior masonry in a dry basement or garage may stay attractive much longer.
The best maintenance habit is simple: inspect the wall once or twice a year. Touch up small cracks, clean dirt, and watch for peeling or moisture stains. Catching problems early is much easier than repainting an entire wall while questioning every decision that brought you there.
Real-World Experience: Lessons from Painting Masonry Walls
The first lesson most people learn when painting masonry walls is that the wall is thirstier than expected. A concrete block wall can absorb primer so quickly that you begin to wonder whether the wall has a secret basement gym habit. This is normal. Porous masonry often needs more primer and paint than a smooth drywall surface of the same size. Always check product coverage estimates, then plan for extra if the surface is rough, old, or highly absorbent.
Another practical lesson: cleaning takes longer than painting. On many projects, the actual rolling of paint is the easy part. The real work is removing dust from block pores, brushing out mortar joints, scraping flaking paint, washing stains, waiting for the wall to dry, and patching cracks. People who skip this stage often finish faster, but they also repaint sooner. The wall remembers. The wall always remembers.
Color choice also behaves differently on masonry. Rough textures create shadows, so colors can look deeper or more dramatic than they did on a tiny paint chip. A soft warm white may look clean and classic on a brick fireplace, while a dark charcoal can make a garden wall feel modern and bold. Before committing, test a sample on the actual wall and view it at different times of day. Morning light, afternoon sun, and porch lighting can make the same color look like three distant cousins.
On exterior projects, weather planning is everything. A wall painted too soon after rain may peel. A wall painted in direct summer sun may dry too fast, making lap marks more visible. A windy day can blow dust into wet paint, giving your finish the texture of a beach towel. The best painting day is mild, dry, and calm. It may not feel exciting, but your paint will be quietly thrilled.
One of the most useful habits is brushing before rolling. On brick, block, and stucco, a brush helps push primer and paint into joints, edges, pits, and hairline cracks. Then the roller can cover the larger areas evenly. If you only roll, you may leave tiny uncoated pockets that become obvious later, especially when light hits the wall from an angle.
Finally, do not judge the project too early. The first coat on masonry can look patchy, uneven, or mildly tragic. That does not mean you failed. It often means the wall is absorbing paint at different rates. Let the first coat dry fully, then apply the second coat. The second coat is where the wall usually stops looking like a construction experiment and starts looking intentional.
The best masonry painting projects are not rushed. They are cleaned, repaired, primed, painted, and given time to cure. Do that, and your wall will look fresher, cleaner, and more finished. It may not send you a thank-you card, but it will stop looking like it has been emotionally neglected since 1987.
Conclusion
Learning how to paint masonry walls is really learning how to respect the surface. Masonry is strong, but it is also porous, mineral-rich, and sensitive to moisture. A long-lasting finish begins before the paint can opens. Inspect the wall, remove moisture problems, clean thoroughly, repair damage, apply the right masonry primer, and finish with two coats of quality masonry paint.
The five-step process is simple, but each step matters. Skip cleaning, and paint may not bond. Skip repairs, and cracks may show through. Skip primer, and porous masonry may absorb paint unevenly. Rush drying time, and moisture may ruin the finish. But follow the process patiently, and you can transform brick, concrete, stucco, or block walls into clean, durable surfaces that look professionally done.
In short: prep like a pro, paint like a patient person, and never underestimate a wall made of rocks.


