Table of Contents >> Show >> Hide
- What Polishing Granite Actually Means
- What You Need to Polish Granite Countertops
- Step-by-Step: How to Polish Granite Counter Tops
- Step 1: Clear the Countertop
- Step 2: Wipe Away Crumbs and Dust
- Step 3: Clean With Mild Soap or Stone Cleaner
- Step 4: Rinse Thoroughly
- Step 5: Dry Completely
- Step 6: Check Whether the Granite Needs Sealing
- Step 7: Seal First If Needed
- Step 8: Apply Granite Polish
- Step 9: Inspect From Different Angles
- How Often Should You Polish Granite Countertops?
- How to Fix Dull Granite Before Polishing
- Common Granite Polishing Mistakes
- Daily Habits That Keep Granite Shiny
- When to Call a Professional
- Experience Notes: Real-Life Lessons From Polishing Granite Countertops
- Conclusion
Granite countertops have a way of making a kitchen look instantly more grown-up. One moment you are reheating leftovers in gym shorts; the next, your kitchen looks like it belongs in a lifestyle magazine where everyone owns matching linen napkins. But even granite, tough as it is, can lose its sparkle. Fingerprints, hard water spots, soap film, cooking grease, and the mysterious kitchen fog known as “daily life” can all leave the surface looking dull.
The good news? Learning how to polish granite counter tops is not complicated. You do not need a degree in geology, a contractor’s license, or a dramatic toolbox that unfolds like a spaceship. Most homeowners can restore everyday shine with a careful clean, a stone-safe polish, and the right buffing technique. The key is knowing what polishing can fix, what it cannot fix, and which products should never meet your granite unless you enjoy expensive regrets.
This complete guide walks you through the safest, simplest way to clean, seal, and polish granite countertops so they look glossy, smooth, and well cared for. We will also cover common mistakes, stain fixes, maintenance habits, and real-life experience tips from the kind of kitchen chaos that happens between coffee, dinner prep, and someone placing a hot pan exactly where you told them not to.
What Polishing Granite Actually Means
Before grabbing a bottle labeled “shine miracle,” it helps to understand what granite polishing really does. Granite countertops usually arrive with a factory or professional finish. That glossy, reflective look is created by mechanical polishing with specialized abrasives before the slab is installed. A household granite polish does not recreate that deep professional finish from scratch. Instead, it enhances the existing finish by removing light residue, improving luster, and adding a temporary protective shine.
Think of it like brushing your hair versus getting a salon cut. A polish can make the surface look cleaner, brighter, and smoother, but it cannot repair deep scratches, chips, severe dull patches, or damage caused by harsh chemicals. For those problems, a stone restoration professional may be needed.
Polishing vs. Cleaning vs. Sealing
These three steps are related, but they are not the same thing:
- Cleaning removes food residue, grease, dust, fingerprints, and surface grime.
- Sealing helps protect porous granite from absorbing liquids and staining.
- Polishing boosts shine and helps reduce visible smudges, water spots, and dullness.
The correct order is simple: clean first, seal if needed, then polish after the sealer has cured. Polishing a dirty countertop is like putting cologne on a gym sock. Technically something happened, but not the thing you wanted.
What You Need to Polish Granite Countertops
You do not need many supplies, but you do need the right ones. Granite is hard, but the sealant and surface finish can still be damaged by abrasive or acidic products.
Supplies
- Warm water
- Mild dish soap or a pH-neutral granite cleaner
- Soft microfiber cloths
- Non-scratch sponge
- Granite-safe polish
- Granite sealer, if the countertop fails the water test
- Dry lint-free towel
- Plastic wrap and baking soda for optional stain treatment
Products to Avoid
Never polish granite with vinegar, lemon juice, bleach, ammonia-based glass cleaner, abrasive powders, steel wool, scouring pads, oven cleaner, or random all-purpose sprays unless the label clearly says they are safe for natural stone. Acidic cleaners can weaken sealers and dull the surface. Abrasive tools can scratch or haze the finish. Granite may be tough, but it is not interested in being scrubbed like a barbecue grate.
Step-by-Step: How to Polish Granite Counter Tops
Step 1: Clear the Countertop
Remove appliances, cutting boards, spice jars, mail, fruit bowls, and that one mysterious charger nobody claims. A clear surface helps you clean evenly and prevents missed spots around heavy items. It also gives you a better view of dull areas, cloudy patches, and stains.
Step 2: Wipe Away Crumbs and Dust
Use a dry microfiber cloth to remove crumbs, grit, and dust. This matters more than most people think. Tiny particles can act like sandpaper when rubbed across the surface. If your countertop feels gritty, do not start polishing yet. Granite shine begins with a clean, debris-free surface.
Step 3: Clean With Mild Soap or Stone Cleaner
Mix a few drops of mild dish soap with warm water, or use a pH-neutral granite cleaner. Dampen a microfiber cloth or soft sponge, then wipe the counter in sections. Pay extra attention to areas near the stove, sink, coffee maker, and prep zones, because those places collect grease, water minerals, and splashes.
Do not flood the countertop. Granite is natural stone, and while properly sealed granite resists moisture well, soaking it is unnecessary. A damp cloth is enough for routine cleaning.
Step 4: Rinse Thoroughly
Soap residue is a common reason granite looks cloudy after cleaning. After washing, wipe the surface again with a clean cloth dampened with plain water. Rinse the cloth often. If you skip this step, your polish may simply trap soap film under a shiny layer, which is not exactly the glamorous kitchen moment we are chasing.
Step 5: Dry Completely
Dry the countertop with a clean microfiber towel. Water spots and streaks often appear when granite air-dries, especially around sinks or in homes with hard water. Buff lightly in circular motions until the surface feels dry and smooth.
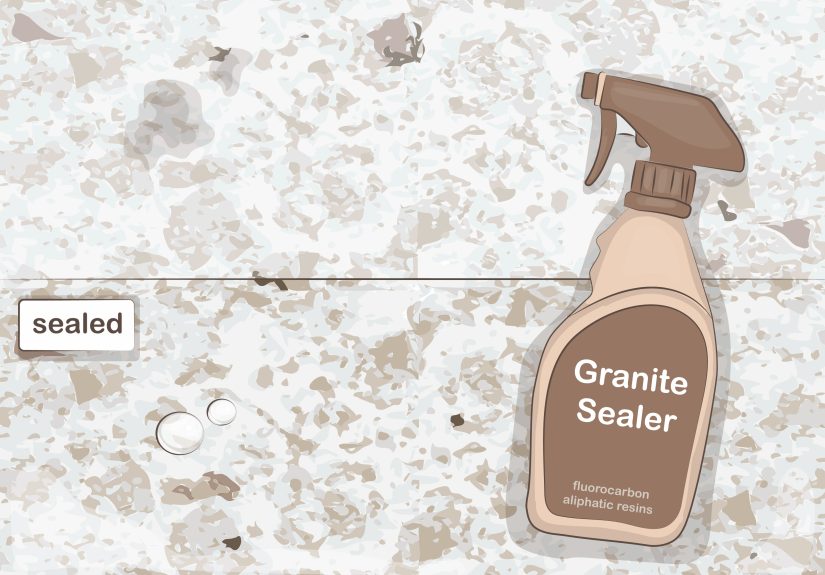
Step 6: Check Whether the Granite Needs Sealing
Before polishing, test the seal. Place a few drops of water on the countertop and let them sit for about 10 to 15 minutes. If the water beads on the surface, the seal is probably still doing its job. If the granite darkens or absorbs the water quickly, it may need sealing before polishing.
Not every granite slab behaves the same way. Some darker stones are naturally dense and may need less sealing. Some lighter stones are more absorbent and require more attention. The water test is better than guessing based on color alone.
Step 7: Seal First If Needed
If your granite needs sealing, apply a granite-safe sealer according to the product directions. Work in small sections, spread it evenly, allow it to penetrate for the recommended time, and wipe away excess before it dries into a haze. Many sealers need several hours to fully cure; some care guides recommend waiting about 24 hours before polishing. Always follow the label because sealers vary.
Do not rush this step. Polishing over uncured sealer can cause streaks, cloudiness, or uneven shine. Granite rewards patience. It is basically the sourdough starter of countertops, except less emotionally needy.
Step 8: Apply Granite Polish
Once the surface is clean, dry, and properly sealed, apply a granite-safe polish. Spray a light amount over a small section rather than coating the entire counter at once. Too much polish can leave streaks or a greasy feel.
Use a clean microfiber cloth to spread the polish evenly. Buff in circular motions, then finish with long, smooth passes following the natural flow of the countertop. Flip the cloth to a dry side and buff again until the surface shines.
Step 9: Inspect From Different Angles
Granite can look perfect from one angle and streaky from another. Stand near a window or under overhead lighting and check the surface. If you see cloudy areas, buff them with a dry microfiber cloth. If the haze remains, it may be leftover soap, excess polish, hard water residue, or sealer residue rather than a polishing problem.
How Often Should You Polish Granite Countertops?
For most kitchens, polishing once every one to four weeks is enough, depending on use, product instructions, and the level of shine you prefer. Busy kitchens may benefit from weekly polishing in high-traffic areas, while low-use counters may only need occasional buffing.
Daily cleaning is more important than frequent polishing. A countertop that is wiped down, rinsed, and dried regularly will keep its shine longer. Overusing polish can create buildup, especially if the counter is not cleaned properly first.
How to Fix Dull Granite Before Polishing
Cloudy Film
A cloudy film often comes from soap residue, hard water minerals, cooking oils, or too much cleaning product. Start with a thorough rinse using plain warm water and a microfiber cloth. Dry completely. If the haze remains, use a granite-safe cleaner designed to remove buildup.
Hard Water Spots
Water spots usually gather around sinks, faucets, and dish-drying areas. Wipe spills quickly and dry the counter after cleaning. Avoid acidic descalers, vinegar, and lemon-based cleaners. For stubborn mineral deposits, use a natural-stone-safe product and gentle pressure with a non-scratch pad.
Grease Near the Stove
Grease can make granite look dull and sticky. Use warm water with mild dish soap or a stone-safe degreasing cleaner. Avoid harsh degreasers unless the label confirms they are safe for sealed granite. After cleaning, rinse well and dry before polishing.
Stains
If a stain has soaked into the stone, polishing will not remove it. Try a baking soda poultice. For oil-based stains, mix baking soda with water into a paste. For some organic stains on lighter granite, baking soda with hydrogen peroxide may help, but always test first in a hidden area. Spread the paste over the stain, cover it with plastic wrap, let it sit, then rinse and dry. Deep or stubborn stains may require professional treatment.
Common Granite Polishing Mistakes
Mistake 1: Using Vinegar Because It Feels “Natural”
Vinegar is wonderful for many cleaning jobs, but granite is not one of them. Its acidity can weaken sealers and contribute to dullness over time. Natural does not always mean stone-safe. Poison ivy is natural too, and nobody wants that in the kitchen.
Mistake 2: Scrubbing With Abrasive Pads
Steel wool, rough scouring pads, abrasive powders, and melamine sponges can damage the finish. Use microfiber cloths and non-scratch sponges instead.
Mistake 3: Polishing Before Cleaning
Polish should enhance a clean surface, not seal in crumbs, grease, or soap film. Always clean, rinse, and dry first.
Mistake 4: Skipping the Seal Test
If granite absorbs water quickly, polishing alone will not protect it from staining. Test first, seal if needed, then polish after the sealer cures.
Mistake 5: Using Wax
Wax can create buildup, attract dust, and make granite look uneven. Use a product made for granite or natural stone. The goal is a clean shine, not a countertop that feels like a freshly detailed car hood.
Daily Habits That Keep Granite Shiny
Polishing is only one part of granite countertop maintenance. The best shine comes from small habits repeated consistently.
- Wipe spills quickly, especially oil, wine, coffee, citrus juice, and tomato sauce.
- Use cutting boards instead of cutting directly on granite.
- Place trivets under hot pans, even though granite is heat resistant.
- Dry around sinks after washing dishes.
- Use coasters under glasses, bottles, and soap dispensers.
- Clean with mild soap or stone-safe cleaner, then rinse and dry.
These habits prevent most dullness before it starts. Granite does not need pampering, but it does appreciate not being treated like a cafeteria table during a lunch rush.
When to Call a Professional
Call a stone professional if your granite has deep scratches, chips, cracks, uneven dull patches, severe hard water damage, or a cloudy sealer haze that will not buff out. Professional restoration may involve diamond abrasives, specialized polishing compounds, or sealer removal. These are not ideal weekend experiments unless your weekend plans include panic-searching “how much does a new countertop cost?”
You should also get expert help if you are unsure whether your countertop is true granite. Some materials look similar but require different care. Engineered quartz, marble, quartzite, soapstone, and granite each have different maintenance needs.
Experience Notes: Real-Life Lessons From Polishing Granite Countertops
One of the biggest lessons from caring for granite countertops is that shine is usually lost slowly, not dramatically. Most people do not wake up one morning to find their granite looking ruined. Instead, the surface starts to look a little tired around the sink, a little cloudy near the coffee maker, and a little greasy beside the stove. Then one day the sunlight hits it just right and you think, “Was this always this dull, or has my kitchen been quietly aging behind my back?”
In real kitchens, the sink area is usually the first trouble zone. Water splashes, soap drips, and mineral deposits build up faster than expected. A simple habit makes a big difference: keep a microfiber cloth nearby and dry the stone after washing dishes. It sounds almost too easy, but drying is one of the best shine-saving tricks. Water left to evaporate can leave spots, especially in hard-water areas, and those spots make even clean granite look neglected.
Another practical lesson is to use less product than you think. Many homeowners spray polish like they are watering a lawn. The result is streaks, smears, and a surface that feels slightly tacky. A light mist over a small area works better. Buff it completely before moving on. If the cloth starts dragging or leaving marks, switch to a fresh dry cloth. Microfiber cloths are inexpensive, and using several clean ones is far cheaper than fighting a cloudy countertop for half an hour.
Cooking habits also matter. Around the stove, oil mist can settle on granite even when you do not notice it. If you polish without removing that thin grease layer first, the shine will look uneven. Warm water and mild dish soap are usually enough, but the rinse step is crucial. Soap left behind creates haze, and haze is the enemy of that deep, reflective granite look.
One helpful routine is the “guest-ready polish.” Before hosting, clear the counters, clean with a stone-safe cleaner, rinse, dry, and do a quick polish only on visible areas. This takes less time than deep-cleaning the whole kitchen and makes the room look instantly fresher. Just do not use this as a substitute for sealing. Polish is cosmetic support; sealer is stain protection.
It is also worth learning your specific granite. Some slabs are dense and forgiving. Others absorb liquid more quickly and need regular sealing. The water test removes the guesswork. Once you know how your countertop behaves, maintenance becomes easier and less stressful. Granite care is not about perfection. It is about using gentle products, avoiding obvious disasters, and building small habits that keep the stone looking beautiful year after year.
Conclusion
Polishing granite counter tops is simple when you follow the right order: clean, rinse, dry, test the seal, seal if needed, and polish with a product made for natural stone. Avoid vinegar, lemon juice, bleach, ammonia, abrasive pads, wax, and mystery cleaners from the back of the cabinet. Granite is durable, but its shine depends on careful maintenance.
For everyday sparkle, wipe spills quickly, dry the surface after cleaning, and polish lightly when the countertop needs a boost. For stains, haze, or deep damage, slow down and identify the cause before reaching for stronger products. The best granite care is not aggressive; it is consistent. Treat your countertop well, and it will keep doing what granite does best: looking elegant while silently judging the rest of the kitchen.


