Table of Contents >> Show >> Hide
- Why Sew Sofa Armrest Covers Instead of Buying Them?
- Quick Style Choices Before You Start
- What You’ll Need
- How to Sew Armrest Covers for Sofas: 13 Steps
- Step 1: Decide Your Coverage (Top-Only vs. Full “Cap”)
- Step 2: Measure the Sofa Arm Like You Mean It
- Step 3: Pick the Right Fabric (Your Sofa Has Feelings, Too)
- Step 4: Make a Paper Pattern (So You Don’t “Wing It” Into Regret)
- Step 5: Test the Pattern on the Sofa (The “Muslin Saves Marriages” Step)
- Step 6: Prep Your Fabric (Prewash, Press, and Pretend You’re a Pro)
- Step 7: Cut Your Fabric Pieces (Grainlines Are Not a Suggestion)
- Step 8: Reinforce High-Wear Areas (Optional, But Smart)
- Step 9: Sew the Side Panels to the Top Panel
- Step 10: Shape the Front Edge (Square, Rounded, or Rolled)
- Step 11: Finish the Seams So They Don’t Fray Into Chaos
- Step 12: Add a Closure That Matches Your Lifestyle
- Step 13: Hem, Topstitch, and Final-Fit Like You Planned This All Along
- Fit Tips for Different Sofa Arm Styles
- Care, Cleaning, and “Oops” Maintenance
- Real-World Sewing Notes: What I Learned the Hard Way (So You Don’t Have To)
- Conclusion
Sofa arms live a tough life. They get leaned on, snack-crumed on, pet-napped on, and occasionally used as a
launchpad for dramatic TV reactions. If your sofa’s arms are looking a little “well-loved” (read: tired), sewing
armrest covers for sofas is one of the quickest DIY upgrades you can makewithout reupholstering
the whole couch or selling a kidney for a new one.
In this guide, you’ll learn a practical, custom-fit method that works for most arm shapestrack arms, rolled arms,
and the “what even is this geometry?” modern arms. We’ll keep it beginner-friendly, but polished enough that your
living room won’t look like a middle-school home ec final.
Why Sew Sofa Armrest Covers Instead of Buying Them?
Store-bought sofa arm covers can be fine, but they often slide around, fit weird, or look like they came
free with a subscription you don’t remember signing up for. Sewing your own means:
- A real fit for your exact arm size and shape
- Better fabric choices (hello, washable canvas and pet-friendly textures)
- Design upgrades like piping, topstitching, quilting, or contrast trim
- Protection from wear, oils, spills, and claw-based “interior design”
Quick Style Choices Before You Start
Your armrest covers can be as simple or as fancy as you want. Choose one of these styles:
- Drape style (fastest): Like a tailored mini-blanket. Minimal shaping, great for beginners.
- Boxed style (most secure): A fitted “cap” with side panels that hugs the arm.
-
Strap-and-anchor style (best for slippery fabrics): Adds Velcro straps or ties underneath to
stop sliding.
This tutorial focuses on a boxed style armrest cover because it looks custom and stays putyet it
still uses straightforward seams and simple patterning.
What You’ll Need
Materials
- Fabric (½–1½ yards depending on arm size and pattern matching)
- Matching thread (polyester is durable; upholstery thread optional)
- Optional: lightweight fusible interfacing (for crisp edges)
- Optional: batting or foam wrap (for a padded, quilted look)
- Closure option: sew-on Velcro, snaps, elastic, or fabric ties
- Optional: piping/welting cord for a professional finish
Tools
- Sewing machine (a heavy-duty needle helps: size 90/14 or 100/16)
- Fabric scissors or rotary cutter + mat
- Measuring tape and ruler
- Chalk or washable fabric marker
- Pins or sewing clips (clips are a gift from the heavens for thick fabric)
- Iron and ironing board
- Paper for patterning (kraft paper, freezer paper, or even taped-together printer paper)
How to Sew Armrest Covers for Sofas: 13 Steps
Step 1: Decide Your Coverage (Top-Only vs. Full “Cap”)
Do you want coverage just on the top where elbows and coffee cups landor do you want it to wrap down the sides?
Most people prefer a full cap that drops 6–10 inches on each side. It looks intentional and helps prevent wear on
the outer edges.
Step 2: Measure the Sofa Arm Like You Mean It
Measure these areas (write them down, because future-you will not remember):
- Length: from the front edge of the arm to the back edge
- Top width: across the top of the arm
- Drop: how far you want the cover to hang down each side
- Front shape: squared, rounded, or rolled
Tip: If your arm is rounded/rolled, add a little extra ease so the cover doesn’t look like it’s clinging on for
dear life.
Step 3: Pick the Right Fabric (Your Sofa Has Feelings, Too)
For durable DIY armrest covers, choose fabrics that can handle friction and frequent washing:
canvas, denim, twill, duck cloth, home décor cotton, or upholstery fabric. If you have pets or kids, consider
tight weaves that don’t snag easily.
- Pattern tip: Large prints may need extra yardage to look centered and matched.
- Nap tip: Velvet or microfiber has directioncut both covers the same way so the color “sheen”
matches.
Step 4: Make a Paper Pattern (So You Don’t “Wing It” Into Regret)
You’ll create three main pattern pieces:
- Top panel: length × top width
- Side panels (2): length × desired drop
- Optional front panel: if you want a shaped front edge (great for rolled arms)
Add a ½-inch seam allowance around all edges that will be sewn. If you’re working with bulky
upholstery fabric, you can bump that up slightlyjust keep it consistent.
Step 5: Test the Pattern on the Sofa (The “Muslin Saves Marriages” Step)
Before cutting into your “nice fabric,” test your pattern with inexpensive cotton or muslin. Pin it together and
place it on the arm. Check:
- Is the top centered and smooth?
- Are the side drops even?
- Does the front sit nicely (no weird puckers or flare-outs)?
Adjust the paper pattern now. This is the cheapest time to make mistakes.
Step 6: Prep Your Fabric (Prewash, Press, and Pretend You’re a Pro)
If your fabric is washable, prewash and dry it the way you’ll launder the finished covers. This helps prevent
surprise shrinking later. Then press it flat so your pieces cut accurately and your seams behave.
Step 7: Cut Your Fabric Pieces (Grainlines Are Not a Suggestion)
Lay your pattern pieces on the fabric, minding the grain and any print direction. Cut:
- 1 top panel
- 2 side panels (mirror images if needed)
- Optional: 1 front panel or curved front shaping piece
If you’re making a pair of covers (one for each arm), cut everything twicethen label pieces so you don’t sew the
“left” cover into a “right-ish” cover.
Step 8: Reinforce High-Wear Areas (Optional, But Smart)
Sofa arms get friction. If you want your covers to look crisp longer:
- Fuse lightweight interfacing to the wrong side of the top panel
- Add a thin layer of batting for a padded, luxe look
- Quilt the top panel (simple straight lines look modern and hide minor sins)
Step 9: Sew the Side Panels to the Top Panel
Place the top panel and one side panel right sides together. Pin or clip along one long edge.
Sew using your seam allowance (commonly ½ inch). Repeat for the other side panel.
Press seams open if your fabric allows. For thicker fabric, pressing seams to one side and topstitching can reduce
bulk and look intentionally “upholstery-ish.”
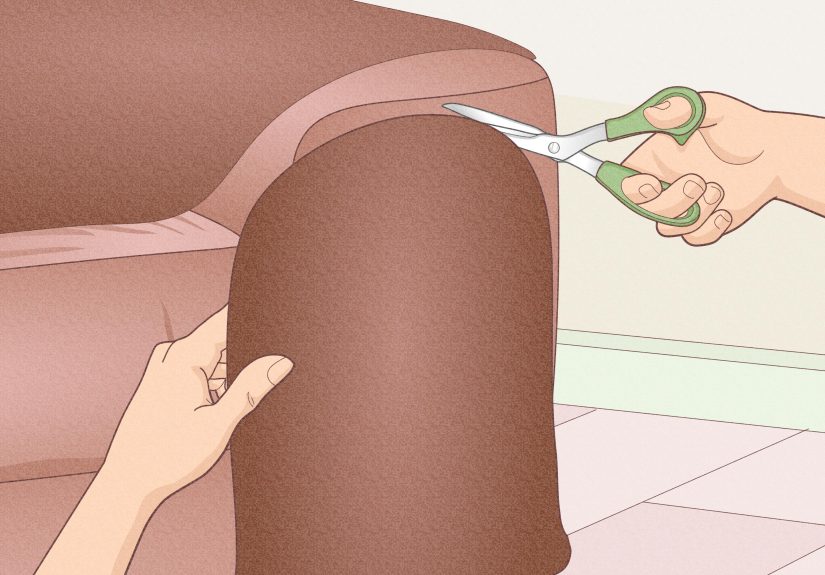
Step 10: Shape the Front Edge (Square, Rounded, or Rolled)
If your sofa arms are square, you can leave the front as a clean straight edge and simply hem it later. If the arm
front is rounded or rolled, you’ll get a better fit by shaping it:
- Pin the cover onto the arm and mark the curve with chalk
- Remove, then sew along the marked curve
- Clip curves (tiny snips into the seam allowance) so it turns smoothly
Step 11: Finish the Seams So They Don’t Fray Into Chaos
Upholstery-weight fabrics love to fray like it’s their hobby. Finish your seams with one of these:
- Zigzag stitch along the raw edges
- Overcast stitch (many machines have one)
- Serger/overlocker if you have it
- Bias tape binding for a clean interior finish
Step 12: Add a Closure That Matches Your Lifestyle
If your cover fits snugly and your fabric has grip (like canvas), you may not need a closure. But if you have
leather sofas, slick fabric, energetic pets, or a toddler who believes in parkour, add an anchor:
- Velcro straps: Sew one side to the underside edges and wrap under the arm to fasten.
- Ties: Fabric ties look charming and adjust easily.
- Elastic: Adds gentle tension; great for a “hugged” fit.
- Snaps: Neat and secure, especially for a tailored look.
Pro tip: Put closures underneath or toward the inside of the sofa arm so they’re hidden from normal view.
Step 13: Hem, Topstitch, and Final-Fit Like You Planned This All Along
Hem the bottom edges (a simple double-fold hem works well). Add topstitching along edges for durability and that
crisp “store-bought but better” finish. Then place the cover on the sofa, smooth it out, and admire your work like
you’re about to list your living room on a design blog.
Fit Tips for Different Sofa Arm Styles
Track Arms (Straight, Boxy Arms)
These are the easiest. A rectangular top plus rectangular sides often fits perfectly. Add Velcro straps if the
fabric slides.
Rolled Arms (Classic, Rounded Arms)
Plan for curves at the front edge. Testing with muslin is especially helpful here. Consider adding piping along
the top edge for a more tailored, traditional look.
Flared or Angled Arms
Measure both the front and back widthssometimes they’re different. Your side panels may need a slight taper. When
in doubt, pattern directly on the arm using pinned fabric, then transfer the shapes to paper.
Care, Cleaning, and “Oops” Maintenance
The whole point of sewing armrest covers for sofas is that they’re easier to clean than the sofa
itself. A few tips:
- Choose washable fabric when possible (canvas and sturdy cotton blends are great).
- Spot-clean often; deep-wash less frequently to reduce wear.
- Press after washing for a crisp look (or embrace the relaxed “I’m casual but expensive” vibe).
- If Velcro collects lint, clean it with a seam ripper tip or a stiff brush.
Real-World Sewing Notes: What I Learned the Hard Way (So You Don’t Have To)
The first time you sew a sofa arm cover, you’ll feel oddly confident. It’s basically a few rectangles, right?
And yessometimes it is. But armrests have a sneaky way of being “mostly rectangular” in the same way a raccoon is
“mostly a cat.” Similar silhouette. Completely different energy.
Here’s the big lesson: your pattern is everything. When I skipped the muslin test once (because I
was feeling brave, and also because I was out of muslin), I cut straight into my good fabric. The result fit… in
the sense that it existed on the arm. But it also bubbled at the front like a tiny fabric igloo. I tried to press
it flatter. I tried to “just pull it tighter.” I tried to convince myself it looked intentional. It did not.
Another hard-won truth: slippery fabric will betray you. If your sofa is leather or performance
fabric with a smooth finish, a cover without an anchor will slowly migrate. You won’t notice at first. Then one day
you’ll walk into the room and the cover will be hanging off the side like it’s trying to escape your décor
choices. Velcro straps underneath fixed this instantly. Ties worked too, but Velcro felt like the least-fussy
everyday solution.
If you’re going for a “nice” finish, topstitching is the secret sauce. The difference between “homemade” and
“handmade (in a good way)” is often one clean line of stitching near the edge. The trick is to slow down and use a
longer stitch lengthespecially on thicker fabricsso it looks intentional and doesn’t pucker.
And let’s talk about seam bulk. Upholstery fabric can get thick fast, especially where seams meet. If your machine
starts thumping like it’s climbing a hill, don’t force it. Grade your seams (trim one seam allowance narrower than
the other) and press well. Sewing clips help more than pins here because they don’t distort layers, and they won’t
leave little pinholes in some fabrics.
Finally, if you’re making two covers, cut them assembly-line style. I once cut one cover, sewed it, and then tried
to recreate it “from memory” for the second arm. The second one was… related. Like a cousin. Not a twin. Cut both
at once, label your pieces, and save yourself from living with mismatched arms forever.
Bottom line: take your time on measuring and patterning, choose fabric that matches your real life (pets, kids,
snacks, all of it), and add a simple anchor if your cover slides. You’ll end up with armrest covers that look neat,
stay put, and protect your sofa from the daily chaos we all pretend isn’t happening.
Conclusion
Sewing your own sofa armrest covers is one of those rare DIY projects that’s practical, affordable,
and genuinely satisfying. With a solid pattern, durable fabric, and a closure that fits your household’s energy
level, you’ll get a custom look that protects your sofa and upgrades your spaceno reupholstery drama required.


