Table of Contents >> Show >> Hide
- What Does It Mean to Sync Cell Phones?
- Before You Start, Check These Basics
- How to Sync Cell Phones: 8 Steps
- Step 1: Decide What You Actually Want to Sync
- Step 2: Back Up the Old Phone First
- Step 3: Put Both Phones on Wi-Fi, Power, and the Right Settings
- Step 4: Sign In to the Same Cloud Ecosystem Whenever Possible
- Step 5: Choose the Right Transfer Method for Your Phone Pair
- Step 6: Turn On Ongoing Sync for Contacts, Calendars, Photos, and Notes
- Step 7: Check What Did Not Transfer Cleanly
- Step 8: Finish the Job Safely
- What Usually Syncs Well and What Usually Does Not
- Common Mistakes to Avoid When Syncing Cell Phones
- Real-World Experiences: What Syncing Cell Phones Feels Like in Practice
- Final Thoughts
If you have ever stared at a shiny new phone while your old one still held your contacts, photos, texts, calendar, and that one screenshot you swear is “important,” welcome to the club. Syncing cell phones sounds like something that should take one magical tap. In reality, it is part setup, part strategy, and part resisting the urge to throw both phones onto the couch and order takeout.
The good news is that syncing phones is much easier than it used to be. Whether you are moving from iPhone to iPhone, Android to Android, Android to iPhone, or iPhone to Android, modern tools can transfer a lot of your content and then keep the important stuff updated across devices. The secret is knowing which method matches your phones and what “sync” actually means.
In this guide, you will learn how to sync cell phones in eight practical steps, what transfers well, what usually does not, and how to avoid the classic mistakes that turn a simple phone switch into a weekend project.
What Does It Mean to Sync Cell Phones?
When people say they want to sync cell phones, they usually mean one of two things:
- One-time transfer: moving contacts, photos, messages, settings, and apps from an old phone to a new one.
- Ongoing sync: keeping data such as contacts, calendars, notes, and photos updated across more than one device through a cloud account.
That distinction matters. A transfer gets you started. A sync keeps your digital life from splitting into two separate universes, like a sci-fi movie but with more duplicate contacts.
Before You Start, Check These Basics
Before you sync your phones, make sure you have the boring-but-essential stuff covered:
- Both phones are charged, or at least not clinging to 4% battery life.
- You know the passcode, PIN, Apple Account password, or Google Account password for the old phone.
- Wi-Fi is available and stable.
- Bluetooth is on if your chosen method requires it.
- You have enough cloud storage if you plan to use backup and restore.
- Your apps are updated enough to support the transfer tools.
Once that is done, you are ready to actually sync cell phones instead of just thinking about it very intensely.
How to Sync Cell Phones: 8 Steps
Step 1: Decide What You Actually Want to Sync
Start by identifying the data that matters most. For most people, that list includes contacts, photos, videos, text messages, call history, calendars, notes, app data, and maybe music or files.
This step sounds obvious, but it saves headaches later. If your top priority is contacts and calendars, an account-based sync may be enough. If you want text messages, home screen layout, photos, and app settings, you will probably need a full device-to-device transfer or a backup restore.
Think of it like packing for a move. You do not need to label every paperclip, but you should know whether you are moving the whole house or just the essentials.
Step 2: Back Up the Old Phone First
Before you transfer anything, create a backup. This is your safety net in case the sync stalls, the cable misbehaves, or one phone decides today is the day it becomes “temporarily unavailable.”
If you use an iPhone, back up to iCloud or to a computer. If you use Android, turn on your Google backup and confirm that recent backup data exists. For photos, check whether iCloud Photos or Google Photos is already uploading your media. A complete backup is especially helpful if you are moving to a different brand, restoring from the cloud, or planning to wipe the old phone afterward.
Skipping this step is like walking a tightrope without a net because “it will probably be fine.” Sometimes it is. Sometimes it becomes a story you tell with dramatic hand gestures.
Step 3: Put Both Phones on Wi-Fi, Power, and the Right Settings
Most phone sync methods work best when both devices are awake, charged, and connected. Put both phones on Wi-Fi. Turn on Bluetooth if you are using a nearby-device setup like Apple Quick Start. If you are using a cable transfer, use a compatible cable or adapter before you begin, not after the setup screen starts yelling for help.
This is also a good time to check for software updates if one phone is very outdated. You do not always need the latest version, but wildly different software versions can make transfers bumpier than they need to be.
Step 4: Sign In to the Same Cloud Ecosystem Whenever Possible
The easiest way to sync cell phones long term is to keep important data tied to an account instead of only to the device. That means using the same Apple Account across Apple devices, the same Google Account across Android devices, or the same cloud apps across different platforms.
For example:
- iPhone to iPhone: use your Apple Account, iCloud Contacts, iCloud Photos, iCloud Backup, and related sync settings.
- Android to Android: use your Google Account, Google Contacts sync, Google Calendar, Google Photos backup, and Android backup.
- Mixed platforms: use shared services like Google Contacts, Google Photos, Outlook, OneDrive, Dropbox, or other cross-platform apps for ongoing syncing.
If you want two phones to stay aligned after the initial setup, cloud sync is not optional. It is the part that keeps both devices singing from the same hymn sheet.
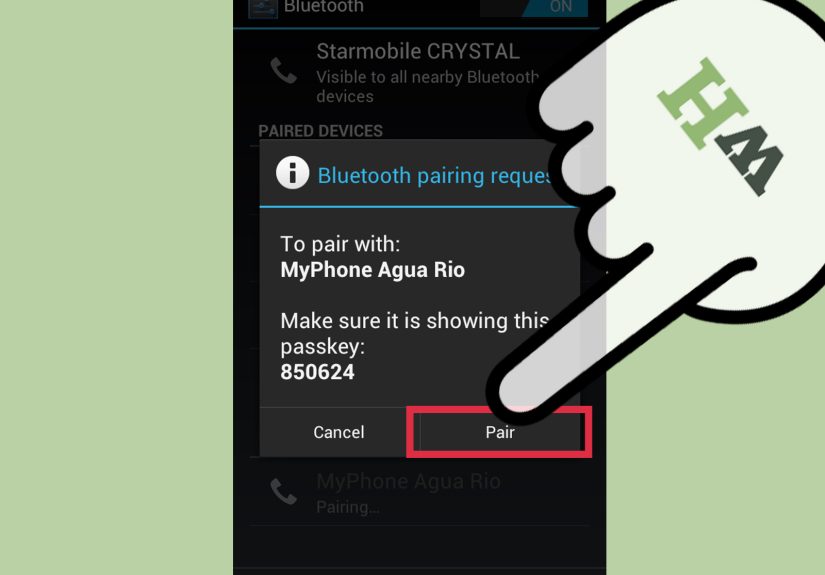
Step 5: Choose the Right Transfer Method for Your Phone Pair
This is the make-or-break step. Different phone combinations need different tools.
iPhone to iPhone
Use Quick Start. Place the new iPhone near the old one, keep Wi-Fi and Bluetooth on, and follow the prompts. This is usually the most seamless option for transferring apps, settings, messages, photos, and other device data.
Android to Android
Use the built-in Android setup flow, your Google backup, or manufacturer tools such as Samsung Smart Switch for Galaxy phones. Pixel devices also support transfer during setup, with cable and wireless options depending on the situation.
Android to iPhone
Use Move to iOS. This is the official method for moving selected content from Android to a new iPhone. It is especially useful during initial iPhone setup.
iPhone to Android
Use the new Android phone’s transfer setup, which may include cable-based transfer or an app-based method such as Switch to Android or a manufacturer-specific tool. Pixel phones, for example, support guided transfer from iPhone.
Carrier and computer-assisted options
Some carriers, including Verizon and AT&T, also offer transfer or cloud tools. Microsoft Phone Link can help keep some content and communication features accessible between a phone and a Windows PC, though it is not a full phone-to-phone migration tool. These options can be handy when built-in tools are incomplete or when you want an extra sync layer for photos, messages, or notifications.
The key idea is simple: use the native setup tool first, then use cloud sync to fill in the gaps.
Step 6: Turn On Ongoing Sync for Contacts, Calendars, Photos, and Notes
After the transfer finishes, do not stop at “close enough.” If you want your phones to stay matched, enable syncing for the categories that change often.
Check these areas:
- Contacts: make sure they are stored in iCloud, Google Contacts, Outlook, or another cloud account instead of only on the device or SIM.
- Calendars: verify that your calendar app is connected to the right account.
- Photos: turn on iCloud Photos or Google Photos backup if you want photos available on more than one device.
- Notes and reminders: confirm the storage account inside each app.
- Email: add the same email accounts to both phones if you use more than one device.
This is the difference between a one-time move and a living sync setup. Without it, the phones may look identical today and completely different next Tuesday.
Step 7: Check What Did Not Transfer Cleanly
No sync method is perfect. Some content may move beautifully, while some items behave like cats being asked to take a bath.
Common trouble spots include:
- App-specific logins and settings
- Paid apps that do not have cross-platform versions
- Certain text message histories between different operating systems
- Downloads, PDFs, and oddball files saved in random folders
- Music purchased through older services
- Authenticator apps and passkeys that may need manual setup
Open your most important apps and confirm they work. Check your contacts count. Browse recent photos. Send yourself a test text. Open the calendar. Look at notes. This five-minute audit can save hours later.
Step 8: Finish the Job Safely
Once everything important is on the new phone and ongoing sync is working, take care of the final cleanup.
- Keep the old phone untouched for a day or two if possible.
- Make one more backup of the new phone after setup.
- Sign out of services on the old phone only after confirming the new one is complete.
- Disable activation locks or account ties properly if you plan to sell, recycle, or give away the old device.
- Factory reset the old phone only after you are completely sure your data made it over.
This is the least glamorous step, but it protects your privacy and keeps your account from staying glued to a device that is about to live in a drawer, a resale box, or your cousin’s backpack.
What Usually Syncs Well and What Usually Does Not
Usually syncs well
- Contacts
- Calendars
- Photos and videos
- Email accounts
- Notes stored in cloud services
- Many apps and app lists
May need extra work
- Messages across iPhone and Android
- App logins and app-specific preferences
- Offline music and downloads
- Two-factor authentication apps
- Files stored only on internal device storage
In other words, cloud-friendly content tends to behave. Device-only content tends to get dramatic.
Common Mistakes to Avoid When Syncing Cell Phones
- Not backing up first: the oldest mistake in the book, still somehow very popular.
- Using the wrong account: syncing to the wrong Google or Apple account creates chaos fast.
- Wiping the old phone too early: never erase first and hope later.
- Relying on a SIM card for everything: SIM contacts are limited and old-fashioned for full phone syncing.
- Ignoring storage limits: photo sync can stall if your cloud storage is full.
- Assuming every app transfers equally: some do, some do not, and some act offended that you even asked.
Real-World Experiences: What Syncing Cell Phones Feels Like in Practice
The funny thing about syncing cell phones is that the official steps make it sound calm, tidy, and almost spa-like. Real life has a little more personality. For example, an iPhone-to-iPhone transfer is often the smoothest experience. You set the phones next to each other, follow Quick Start, and spend a while watching progress bars crawl across the screen like they are training for a marathon. It usually works well, but it still helps to be patient. Photos may keep downloading in the background for hours, and some apps will quietly ask for logins later.
Android-to-Android syncing can feel a bit more varied, mostly because different brands love doing things their own way. A Samsung phone using Smart Switch can transfer a lot of data beautifully, while another Android device may lean more heavily on Google backup during setup. The result is still good, but the path may look slightly different depending on the brand. That is why people sometimes say, “I followed the steps exactly,” and both statements are true even though their screens looked nothing alike.
The most memorable experiences usually happen during cross-platform moves. Going from Android to iPhone or iPhone to Android is perfectly doable, but it is rarely the time to be in a hurry. You may find that contacts and photos move over nicely, while text threads, app layouts, and certain settings require more manual cleanup. It is not failure; it is just the price of switching digital neighborhoods.
Another common experience is the “everything transferred, but not exactly how I expected” moment. Maybe your contacts are there, but half are saved under Google and half under the phone itself. Maybe your photos synced, but your favorite messaging app still wants verification. Maybe your notes made it, but the reminders did not. This is why post-transfer checking matters so much. The goal is not just to move data. The goal is to make daily life normal again.
People who have the easiest time syncing phones usually do two things well: they back up first, and they keep important data tied to cloud accounts instead of the device alone. That means less panic, fewer missing contacts, and a much lower chance of digging through the old phone three weeks later because one password app did not come along for the ride. It may not sound glamorous, but good syncing is mostly about setting yourself up so your future self does not have to become a detective.
Final Thoughts
If you want to know how to sync cell phones without losing your mind, the answer is surprisingly simple: back up first, use the right transfer method for your phone pair, turn on cloud sync for the data that matters, and double-check everything before retiring the old device. That is the whole game.
Whether you are upgrading, switching brands, or trying to keep two phones aligned, the best sync setup is the one that makes your information available where you need it and boringly reliable. In tech, boring is beautiful. It means your contacts show up, your photos are there, your calendar behaves, and nobody has to spend Saturday re-entering phone numbers by hand like it is 2004.


