Table of Contents >> Show >> Hide
- When Should You Winterize an Above-Ground Pool?
- Supplies You Need to Winterize an Above-Ground Pool
- Step 1: Remove Toys, Ladders, and Accessories
- Step 2: Deep Clean the Pool Before Closing
- Step 3: Test and Balance the Water
- Step 4: Shock the Pool
- Step 5: Lower the Water Level
- Step 6: Disconnect Hoses and Protect Openings
- Step 7: Winterize the Pump and Filter
- Step 8: Add an Air Pillow in Freezing Climates
- Step 9: Install and Secure the Winter Cover
- Common Above-Ground Pool Winterizing Mistakes
- How to Winterize a Soft-Sided Above-Ground Pool
- Spring Will Be Easier If You Close Correctly
- Conclusion: Give Your Pool a Proper Winter Nap
- Real-World Experience: What Pool Owners Learn After a Few Winters
- SEO Tags
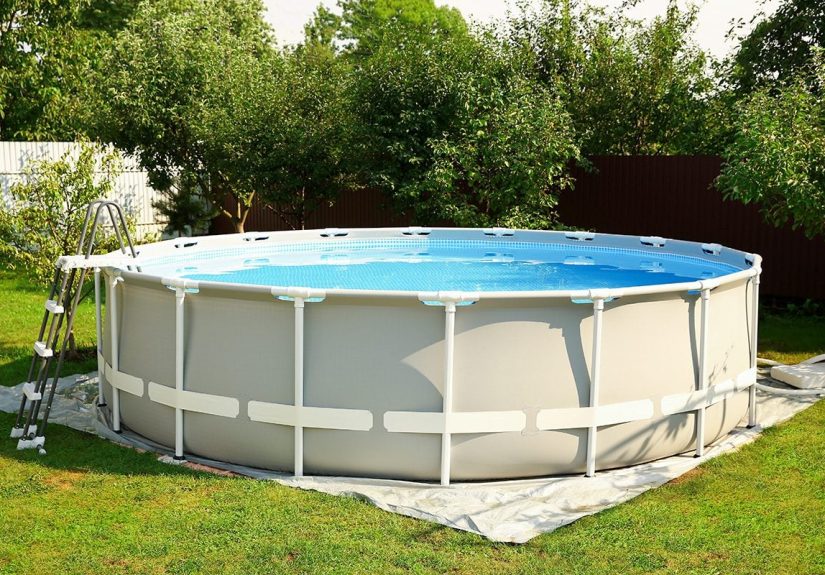
Winter has a special talent for showing up right when your pool still has one lonely leaf floating in it and a pool noodle hiding behind the ladder. If you own an above-ground pool, closing it correctly before freezing weather is one of the smartest things you can do for your liner, pump, filter, hoses, and springtime sanity. A little work in the fall can save you from cracked fittings, algae soup, stained vinyl, and that deeply unpleasant moment when you realize your filter did not survive January.
The good news? Learning how to winterize an above-ground pool is not complicated. It is mostly a matter of cleaning, balancing the water, protecting the plumbing, storing removable parts, and securing a winter cover so the pool can nap peacefully until swim season returns. Think of it as tucking your pool into bed, except the blanket has a cable-and-winch system and the bedtime snack is pool shock.
This guide walks you through the full above-ground pool closing process, including what supplies you need, when to start, how low to drain the water, how to winterize the pump and filter, and which mistakes to avoid. Whether you have a steel-frame pool, resin pool, hybrid above-ground pool, or a seasonal soft-sided pool, the goal is the same: protect your investment and make spring opening easier.
When Should You Winterize an Above-Ground Pool?
The best time to winterize an above-ground pool is when the swimming season is clearly over and the water temperature is consistently below about 65 degrees Fahrenheit. In many colder regions of the United States, that usually happens sometime between late September and late October. The exact timing depends on your climate, local freeze dates, shade, pool size, and whether fall weather is being polite or acting like it forgot the script.
Do not close too early if the water is still warm. Warm water under a winter cover can encourage algae growth, especially if leaves and organic debris are left behind. On the other hand, do not wait until the first hard freeze. Freezing water expands, and expansion is not kind to skimmers, return fittings, hoses, pumps, filters, valves, or chlorinators.
A practical rule is this: winterize after regular swimming ends, after the water cools, and before freezing weather becomes likely. If nighttime temperatures are dipping toward freezing, move the pool closing project to the top of your weekend list. Your future self, sipping coffee next spring while opening a clean pool, will be grateful.
Supplies You Need to Winterize an Above-Ground Pool
Before you begin, gather your winterizing supplies so you are not running to the pool store halfway through the job with wet shoes and a suspiciously green skimmer basket. You may not need every item, but most above-ground pool owners should have the basics ready.
- Pool water test kit or fresh test strips
- Pool brush, skimmer net, and pool vacuum
- Pool shock, preferably suited to your sanitizer system
- Winter algaecide or pool closing chemical kit
- pH, alkalinity, and calcium hardness adjusters if needed
- Winter skimmer plate or skimmer plug
- Return jet plug or threaded winter plug
- Pool air pillow for freezing climates
- Above-ground winter pool cover
- Cover cable, winch, clips, or cover seal
- Submersible pump or siphon hose if you need to lower water
- A labeled container or bag for drain plugs and small parts
One important note: always check your pool manufacturer’s manual before adding chemicals, lowering water, or plugging fittings. Above-ground pools can look similar from the patio, but liners, skimmers, frames, and equipment setups vary. The manual is not exactly beach reading, but it is cheaper than replacing parts.
Step 1: Remove Toys, Ladders, and Accessories
Start by clearing the pool area. Remove ladders, steps, solar covers, floating chlorinators, thermometers, pool toys, volleyball nets, automatic cleaners, and anything else that does not need to spend the winter outside. Metal ladders and rails can rust, plastic parts can crack, and forgotten pool toys can stain the liner or trap debris.
Rinse everything with clean water, let it dry completely, and store it in a garage, shed, basement, or another dry location. If you have removable ladder treads or hardware, keep them together in a labeled bag. Spring opening is much nicer when you are not asking, “Where did that one weird screw go?”
Step 2: Deep Clean the Pool Before Closing
A clean pool closes better and opens better. Skim leaves, bugs, twigs, and floating debris from the surface. Brush the pool walls, floor, coves, seams, and behind the ladder area where algae likes to lurk like it pays rent. Then vacuum the pool slowly and thoroughly.
This step matters because organic debris breaks down under the cover. Leaves can stain vinyl liners, encourage algae, and create murky water. If you close a dirty pool, winter will not magically clean it for you. Winter is powerful, but it is not a maid service.
If your pool is already cloudy or green, do not cover it and hope for the best. Clear the water first. Balance the chemistry, shock appropriately, run the filter, brush again, and vacuum. Closing clear water gives you a much better shot at opening clear water in spring.
Step 3: Test and Balance the Water
Balanced water helps protect the liner, metal components, and pool surfaces during the months when circulation is off or reduced. Use a reliable test kit or new test strips. Old test strips that sat in a hot shed all summer may be less trustworthy than a weather forecast from your uncle.
For most above-ground pools, aim for the following general ranges before winterizing:
- pH: about 7.2 to 7.8
- Total alkalinity: about 80 to 120 ppm, or the range recommended by your chemical system
- Calcium hardness: follow your pool and chemical manufacturer’s guidance, especially for vinyl liners
- Free chlorine: generally in the normal operating range before shocking
Adjust one chemical at a time and allow the water to circulate between adjustments. Do not toss every chemical into the pool at once like you are seasoning soup. Pool chemistry works best with patience, measurement, and label directions.
Step 4: Shock the Pool
After the pool is clean and balanced, add pool shock according to the product label. Shocking oxidizes contaminants and helps reduce the chance of algae and bacteria hanging around under the winter cover. Many pool owners shock the pool the night before closing and let the pump circulate the water for several hours or overnight.
Use the correct shock for your pool type and sanitizer system. If you have a vinyl liner, dissolve granular products in a clean bucket of water first when the label recommends it, then pour carefully around the pool perimeter. Never mix different chemicals together, and never add water to chemicals; add chemicals to water when pre-dissolving is instructed.
After shocking, brush the pool again to help distribute the treatment and prevent undissolved granules from sitting on the liner. Once the chlorine level returns to the appropriate range for your winterizing chemicals, add winter algaecide or the products in your pool closing kit according to instructions.
Step 5: Lower the Water Level
For many above-ground pools in freezing climates, the water level should be lowered below the skimmer and return opening, commonly around 4 to 6 inches below the skimmer. This helps prevent water from entering and freezing in the skimmer body or return fitting. You can lower the water using a submersible pump, siphon hose, or your filter’s waste setting if your system has one.
However, do not drain the pool completely unless your manufacturer specifically says to do so. Above-ground pool walls and liners are designed to hold water. Removing too much water can cause the liner to shrink, shift, wrinkle, or become damaged. The weight of the water also helps support the pool structure during winter weather.
If you use a winter skimmer cover plate, sometimes called an Aquador-style cover, you may not need to lower the water as much. These plates seal off the skimmer opening so water stays out. Follow the product instructions exactly. A good skimmer plate can save water and reduce stress on the cover, but only if it is installed correctly.
Step 6: Disconnect Hoses and Protect Openings
Once the water is lowered, disconnect the hoses from the skimmer, return fitting, pump, and filter. Let the hoses drain completely. Water trapped in a hose can freeze, expand, and split the hose. Store hoses indoors or in a dry shed if possible. Avoid folding them sharply, because cold plastic can crack.
Install a return plug in the return fitting and a winter skimmer plug or skimmer cover according to your setup. Remove the skimmer basket and weir door if recommended by your manufacturer. If the skimmer must remain open to drain rainwater, make sure it cannot hold standing water that could freeze.
Above-ground pool plumbing is usually simpler than in-ground plumbing because the pump and filter are not buried underground. That is a gift. Accept it graciously. Disconnecting and draining hoses is often enough for many above-ground systems, but any hard-plumbed lines should be blown out or winterized using the method recommended for your equipment.
Step 7: Winterize the Pump and Filter
Turn off power to the pump before working on the equipment. Unplug the pump if it is connected by cord, and make sure timers or automation systems cannot start it accidentally. Then remove drain plugs from the pump housing, filter tank, chlorinator, heater, and any other equipment that holds water.
For a sand filter, backwash until the water runs clear, rinse briefly if your valve has that setting, then open the drain plug at the bottom of the tank. Many multiport valves have a “winter” or “winterize” setting that lifts the internal gasket and helps protect the valve. Leave the drain plug off during storage, but put it in a labeled bag or store it in the pump basket so it does not vanish into the mysterious black hole where pool parts go.
For a cartridge filter, remove the cartridge, rinse it thoroughly, inspect it for tears or damage, and let it dry before storing it indoors. For a diatomaceous earth filter, follow the manufacturer’s cleaning and winterizing steps. If your pump is small enough to move, storing it in a dry indoor space is ideal. Freezing weather is hard on seals, housings, lids, pressure gauges, and plastic fittings.
Step 8: Add an Air Pillow in Freezing Climates
An air pillow sits under the winter cover in the center of the pool. Its purpose is not to hold the cover up like a circus tent. Instead, it helps absorb pressure from expanding ice and encourages water and debris to move toward the pool edges, where it is easier to remove.
Inflate the pillow only about 50 to 70 percent. Overinflated pillows can pop as temperatures change. Tie the pillow loosely so it stays near the center. If it drifts a little, do not panic. The pillow is there to reduce ice pressure, not win a geometry contest.
In mild climates where the pool does not freeze, an air pillow may not be necessary. In areas with hard freezes, it is a small investment that can help protect the pool wall, liner, and skimmer area from ice expansion.
Step 9: Install and Secure the Winter Cover
Use a winter cover designed for above-ground pools and sized correctly for your pool shape and dimensions. Pull the cover evenly over the pool, leaving enough overlap around the edges. Secure it with the cable and winch system, cover clips, wall bags, or a cover seal. If your pool is in a windy area, extra clips or a cover seal can make a big difference.
Do not use bricks, rocks, cinder blocks, or sharp objects to hold the cover down. If one falls into the pool, it can tear the liner. If wind catches the cover, hard weights can become dangerous. Use proper pool cover accessories instead.
During winter, remove standing water from solid covers when it becomes excessive. A little water can help weigh the cover down, but too much can stretch the cover and pull on the pool walls. Use a cover pump or siphon. Also remove heavy leaf piles before they become wet, frozen, and heavier than your motivation in February.
Common Above-Ground Pool Winterizing Mistakes
Closing the Pool While It Is Dirty
If leaves, algae, and dirt are left in the pool, they will break down under the cover. That can lead to stains, odors, and cloudy water. Clean first, then close.
Draining Too Much Water
An above-ground pool usually should not be emptied for winter unless it is a seasonal pool designed for takedown and storage. Too little water can damage the liner and reduce wall support.
Forgetting Drain Plugs
Pump and filter drain plugs are small but important. Remove them so water can escape. Store them somewhere obvious, such as inside the pump basket, so spring opening does not become a treasure hunt.
Using the Wrong Antifreeze
If pool antifreeze is needed for certain lines, use only non-toxic pool antifreeze made for swimming pool systems. Never use automotive antifreeze. It is unsafe and not designed for pool equipment.
Ignoring the Cover All Winter
Winterizing is not a “set it and forget it until Memorial Day” project. Check the cover after storms, heavy winds, ice, and snowfall. A five-minute inspection can prevent a big mess.
How to Winterize a Soft-Sided Above-Ground Pool
Some soft-sided pools, including many smaller frame pools, are designed to be drained, dried, disassembled, and stored for winter. If your pool manual recommends storage, follow that route instead of leaving it outside. Drain the pool completely, clean the liner gently, let every piece dry, and fold the liner loosely. Store it in a dry place away from rodents, sharp tools, and extreme cold.
For larger soft-sided pools that can remain up, follow the manufacturer’s winterizing instructions carefully. These pools may need more support, special plugs, or different water-level guidance than traditional steel-wall above-ground pools. When in doubt, the manual wins.
Spring Will Be Easier If You Close Correctly
The entire point of winterizing an above-ground pool is not just surviving winter. It is making spring easier. When the pool is clean, balanced, covered securely, and protected from freeze damage, reopening is usually faster and less expensive. You may still need to remove debris, top off the water, reconnect equipment, test chemistry, and shock the pool, but you are not starting from disaster mode.
A properly closed pool also extends the life of your liner, pump, filter, hoses, cover, skimmer, and accessories. Pool ownership is already full of enough little chores. Winterizing helps prevent those chores from becoming invoices.
Conclusion: Give Your Pool a Proper Winter Nap
Winterizing an above-ground pool is one of those projects that rewards careful work. Clean the pool thoroughly, balance the water, shock it, add winter chemicals, lower the water to the proper level, disconnect and drain hoses, winterize the pump and filter, protect the skimmer and return, add an air pillow if needed, and secure the cover. None of these steps are especially glamorous, but together they protect your pool from freezing temperatures, algae growth, liner stains, and equipment damage.
The best pool closing strategy is simple: do not rush, do not guess on chemicals, and do not leave water trapped in equipment. Follow product labels and manufacturer instructions. Take photos of your equipment setup before disconnecting anything if you are new to the process. Label small parts. Store accessories dry. Check the cover during winter. These small habits can make the difference between a smooth spring opening and a backyard comedy-drama starring you, a cracked hose, and several words not suitable for a family pool day.
Real-World Experience: What Pool Owners Learn After a Few Winters
After helping with and hearing from plenty of above-ground pool owners, one lesson comes up again and again: winterizing is not hard, but skipping details is expensive. The most common regret is closing the pool when it is “mostly clean.” Mostly clean in October often becomes tea-colored water in April. Leaves are sneaky. They sink, stain, and make the water smell like a swamp got invited to brunch. Taking one extra hour to brush, skim, and vacuum before closing can save several days of cleanup in spring.
Another practical experience is that the cover needs more attention than people expect. A winter cover is strong, but it is not magic. Wind can loosen the cable. Heavy rain can pool in the center. Wet leaves can gather in one corner and tug the cover sideways. Owners in windy neighborhoods often learn to use cover clips, a cover seal, or wall bags after one dramatic storm turns the cover into a backyard parachute. Checking the cover after bad weather is a small habit that prevents big headaches.
Many first-time pool owners also underestimate the importance of storing equipment indoors. A pump left outside with just a little water inside can freeze and crack. A pressure gauge can break. A cartridge filter stored wet can develop mildew. Hoses left in the sun and cold can become brittle. The better habit is to drain everything, dry what you can, and store removable parts in a garage, basement, or shed. Labeling the plugs, clamps, eyeball fittings, baskets, and small hardware is not overly fussy; it is future-you insurance.
Pool chemistry is another area where experience helps. Some owners think winter chemicals can fix unbalanced water. They cannot. If the pH is too high, scale and cloudy water may show up. If it is too low, corrosion and liner issues become more likely. If chlorine is mishandled, the liner can fade or stain. Testing and balancing before adding shock and winter products gives those products a better chance to work. It also makes spring opening less dramatic, which is always welcome.
Finally, seasoned pool owners learn that every pool has its own personality. A shaded pool under maple trees needs more leaf management. A pool in an open yard may need more cover security because of wind. A pool in Minnesota has different winter concerns than one in North Carolina. A soft-sided pool may need to be taken down, while a steel-wall above-ground pool usually remains standing with water inside. The best approach is to combine general winterizing principles with your local climate and your manufacturer’s instructions.
In short, good winterizing is a mix of science, routine, and a little backyard common sense. Clean water, balanced chemistry, dry equipment, protected openings, and a secure cover will take you far. And when spring arrives, you will be glad you did the careful work before the first freeze instead of trying to solve winter’s problems with a garden hose, a credit card, and regret.
Note: This article is for general educational pool-care guidance. Always follow your pool manufacturer’s instructions, chemical labels, and local freeze-weather recommendations for your specific above-ground pool system.


