Table of Contents >> Show >> Hide
- Why Rim Joist Insulation Matters So Much
- The Best Materials for Insulating Basement Rim Joists
- Planning Your DIY Rim Joist Insulation Project
- Tools and Materials Checklist
- Step-by-Step: How to Insulate Basement Rim Joists
- Common Mistakes to Avoid
- Maintenance and When to Call a Pro
- Real-World DIY Experiences and Pro Tips (Extended)
- Conclusion
If your floors feel chilly in January, your furnace runs like it’s training for a marathon, and spiders seem suspiciously fond of the basement, your rim joists are probably to blame.
The rim joist (also called a band joist) is that horizontal framing member running around the top of your foundation. It’s basically a big, drafty belt around your house and if it’s not insulated and air-sealed, it’s leaking money, comfort, and warm air.
The good news? Insulating basement rim joists is one of the highest-value DIY energy upgrades you can tackle in a weekend. With a utility knife, some rigid foam, and a can (or six) of spray foam, you can dramatically cut air leaks, reduce condensation and mold risk, and make the rooms above the basement feel noticeably warmer.
Why Rim Joist Insulation Matters So Much
What Is a Rim Joist, Exactly?
In typical wood-framed homes, floor joists sit on top of the foundation wall. The rim joist runs perpendicular to those floor joists and closes off the ends, forming a band around the perimeter of the house. Because it’s part of the above-grade structure and sits right at the edge of indoor and outdoor air, it’s exposed to big temperature swings and constant air pressure differences.
Unfortunately, builders used to treat this area as an afterthought. Many homes have nothing more than a thin piece of wood and maybe a loose fiberglass batt shoved in the cavity. That’s not air-tight, and it’s definitely not moisture-smart.
Energy, Comfort, and Moisture: The Rim Joist Trifecta
Air leaks at the rim joist are a huge contributor to stack effect the natural movement of air where warm air rises and escapes at the top of the house, pulling cold air in down low. Your rim joists are one of the main “cold-air in” gates. Air sealing and insulating this band can:
- Reduce heating and cooling costs by cutting uncontrolled air infiltration.
- Eliminate drafty floors and cold spots near exterior walls.
- Lower the risk of condensation, mold, and wood rot on cold rim joist surfaces.
- Make the basement feel less like a cave and more like usable space.
Building science research has found that many moisture problems in basements start right at the rim joists when warm, humid air contacts cold wood or sheathing. Proper air sealing plus insulation keeps that surface warmer and keeps humid indoor air from sneaking into the cavity and condensing.
The Best Materials for Insulating Basement Rim Joists
Let’s address the fuzzy pink elephant in the room: fiberglass. For rim joists, fiberglass alone is not your friend.
Rigid Foam Board (Cut-and-Cobble Method)
The most common DIY approach is to use rigid foam board cut to fit each joist bay, then sealed around the edges with spray foam or caulk. Popular foam types include:
- XPS (extruded polystyrene): Often blue or pink, decent R-value (about R-5 per inch), moisture resistant.
- Polyiso (polyisocyanurate): Higher R-value per inch, usually foil-faced; good where you want maximum performance in minimal thickness.
- EPS (expanded polystyrene): White beadboard; lower R-value per inch but cost-effective and still moisture resistant when properly detailed.
Many energy programs target about R-10 at the rim joist, which often means using 2 inches of rigid foam in cold and mixed climates. Always check your local code requirements for minimum R-values.
Spray Foam Insulation
Spray foam is the overachiever of rim joist insulation. Closed-cell spray foam, in particular, both air-seals and insulates in one step and is excellent for condensation control. It adheres to wood and masonry, fills odd shapes, and forms a continuous air barrier.
You can:
- Hire a professional to apply closed-cell spray foam (best for large basements or complex conditions).
- Use DIY two-component kits for smaller projects if you’re comfortable with PPE and following directions to the letter.
Spray foam shines in cold climates where condensation risk is high, but it’s more expensive and less forgiving of mistakes than rigid foam board.
Why Fiberglass Alone Is a Bad Idea
Fiberglass and mineral wool are great insulators, but they do not stop air movement. If you stuff a fiberglass batt against a cold rim joist without an air barrier, warm interior air can move through the fibers, hit the cold surface, and condense. That’s a recipe for moldy insulation and potentially rotting framing.
If you want to use fiberglass, treat it as a secondary layer over foam. First air-seal and insulate with rigid or spray foam, then add a fiberglass batt in front of it to boost R-value if your climate and code call for more insulation.
Planning Your DIY Rim Joist Insulation Project
Before you start cutting foam like a human CNC machine, take a few minutes to plan:
- Check for existing moisture issues. If you see active water leaks, efflorescence, or heavy mold, fix those first. Insulation is not a band-aid for bulk water problems.
- Know your climate. In very cold climates, a higher R-value and better condensation control (often closed-cell spray foam or thicker rigid foam) are critical.
- Look for combustion appliances. If you have a naturally drafted furnace or water heater, major air sealing can change how those appliances draft. You may need a combustion safety check from a pro after air sealing.
- Check code. Some jurisdictions have rules about foam insulation in basements (fire protection, ignition barriers, and vapor control). You may need to cover exposed foam with drywall or a code-approved barrier.
Tools and Materials Checklist
Here’s a typical list for a cut-and-cobble rigid foam project:
- Rigid foam boards (XPS, EPS, or polyiso) – thickness to meet your R-value target.
- Measuring tape and permanent marker.
- Utility knife with plenty of new blades, or a fine-tooth handsaw/insulation saw.
- Construction adhesive rated for foam (optional, for stubborn surfaces).
- Canned spray foam (expanding polyurethane) or high-quality caulk.
- Foam gun and gun cleaner (if using pro-style gun foam).
- Safety glasses, gloves, and a dust mask or respirator.
- Work light or headlamp for those deep, mysterious corners.
- Step ladder or sturdy platform if the rim joist is above head height.
Step-by-Step: How to Insulate Basement Rim Joists
1. Prep the Area and Stay Safe
Clear any stored boxes, shelving, and spider webs (optional but recommended for your mental health) away from the foundation walls so you can access the rim joists. Lay down a drop cloth to catch foam crumbs and drips.
Put on safety glasses and gloves. If you’re using a lot of spray foam, crack a window, set up a fan for ventilation, and consider a respirator rated for organic vapors according to the foam manufacturer’s instructions.
2. Locate and Inspect the Rim Joist
Look up at the top of the basement wall. You’ll typically see:
- The top of the concrete or block wall.
- The sill plate (a horizontal 2x lumber piece on top of the concrete).
- The rim joist (the vertical board against the exterior sheathing).
- The ends of the floor joists coming into the rim joist cavity.
Inspect for:
- Visible gaps between sill plate and concrete.
- Daylight around rim joists (yes, people really find this).
- Signs of past moisture dark staining, mold, or soft wood.
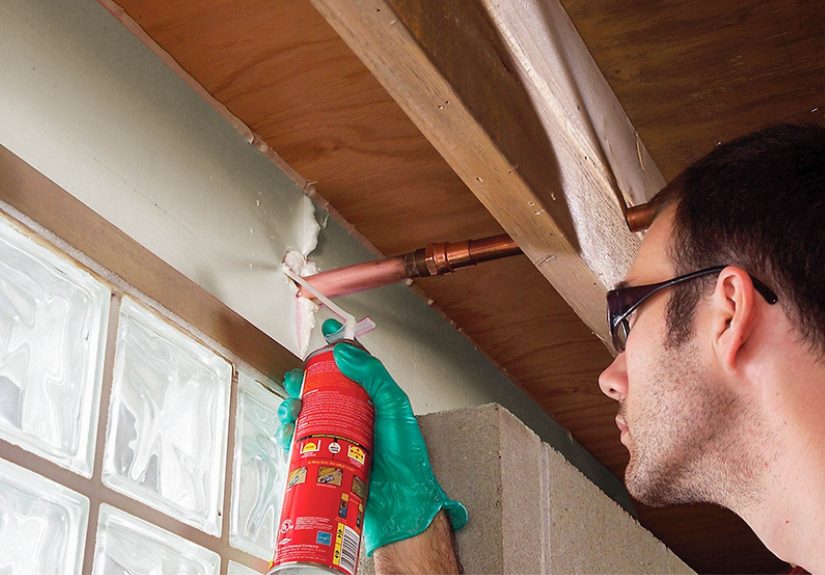
3. Air-Seal Gaps and Cracks First
Insulation works best when air movement is under control. Start by sealing:
- Gaps between the sill plate and foundation with caulk or spray foam.
- Cracks around pipes, wires, and vents penetrating the rim joist.
- Any visible hairline cracks where outside air leaks through.
Don’t go crazy with expanding foam you want enough to fill gaps, not swallow them whole. Use low-expanding foam around window frames or delicate areas.
4. Measure and Cut Rigid Foam Panels
Each joist bay is slightly different (because houses are charmingly imperfect), so measure each one individually. Measure width and height of the cavity at the rim joist.
Transfer those measurements to the foam board with a marker. Score deeply with a utility knife along a straightedge, snap the board, and trim the facing if necessary. Aim for a snug fit without needing a sledgehammer to install it.
5. Install the Foam and Seal the Edges
Gently push each foam piece into place against the rim joist. A slight friction fit is ideal. If the surface is rough or you want extra security, add a bead of construction adhesive rated for foam to the back before installing.
Once the foam is in, run a bead of spray foam or caulk around all four edges to create a continuous air seal – foam-to-wood, foam-to-joist, foam-to-sill. This edge seal is where a lot of the magic happens: you’re capping off air leaks while adding insulation.
6. Optional: Add Fiberglass or Mineral Wool Over Foam
In colder climates, or if your energy audit calls for more R-value, you can add a fiberglass or mineral wool batt in front of the rigid foam. The foam is your air and moisture control layer; the batt is just bonus insulation.
Cut pieces of batt to fit the cavity and gently friction-fit them in place. Do not compress the insulation that reduces its effectiveness. Make sure the batts don’t push the foam off the rim joist or create gaps.
7. Clean Up and Inspect Your Work
After the foam cures, trim any big drips or blobs with a utility knife so they don’t interfere with future finishes or fire barriers. Walk the perimeter and look for any missed bays or spots where you can still feel drafts with the back of your hand on a windy day.
If required by local code, plan to cover exposed foam with drywall or another approved ignition barrier, especially if the basement is or will become finished living space.
Common Mistakes to Avoid
- Skipping the air sealing. Just shoving foam or fiberglass into the cavity without sealing edges means air will still race around the insulation. You get a cold, expensive cushion.
- Using fiberglass alone against cold surfaces. That’s asking for condensation and mold. Always pair it with an air-impermeable layer like rigid or spray foam at the cold side.
- Leaving big gaps or loose fits. A 1/2-inch gap around a “sort of fits” foam panel is basically a built-in leak. Measure carefully and use spray foam generously around edges.
- Ignoring moisture problems. Don’t bury active leaks, bulk water, or obvious rot behind foam. Fix the source (grading, gutters, foundation cracks) before you insulate.
- Forgetting combustion safety. Big air-sealing projects can affect how naturally drafted appliances vent. If in doubt, have a pro perform a combustion safety test.
Maintenance and When to Call a Pro
Once your rim joists are insulated, they don’t need much attention. Still, it’s smart to:
- Do a quick visual inspection once a year for signs of moisture or pests.
- Check that foam panels are still snug and the sealant hasn’t pulled away.
- Re-caulk or re-foam if you see new gaps or cracks due to building movement.
Consider calling a professional if:
- Your basement shows significant water intrusion or existing mold issues.
- You have complex framing, steel beams, or hard-to-access cavities.
- You want whole-house air sealing, attic and rim joist work done as a package.
- You’re uncomfortable working around gas lines, wiring, or combustion appliances.
Real-World DIY Experiences and Pro Tips (Extended)
Talk to homeowners who have tackled their rim joists and you’ll hear the same story over and over: “I wish I had done this years ago.” The project doesn’t have the instant visual gratification of a kitchen makeover, but you feel the difference the next cold snap.
One common experience: people start with the side of the basement closest to a drafty living room. After insulating just that section, they notice the floor upstairs feels less like an ice rink. That quick win usually motivates them to work their way around the entire foundation over a few evenings.
Another lesson learned from countless DIYers: buy more spray foam than you think you need. Those little gaps add up, and you don’t want to stop mid-project and run to the store with foam-dusted hair. If you’re insulating a full-size basement, grabbing a foam gun and larger canisters can be cheaper and easier to control than dozens of disposable cans.
People also discover how quirky framing can be. Some joist bays are textbook rectangles; others have angled headers, pipes zig-zagging through, or low-hanging ductwork. The trick is to stay flexible: instead of one perfect piece of foam, use two smaller pieces, or notch around pipes and seal the edges carefully. The goal is air-tightness and coverage, not Instagram-level symmetry.
Many homeowners report that insulating the rim joists changes the “feel” of the basement. The space gets less damp, the earthy basement smell fades, and stored items feel less clammy. In some cases, dehumidifiers run less often because there’s less warm, humid air meeting cold surfaces and condensing.
From a comfort standpoint, the biggest improvement is often in rooms above cantilevered sections or overhangs. Those areas can be brutally cold in winter because the rim joists and floor cavities are exposed on multiple sides. Sealing and insulating these spots can turn a formerly drafty dining nook into a cozy breakfast corner.
Pros tend to emphasize one key idea: don’t think of rim joist insulation as a stand-alone upgrade. It’s part of a system. When combined with attic air sealing and insulation, proper bathroom and kitchen exhaust, and basic moisture control outside (gutters, downspouts, grading), you get a much tighter, more durable, and more comfortable home.
Finally, there’s the long-term satisfaction. You may not see the foam once the job is done, but you’ll be reminded of it each month when your utility bill shows up a little lower. And when your kids stop complaining about “the cold corner” in the living room, you’ll know your weekend with a utility knife and foam board was absolutely worth it.
Conclusion
Insulating basement rim joists isn’t glamorous, but it’s one of the smartest DIY projects you can take on. By combining careful air sealing with the right insulation usually rigid foam or spray foam you’ll reduce drafts, improve comfort, cut energy waste, and protect your home from hidden moisture damage.
Think of it as giving your house a warm, snug belt that keeps the good air in, the cold air out, and your heating system from working overtime. A few hours of crawling around the basement now can pay you back for years in comfort and savings.


