Table of Contents >> Show >> Hide
- Why This Layered Ice Cream Cake Works
- Tools You’ll Want (and What Works in a Pinch)
- Ingredients
- Step-by-Step: How to Make a Layered Ice Cream Cake
- Timing Game Plan (So You’re Not Guessing)
- Flavor & Layer Ideas That Always Get “Ooooh” Reactions
- Pro Tips for Clean Layers and Clean Slices
- Make-Ahead, Storage, and Serving
- FAQ
- of Extremely Practical (and Slightly Chaotic) Ice Cream Cake Wisdom
- Conclusion
If you’ve ever stood in front of the freezer aisle whispering, “I deserve a dessert with layers,” this is your sign.
This layered ice cream cake recipe is a no-bake, make-ahead showstopper built for birthdays, cookouts,
and random Tuesdays that need confetti sprinkles and emotional support chocolate.
We’re talking a crunchy cookie crust, two dreamy ice cream layers, a rich fudge middle, and a cloud of whipped topping
that makes the whole thing look like it graduated from Dessert University with honors. The best part? You don’t need
fancy pastry skillsjust a freezer and a little patience (the hardest ingredient, honestly).
Why This Layered Ice Cream Cake Works
The magic is all about contrast: creamy ice cream against a crisp crust, velvety fudge against a crunchy
cookie “surprise,” and a fluffy topping that keeps everything neat while you pretend you’re the kind of person who
plates desserts instead of eating over the sink.
- Make-ahead friendly: Assemble today, serve tomorrow, look like a genius forever.
- Customizable: Swap flavors, swap toppings, swap your worries for sprinkles.
- No oven required: Your kitchen stays cool, like your social life after you serve this cake.
Tools You’ll Want (and What Works in a Pinch)
- 9-inch springform pan (best for clean sides and easy release)
- Plastic wrap or parchment (for liningthis is your “insurance policy”)
- Offset spatula (or a butter knife that believes in itself)
- Large bowl (for cookie crumbs)
- Measuring cups/spoons (we’re being civilized today)
No springform pan? Use a deep cake pan or loaf pan lined generously with plastic wrap so you can lift the whole cake out.
The cake will still taste like victory.
Ingredients
For the Cookie Crust
- 24–28 chocolate sandwich cookies (Oreos or similar), crushed into fine crumbs
- 4 tablespoons unsalted butter, melted
- Pinch of salt (optional, but it makes chocolate taste louder)
For the Ice Cream Layers
- 1.5 quarts vanilla ice cream (or cookies & cream)
- 1.5 quarts chocolate ice cream (or your “second favorite” flavor)
Tip: Choose dense, premium-style ice cream for the cleanest slices. Super airy ice cream is delicious, but it
can freeze a bit icier and melt faster while you’re spreading layers.
For the Fudge + Crunch Layer
- 1 to 1 1/4 cups hot fudge sauce (store-bought is totally fine)
- 1 1/2 cups crushed cookies (a mix of crumbs + chunks is perfect)
- Optional: 1/2 cup chocolate wafer crumbs or crispy chocolate pearls for extra crunch
For the Topping
- 2 cups heavy cream, very cold
- 1/2 cup powdered sugar
- 1 teaspoon vanilla extract
- Pinch of salt
- Sprinkles, cookie pieces, mini chocolate chips, or crushed candy for decorating
Shortcut option: Use whipped topping (like Cool Whip) if you want maximum ease. Homemade whipped cream is fluffier and
tastes fresherchoose your adventure.
Step-by-Step: How to Make a Layered Ice Cream Cake
1) Prep the pan (aka: future-you says thank you)
Line a 9-inch springform pan with plastic wrap, leaving plenty of overhang. This helps you lift and release the cake
without turning it into a frozen landslide. If you’re using parchment on the bottom, greatjust keep it flat.
2) Make the cookie crust
Mix crushed cookies with melted butter (and a pinch of salt if you like). Press firmly into the bottom of the pan.
Use the bottom of a measuring cup to pack it down like you’re sealing a delicious envelope.
Freeze the crust for 10–15 minutes while you set up the next layer. It should feel firm to the touch.
3) Spread the first ice cream layer
Let the first flavor of ice cream sit at room temperature for 8–12 minutesjust enough to soften so it spreads
easily, not so much that it turns into soup. Scoop it onto the crust and smooth into an even layer.
Freeze for 30–45 minutes, or until the surface is firm. This “freeze between layers” step is the difference
between crisp stripes and chaotic swirls (unless chaotic swirls is your brandthen carry on).
4) Add the fudge + crunch layer
Warm the hot fudge just until it’s spreadable, then let it cool briefly so it’s not piping hot.
Spread a thin, even layer of fudge over the frozen ice cream. Sprinkle cookie chunks/crumbs on top and gently press them in.
Freeze again for 20–30 minutes so the center sets up and doesn’t slide around later.
5) Spread the second ice cream layer
Soften your second flavor just like before. Spread it evenly over the fudge/crunch layer, smoothing the top.
Freeze for at least 4 hours, but overnight is best for clean slicing and easy unmolding.
6) Whip the topping
In a cold bowl, whip heavy cream with powdered sugar, vanilla, and a pinch of salt until it holds medium-stiff peaks.
You want it fluffy and spreadable, not grainy. If you accidentally over-whip, you’re one step away from butterback away slowly.
7) Frost and decorate (fast, like a freezer-speed makeover)
Remove the cake from the springform pan. Spread whipped cream over the top and sides.
Add sprinkles, cookie pieces, chocolate chips, or a drizzle of fudge.
Freeze the finished cake for 1–2 hours before serving so the topping firms up and the cake slices neatly.
Timing Game Plan (So You’re Not Guessing)
| Step | Active Time | Freeze Time |
|---|---|---|
| Crust | 10 minutes | 10–15 minutes |
| Layer 1 ice cream | 10 minutes | 30–45 minutes |
| Fudge + crunch | 5 minutes | 20–30 minutes |
| Layer 2 ice cream | 10 minutes | 4 hours (overnight best) |
| Frost + decorate | 15–20 minutes | 1–2 hours |
Flavor & Layer Ideas That Always Get “Ooooh” Reactions
The easiest way to make this recipe feel brand-new is to change the flavor combo or swap the center layer.
Here are a few crowd favorites:
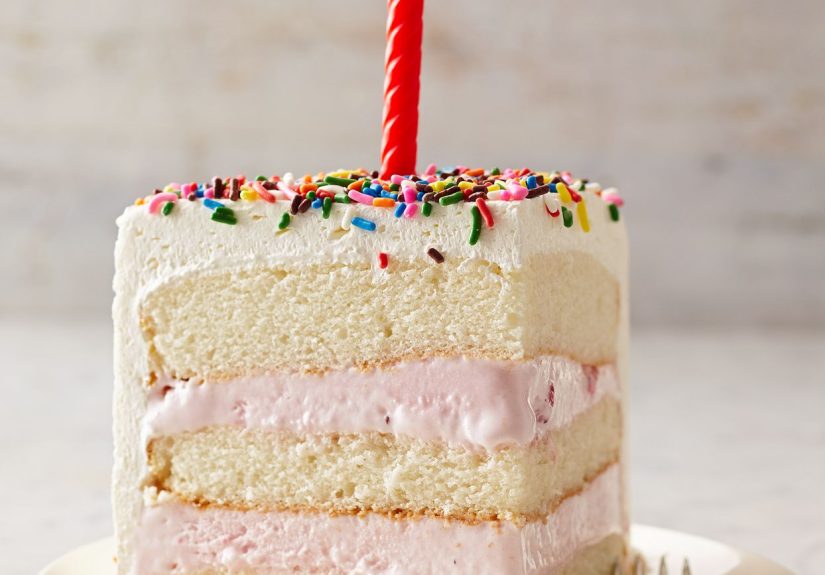
- Classic birthday: vanilla + chocolate, fudge center, rainbow sprinkles, cookie crust.
- Neapolitan vibes: strawberry + vanilla + chocolate (use two layers and a strawberry drizzle).
- Mint-chocolate-chip dream: mint + chocolate, fudge center, crushed thin mints or chocolate wafers.
- PB & chocolate: chocolate + peanut butter cup, fudge center, chopped peanut butter candies on top.
- Cookies & cream overload: cookies & cream + chocolate, extra cookie crunch layer, cookie crumble topping.
Pro Tips for Clean Layers and Clean Slices
Work in “cold bursts”
Ice cream is basically delicious dramaleave it out too long and it starts making scenes. Soften only what you need,
spread quickly, and get the pan back into the freezer.
Line the pan like you mean it
Plastic wrap overhang makes lifting and releasing the cake so much easier. It also saves you from chiseling frozen dessert
from the sides of the pan like you’re excavating an ancient artifact.
Warm knife, wipe knife, repeat
For picture-perfect slices: dip a long knife in hot water, wipe dry, slice, wipe again.
It’s the same principle as slicing cheesecakeexcept colder and with more sprinkles.
Let it sit briefly before serving
After the cake comes out of the freezer, give it 5–10 minutes on the counter (depending on your room temperature).
That tiny pause helps the flavors pop and makes slicing easier.
Make-Ahead, Storage, and Serving
- Make-ahead: This cake is happiest when made the day before. Overnight freezing gives the best structure.
- Storage: Wrap tightly in plastic wrap and then foil. Store in the freezer for up to 7 days for best texture.
- Serving: Serve on chilled plates if possible (warm plates + ice cream = tiny puddles).
If you’re transporting the cake, keep it in a cooler with ice packs. Think of it like a celebrity: it travels better with security.
FAQ
Can I use cake layers instead of a cookie crust?
Yes! Use thin cake layers (store-bought pound cake slices work too). Freeze the cake layers before assembling so they stay firm.
If you use homemade cake, keep layers thin so they don’t feel dry once frozen.
What’s the best pan size?
A 9-inch springform pan is the sweet spot: tall enough for layers, easy to release, and standard for most ice cream cake recipes.
If you use an 8-inch pan, you’ll get taller layers (and need a bit more patience while spreading).
My fudge layer crackeddid I ruin it?
Not at all. A cracked fudge layer is still fudge. Let the cake sit 5–10 minutes before slicing; everything softens slightly and becomes cooperative.
How do I keep the cookie crunch from going soggy?
Keep the crunch layer sandwiched between cold elements and freeze it after adding. Also, avoid overly wet fillings (like juicy fruit sauces) directly on cookies.
of Extremely Practical (and Slightly Chaotic) Ice Cream Cake Wisdom
Ice cream cake looks calm when it’s finishedsmooth sides, tidy layers, sprinkles sitting politely on top like they didn’t come from a plastic jar
you opened too aggressively. But behind every perfect slice is a tiny saga of temperature management. This section is your friendly heads-up so your cake
doesn’t audition for a slapstick comedy.
First, the “just one minute” trap. Ice cream waits for no one. You’ll think, “I’ll just answer this text,” and suddenly your ice cream is
the consistency of soft-serve. A good rule: if the ice cream is spreadable, spread it. If it’s dreamy and scoopable, keep it cold until you’re ready.
If it’s melting around the edges, congratulationsyou’re making an abstract dessert. It will still taste great, but your layers may look like they took
a scenic route.
Second, the crumb situation. Cookie crumbs are enthusiastic. They get everywhere: counter, floor, your shirt, somehow the dog (if you have one).
The easiest way to keep your sanity is to crush cookies in a zip-top bag, then open it like you’re defusing a glitter bomb. Also, don’t aim for dust-only crumbs.
A mix of fine crumbs and small chunks gives the crunch layer personalitylike a surprise party, but crunchy.
Third, the fudge temperature drama. Hot fudge is basically molten joy, but if it’s too warm, it will melt your ice cream layer and create
a fudge moat. The move is simple: warm it until spreadable, then let it cool a few minutes. You want “spreadable like peanut butter,” not “volcanic.”
If you’re unsure, test a tiny smear on a frozen spoon. If it instantly turns the spoon into a slip ’n slide, cool it a bit longer.
Fourth, the freezer space shuffle. Ice cream cakes are tall, proud, and oddly shaped. Make room before you start. Nothing ruins momentum
like building a beautiful cake only to discover your freezer is full of mysterious frozen bags labeled “soup??” from last year.
Slide a flat baking sheet onto a shelf first; it gives your pan a stable base and makes it easy to move in and out between layers.
Fifth, slicing is a ceremony. If you cut straight-from-the-freezer, you might need the strength of a lumberjack.
If you wait too long, slices will slump. The happy place is 5–10 minutes at room temp, then a hot-water knife routine.
This is also the moment to practice your “I totally meant for it to look like this” facejust in case.
Finally, remember that ice cream cake is a celebration dessert. It’s allowed to be playful. Add a candy layer. Swap flavors.
Top it with ridiculous amounts of sprinkles. The only true mistake is not freezing between layers and then acting surprised when
your “layered” cake becomes a delicious tie-dye situation. Which, to be fair, still sounds like a win.
Conclusion
A layered ice cream cake is the dessert equivalent of showing up to the party wearing sunglasses indoors: bold, fun, and guaranteed to get attention.
With a crunchy crust, two creamy layers, and a fudge-and-cookie center, you get a crowd-pleasing cake that’s easier than it looksand way more exciting
than “just ice cream.” Freeze it overnight, slice it like a pro, and accept compliments graciously.


