Table of Contents >> Show >> Hide
- Why a Pallet Wood Easel Is a Great Kids’ Project (Even If You’re Not a “Woodworking Person”)
- Start Here: How to Choose a Safe Pallet (Because Kids Touch Everything)
- Tools and Materials
- Design Plan: A Simple, Sturdy A-Frame Easel That Folds Flat
- Step-by-Step: Build Your Scrap Pallet Kids Easel
- Step 1: Break Down the Pallet (Without Turning It Into Toothpicks)
- Step 2: Prep the Wood for Kid Hands
- Step 3: Build Two Matching Side Frames
- Step 4: Attach the Two Frames with Hinges
- Step 5: Add a Chain or Strap (The “Please Don’t Faceplant” Feature)
- Step 6: Install Your Drawing Surfaces
- Step 7: Add a Paper Roll Holder (Because Kids Love Endless Paper)
- Step 8: Build a Supply Tray (The Mess Has to Live Somewhere)
- Make It Kid-Proof: Safety, Stability, and Smarter Finishes
- Customization Ideas (Choose Your Adventure)
- Budget and Time Reality Check
- Troubleshooting (Because DIY Projects Have Personalities)
- Real-Life Experience: What It’s Actually Like to Build (and Live With) a Pallet Easel for Kids
- Final Thoughts
You know what’s funny? The word pallet can mean “an artist’s palette”… and also “that free wooden thing behind the grocery store that turns into every Pinterest project ever.” Today we’re going full circle: using a wood pallet to build an art easel for kids. It’s budget-friendly, surprisingly sturdy, and it lets your child paint, draw, and create masterpieces that you will absolutely treasure forever (even the ones that look like a penguin sneezed on a rainbow).
This guide walks you through how to make a kid-sized A-frame easel from scrap pallet woodplus smart add-ons like a paper roll holder, a supply tray, and a double-sided surface (chalkboard on one side, whiteboard or clip surface on the other). We’ll also cover the big one: pallet safety, because “free wood” is only a bargain if it doesn’t come with mystery chemicals and questionable stains.
Why a Pallet Wood Easel Is a Great Kids’ Project (Even If You’re Not a “Woodworking Person”)
- Low cost, high joy: Pallets are often free, and most of the spend is screws, hinges, and paint.
- Built for real life: A-frame easels are stable, and you can design yours to fold flat for storage.
- Customizable: Tall kid? Short kid? Two kids fighting over one easel? You can adapt the size and features.
- Eco-friendly: Upcycling keeps usable wood out of the waste stream and gives it a second career as “art assistant.”
Start Here: How to Choose a Safe Pallet (Because Kids Touch Everything)
Not all pallets are created equal. Some are perfectly safe and heat-treated; others have been fumigated or exposed to who-knows-what on loading docks. Since this is a kids’ easel, be extra picky. Here’s how to choose pallet wood you can feel good about.
Look for the Treatment Stamp: “HT” Is Your Best Friend
Many pallets used in shipping carry an ISPM 15/IPPC mark that indicates the pallet was treated to prevent the spread of pests. You want pallets stamped HT (heat-treated). Avoid pallets stamped MB (methyl bromide fumigation). If there’s no stamp at all, treat it as “unknown history” and skip it for kid projects.
Do a “Gross Factor” Check
- Skip oily, sticky, or stained pallets (especially dark stains that look like they’ve seen things).
- Avoid strong odors (chemical smell = hard pass).
- Prefer pallets used for dry goods like paper products or boxed items, ideally from a source you trust.
Quick Pallet Wood Safety Rules for Indoor/Kid Builds
- Choose HT-stamped pallets whenever possible.
- Don’t use pallets that look contaminated or were used for unknown industrial materials.
- Wear a dust mask and eye protection when cutting/sanding (pallet wood dust is not a spa treatment).
- Plan to sand well and use a kid-friendly finish after assembly.
Tools and Materials
Your exact list depends on what you’re adding (paper roll, chalkboard, whiteboard, tray). Here’s a practical, “buildable in real life” setup.
Wood & Surfaces
- 1–2 heat-treated wood pallets (enough slats for legs, braces, tray)
- One board/panel for the art surface:
- Chalkboard panel OR plywood/MDF painted with chalkboard paint
- Whiteboard panel OR smooth plywood with a clip/cleat system for paper
- Optional: a 1/4″ plywood backing piece (helps stiffen the chalkboard side)
Hardware
- 2 small hinges (to connect the two frames at the top)
- 1 chain or strap (prevents the legs from sliding too far apart)
- Wood screws (1 1/4″ and 2″ are common “do most things” sizes)
- Wood glue
- Optional: dowel rod (paper roll bar), curtain rod, or a straight scrap stick
- Optional: 2–4 clips/clamps (to hold paper)
Tools
- Pry bar and hammer (or a pallet breaker tool)
- Drill/driver
- Saw (miter saw, circular saw, or jigsaw)
- Sander or sanding block + sandpaper (80/120/180 grit)
- Measuring tape + pencil
- Safety gear: gloves, eye protection, dust mask
Finishes & Kid-Friendly Supplies
- Chalkboard paint (if not using a pre-made chalkboard panel)
- Water-based clear coat or child-appropriate finish (let it cure fully)
- Non-toxic art supplies labeled for kids (look for kid-safety labeling on materials)
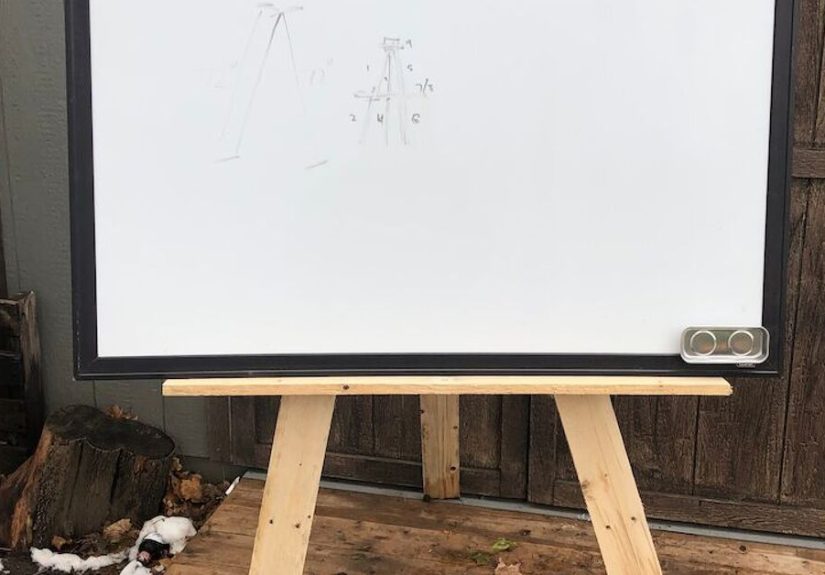
Design Plan: A Simple, Sturdy A-Frame Easel That Folds Flat
A reliable kid easel footprint is roughly 22–23 inches wide, about 20 inches deep when opened, and around 47 inches tall. That size works well for kids while staying stable. If your child is older/taller, bump the height up and widen the stance.
Suggested Dimensions (Easy to Adjust)
- Overall open size: ~22 1/2″ wide × ~20 1/2″ deep × ~47″ tall
- Board size: about 18″–20″ square/rectangular surface per side (or larger if you want a “serious studio” vibe)
- Paper roll bar: 24″ to 29″ wide depending on roll width and your frame design
Step-by-Step: Build Your Scrap Pallet Kids Easel
Step 1: Break Down the Pallet (Without Turning It Into Toothpicks)
- Remove nails safely: Use a pry bar and hammer, or cut nails between slats with a reciprocating saw if they’re stubborn.
- Pull staples: Pallets love hidden staples. Find and remove themyour saw blade will thank you.
- Sort boards: Pick the straightest pieces for legs and long rails. Use knotty/ugly boards for braces or the supply tray.
Step 2: Prep the Wood for Kid Hands
- Sand the faces: Start with 80 grit to flatten roughness, then 120, then 180 for a kid-friendly feel.
- Round edges: Slightly soften corners with sandpaper (or a router if you have one). This reduces splinters and “owie” moments.
- Check again for metal: Run your hand carefully along edges and look for nail tips.
Step 3: Build Two Matching Side Frames
Think of this as building two narrow ladder-like frames, then hinging them together at the top to form an A. You can do fancy pocket holes or keep it simple with screws and glue.
Basic cut list (adjust to your wood):
- (4) Legs: 42″–48″ long (depending on how tall you want the easel)
- (4) Cross rails: 20″–24″ long (top and mid rails for each frame)
- (2) Lower braces: 20″–24″ long (one per frame, near the bottom for stiffness)
- Lay two legs on a flat surface and attach a top rail and a mid rail (glue + screws). Repeat for the second frame.
- Add a lower brace on each frame to reduce wobble (this makes a bigger difference than people expect).
Step 4: Attach the Two Frames with Hinges
- Stand the frames upright and align them like a folded tent.
- Attach two hinges near the topone a few inches from each side.
- Test the fold: it should open smoothly and close relatively flat.
Step 5: Add a Chain or Strap (The “Please Don’t Faceplant” Feature)
A chain (or strong strap/rope) keeps the legs from spreading too far, which improves stability and protects curious kids from accidental collapses.
- Open the easel to the stance you like (wider = more stable).
- Attach chain ends to the inner sides of the frames at matching heights.
- Adjust length until the easel feels sturdy but not awkwardly wide.
Step 6: Install Your Drawing Surfaces
You have a few good optionschoose based on how your kid actually creates (paint? markers? chalk? all of the above?).
Option A: Chalkboard + Whiteboard (Classic “Two-Sided”)
- Chalkboard side: Attach a chalkboard panel, or paint a smooth panel with chalkboard paint and let it cure.
- Whiteboard side: Screw on a pre-made whiteboard panel or mount a smooth board and use clips for paper.
Option B: Chalkboard + Paper-Clamp Side (Lower Cost, Less Smudgy)
- One side is chalkboard.
- The other side uses cleats (thin wood strips) or large clips to hold paper for crayons, watercolor, or posters.
Step 7: Add a Paper Roll Holder (Because Kids Love Endless Paper)
If you’ve never watched a child discover a continuous paper roll, you’re in for a magical moment… followed by a paper-mummy incident. Worth it.
- Mount a dowel rod or straight stick across the top between frames (front-to-back or side-to-side depending on design).
- Slide a paper roll on the bar.
- Add a simple tear edge: a thin strip of wood below the bar can act like a guide for tearing cleanly.
Step 8: Build a Supply Tray (The Mess Has to Live Somewhere)
A tray keeps markers, chalk, brushes, and erasers off the floor (and out of the dog’s mouth).
- Cut a tray base from pallet slats (or a wider scrap board if you have it).
- Screw it across the front frame at a comfortable height for your child.
- Add a small lip along the front so supplies don’t launch themselves during enthusiastic art sessions.
Make It Kid-Proof: Safety, Stability, and Smarter Finishes
Stability Tips
- Wider stance = safer stance: Keep the A-frame spread wide enough that it doesn’t rock when a child leans in.
- Add non-slip feet: Felt pads or rubber feet help on hard floors.
- Keep heavy items low: Put storage trays lower rather than top-heavy.
- Watch pinch points: Hinges can pinch fingersconsider hinge covers or keep hinges slightly recessed.
Kid-Friendly Paint and Art Supply Labels
For kids’ art materials, look for products clearly labeled for children and avoid adult-only materials with cautionary labeling. If you want a quick “parent sanity check,” choose supplies that are explicitly marketed for kids and follow package directions for ventilation and age range.
Finishing the Wood (So It Survives Juice Boxes and Finger Paint)
- Water-based clear coats are popular for kid furniture because they’re durable and lower odor than many solvent-based products.
- Let finishes cure fully before letting kids use the easel. “Dry to the touch” is not the same as “fully cured.”
- If you paint, consider sealing the painted areas once fully dry for easier wipe-downs.
Customization Ideas (Choose Your Adventure)
Make It Adjustable
- Add multiple height positions for the tray using pre-drilled holes.
- Install a movable crossbar with bolts and wing nuts (older kids love the “engineering” part).
Add Storage Without Adding Chaos
- Screw small buckets or cups onto the tray (perfect for brushes).
- Add a fabric pouch on the side for crayons and erasers.
- Hang clipboards from hooks for rotating “gallery displays.”
Make It Easy to Clean
- Seal the wood well so paint doesn’t soak in.
- Use a removable tray liner (thin plastic sheet or washable mat).
- If using dry-erase, keep a soft cloth and safe cleaner nearby (and test on a corner first).
Budget and Time Reality Check
- Time: A focused afternoon if you keep it simple; a weekend if you add paper roll + tray + two surfaces.
- Cost: Often $15–$60 depending on surfaces and hardware. Pallet wood is typically the cheapest part.
Troubleshooting (Because DIY Projects Have Personalities)
“My easel wobbles.”
- Widen the stance (shorten the chain/strap).
- Add a lower brace or diagonal supports.
- Check for twisted legsswap in straighter boards if needed.
“Chalkboard looks streaky or won’t erase clean.”
- Apply thin coats and let them dry fully between coats.
- Condition the board by rubbing chalk over it and wiping off before first use (many chalk surfaces perform better after conditioning).
“Paper keeps ripping weird.”
- Add a straight tear strip (thin wood) under the roll to guide tearing.
- Use clips on the sides to keep paper from shifting while kids tug.
Real-Life Experience: What It’s Actually Like to Build (and Live With) a Pallet Easel for Kids
The first time I built a pallet-wood easel, I had a very pure, optimistic vision: kids would calmly create art, put supplies neatly in the tray, and the easel would sit in the corner like a tasteful Montessori catalog photo. That vision lasted about twelve minutes.
Here’s what really happenedand why it turned out to be even better than the fantasy version.
Lesson #1: Pallet wood is “free,” but it charges you in sanding. I thought I could do a quick pass with sandpaper and call it done. Nope. Pallet boards are rough, often splintery, and sometimes stamped with ink. Once kids start using an easel daily, you notice every sharp edge and scratchy surface. The fix was simple: I leaned into a real sanding routine80 grit for the rough stuff, 120 to smooth it, and 180 on edges where little hands grab. I also rounded every corner like I was preparing it for an Olympic toddler obstacle course. After that, the easel felt genuinely kid-friendly.
Lesson #2: Stability matters more than “cute.” My early design was narrow because I wanted it to fold super flat. It did fold flat… right up until a child leaned in with the force of a small rhinoceros. I widened the A-frame stance by adjusting the chain length, then added a low brace near the bottom. That changed everything. Suddenly the easel stopped wobbling, and the kids stopped “testing physics.”
Lesson #3: The tray is the MVP. You can skip the paper roll and still have a great easel. But skipping the tray? That’s how you end up with marker caps in couch cushions and chalk dust migrating into places chalk dust should not migrate. Once the tray was installed, clean-up became a reasonable request instead of a comedy routine. I added a small lip on the front edge andthis is key screwed two little cups to one side for brushes. Suddenly the easel had “homes” for tools, which made kids more likely to put them away (not always, but more often).
Lesson #4: Kids don’t use surfaces the way adults imagine. I assumed the chalkboard would be the star. What they loved most? The paper roll. There’s something about “endless paper” that feels like unlimited creative permission. The paper roll also made painting less stressful because we could tear off messy sections without sacrificing a whole pad of nice paper. The only downside is that kids can unspool paper with impressive speedso I added side clips to hold the paper in place while they worked and a simple tear edge to keep ripping tidy.
Lesson #5: The best part isn’t the easelit’s what happens around it. The easel became a daily routine anchor: a place to doodle while breakfast cooked, a spot to practice letters, a stage for “art shows” where every drawing got a dramatic introduction. We even used one side as a “family message board” with prompts like “Draw your dream pet” or “Write one kind thing.” The project wasn’t just a DIY build; it became a little creativity station that made our home feel more playful.
If I had to summarize the experience in one sentence, it would be: build it sturdy, sand it like you mean it, add the tray, and then enjoy the beautiful chaos. Because a pallet easel isn’t just a piece of woodit’s a surprisingly effective machine for turning free time into imagination.
Final Thoughts
A DIY pallet wood easel is one of those projects that delivers way beyond its price tag. It’s practical, personal, and endlessly adaptable. Build it simple or go all-in with a double-sided board, paper roll, tray, and storage. Either way, you’ll end up with a sturdy art station and a front-row seat to your kid’s creativitysmudges, giggles, and all.


