Table of Contents >> Show >> Hide
- What Is a Mother of Pearl Ceiling Light Cover?
- Why Mother of Pearl Works So Well in Lighting
- Planning Your DIY Mother of Pearl Ceiling Light Cover
- Step-by-Step: A Hometalk-Inspired Mother of Pearl Light Cover
- Styling Ideas for a Mother of Pearl Ceiling Light Cover
- Maintenance, Safety, and Long-Term Care
- Troubleshooting: Common DIY Light Cover Issues
- Real-Life Experiences with a Mother of Pearl Ceiling Light Cover
Some people buy a fancy chandelier to make a room feel special. Others take one look at their builder-grade
“boob light” on the ceiling, sigh dramatically, and say, “I can fix that.” The Mother of Pearl ceiling light cover
that’s been shared around Hometalk and Pinterest falls firmly into the second category: it turns an ordinary
ceiling fixture into a glowing seashell statement piece for under the cost of a takeout dinner.
In this guide, inspired by that viral Hometalk project, we’ll walk through what a Mother of Pearl ceiling light
cover is, why it works so well in coastal and modern homes, how to build your own version, and how to style and
maintain it so it keeps shimmering for years. We’ll also finish with some real-life experience notes and design
ideas to help you avoid the “hot glue everywhere” phase of the project.
What Is a Mother of Pearl Ceiling Light Cover?
A Mother of Pearl ceiling light cover is essentially a decorative shell “shade” that slips over or replaces a
standard ceiling fixture. Instead of a plain glass dome, you get a mosaic of lustrous shellsoften capiz or
similar lightweight mother of pearl discsthat catch the light and turn a basic fixture into a focal point.
Retail versions show up on design sites as flush mounts, semi-flush mounts, and pendants that use dozens or even
hundreds of shell pieces to create a soft, diffused glow.
The Hometalk-style project that keeps popping up on Pinterest takes that high-end look and recreates it on a
budget. The original creator painted a bedroom a wedgewood blue and needed an eye-catching ceiling fixture that
didn’t require selling a kidney. Their solution: a DIY Mother of Pearl cover made from inexpensive shell pieces
over a plain flush-mount base, with a total cost under about $40.
Why Mother of Pearl Works So Well in Lighting
Soft, Glowy, and Surprisingly Versatile
Mother of pearl and capiz shells are naturally translucent, which makes them perfect for lighting. When you place
them in front of a bulb, the shells don’t just let light throughthey soften and scatter it, creating a glow that
’s more “sunset on the beach” and less “interrogation room overhead.”
Design retailers lean into this by using layers of small shell tiles, discs, or petals in their fixtures. A
simple flush mount covered in shell squares looks like a luminous mosaic. Cascading shell pendants mimic
chandeliers but feel coastal and airy instead of formal. Homeowners love them in bedrooms, bathrooms, entryways,
and dining rooms because they offer both texture and ambient light without visually weighing down the ceiling.
Capiz vs. Mother of Pearl: What’s the Difference?
In decor, people often use “capiz” and “mother of pearl” interchangeably, but they’re slightly different. Capiz is
a thin, translucent shell (from the Placuna placenta mollusk) that has a delicate, glasslike look. Mother of
pearl is the iridescent inner lining of certain mollusk shells; it typically looks thicker and more opalescent.
Both are used in lighting because they’re lightweight yet strong enough to be formed into tiles, discs, or
petals.
In practice, many “mother of pearl” fixtures on the market are actually capiz shells or a mix of capiz and mother
of pearl elements. Designers gravitate toward these materials because they’re timeless, durable, and have a
luxurious shimmer that instantly upgrades even a simple fixture.
Planning Your DIY Mother of Pearl Ceiling Light Cover
Before you start ordering shells by the pound, take a minute to plan. A little measuring and mood-boarding now
saves you from discovering mid-project that your beautiful cover collides with the closet door.
1. Choose the Base Fixture
The original Hometalk-style project starts with a very basic, flush-mount ceiling lightthink plain glass dome
and metal base that came with the house. That’s perfect, because it gives you a sturdy structure and all the
wiring is already handled. You’re simply upgrading the cover, not rewiring the room.
Look for a fixture that:
- Mounts close to the ceiling (semi-flush also works if your ceilings are high).
- Has a removable glass shade or dome.
- Uses standard bulbs so you can easily swap in LEDs to keep shells from getting too warm.
2. Gather Materials and Tools
Your exact materials will depend on the look you’re going for, but a typical mother of pearl ceiling light cover
might include:
-
Shell elements: capiz or mother of pearl discs, tiles, or small mosaic pieces. Look for pre-drilled discs
if you’re planning a dangling chandelier-style cover, or flat tiles if you want a mosaic dome. -
Adhesive: a strong clear-drying glue suitable for glass or metal, or a high-temperature glue gun if the
fixture doesn’t run hot. -
Base form: the original glass shade, a metal ring, a craft store drum shade frame, or a wire basket that
fits over your fixture. - Paint and primer: optional, but a white or metallic base behind the shells helps bounce more light.
- LED bulbs: cool-running bulbs that protect your shells and adhesive.
You’ll also want painter’s tape, a drop cloth, and a step ladder so you’re working safely and not balancing on the
nearest wobbly chair “just for a minute.”
Step-by-Step: A Hometalk-Inspired Mother of Pearl Light Cover
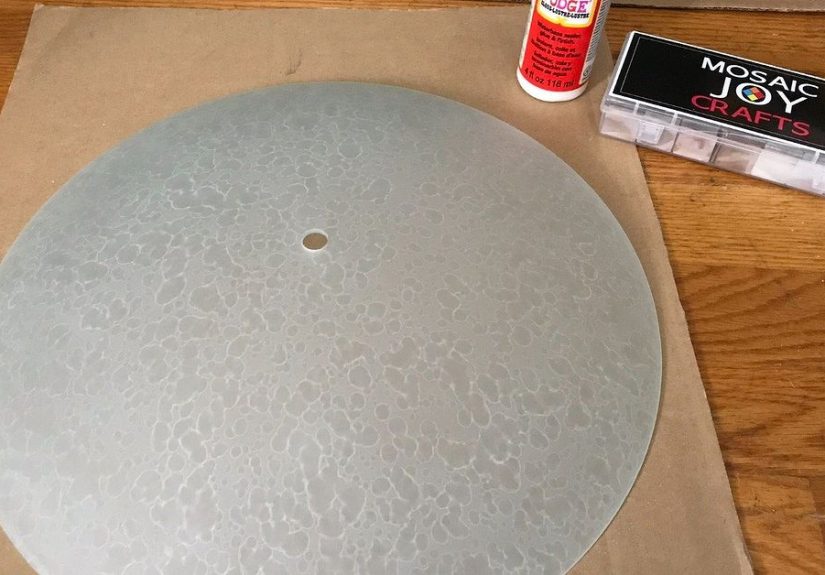
Step 1: Remove and Prep the Old Shade
Turn off the power at the breaker (not just the wall switch), then carefully remove the existing glass shade from
your ceiling fixture. Clean it thoroughly with glass cleaner and let it dry. If you’re using a metal or wire
frame instead, give it a quick wipe to remove dust or oil.
If you plan to paint the base, now’s the time. A coat of white, soft gold, or brushed nickel spray paint on the
exterior and interior can make cheaper materials look intentional and help unify the overall design.
Step 2: Lay Out Your Design
On a table, dry-fit your shell pieces to figure out the pattern. You can:
- Create a tight mosaic of small square or rectangular tiles.
- Arrange circular discs in overlapping rows like fish scales.
- Alternate pearlescent pieces with clear glass gems for extra sparkle.
Take a quick photo once you like the patternfuture-you will thank you when you get halfway through gluing and
forget what “looked better a second ago.”
Step 3: Attach the Shells
Working in small sections, apply adhesive to the base and press your shells into place. If you’re creating a
mosaic, start at the bottom edge of the shade and work upward so the rows stay even. If you’re gluing discs to a
frame, attach them in overlapping layers so they can move slightly and catch the light.
Don’t worry if some shells have minor imperfections or color variationsthat’s exactly what makes the finished
piece feel handcrafted and high-end, similar to the artisanal fixtures sold by boutique lighting brands that use
recycled capiz shells.
Step 4: Let Everything Cure
Follow your adhesive’s instructions for cure time. Many glues feel dry within an hour but need a full 24 hours to
reach maximum strength. This is not the moment to rush; you don’t want to be the person who flips on the light
and watches a small shell avalanche slide onto the floor.
Step 5: Reinstall and Test
Once the cover is fully dry, reinstall it on the ceiling fixture, double-check that all screws or finials are
snug, and turn the power back on. Swap in LED bulbs if you haven’t already. When you flip the switch, you should
see a soft, pearly glow and subtle reflections on the wallsproof you’ve officially retired the boring builder
light.
Styling Ideas for a Mother of Pearl Ceiling Light Cover
The magic of a mother of pearl ceiling light is how easily it works with different decor styles. Here are some
ways to make yours feel intentional, not random:
Coastal Calm Bedroom
Pair your shell-covered fixture with wedgewood blue walls, crisp white bedding, and a jute rug. Add a few framed
coastal prints or botanical sketches, and you suddenly have a space that looks like it belongs in a beach house
listingeven if your actual view is your neighbor’s fence.
Glam Small Entryway
In a compact foyer, a mother of pearl flush mount can stand in for a chandelier. Combine it with a round mirror,
a small console table, and a bowl for keys. The reflective shell surface bounces light around, making tight
spaces feel larger and more welcoming.
Soft Glow in the Bathroom
Shell lighting is right at home in bathrooms, especially if you already have marble, subway tile, or soft neutral
tones. Just confirm that your fixture and bulbs are rated appropriately for damp locations, and avoid direct
contact with steam if possible.
Maintenance, Safety, and Long-Term Care
Cleaning Without Dulling the Shine
To clean a mother of pearl light cover, skip harsh chemicals and abrasive cloths. Instead:
- Turn the power off before you touch the fixture.
- Dust gently with a soft microfiber cloth or a feather duster.
-
For spots, use a barely damp cloth with mild soap, then dry immediately. Avoid soaking the shells or saturating
the adhesive.
This kind of gentle care is similar to what manufacturers recommend for commercial shell chandeliers and capiz
pendantslight touch, minimal moisture, and no ammonia-based cleaners.
Heat, Bulbs, and Safety
Shells themselves are fairly heat-resistant, but adhesives and frames may not be. That’s why LEDs are your best
friend: they run cooler, last longer, and use far less energy than incandescent or halogen bulbs. Make sure the
total wattage stays within the fixture manufacturer’s rating, and never cover ventilation holes or slots that are
designed to release heat.
Troubleshooting: Common DIY Light Cover Issues
“My Shells Won’t Stick”
If shells slide or fall off, you may be using the wrong adhesive or working on a dusty, glossy, or oily surface.
Lightly scuff slick metal or glass with very fine sandpaper, wipe it clean, and try again with a glue formulated
for glass, ceramic, or metal.
“It Looks Uneven”
Small irregularities are part of the charm, but if the pattern looks chaotic instead of organic, add a border
row. A neat outer ring of evenly sized shells or tiles helps visually contain everything, even if the interior
mosaic is a little more freeform.
“The Room Feels Too Dark”
If the finished cover blocks more light than you expected, try:
- Switching to brighter but still safe LED bulbs.
- Using shells only on the sides and leaving the bottom more open.
- Painting the interior of the base a bright white before adding shells.
Real-Life Experiences with a Mother of Pearl Ceiling Light Cover
The fun thing about this project is how dramatically it changes the feel of a room without requiring a huge
budget or advanced electrical skills. Homeowners who’ve tried their own versions usually start with the same
complaint: “My old ceiling light is ugly, but everything I like online is expensive.” By the end, they’re
typically surprised by just how custom and high-end the finished cover looks.
One common experience is the “I had no idea this would reflect so much light” moment. When the fixture is turned
on at night, the shell pieces throw subtle reflections and patterns across the ceiling and walls. It’s not a
disco ball effectno spinning lightsbut more like gentle ripples, as if light is passing through shallow water.
That soft shimmer is one of the reasons coastal and beach-style interiors lean so heavily on mother of pearl and
capiz decor.
Another frequent lesson: planning saves your sanity. DIYers who rush in and start gluing shells directly to a
ceiling fixture often find themselves working overhead with sticky fingers and sliding tiles. Those who prep on a
tabletopcreating the design on a removable shade or frame firsthave a much smoother time. They can sit
comfortably, take breaks, and only climb the ladder when it’s time to install the fully finished piece.
Durability is usually better than people expect. Because the shells are rigid and slightly curved, they don’t
show fingerprints the way clear glass does, and they hide minor dust between cleanings. Families with kids and
pets report that once the fixture is up and cured, it stays put; the main wear-and-tear comes from the occasional
over-enthusiastic pillow toss or step-stool bump during painting projects, not everyday use.
On the flip side, some DIYers admit that sourcing shells can be an adventure. Ordering from multiple suppliers to
find a consistent color or finish is pretty common. Natural shells varysome are more cream, others more gray or
champagneso a smart strategy is to order a bit extra and sort them by tone. Use the most similar pieces in the
most visible areas and the more varied ones near the top where they’re less noticeable.
There’s also a psychological win that comes with this project. Replacing a stock ceiling light with something
handmade sends a subtle message: this is not just a rental-grade space; this is my room. That feeling of
ownership and customization often inspires more upgradesfresh paint, better window treatments, maybe even a new
rugbecause the ceiling fixture quietly sets a higher standard for the rest of the decor.
Finally, the cost-versus-impact ratio is hard to beat. Between a basic flush-mount fixture, a bag or two of shell
pieces, adhesive, and paint, many homeowners still land under that roughly $40–$60 range, especially if they
reuse an existing base. Compare that with boutique mother of pearl light fixtures that run into the hundreds or
even thousands of dollars, and the DIY route starts to look pretty compelling. You get the same shimmering,
magazine-worthy effect, plus the satisfaction of being able to say, “Oh, that? I made it.”
If you’ve ever looked at your ceiling and thought, “This room deserves something prettier,” a Mother of Pearl
ceiling light cover is a surprisingly approachable place to start. It turns an everyday fixture into jewelry for
your roomsparkly, luminous, and uniquely yourswithout requiring an electrician, a massive budget, or a design
degree. Just a little patience, a pile of shells, and a willingness to climb a ladder with style.


