Table of Contents >> Show >> Hide
- Why a Rustic Pallet Wood Trunk Is Such a Great Project
- Choosing and Preparing Pallet Wood Safely
- Basic Design for a Rustic Pallet Wood Trunk
- Step-by-Step Overview: Building Your Trunk
- Finishing Ideas for a Rustic Pallet Wood Trunk
- How to Use and Style Your Pallet Wood Trunk
- Extra : Real-Life Experiences With Rustic Pallet Wood Trunks
- Conclusion: A Storage Piece With Soul
If your living room is starting to look like a lost-and-found bin for blankets, toys, and random “I’ll put this away later” items, a rustic pallet wood trunk might be your new best friend. It’s part storage, part coffee table, part conversation piece, and 100% “I totally made that myself” bragging rights.
Inspired by the rustic pallet wood trunk projects shared on community DIY sites like Hometalk, this guide walks you through how to design, build, and enjoy your own trunk using reclaimed pallet wood. We’ll cover everything from choosing safe pallets to simple joinery, lid options, finishes, and clever ways to style and use your trunk once it’s in your home.
Why a Rustic Pallet Wood Trunk Is Such a Great Project
A pallet wood trunk hits the sweet spot between beginner-friendly and seriously impressive. You’re basically building a big wooden box, but the end result looks like something you hunted down at a flea market after a dramatic bidding war.
Budget-Friendly and Eco-Conscious
One of the biggest perks of using pallet wood is cost. Many DIYers score pallets for free or for just a few dollars from local hardware stores, warehouses, or small businesses. Turning that “trash” into a beautiful storage chest keeps usable lumber out of landfills and gives your home decor a sustainability story.
Flexible Style and Size
A rustic pallet wood trunk can be customized to suit your space:
- Coffee table trunk for the living room
- Toy chest for a playroom or kid’s bedroom
- Blanket trunk at the foot of the bed
- Entryway bench with shoe storage inside
You can build it narrow for a hallway, longer for the foot of your bed, or deeper if you want to stash bulky items like winter blankets or camping gear.
Perfectly Imperfect Rustic Charm
Pallet boards come with knots, nail holes, color variation, and texture. Instead of hiding that, a rustic trunk celebrates it. A little dent here and a weathered grain there make the piece feel like it has a historyeven though it was built in your driveway last weekend.
Choosing and Preparing Pallet Wood Safely
Before you start ripping boards off a pallet like you’re in an action movie, you need to make sure the wood is safe for indoor furniture. Not all pallets are created equal.
Check the Stamps and Markings
Look for stamps burned or inked into the sides of the pallet blocks or stringers. Common markings include:
- HT – Heat treated. These pallets are typically considered safer for reuse because they were treated with heat rather than chemicals.
- MB – Methyl bromide. Avoid these. This chemical fumigant has been associated with toxicity, and pallets marked “MB” shouldn’t be used for indoor furniture.
- Unmarked local pallets – Many domestic or “national” pallets aren’t stamped at all. If they’re clean and from a reputable source, they’re often a good candidate for DIY use.
No matter what the stamp says, skip any pallet that looks filthy, oily, moldy, or suspicious. If it smells like something leaked on it, trust your nose and walk away.
Cleaning and Treating the Pallet Wood
Once you’ve found clean, safe pallets, give the boards a spa day:
- Scrub with soapy water or a mild bleach solution to remove grime.
- Rinse thoroughly and let the boards dry completely in a sunny, ventilated area.
- After drying, sand to remove splinters, dirt, and rough edges before you ever bring the wood inside.
This prep not only makes your trunk safer and cleaner, it also helps stain, paint, or clear finish adhere evenly and look better.
Tools and Safety Gear
For a typical pallet wood trunk, you’ll want:
- Hammer and pry bar or a reciprocating saw for deconstructing pallets
- Circular saw or miter saw for cutting boards to length
- Screws or finish nails and a drill/driver or nailer
- Wood glue for extra strength
- Orbital sander and sanding discs
- Measuring tape, square, and pencil
- Safety glasses, work gloves, and a dust mask or respirator
Pallet wood can be surprisingly hard and nail-heavy, so don’t skip the safety gear. Hidden nails are like tiny, steel jump scares for your saw blades.
Basic Design for a Rustic Pallet Wood Trunk
At its core, a pallet wood trunk is a box with a lid. The magic is in the details: proportions, hardware, and the finish. Here’s a simple blueprint-style overview.
Suggested Dimensions
You can adjust the size as needed, but a practical starting point is:
- Length: 36–42 inches (fits nicely as a coffee table or at the end of a queen bed)
- Width: 16–20 inches
- Height: 18–20 inches (comfortable seating height)
Structural Base
Many DIYers use thicker pallet boards or standard 2×2 or 2×3 lumber for the internal frame, then skin it with pallet planks. This gives the trunk a solid skeleton and makes the build more forgiving if your pallet boards aren’t perfectly straight.
- Build a rectangular frame for the bottom.
- Add vertical corner posts (one in each corner).
- Connect the posts with rails at the top to form a box frame.
Once the frame is done, you attach pallet boards to the outside like siding, creating that rustic plank look.
Bottom Panel and Lid
For the bottom, many builders use 3/4-inch plywood or MDF cut to size and secured to the frame. It’s flat, strong, and easier than trying to line up a bunch of narrow pallet boards perfectly.
The lid can be made from:
- Edge-glued pallet boards
- Pallet boards attached to a plywood substrate
- A framed “barn door” style top with visible cross braces
Add simple butt hinges, strap hinges, or decorative trunk hinges. Soft-close or toy box hinges are nice if you don’t want the lid slamming down on fingers or making dramatic noises at 2 a.m.
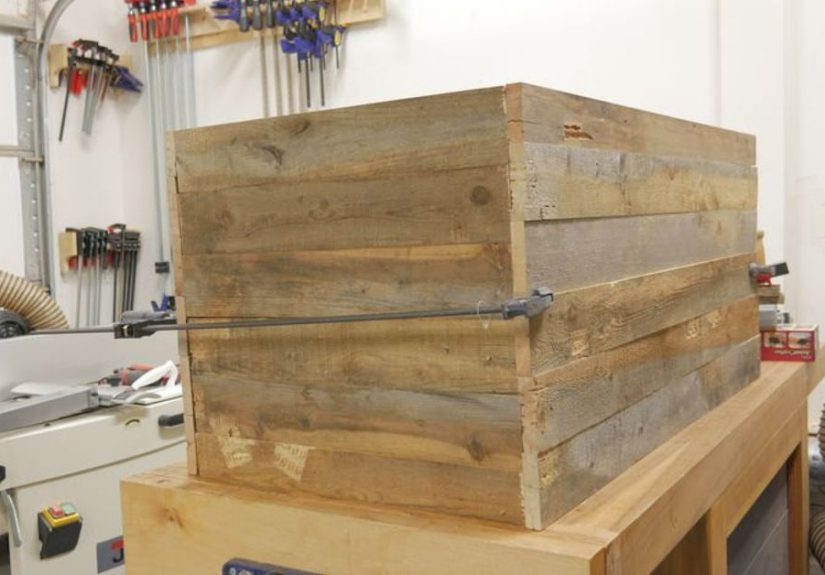
Step-by-Step Overview: Building Your Trunk
1. Break Down the Pallets
Carefully remove the boards from the pallet using a pry bar and hammer, or cut through the nails with a reciprocating saw. Remove any exposed nails or staples, then sort boards by length and thickness.
2. Cut the Frame Pieces
Cut four pieces for the bottom rectangle and four vertical corner posts. Then cut top rails that match the dimensions of the bottom frame. Dry-fit everything before assembling to be sure it’s square.
3. Assemble the Frame
Use wood glue and screws to build the base rectangle. Attach the corner posts, then add the top rails. Check for square by measuring diagonalsif they’re equal, you’re good. If not, gently pull or clamp the frame into alignment.
4. Attach the Bottom Panel
Cut your plywood or MDF to match the footprint of the frame. Secure it with screws spaced every 6–8 inches around the perimeter. If you plan to store heavy items, consider adding a center support under the bottom panel.
5. Skin the Sides With Pallet Boards
Starting at the bottom, attach pallet boards horizontally around the trunk, like cladding. You can stagger the lengths for a patchwork look or cut them to the same length for a more uniform style. Leave a small overhang at the corners if you like a rougher, “built in the barn” vibe.
6. Build the Lid
Lay pallet boards side by side until you reach your desired width, then cut them to length. Glue and screw them to cleats or a plywood base on the underside to hold everything together. Sand the top smooth enough that cups, books, and remote controls don’t wobble.
7. Add the Hinges and Hardware
Attach the hinges at the back, pre-drilling pilot holes to avoid splitting. Then add:
- Front hasps or latches for a classic trunk look
- Side handles for easier lifting
- Corner brackets or decorative straps for extra character
Hardware in black, bronze, or antique brass pairs beautifully with rustic wood and gives the trunk a “found treasure” feel.
Finishing Ideas for a Rustic Pallet Wood Trunk
Embrace the Imperfections
Before finishing, fill any huge gaps or crater-sized nail holes you don’t like, but leave smaller ones for charm. Sand enough to eliminate splinters, but not so much that you erase all the character.
Stain, Paint, or a Mix of Both
Popular finishes for a rustic pallet wood trunk include:
- Warm stain + clear topcoat for a classic farmhouse look
- Weathered gray stain for a coastal or industrial vibe
- Chalk paint with light distressing for a vintage cottage feel
- Two-tone (painted base, stained lid) for extra contrast
Whatever you choose, seal with a clear polyurethane, water-based poly, or furniture wax so your new trunk can handle coffee mugs, feet, and the occasional snack spill.
Optional Hidden Compartment
If you want to channel your inner magician, you can create a false bottom inside the trunk. Use a raised platform with a removable panel so you can tuck away valuables or important documents. A knot hole or small finger pull can act as the discreet “secret” handle.
How to Use and Style Your Pallet Wood Trunk
Once your rustic pallet trunk is done, it becomes a multitasking hero around the house.
Living Room Coffee Table
Top it with a tray for drinks and remotes, stack a few coffee table books, and drape a throw over one corner. Inside, hide blankets, board games, or the chaotic tangle of game controllers you pretend doesn’t exist.
Bedroom Storage Bench
Place the trunk at the foot of the bed to store seasonal bedding, pillows, or extra linens. Add a cushion or folded quilt on top, and you’ve created a cozy spot to sit while putting on shoes.
Kid-Friendly Toy Chest
With soft-close hinges and rounded corners, a pallet trunk makes a charming toy chest. You get to keep the rustic style; your kids get a place to toss their toys when you utter the words “clean up time.”
Entryway Organizer
Use it in the entryway as a bench that hides shoes, bags, and seasonal gear. Add a few hooks on the wall above and a mirror, and you’ve created a mini mudroom out of thin air and pallet boards.
Extra : Real-Life Experiences With Rustic Pallet Wood Trunks
Rustic pallet wood trunks aren’t just about saving money or filling an empty spacethey’re about the stories that come with them. If you scroll through DIY communities like Hometalk or social feeds full of pallet projects, you’ll notice the same pattern: people start with a rough stack of boards and end up with a piece that’s deeply personal.
One common experience DIYers share is the “learning curve” moment. The first time you pry apart a pallet, you realize it’s a workout. Nails snap, boards crack, and you quickly discover why some people swear by using a reciprocating saw instead of a pry bar. The upside? By the time the boards are free, you’ve earned serious respect for anyone who works with reclaimed wood regularly.
Another recurring theme is how forgiving the rustic style really is. Maybe one side of your trunk ends up a little more weathered than the other. Maybe a board has a darker streak or a knot right in the middle. Instead of starting over, most DIYers lean into it. They’ll position that “imperfect” board front and center, then friends come over and say, “Wow, that board is gorgeous.” What you thought was a flaw becomes the star of the piece.
People also talk a lot about the moment the trunk is styled for the first time. Before that, it’s just a project in the garage. But once it’s in the living room with a tray, candle, and a stack of coasters, it suddenly looks like something from a home decor magazine. That transformationseeing a trunk you built from pallets sit proudly where a store-bought coffee table might have beenis incredibly satisfying.
Families often find that a rustic pallet wood trunk becomes a kind of “memory box” over time. At first, it might just hold pillows and blankets. Later, it quietly collects photo albums, old yearbooks, kids’ artwork, holiday decorations, or even the board games that always come out during family gatherings. The trunk doesn’t just store stuff; it stores little pieces of your life.
There’s also the social side of the project. Many DIYers mention that their pallet trunk builds turn into weekend events. Someone cuts boards, someone sands, someone tests stain colors on a scrap piece. Kids “help” by handing over screws or drawing chalk designs on the wood before the final finish. By the end, the trunk isn’t just “made by me”it’s made by “us.”
For people who sell handmade furniture locally or online, a rustic pallet wood trunk can be a gateway project. It’s relatively simple to repeat, endlessly customizable with different stains and hardware, and universally useful. Buyers might use it as a coffee table, others as a toy chest, and some as a foot-of-the-bed piece. From a business perspective, one good design can serve a lot of different customers just by tweaking dimensions and finishes.
Finally, many DIYers say that their first pallet trunk changes the way they look at scrap materials in general. After this project, an old door stops being “trash” and starts looking like a future headboard. Leftover stair spindles become future table legs. That’s part of why the rustic pallet wood trunk is such a beloved project: it doesn’t just organize your home; it rewires how you see everyday materials and what they could become.
So when you build your own Rustic Pallet Wood Trunk inspired by Hometalk-style projects, you’re not just making a box. You’re making a piece that tells a storyfrom where the pallets came from to who helped build it and what you choose to tuck inside. Every dent, scratch, and knot becomes part of that story, and honestly, that’s what makes rustic furniture feel so warm and inviting.
Conclusion: A Storage Piece With Soul
A rustic pallet wood trunk is the kind of DIY project that keeps paying you back. You get extra storage, a stylish coffee table or bench, and a handmade focal point that brings character to your home. Along the way, you learn how to select safe pallets, practice fundamental woodworking skills, and transform rough, discarded boards into a polished, functional piece.
Whether you’re channeling the creative spirit of Hometalk’s DIY community or simply trying to tame the clutter in your living room, a pallet wood trunk is a satisfying, approachable project. It’s proof that with a few tools, a little patience, and a pile of reclaimed boards, you can build something beautiful, useful, and uniquely yours.


