Table of Contents >> Show >> Hide
- Why bathroom storage feels impossible in a small space
- The two-hour bathroom storage makeover: what she did
- Smart bathroom storage ideas you can steal today
- How to plan your own two-hour bathroom storage project
- Real-life experiences: what people learn from quick bathroom storage makeovers
- You probably own more “just in case” products than you think
- Vertical storage feels bigger, even if your bathroom isn’t
- DIY storage boosts confidence – and leads to more projects
- Little details matter more than perfection
- Smart storage can even save money
- Renter-friendly tweaks still have big impact
- Final thoughts: a bigger-feeling bathroom, no remodel required
If your bathroom counter currently looks like a beauty store exploded, you are absolutely not alone.
Tiny sinks, no linen closet, one lonely towel bar – it’s like some bathrooms were designed by people
who don’t own shampoo. The good news? You don’t need to knock down walls or hire a contractor to fix it.
In fact, one clever DIYer on Hometalk managed to double her bathroom storage in just two hours with a
surprisingly simple idea – and you can totally steal it.
Her secret? Turning cute wooden wall signs into hidden bathroom cabinets. It’s fast, renter-friendly,
and way more stylish than another plastic over-the-door caddy. Along the way she also put unused
vertical space to work, added smart towel storage, and finally gave every lotion, cotton pad, and spare
roll of toilet paper a proper home. Let’s walk through exactly how she did it – and how you can use the
same tricks to transform your own small bathroom storage, even on a weeknight.
Why bathroom storage feels impossible in a small space
Small bathrooms are sneaky. On paper, they look fine: a sink, toilet, shower, maybe a tiny vanity.
Then you move in with your real-life stuff – skincare, makeup, first-aid, cleaning supplies, extra towels –
and suddenly every flat surface is a clutter magnet. The main problem isn’t just how much you own; it’s
how little usable storage you have.
Common issues include:
- No linen closet: Towels end up on hooks, over doors, or stacked on the tank.
- Shallow vanities: One drawer and a half-shelf isn’t enough for daily essentials.
- Wasted wall space: Huge blank walls over the toilet or behind the door go unused.
- Awkward layouts: Radiators, windows, or doors make traditional cabinets hard to fit.
The solution is not necessarily “get rid of everything you own” (though decluttering helps).
It’s learning to use vertical space, hidden storage, and
multifunctional pieces so your bathroom feels calm instead of chaotic.
The two-hour bathroom storage makeover: what she did
Our DIY star was tired of staring at a messy open shelf and cluttered counter. She wanted storage that:
- Could be done in a couple of hours
- Didn’t require major tools or advanced carpentry skills
- Still looked pretty – because the bathroom is part of the house, not a storage closet
Her genius solution: turn decorative wooden signs into slim, wall-mounted hidden cabinets
that swing open to reveal shelves inside. Think “medicine cabinet,” but cuter and customized to your style.
Step 1: Start with a quick declutter and a tape measure
Before she picked up a drill, she grabbed a trash bag and a tape measure. In about 15–20 minutes she:
- Tossed empty bottles and expired products
- Set aside duplicates or “once-a-year” items to store outside the bathroom
- Measured the available wall space above the toilet and next to the mirror
This step matters because it tells you exactly how tall and wide your new storage can be – and what
needs to fit inside (for example, standing hair products vs. folded washcloths).
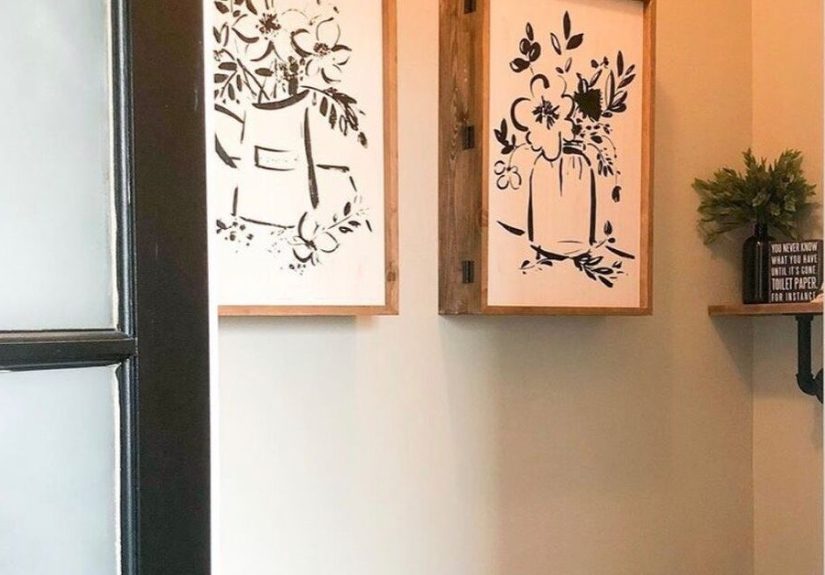
Step 2: Turn wall art into hidden cabinets
Instead of buying pre-made cabinets, she started with inexpensive wooden wall signs – the kind you see with
cute phrases like “Relax & Unwind” or “Wash, Brush, Floss, Flush.” These signs already had:
- A finished front (no painting required)
- A solid wood or MDF surface that could handle hinges
- A style that matched her bathroom decor
To turn them into cabinets, she:
- Built a shallow box out of 1×3 or similar boards to match the size of each sign.
- Attached the box to the wall, hitting studs or using strong wall anchors.
- Added small shelves inside the box for items like cotton pads, razors, and travel-sized products.
- Installed simple hinges so the sign could swing open like a door.
- Added a small magnet or clasp so the “door” stayed closed and looked like normal decor.
The result: what looks like cute wall art at first glance, but opens to reveal organized storage.
Perfect for everyday items you don’t want on display but need within reach.
Step 3: Use the vertical space over the toilet
The wall over the toilet is prime real estate in a small bathroom. Instead of a single short shelf,
she took advantage of the full height of the wall. Combining the hidden sign cabinets with one or two
regular open shelves turned that whole wall into a functional storage zone.
On the open shelf she placed:
- Pretty baskets for extra toilet paper and feminine products
- A small plant (fake or real) for a spa-like touch
- A lidded jar for bath salts or cotton balls
Hidden inside the sign cabinets, she stored:
- Backup razors and toothbrush heads
- Mini first-aid supplies
- Travel-size toiletries for guests
By stacking hidden and open storage, she kept the room looking light and decorative, not like a crowded
utility closet.
Step 4: Add hooks, baskets, and little upgrades
With the main cabinets up, she used the remaining time for easy wins:
- Hooks behind the door: Perfect for robes and everyday towels.
- A small basket under the sink: For cleaning supplies and extra soap.
- Drawer organizers: To stop makeup, combs, and tubes from rolling around.
None of these took more than a few minutes, but together they made the whole bathroom feel bigger,
calmer, and easier to keep clean.
Smart bathroom storage ideas you can steal today
Her project is one example, but the principles behind it work in almost any small bathroom. Here are
more ways to get creative with bathroom storage – no renovation required.
Go up, not out
When floor space is limited, vertical storage is your best friend. Look for ways to go up the wall:
- Over-the-toilet cabinets or shelves: Great for towels, toilet paper, and baskets of supplies.
- Floating shelves: Stack two or three above each other to hold jars, candles, and decor.
- Tall freestanding cabinets: Slim towers can fit in corners and store everything from
hair tools to medicine (with child locks if needed).
Even adding a single tall, narrow storage piece can relieve a lot of pressure from your vanity and
countertop.
Use the back of the door and “dead zones”
Take a look around your bathroom and hunt for “dead zones” – awkward, narrow, or ignored spaces that
could be doing more work:
- Behind the door: Over-the-door hooks, racks, or slim shelves can hold towels, robes,
or extra toiletries. - Under the sink: Stackable bins, risers, and pull-out baskets keep you from losing
things in the dark back corner. - Beside the vanity or toilet: A narrow storage cart or ladder shelf can slide into
tiny gaps.
Once you start looking for these spaces, you’ll see many more opportunities to add storage without
making the room feel cramped.
Try a towel ladder instead of a traditional bar
A towel ladder is an easy DIY project and a stylish alternative to a basic towel bar. Because it leans
against the wall, it:
- Holds multiple towels at once
- Can be moved around if you rearrange the room
- Adds vertical interest without taking much floor space
You can build one from dowels or 2x2s, or buy a ready-made version if you’re not in a DIY mood. Either
way, it turns towels into decor instead of clutter.
Think in zones, not random spots
One of the biggest reasons bathrooms get messy is that items don’t have clear “homes.” Instead of tossing
everything wherever it fits, divide your storage into zones:
- Daily-use zone: Toothpaste, face wash, deodorant – near the sink, at eye level.
- Weekly-use zone: Masks, deep conditioners, shaving kits – in a cabinet or bin.
- Backup & bulk zone: Extra toilet paper, spare shampoo – in higher shelves or a
closet outside the bathroom.
When you know where things “live,” it’s much easier to put them back quickly, which keeps your bathroom
looking organized with minimal effort.
How to plan your own two-hour bathroom storage project
Want to copy her momentum and tackle your own space in a single session? Here’s a simple two-hour game plan.
Step 1: 20–30 minutes – declutter and sort
Set a timer and move fast. Toss obvious trash, empty bottles, and ancient travel-size products you’ll
never finish. Group what’s left into:
- Daily use
- Weekly/occasional
- Backups and extras
This gives you a clear idea of how much storage you actually need – and what truly has to stay in the
bathroom versus another closet.
Step 2: 60 minutes – install one “hero” storage solution
Choose one big-impact project:
- Hidden sign cabinets like her Hometalk project
- An over-the-toilet cabinet or set of shelves
- A towel ladder plus a small wall shelf
Pre-gather tools (drill, anchors, level, screws) so you’re not hunting for them mid-project. Measure
carefully, mark your holes, and install. Focus on getting this one hero piece solid and safe – it will
carry most of the storage.
Step 3: 30–40 minutes – style, label, and fine-tune
Finally, load your new storage thoughtfully:
- Put daily items at eye or hand level.
- Use labels or clear containers so you can see what’s inside without rummaging.
- Leave a little breathing room on shelves so the room doesn’t feel crowded.
Add one or two decorative touches – a plant, a candle, framed art – so the bathroom feels like a tiny spa
instead of a storage unit.
Real-life experiences: what people learn from quick bathroom storage makeovers
Fast projects like this Hometalk-inspired makeover don’t just give you new shelves – they tend to change
the way you live in your bathroom every day. Here are some common lessons people share after doing
similar two-hour bathroom storage upgrades.
You probably own more “just in case” products than you think
Many people start a storage project thinking they need more space, and end it realizing they mainly needed
fewer half-used bottles. Once you pull everything out, you’ll usually find:
- The hairspray you tried once and hated
- Expired sunscreen from three summers ago
- Hotel shampoos you’ve been “saving” for a mythical trip
The act of building new storage often motivates a ruthless edit. Ironically, the more thoughtful your
storage becomes, the less you want to keep random clutter around.
Vertical storage feels bigger, even if your bathroom isn’t
After adding tall cabinets, over-the-toilet shelves, or hidden wall cabinets, people often say the room
suddenly feels more “finished” and less cramped. That’s because your eye travels upward instead of
stopping at a cluttered counter. The walls start to work for you instead of just framing the mess.
DIY storage boosts confidence – and leads to more projects
A two-hour project is a perfect confidence builder. Hanging your first cabinet, successfully hitting a
stud, installing a hook that doesn’t fall out – these are small wins that make you feel capable. Many
people find that once the bathroom is done, they’re ready to tackle a pantry shelf, closet makeover, or
laundry-room storage next.
Little details matter more than perfection
No one will notice if your shelf is one millimeter off center. What they (and you) will notice is how easy
it is to grab a towel, find cotton swabs, or see how many rolls of toilet paper you have left at a glance.
The practical details – like bins that slide smoothly, labels that make sense, and hooks at the right height –
are the things that make the bathroom feel organized long term.
Smart storage can even save money
When your products and supplies are visible and organized, you’re far less likely to rebuy things you already
own. Clear zones and labeled containers help you quickly spot when you’re actually running out of something
versus when it’s just hiding behind a tall bottle. Over time, that can easily offset the cost of a few boards,
hinges, and wall anchors.
Renter-friendly tweaks still have big impact
Even if you can’t drill into walls, you can use tension rods under the sink, over-the-door racks, freestanding
ladder shelves, and large baskets to create structure. The idea behind this two-hour makeover isn’t “you must
build custom cabinets”; it’s “use the space you already have in a more intentional way.” Whether that’s
hidden storage behind cute signs or a narrow cart beside the toilet, the principle is the same.
Final thoughts: a bigger-feeling bathroom, no remodel required
The creative Hometalk makeover proves that you don’t need a massive remodel or endless weekends to fix a
storage-starved bathroom. With a couple of wooden signs, a few basic boards, and some smart planning, she
created hidden storage, freed her countertop, and gave her bathroom real personality – all in about two hours.
Take a fresh look at your own space. Where could you add a hidden cabinet disguised as wall art? Could you
stack shelves above the toilet, lean a towel ladder in an empty corner, or turn the back of the door into a
mini storage wall? Pick one idea, set a timer, and give yourself two hours. By tonight, your bathroom could
feel bigger, calmer, and way more you – no sledgehammer required.


