Table of Contents >> Show >> Hide
- Introduction: The Floor May Be Vintage, But the Risk Is Real
- Way 1: Check the Age, History, and Installation Clues
- Way 2: Look for Visual and Material Clues Without Disturbing the Tiles
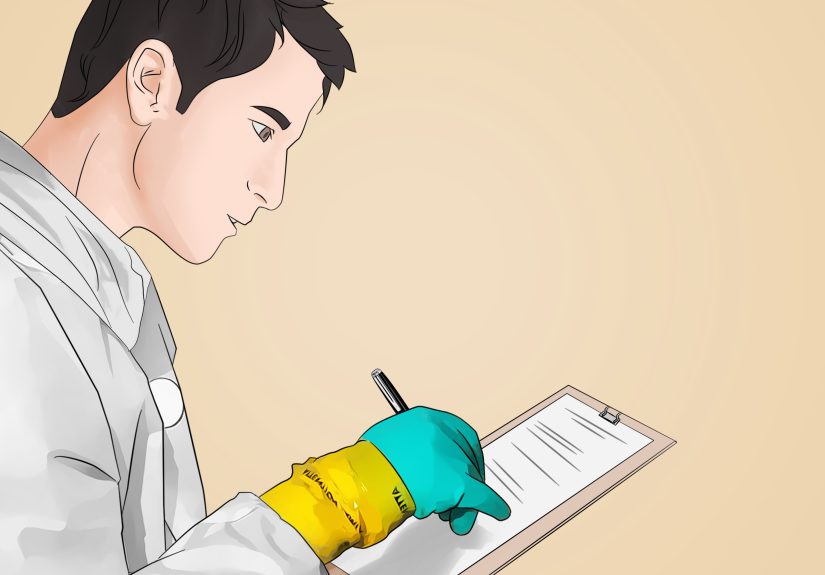
- Way 3: Confirm With Professional Asbestos Testing
- How to Tell If You Should Be Concerned
- Common Myths About Identifying Asbestos Tiles
- Practical Examples: Is This Floor Suspicious?
- Extra Experience Section: What Real-World Asbestos Tile Identification Feels Like
- Conclusion: Identify the Risk, Then Let Testing Do the Talking
Safety note: This guide is for identification and planning only. Do not sand, scrape, drill, grind, break, pry, dry-sweep, or remove suspected asbestos tiles. If you are planning renovation, demolition, or flooring replacement, contact a trained asbestos professional and use a qualified laboratory test.
Introduction: The Floor May Be Vintage, But the Risk Is Real
Old flooring has a way of hiding secrets. Sometimes those secrets are charming, like a hardwood floor beneath tired carpet. Sometimes they are less charming, like mystery stains shaped suspiciously like a 1970s fondue accident. And sometimes, the secret is asbestos tile.
Asbestos tiles were widely used in older homes, schools, offices, basements, and apartment buildings because asbestos fibers added strength, heat resistance, and durability. In flooring, asbestos often appeared in vinyl tiles, asphalt tiles, sheet flooring backing, and the dark adhesive commonly called black mastic. The tricky part is that asbestos is not something you can confidently identify by sight alone. A tile can look completely ordinary and still contain asbestos. Another tile can look suspicious and test negative. Asbestos is not polite enough to label itself.
Still, there are smart ways to spot possible asbestos floor tiles before you renovate. The goal is not to play detective with a pry bar. The goal is to recognize risk clues, stop before disturbing the material, and decide whether professional testing is needed. The three safest ways to identify asbestos tiles are: check the age and history of the flooring, look for visual and material clues without damaging the tiles, and confirm your suspicion through professional asbestos testing.
Let’s walk through each method carefully, with practical examples, plain-language safety advice, and zero encouragement to turn your floor into a science experiment.
Way 1: Check the Age, History, and Installation Clues
Start With the Building’s Age
The first clue is the age of the home or building. If the structure was built or remodeled before the 1980s, asbestos-containing flooring becomes a real possibility. That does not mean every old floor contains asbestos, but it does mean you should slow down before ripping anything up.
Many asbestos floor products were installed from the early and mid-20th century through the late 1970s and, in some cases, into later decades as older stock remained in circulation. Basements, kitchens, laundry rooms, utility rooms, mudrooms, and commercial hallways were especially common places for resilient flooring because these areas needed tough, water-resistant surfaces.
Here is a practical example: if you buy a 1958 ranch house and find square vinyl tiles under carpet in the basement, those tiles deserve caution. If you discover original flooring in a 1972 kitchen, the same rule applies. If the room was remodeled in 2015 by a reputable contractor using modern materials, asbestos is less likely, though not impossible if older layers remain underneath.
Look for Multiple Flooring Layers
Old homes often wear flooring like winter clothing: layer over layer over layer. A modern laminate floor may sit on top of sheet vinyl, which may sit on top of square tiles, which may sit on top of black adhesive. Each hidden layer can tell a story.
If you see newer flooring installed directly over old tile, that may mean a previous owner chose to encapsulate the old material instead of removing it. Encapsulation is often safer than removal when asbestos-containing flooring is intact and not being disturbed. However, it also means future renovation plans need extra care.
Do not peel back layers to “just take a quick look.” That quick look can release dust or break brittle tile. Instead, inspect exposed edges where flooring is already visible, such as near a floor vent, doorway transition, missing threshold, closet corner, or unfinished utility area. If you cannot inspect safely, leave it alone and call a professional.
Search for Documentation
Before assuming the worst, look for paperwork. Old renovation receipts, product boxes, inspection reports, real estate disclosures, maintenance records, and even photos from previous owners can help date the floor. In commercial buildings, facilities departments may have asbestos management plans or prior survey results.
If a previous report says the flooring was tested, pay attention to details. Testing one room does not automatically clear every room. Different tiles, adhesives, backing materials, and layers may need separate samples. A kitchen tile may be different from a basement tile. A tan 12-inch tile may be different from the black adhesive underneath it. Asbestos identification is annoyingly specific, like a picky restaurant order.
Age Clues That Raise Suspicion
Consider asbestos testing before renovation if the flooring matches several of these clues:
- The building or flooring appears to date from before the 1980s.
- The tiles are original or their installation date is unknown.
- The flooring is in a basement, kitchen, laundry room, utility room, hallway, school, office, or older apartment building.
- There are multiple layers of old resilient flooring.
- Dark adhesive or black mastic is visible beneath the tile.
- You plan to remove, sand, cut, drill, level, or disturb the flooring.
Age alone cannot prove asbestos, but it is one of the strongest reasons to pause before demolition.
Way 2: Look for Visual and Material Clues Without Disturbing the Tiles
Check Tile Size and Pattern
One of the most repeated clues is tile size. Older 9-inch by 9-inch floor tiles are often treated as suspicious because many asbestos-containing tiles were manufactured in that size. However, size is not proof. Some asbestos tiles were 12-inch by 12-inch, 18-inch by 18-inch, or other dimensions. Some non-asbestos tiles were also 9-inch squares. The tape measure can raise an eyebrow, but it cannot deliver a verdict.
Patterns can also provide clues. Many older asbestos-containing tiles had marbled, speckled, streaked, stone-look, or solid-color designs. Common colors included tan, brown, gray, green, burgundy, cream, black, and off-white. If your floor looks like it once proudly matched an avocado refrigerator, that does not prove asbestos, but it does suggest the material may be old enough to investigate.
Notice the Condition of the Tile
Intact, well-bonded floor tiles are generally less likely to release fibers than damaged or disturbed materials. The concern increases when tiles are cracked, crumbling, loose, water-damaged, heavily worn, drilled, sanded, scraped, or breaking apart at the edges. Friable material, meaning material that can be crushed or reduced to powder by hand pressure, is especially concerning.
If you see broken corners, powdery residue, curled edges, missing tiles, or exposed backing, stop. Do not sweep the dust. Do not vacuum it with a regular household vacuum. Do not grab a putty knife and “tidy it up.” That is the home improvement equivalent of poking a bear because you want to know if it is awake.
Instead, isolate the area as much as practical, keep people and pets away, avoid air movement that could spread dust, and contact an asbestos professional for next steps.
Look for Black Mastic or Old Adhesive
Black mastic is a dark, tar-like adhesive often found beneath older vinyl or asphalt floor tiles. It may appear black, dark brown, or deep gray. Some black mastics contained asbestos, while others did not. Like tile size, black mastic is a warning sign, not a final answer.
The adhesive matters because even if the tile itself does not contain asbestos, the glue underneath might. Flooring systems should be evaluated as a system: tile, backing, underlayment, adhesive, and sometimes leveling compounds. Removing the top layer without understanding the layers beneath can turn a small project into a costly cleanup.
Inspect Edges, Not Surfaces You Have to Break
Safe visual inspection means looking at what is already visible. You might examine an exposed edge at a doorway, a floor register, a missing baseboard area, or a loose transition strip. Use your eyes, a flashlight, and common sense. Do not create a new edge by cutting or snapping a tile.
If a tile is already loose, do not lift it for curiosity. If adhesive is exposed, do not scrape it. If dust is present, do not disturb it. The purpose of visual inspection is to decide whether to test, not to prove the answer with your fingernail.
Visual Clues That Suggest Possible Asbestos Tiles
Here are common signs that should make you cautious:
- Old square tiles, especially 9-inch by 9-inch tiles.
- Vinyl, asphalt, or resilient tiles installed before the 1980s.
- Dark black or tar-like adhesive beneath the tiles.
- Speckled, marbled, or solid-color vintage patterns.
- Tiles in older basements, kitchens, utility rooms, or commercial areas.
- Cracked, brittle, loose, or worn tiles.
- Old sheet flooring with felt-like backing.
Remember the golden rule: suspicious is not the same as confirmed. It simply means the next step should be testing, not demolition.
Way 3: Confirm With Professional Asbestos Testing
Why Testing Is the Only Reliable Answer
The most accurate way to identify asbestos tiles is laboratory analysis. Asbestos fibers are microscopic, and they cannot be confirmed by color, age, pattern, smell, weight, or internet photos. A professional inspector can collect samples safely and send them to a qualified lab for analysis.
Testing is especially important before remodeling. If you plan to remove flooring, install new flooring that requires surface preparation, level the floor, cut into old materials, drill through tile, or disturb adhesive, testing should happen before the project begins. Testing after you have already smashed the floor into dusty confetti is not a strategy. It is a regret with invoices.
Why Professional Sampling Is Safer Than DIY Guesswork
Some homeowners are tempted by mail-in test kits. The problem is not always the lab; the problem is the sample collection. Taking a sample may require disturbing the material, and doing that incorrectly can create exposure. A trained asbestos inspector knows how to collect representative samples while controlling dust, sealing the sample, documenting the location, and advising whether additional materials should be tested.
Professional testing can also prevent false confidence. For example, one sample from a tile may not tell you whether the mastic contains asbestos. A sample from one room may not represent another room. A sample from the top layer may not reveal asbestos in backing or underlayment. Good inspection is not just about grabbing a chunk; it is about understanding building materials.
What Happens During an Asbestos Inspection?
A typical inspection may include a visual survey, questions about the building’s age and renovation history, identification of suspect materials, sample collection, lab submission, and a written report. The report may identify whether asbestos was detected, what percentage was found, which materials were tested, and what recommendations apply if renovation or removal is planned.
If asbestos is confirmed and the material is intact, the safest option may be to leave it alone and cover it with suitable flooring, depending on local regulations and project conditions. If removal is necessary, licensed asbestos abatement professionals may be required. Rules vary by state and municipality, especially for rental properties, commercial buildings, schools, and demolition projects.
What Not to Do With Suspected Asbestos Floor Tiles
Until you know what you are dealing with, avoid these actions:
- Do not sand old flooring or adhesive.
- Do not use power tools on suspected asbestos tiles.
- Do not dry-scrape black mastic.
- Do not break tiles into small pieces.
- Do not use a regular vacuum on suspected asbestos dust.
- Do not sweep debris aggressively.
- Do not remove flooring just to “see what happens.”
The safest mindset is simple: if the floor might contain asbestos and you plan to disturb it, test first.
How to Tell If You Should Be Concerned
Low Concern: Intact and Undisturbed
If old tiles are in good condition, firmly attached, not crumbling, and not in the path of renovation, the immediate risk is usually lower. Many asbestos-containing materials become hazardous when fibers are released into the air through damage or disturbance. In some cases, leaving intact material alone is safer than removing it.
That said, “leave it alone” does not mean “forget it exists.” Keep records, tell future contractors, avoid abrasive cleaning, and do not allow anyone to sand or cut the flooring.
Medium Concern: Unknown Flooring Before Renovation
If you are planning new flooring, cabinet changes, plumbing work, wall removal, or basement renovation over old tile, concern rises. Even if the tiles look fine today, the project may disturb them tomorrow. This is the ideal time for professional testing because it helps you plan safely and avoid emergency surprises.
High Concern: Damaged, Dusty, or Crumbling Material
If tiles are breaking apart, adhesive is exposed, backing is powdery, or dust is present, treat the area seriously. Keep traffic low, avoid cleaning methods that disturb dust, and contact a professional. The goal is to prevent fibers from becoming airborne or spreading to other areas.
Common Myths About Identifying Asbestos Tiles
Myth 1: “All 9×9 Tiles Contain Asbestos”
Many 9-inch tiles are suspicious, but not all contain asbestos. Size is a clue, not proof. Testing is still required for certainty.
Myth 2: “If the Tile Is Shiny, It Is Safe”
A polished surface does not reveal what is inside the tile, backing, or adhesive. Floor finish can hide age and condition.
Myth 3: “Only the Tile Matters”
The adhesive, backing, underlayment, and leveling compounds may also contain asbestos. A complete flooring evaluation looks beyond the visible surface.
Myth 4: “A Quick Scrape Is Harmless”
Scraping, sanding, grinding, or breaking suspected asbestos materials can release fibers. Curiosity should never outrank safety.
Practical Examples: Is This Floor Suspicious?
Example 1: 1960s Basement With 9-Inch Tiles
A homeowner pulls back a corner of old carpet and sees tan 9-inch square tiles in a basement. The home was built in 1963. Some tiles are cracked near a floor drain. This floor should be treated as suspect. The homeowner should not remove the carpet aggressively or pry up tiles. Professional inspection and testing are the smart next move.
Example 2: 1978 Kitchen With Sheet Vinyl
A kitchen has old sheet vinyl beneath newer floating flooring. The visible edge shows a felt-like backing. Because some older sheet flooring backing contained asbestos, the homeowner should avoid tearing it out and should arrange testing before remodeling.
Example 3: 1995 Bathroom Tile
A bathroom remodeled in 1995 with documented ceramic tile and modern thinset is less suspicious than a pre-1980 vinyl tile floor. However, if demolition will expose older layers underneath, those hidden materials may still need evaluation.
Extra Experience Section: What Real-World Asbestos Tile Identification Feels Like
In real homes, identifying possible asbestos tiles is rarely as neat as a checklist. It usually starts with an innocent project. Someone decides to replace carpet, update a laundry room, or “just freshen up the basement.” Then a corner lifts, a strange old tile appears, and suddenly the weekend project has the emotional tone of a crime documentary.
The first experience many homeowners have is surprise. They expected dust bunnies and maybe a lost Lego. Instead, they find old square tiles, dark adhesive, or a mysterious layer that looks like it has been waiting since the Eisenhower administration. The best move in that moment is to stop. Not panic. Not demolish. Not text three friends and accept the boldest opinion as truth. Just stop.
A useful habit is to photograph what is visible without disturbing anything. Take wide photos of the room, close photos of exposed edges, and pictures of any damaged spots from a safe distance. These photos can help an inspector understand the situation before arriving. If you have renovation records, permits, or old listing photos, gather those too. The more context you provide, the easier it is to decide what needs testing.
Another common experience is frustration. Nobody wants to pay for testing when they were mentally prepared to spend money on beautiful new flooring. But testing is cheaper than contaminating a house, delaying a renovation, or hiring emergency cleanup after materials have been disturbed. Think of asbestos testing like checking the weather before painting the house. It may not be glamorous, but it can save the whole project.
Homeowners also learn that contractors vary. A careful contractor will pause when old flooring appears and recommend testing. A careless one may say, “We rip this stuff out all the time.” That sentence should make your safety antenna stand up. Experience says the best professionals respect unknown materials. They do not guess, grind, or create dust first and ask questions later.
In older homes, another lesson is that the visible floor may not be the original floor. Many people discover two, three, or even four layers. A modern plank floor may cover 1980s sheet vinyl, which covers 1960s tile, which covers black mastic. Each layer can have different risks. That is why testing should focus on the actual materials that may be disturbed, not just the prettiest or ugliest layer.
Finally, the biggest real-world lesson is emotional: asbestos identification is not about fear; it is about control. When you know what the material is, you can plan properly. If it is not asbestos, great. Proceed with normal renovation precautions. If it is asbestos and intact, you may be able to leave it in place. If removal is needed, you can hire qualified help and follow the rules. Either way, knowledge beats guessing.
The safest homeowners are not the ones who can identify every vintage tile pattern by memory. They are the ones who recognize uncertainty, respect old materials, and know when to bring in a professional. That approach keeps the project moving, protects the people in the home, and prevents a simple floor upgrade from becoming an expensive indoor air problem.
Conclusion: Identify the Risk, Then Let Testing Do the Talking
Learning how to identify asbestos tiles begins with three practical steps: check the age and history of the flooring, look for visual clues without disturbing the material, and confirm your suspicion with professional asbestos testing. Old 9-inch tiles, vintage vinyl flooring, black mastic, damaged edges, and pre-1980 installation dates are all reasons to be cautious. None of them, however, can prove asbestos by themselves.
The smartest approach is calm, careful, and boring in the best possible way. Do not sand. Do not scrape. Do not rip up mystery flooring because a video made it look easy. If the material is intact and will not be disturbed, leaving it alone may be the safest choice. If renovation is planned, testing gives you the facts you need before tools start flying.
Asbestos tiles are not automatically an emergency, but they do deserve respect. Treat unknown old flooring like a locked door: do not kick it open. Find the key, call the right expert, and move forward safely.


