Table of Contents >> Show >> Hide
- Why an Infinite Water Supply Matters in Minecraft
- How Minecraft Water Works
- What You Need Before You Start
- Method 1: Build the Classic 2×2 Infinite Water Source
- Method 2: Create Infinite Water from One Bucket Using Kelp
- Which Method Is Better?
- Best Uses for an Infinite Water Supply
- Can You Make Infinite Water in Other Shapes?
- Troubleshooting: Why Is My Infinite Water Source Not Working?
- Final Thoughts
- Player Experience: What It Feels Like to Rely on Infinite Water in Minecraft
- SEO Tags
In Minecraft, water is one of those humble little resources that quietly runs your whole life. It grows crops, saves you from lava, helps you build bubble elevators, turns awkward mountain drops into graceful landings, and makes you feel like an engineering genius even when you are basically digging a square hole and calling it innovation.
The good news is that making an infinite water supply is easy. The better news is that there are two practical ways to do it, depending on whether you have two water buckets ready to go or you are trying to stretch one bucket of water like a survival-mode cheapskate with big dreams and limited iron.
In this guide, you will learn how to create an infinite water supply in Minecraft, when each method makes sense, what common mistakes to avoid, and how to turn a tiny pool into one of the most useful tools in your world. By the end, you will never again need to sprint back to a river like a dehydrated goblin carrying an empty bucket.
Why an Infinite Water Supply Matters in Minecraft
Before we get into the methods, it helps to understand why this tiny setup is such a big deal. An infinite water source in Minecraft is not just a convenience. It is a quality-of-life upgrade that keeps paying you back.
With a permanent water source near your base, you can irrigate farmland, refill buckets for building projects, make water elevators, control lava while mining, fill bottles for brewing, and create safer routes through caves and cliffs. It also saves time, which is Minecraft currency in disguise. The less time you spend jogging to the nearest pond, the more time you spend actually building, farming, exploring, and not getting punted into a ravine by your own bad choices.
How Minecraft Water Works
To make an infinite water supply, you need to know the difference between a source block and flowing water. A source block is a full water block that can be picked up with a bucket. Flowing water is the water that spreads outward from a source block. It looks watery, sounds watery, and absolutely judges you if you try to scoop it like it is the real thing.
The trick behind infinite water is simple: under the right conditions, Minecraft lets water source blocks create more source blocks. That is why a tiny pool can behave like an endless supply. It is not realistic, but neither is punching a tree into usable lumber with your bare hands, so we will allow it.
In modern Minecraft, the most reliable setup is the classic 2×2 water pool. There is also a clever one-bucket method that uses kelp to turn flowing water into source blocks, which is especially handy when resources are tight.
What You Need Before You Start
For Method 1
- 2 water buckets
- 4 open blocks in a 2×2 shape
For Method 2
- 1 water bucket
- Kelp
- 1 solid or plantable block at the bottom of a water column, such as dirt, sand, or gravel
- A little patience, because kelp is helpful but never in a hurry
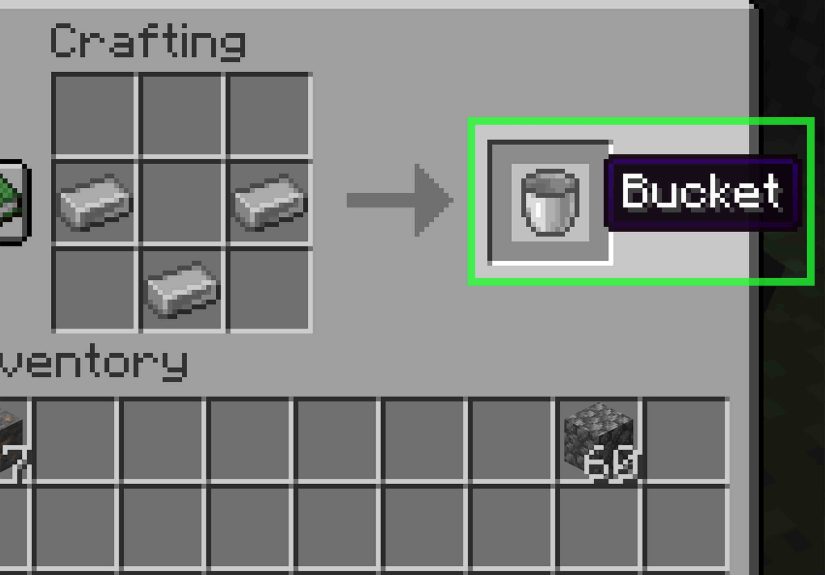
If you do not already have a bucket, craft one with three iron ingots. That makes the iron bucket one of the most valuable early-game tools you can own. A sword helps you survive. A pickaxe helps you progress. A bucket helps you stop screaming.
Method 1: Build the Classic 2×2 Infinite Water Source
This is the easiest and most reliable method. If you search for how to make an infinite water source in Minecraft, this is the version most players mean.
Step 1: Dig a 2×2 Hole
Find a spot near your base and dig a hole that is 2 blocks by 2 blocks and 1 block deep. It should look like a tiny square pool. You can build it indoors, outdoors, underground, or right next to your farm. It does not need to be pretty. It just needs to exist.
Step 2: Place Water in Opposite Corners
Take your first water bucket and place water in one corner of the 2×2 hole. Then take the second bucket and place water in the diagonally opposite corner. Not side by side. Not “close enough.” Diagonal corners.
When you do this correctly, the remaining two blocks will become source blocks as well. Suddenly, the entire 2×2 pool is made of still water, and each block can refill the others. Congratulations. You now own a tiny square of impossible physics.
Step 3: Test It
Scoop water out of any corner with an empty bucket. The pool should immediately refill itself. If it does, your Minecraft infinite water source is working.
Why This Method Is So Popular
The 2×2 pool is fast, compact, and easy to remember. It works great near starter bases, farms, villager areas, potion stations, mine entrances, and crop fields. It is also the foundation for bigger water projects, because once you have a permanent refill point, every other bucket task becomes painless.
Common Mistakes
The biggest mistake is placing the two water buckets in the wrong spots. If you place them side by side in a 2×2 square, you may still get working water depending on the layout, but diagonal placement is the clearest and most dependable method.
Another mistake is trying to scoop flowing water instead of a source block somewhere else in your build and assuming the setup failed. Remember: only source blocks are collectible.
Method 2: Create Infinite Water from One Bucket Using Kelp
This method is the clever survival-player answer to a classic problem: what if you only have one bucket of water? Maybe you are playing Skyblock. Maybe your iron supply is tragic. Maybe you are simply committed to making life harder for yourself in the name of efficiency. Respect.
The good news is that kelp can turn flowing water into source blocks. That means a single bucket can eventually help you create the source blocks you need for a permanent water pool.
When to Use This Method
Use the kelp method when you only have one water bucket and access to kelp, or when you are already building a vertical water column such as a bubble elevator. It is a little more technical than the 2×2 method, but it is still very manageable once you see the logic.
Step 1: Build a Small Vertical Water Column
Make a narrow vertical space, ideally 1 block wide and several blocks tall. Place a solid or plantable block at the bottom if needed. Then pour your single water bucket at the top so the water flows downward through the column.
At this stage, most of the water in the shaft is still flowing water, not source blocks.
Step 2: Plant Kelp from the Bottom Up
Stand at the bottom and place kelp on the bottom block. Then keep placing kelp upward, stacking it until it reaches near the top of the column. As kelp grows into the flowing water blocks, those water blocks convert into water source blocks.
This is the important magic trick. The kelp is not just decorating the shaft like a wet houseplant. It is changing the water itself.
Step 3: Remove the Kelp
Once the whole column has become source blocks, break the kelp. The water remains behind as source blocks. Now you have multiple collectible source blocks made from a setup that started with only one bucket.
Step 4: Make Your Permanent 2×2 Pool
Scoop two buckets of water from the source-filled column and carry them to a 2×2 hole. Place them in opposite diagonal corners, just like in Method 1. You now have a permanent infinite water supply in Minecraft created from a single original water bucket.
Why This Method Is Useful
This is a fantastic workaround for limited-resource worlds. It is also great for players building bubble elevators, underwater structures, or compact vertical systems where they need full source blocks instead of running water. Once you understand the kelp interaction, Minecraft water builds become much easier to control.
Which Method Is Better?
If you already have two buckets of water, Method 1 is the winner. It is faster, simpler, and perfect for beginners.
If you only have one bucket and access to kelp, Method 2 is your smartest play. It takes a little setup, but it saves you from hunting down a second water source or stalling a larger build.
In other words, the classic pool is the best everyday solution, while the kelp trick is the survival-mode underdog that shows up wearing work boots and quietly solves the problem.
Best Uses for an Infinite Water Supply
1. Crop Farming
Water is essential for keeping farmland hydrated. A nearby water source lets you build efficient wheat, carrot, potato, and beetroot farms without constantly hauling new buckets back and forth.
2. Water Elevators
Bubble elevators need source blocks, not just flowing water. That means an infinite water setup nearby can save you a lot of hassle while filling vertical shafts.
3. Safe Mining
A water bucket is one of the best tools for dealing with lava, dropping down cliffs, or softening dangerous falls. Having an infinite source at home means you can always refill before your next expedition.
4. Brewing and Bottles
Need water bottles for potions? An infinite water source by your brewing stand is a huge time saver and makes your potion room feel properly organized instead of like a chemistry accident in progress.
5. Building and Decoration
Waterfalls, canals, fountains, ponds, moats, and decorative pools all become easier when your refill station is right there. Good builders know that pretty water features start with a very unglamorous square hole somewhere nearby.
Can You Make Infinite Water in Other Shapes?
Yes, sort of. There is a smaller variation using a 3×1 trench with water at both ends. In that setup, the center block refills, but it is not as flexible as the classic 2×2 pool. It works, but it is more of a neat trick than the best everyday design.
For most players, the 2×2 infinite water source is still the best option because it is easier to use from any side and easier to recognize at a glance.
Troubleshooting: Why Is My Infinite Water Source Not Working?
If your setup fails, check these things first:
- You placed the water in the wrong corners.
- You are trying to scoop flowing water instead of a source block.
- Your kelp column did not fully convert all the flowing water into source blocks.
- You built a trench variation and expected the whole trench to behave like a 2×2 pool.
Most of the time, the fix is simple: rebuild the pool cleanly, place the water carefully, and test again. Minecraft water is easy once it behaves, but for a few minutes it can absolutely make you question your intelligence.
Final Thoughts
If you are wondering how to create an infinite water supply in Minecraft: 2 ways, the answer comes down to one simple choice. Use the classic 2×2 pool when you have two water buckets, or use the kelp method when you only have one bucket and need to create source blocks the clever way.
Both methods are worth learning because both solve real survival problems. One is fast and beginner-friendly. The other is resourceful and surprisingly satisfying. Either way, once you build an infinite water source near your base, you will wonder why you ever wasted time running to the nearest river like a medieval intern.
Build it once, keep it close, and enjoy one of the most useful upgrades in all of Minecraft.
Player Experience: What It Feels Like to Rely on Infinite Water in Minecraft
One of the funny things about Minecraft is that players rarely get excited about water until the moment they do not have it. Early in a new world, most people are focused on wood, food, coal, and not getting flattened by a creeper before they finish a front door. Water seems common, almost boring. Then you start building an actual base, and suddenly water becomes the most annoying thing to fetch over and over again.
That is usually the moment an infinite water source stops being a neat trick and starts feeling like a life upgrade. The first time you place a 2×2 pool next to your farm, the game changes in a small but permanent way. You stop planning around the nearest river. You stop carrying half-finished projects because you forgot to refill a bucket. You stop making those long, embarrassing runs back to spawn with the energy of someone who went to the grocery store and forgot the one thing they actually needed.
In survival mode, the experience is even more dramatic. If your base is in a plains biome, an infinite water source feels efficient. If your base is in a desert, on a mountain, underground, or in some weird self-imposed challenge map, it feels downright luxurious. There is something deeply satisfying about carving a tiny square into the floor of your base and knowing it solves farming, brewing, lava control, and future building problems all at once.
The one-bucket kelp method has its own special kind of satisfaction. It feels less like routine crafting and more like discovering that Minecraft’s water physics can be gently persuaded to work in your favor. The first time you turn a flowing column into source blocks with kelp, you feel clever in a very specific Minecraft way. Not “I built a redstone computer” clever. More like “I outsmarted a puddle” clever. Still counts.
Players who build water elevators especially notice the difference. Running water looks right but does not behave right for bubble columns, so having true source blocks matters. That is when the humble infinite water setup graduates from a farming convenience to serious infrastructure. Suddenly, your base has transit. You are no longer climbing ladders like it is 2012. You are ascending in style, powered by bubbles and questionable engineering.
There is also a comfort factor. Minecraft can be chaotic. Nights get dangerous, caves get messy, and lava has an almost supernatural ability to appear exactly where you did not want it. A permanent water source near your base feels like stability. It is one of those tiny systems that makes everything else smoother. Not flashy, not glamorous, but endlessly useful.
That is probably why veteran players build one almost automatically. It is not because the setup is exciting. It is because the experience of having it is so much better than the experience of not having it. And in Minecraft, that is often the difference between a base that merely exists and a base that actually works.


