Table of Contents >> Show >> Hide
- Why This DIY Sheep Costume Works
- Supplies You’ll Need
- How to Make a Sheep Costume: 11 Steps
- Step 1: Choose the Base Outfit
- Step 2: Decide Between Cotton Balls and Batting
- Step 3: Prepare the Work Area
- Step 4: Fluff the Cotton Balls
- Step 5: Glue or Stitch the Wool to the Body
- Step 6: Cover the Front, Back, and Hood
- Step 7: Make the Sheep Ears
- Step 8: Attach the Ears to a Hood, Beanie, or Headband
- Step 9: Create the Sheep Tail
- Step 10: Add the Black Sheep Details
- Step 11: Test the Fit Before the Big Event
- Safety, Comfort, and Durability Tips
- Creative Variations for Your Sheep Costume
- Common Mistakes to Avoid
- Real-Life Experiences and Practical Lessons from Making a Sheep Costume
- Conclusion
A sheep costume is one of those rare DIY projects that looks adorable, costs very little, and forgives almost every crafting mistake. Uneven cotton balls? Congratulations, you made wool. Slightly crooked ears? That sheep has personality. A tail that sits a little off-center? Farm animals are not known for runway symmetry.
Whether you need a last-minute Halloween costume, a school play outfit, a nativity scene lamb, a farm animal party look, or a cozy baby photo costume, this guide walks you through how to make a sheep costume in 11 simple steps. The design uses easy-to-find materials like a white hoodie, cotton balls or quilt batting, black leggings, felt, fabric glue, and a headband or beanie. You can make it no-sew, semi-sew, or extra-sturdy depending on how long the costume needs to survive.
The goal is simple: create a fluffy white body, black sheep legs, soft floppy ears, and a tiny tail that says “baa” without requiring a professional costume shop, a sewing machine, or a degree in barnyard engineering.
Why This DIY Sheep Costume Works
The best sheep costumes are built around contrast. A white, fluffy body creates the wooly effect, while black sleeves, pants, gloves, socks, or shoes create the look of sheep legs. Cotton balls give a charming, cloud-like texture, while quilt batting creates a faster, softer, more lightweight wool layer. A hoodie or beanie makes the headpiece easy, and felt ears add the recognizable lamb shape.
This costume also works because it is flexible. For a toddler, you can use a white onesie and a beanie. For a child, use a white sweatshirt or vest over black clothing. For an adult, start with an oversized hoodie or white T-shirt. For a stage performance, make the costume in separate pieces so it can be removed quickly between scenes. For Halloween trick-or-treating, keep the costume short, bright, and easy to move in.
Supplies You’ll Need
- White hoodie, sweatshirt, vest, onesie, or oversized T-shirt
- Black leggings, sweatpants, tights, or long-sleeve shirt for the sheep legs
- White cotton balls, cotton batting, poly-fil, or quilt batting
- Fabric glue, hot glue, or needle and thread
- Black felt or fleece for ears
- Pink or white felt for the inner ears, optional
- White beanie, hood, skull cap, or headband
- Cardboard or paper for an ear template
- Scissors
- Safety pins, Velcro, ribbon, or elastic
- Reflective tape or glow accessories for nighttime wear
- Black face paint or eyeliner for a simple sheep nose, optional
For a child-size costume, plan on using about 300 to 500 cotton balls if you want dense coverage. For an adult costume, you may need several bags. If you are short on time, batting covers more space much faster than individual cotton balls.
How to Make a Sheep Costume: 11 Steps
Step 1: Choose the Base Outfit
Start with a white hoodie, sweatshirt, vest, onesie, or T-shirt. A hoodie is ideal because it gives you a built-in place to attach ears and wool around the head. A vest is great for school plays because it is cooler, lighter, and easier to take on and off. A onesie works beautifully for babies because it keeps the costume simple and comfortable.
If you are gluing cotton balls directly onto clothing, choose a base garment that is slightly larger than normal. Once cotton balls or batting are attached, the fabric may not stretch as much. A roomy base also leaves space for a layer underneath if the costume will be worn outdoors.
Step 2: Decide Between Cotton Balls and Batting
Cotton balls create a classic homemade sheep costume look. They are round, fluffy, and instantly recognizable as pretend wool. The downside is that they take time to attach. Batting or poly-fil is faster because you can glue larger patches at once. It also gives the costume a softer, more cloud-like texture.
For a neat costume, use cotton balls. For a quick costume, use batting. For the fluffiest costume in the pasture, combine both: use batting as the base layer and add cotton balls on top around the chest, hood, and tail for texture.
Step 3: Prepare the Work Area
Lay the hoodie or shirt flat on a table. Slip cardboard, wax paper, or a plastic cutting mat inside the garment before gluing. This prevents glue from soaking through and sticking the front of the shirt to the back. That is not a sheep costume; that is a fabric sandwich.
Keep your cotton balls, glue, scissors, felt, and templates nearby. If you are using hot glue, work in small sections and avoid pressing hot glue through thin fabric. If a child is helping, let them place cotton balls while an adult handles the hot glue.
Step 4: Fluff the Cotton Balls
Before attaching cotton balls, gently pull each one apart just enough to make it larger and more wool-like. Do not shred it into tiny wisps. You want fluffy spirals, not a snowstorm on your table.
Fluffing cotton balls helps cover more area and gives the costume a natural texture. Real sheep wool is not perfectly round and uniform, so a little variation makes the costume look better. If some pieces are bigger and some are smaller, that is completely fine.
Step 5: Glue or Stitch the Wool to the Body
Apply fabric glue or hot glue to a small area of the hoodie, shirt, or vest. Press cotton balls or batting firmly into place. Work from the center outward, or from the bottom upward, so you can control the spacing. If you are using cotton balls, place them close together for a full wooly look. If you are using batting, pull it into soft uneven pieces and glue the edges down.
For a stronger costume, use an “X” of glue under each cotton ball instead of one tiny dot. For a washable or reusable costume, hand-stitch small clusters of cotton or batting to the garment. Stitching takes longer, but it holds up better if the costume will be worn for several events.
Step 6: Cover the Front, Back, and Hood
Once the front is covered, let it dry before turning the garment over. Then cover the back. If you are making the costume for a stage performance where the audience mostly sees the front, you can use slightly lighter coverage on the back. For Halloween photos, cover both sides generously.
If your base has a hood, add cotton balls or batting to the hood as well. Leave the face opening clear so the wearer can see and breathe comfortably. Avoid adding bulky wool under the chin because it can feel scratchy or annoying after a while.
Step 7: Make the Sheep Ears
Draw a long teardrop or rounded triangle shape on paper to make an ear template. Cut two ears from black felt or fleece. If you want a softer lamb look, cut smaller pink or white inner-ear pieces and glue them onto the black ears.
For floppy ears, use felt as-is. For ears that stick out slightly, add a thin piece of cardboard or craft foam between two layers of felt. Keep the ears lightweight. Heavy ears may droop, tug, or slowly migrate down the headband like they are trying to escape the costume.
Step 8: Attach the Ears to a Hood, Beanie, or Headband
If you are using a hoodie, glue or stitch the ears to the sides of the hood. Place them slightly above ear level so they frame the face. If you are using a beanie or skull cap, stitch or glue the ears to the sides, then add cotton balls around the base to hide the attachment points.
A headband is a good option for warm weather because it keeps the head cooler. Wrap the headband with white felt, ribbon, or cotton batting, then attach the ears. Reinforce the ears with a few stitches if the costume will be worn by a child who plans to run, jump, dance, or become emotionally committed to sheep realism.
Step 9: Create the Sheep Tail
A sheep tail should be small, fluffy, and simple. Gather a handful of cotton balls or a small piece of batting into a rounded puff. Glue or stitch it together, then attach it to the back of the costume with a safety pin, Velcro, or a few hand stitches.
Do not make the tail too long. A big swinging tail might look funny, but it can get caught on chairs, doors, or other costumes. A compact tail is safer, cuter, and less likely to be mistaken for a misplaced dust mop.
Step 10: Add the Black Sheep Details
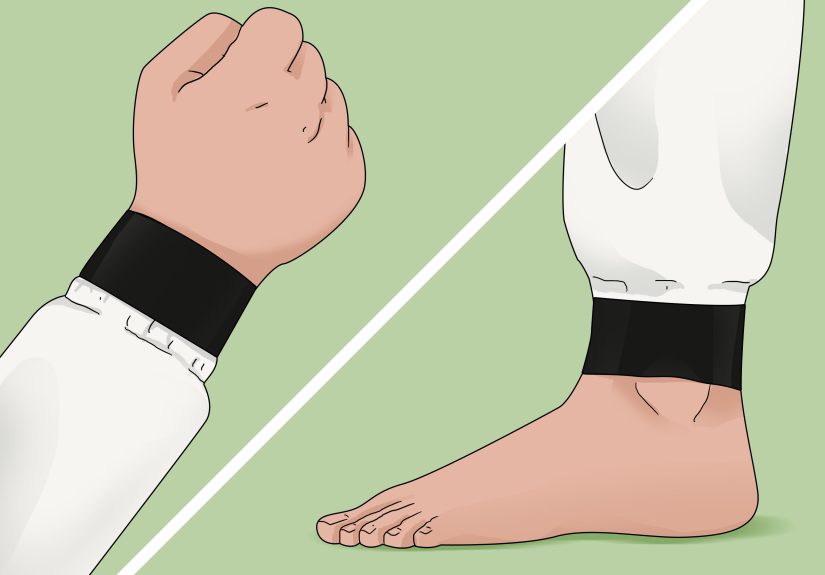
To complete the sheep look, pair the fluffy white top with black leggings, tights, sweatpants, or a black long-sleeve shirt. Black gloves and black socks or shoes help create the look of hooves. For babies or toddlers, black footed pajamas under the wooly body are a comfortable option.
You can also add a simple sheep nose with black face paint or eyeliner. Draw a small oval or heart shape on the nose and, if desired, a short line down toward the upper lip. Keep face paint minimal, especially for young children. A sheep does not need a full theatrical makeover to be convincing. Fluff does most of the work.
Step 11: Test the Fit Before the Big Event
Have the wearer try on the entire costume before Halloween night, school performance day, or photo time. Check whether the costume is too warm, too tight, too itchy, or too bulky. Make sure the wearer can sit, walk, climb stairs, use the bathroom, and move their arms comfortably.
Trim any loose strings, secure weak cotton balls, and make sure the costume does not drag on the ground. If it will be worn outdoors at night, add reflective tape to shoes, sleeves, candy bags, or the back of the costume. A sheep costume should be adorable, but it should also be visible.
Safety, Comfort, and Durability Tips
Because cotton balls and batting can be flammable, keep the costume away from candles, fire pits, heaters, jack-o’-lantern flames, and other heat sources. Battery-operated candles and glow sticks are smarter choices around handmade costumes. Avoid long trailing fabric, oversized sleeves, or pieces that can catch on furniture or decorations.
Comfort matters, too. A cotton-covered hoodie can become surprisingly warm. If the event is indoors, consider a vest instead of a sweatshirt. If the costume is for a toddler, avoid anything around the neck that ties tightly. Use Velcro, snaps, or loose elastic instead of long cords.
For durability, fabric glue usually works better than school glue. Hot glue is fast, but it can stiffen the fabric and may pop off with movement. Stitching is the strongest method, especially for ears, tail, and high-stress areas like shoulders. If you need the costume to survive multiple wearings, reinforce the wool in clusters rather than attaching every single cotton ball with one tiny dot.
Creative Variations for Your Sheep Costume
Baby Lamb Costume
Use a white onesie, a soft beanie, and cotton balls. Keep the wool away from the baby’s hands and mouth. Skip small detachable parts and make sure everything is firmly attached.
Black Sheep Costume
Flip the color scheme by using black clothing and dark gray or black batting. Add a tiny sign that says “family rebel” if the costume is for a party with people who appreciate gentle comedy.
Shaun-Inspired Sheep Costume
Use a black long-sleeve shirt and black pants, then add a white wooly vest and a fluffy cap. Keep the face area mostly black and the body fluffy for that playful cartoon lamb vibe.
Little Bo Peep Group Costume
Pair one sheep costume with a shepherd or Little Bo Peep outfit. This is a fun idea for siblings, couples, school events, or group Halloween themes.
Common Mistakes to Avoid
The biggest mistake is using too little glue. Cotton balls need enough adhesive to stay attached through movement. Another mistake is covering the costume so heavily that it becomes stiff and uncomfortable. Balance fluff with flexibility.
Do not wait until the last hour to make the ears. The body may look like a sheep once it is fluffy, but the ears are what make the costume instantly recognizable. Also, do not skip the test fitting. A costume that looks great on a table may feel too hot, too scratchy, or too bulky once worn.
Finally, avoid masks that block vision. A simple nose drawn with face paint is usually better, safer, and more comfortable than a full sheep mask.
Real-Life Experiences and Practical Lessons from Making a Sheep Costume
The first thing you learn when making a sheep costume is that cotton balls multiply emotionally, not mathematically. One bag looks enormous in the store, but once you start covering a hoodie, it suddenly feels like you are decorating a parade float with marshmallows one molecule at a time. Buy more cotton balls than you think you need, especially if you want full coverage. If you end up with extras, they are useful for the tail, hood, touch-ups, and the inevitable “one bald patch” you notice five minutes before leaving the house.
Another practical lesson is that the base garment matters more than people expect. A thin T-shirt can work, but it may stretch, wrinkle, or sag under the weight of glue and cotton. A sweatshirt, hoodie, vest, or fleece top gives you a sturdier foundation. For kids, a vest is often the easiest choice because it is not too hot and can be removed quickly. For adults, an oversized hoodie creates the funniest and fluffiest result, especially if the hood is covered in wool and the ears sit on the sides.
If you are making the costume for a school play, choose function over perfection. Stage costumes need to be readable from a distance, not examined by a panel of sheep historians. Big ears, a fluffy front, black sleeves, and a clear tail are usually enough. You can leave the inside seams and hidden back areas less detailed if time is short. The audience will understand the character immediately, and no one in row twelve will know that the left shoulder has emergency cotton-ball patchwork.
For Halloween, comfort becomes the main issue. A heavily glued cotton costume can get warm fast, especially over layers. If the wearer will be walking outdoors, keep the bottom half simple with black leggings or pants and avoid fluffy fabric around the ankles. Fluff near the feet can pick up leaves, dirt, candy wrappers, and mysterious sidewalk debris. Sheep may live in fields, but your costume does not need to collect evidence from every driveway.
Glue choice also affects the experience. Hot glue is fast and satisfying, but it can create stiff spots. Fabric glue takes longer to dry, but it keeps the garment more flexible. If you are making the costume the night before, hot glue may save the day. If you have a few days, fabric glue or hand-stitching creates a more comfortable result. For high-movement events, reinforce the ears and tail with stitches, because those parts tend to take the most abuse.
A good trick is to make the costume in removable pieces. A fluffy vest, separate headband, and pinned-on tail are easier to store and adjust than one giant wool-covered outfit. This also lets you reuse the black clothing later. After the event, remove the cotton-covered pieces and save them in a breathable bag. Do not crush the costume under heavy items unless you want your sheep to come out looking like it slept under a tractor.
The most charming part of a handmade sheep costume is that it does not need to be flawless. In fact, slightly uneven wool often looks better. A few lumps and bumps make it soft, funny, and handmade in the best possible way. When the wearer smiles, wiggles the ears, or gives one tiny “baa,” the costume has already done its job.
Conclusion
Making a sheep costume is simple, budget-friendly, and surprisingly fun. With a white base, fluffy cotton or batting, black clothing, felt ears, and a small tail, you can create a costume that works for Halloween, school plays, church programs, farm-themed parties, and baby photos. The key is to keep the costume comfortable, safe, and easy to move in. Build the wool in layers, reinforce the ears, avoid open flames, and test the fit before the big event.
Best of all, a DIY sheep costume welcomes imperfection. Every fluffy bump adds character. Every slightly uneven ear adds charm. And every cotton ball that falls off becomes a reminder that handmade costumes have more personality than anything hanging in a plastic bag at the store.


