Table of Contents >> Show >> Hide
- Why This Dollar Store Mushroom Solar Lights DIY Works
- Materials & Tools
- Pick a Mushroom Style
- Step-by-Step: DIY Mushroom Solar Lights Using Dollar Store Bowls
- Step 1: Test your solar light first (seriously)
- Step 2: Disassemble the solar stake light
- Step 3: Mark and cut the center hole in the bowl
- Step 4: Add tiny vent/drain holes (prevents foggy mushrooms)
- Step 5: Prep the surface for paint
- Step 6: Paint your mushroom cap (and make it delightfully weird)
- Step 7: Optional topcoat for weather and UV protection
- Step 8: Mount the solar head into the bowl
- Step 9: Rebuild the stem and stake
- Step 10: Place and charge your mushrooms
- Design Tips for Next-Level Results
- Weatherproofing & Longevity Checklist
- Troubleshooting: When Your Mushroom Isn’t Glowing
- Cost & Time: What to Expect
- of Real-World “What It’s Like” (Without the Fairy Dust)
- Conclusion
Want your garden to look like a fairy moved in… without paying fairy prices? This DIY turns a basic solar stake light and a couple of dollar-store bowls into adorable mushroom solar lights that glow at night and charm your neighbors by day. No wiring. No outlets. No electrician side-eye. Just sunlight doing the work while you take the credit.
Below is a beginner-friendly, “I-only-own-one-screwdriver” tutorial, plus pro-level tricks for better charging, stronger bonds, and weatherproofingbecause outdoor decor shouldn’t melt, peel, or fly away the first time the wind sneezes.
Why This Dollar Store Mushroom Solar Lights DIY Works
Solar path lights are basically tiny outdoor robots: they charge all day, sense darkness automatically, and switch on at night. Your bowl “mushroom cap” becomes a cute diffuser that softens the LED glow into a cozy, magical-looking light. The best part? You’re not building electronicsyou’re re-housing what already works.
Materials & Tools
Core supplies
- Dollar store bowls (plastic works easiest; look for smooth, sturdy bowlspunch bowls are great for larger caps)
- Solar stake/path lights (the common “stake + light head” kind; buy a few so you can make a little mushroom family)
- Outdoor-rated adhesive (E6000-style craft adhesive or a waterproof silicone glue/caulk)
- Spray paint made for plastic (or plastic primer + outdoor spray paint)
- Optional clear topcoat (UV-resistant, outdoor-friendly)
Helpful tools
- Drill (or a heated awl/screwdriver for very small holesdrill is cleaner)
- Step bit or hole saw (nice to have for a neat center hole)
- Sandpaper or sanding sponge (220-ish grit is perfect)
- Rubbing alcohol + paper towels
- Painter’s tape
- Marker, ruler, and a cheap bowl you don’t mind “sacrificing” to crafts
- Safety glasses and gloves (future-you will be grateful)
Pick a Mushroom Style
You’ve got two easy build options. Both look greatchoose based on what your bowls and solar lights look like.
Option A: Classic mushroom cap (most popular)
One bowl = one mushroom cap. The solar light’s head sits at the top so the panel can charge. The LED shines downward under the bowl like a little garden spotlight with a cute hat.
Option B: Extra-large “statement mushroom”
Two bowls = a bigger cap. Some crafters stack bowls (rim-to-rim or offset) to create a wider silhouette. This is awesome for front yards, big planters, or anywhere you want a dramatic glow.
Step-by-Step: DIY Mushroom Solar Lights Using Dollar Store Bowls
Step 1: Test your solar light first (seriously)
Before you build anything, switch the solar light on (many have a tiny on/off switch under the cap) and let it charge in direct sun for a day. At night (or in a dark closet), confirm it actually lights up. It’s way less heartbreaking to return a dud now than after you’ve lovingly painted tiny polka dots for 45 minutes.
Step 2: Disassemble the solar stake light
Most budget solar stake lights separate into three parts: the stake, the post, and the light head (where the solar panel and LED live). Twist or pull gently to separate them. Keep all piecesyou’ll likely reuse the post/stake as your “mushroom stem” support.
Step 3: Mark and cut the center hole in the bowl
Flip your bowl upside down (this is now your mushroom cap). Find the center and mark it. You want a hole just big enough for the solar light head’s “neck” or base to pass through while the solar panel portion stays on top.
- Tip: Start small. You can always widen a hole, but you can’t un-hole a hole.
- Cleaner edges: Use a step bit and drill slowly.
- Safety: Hold the bowl securely (or clamp it) so it doesn’t spin like a plastic helicopter.
Step 4: Add tiny vent/drain holes (prevents foggy mushrooms)
Outdoor humidity + temperature swings can cause condensation under the cap. Make 2–4 small holes near the rim (on the underside) so moisture can escape. Tiny holes also help prevent trapped water from turning your mushroom into a mini birdbath.
Step 5: Prep the surface for paint
This is the step that separates “cute for a weekend” from “still cute next season.”
- Scuff sand the outside of the bowl lightly so paint can grip.
- Clean with rubbing alcohol to remove oils and dust.
- Let it dry completely.
Step 6: Paint your mushroom cap (and make it delightfully weird)
Use spray paint designed for plastic (or prime first). Spray in multiple thin coats instead of one thick coat that drips like a sad candle.
Fun paint ideas:
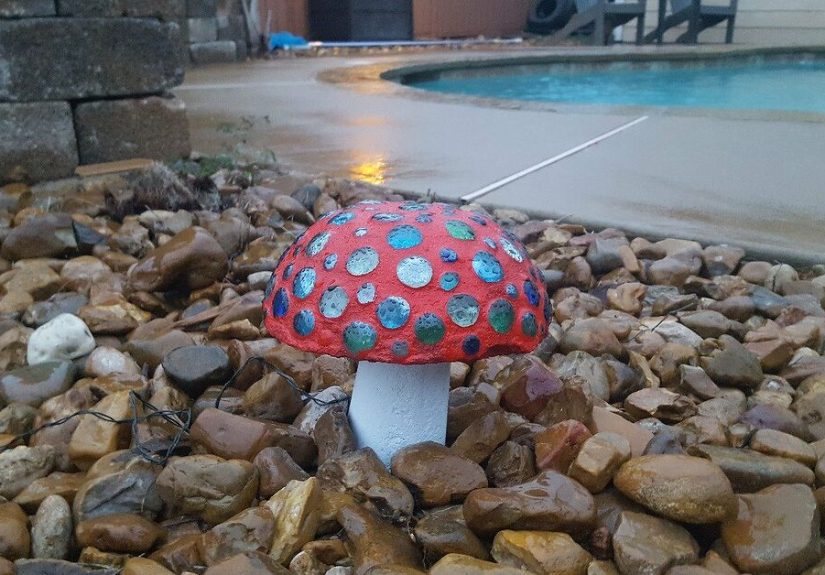
- Classic toadstool: Red cap + white spots (use a stencil or round sponge)
- Modern minimal: Matte black cap + soft warm white glow
- Fairy pastel: Mint, blush, or lavender + pearly clear coat
- “Frosted glass” vibe: Light, translucent coats that still let the glow spread softly
- Galaxy mushroom: Deep navy base + speckled white stars + tiny metallic highlights
Important: Don’t paint over the solar panel. The panel needs direct light to charge. If your design comes close to the panel area, mask it with painter’s tape before spraying.
Step 7: Optional topcoat for weather and UV protection
If your mushrooms will live outside full-time (they will), an outdoor clear topcoat can help protect the finish. Keep the coats light and avoid spraying the solar panel or the light sensor area.
Step 8: Mount the solar head into the bowl
Slide the solar light head through the center hole so the solar panel sits on top of the bowl and the LED points downward under the cap. Adjust until it sits straight (a lopsided mushroom looks… tipsy).
Secure it: Apply your outdoor adhesive around the joint where the light head meets the bowl. Build a neat “gasket” bead. Let it cure fully according to the labelthis is what keeps water out and prevents wobble.
Step 9: Rebuild the stem and stake
Reattach the post and stake the way the solar light was originally assembled. You now have a mushroom cap on top of a solar light stem.
Want a thicker, cuter stem? Here are easy upgrades:
- Dollar store vase/candle holder: Slide the solar post through it or glue it around the post for a chunkier “stem.”
- PVC coupling: Great for stabilizing and centering parts.
- Rocky base: Put the stake into a small planter with pebbles for a heavier, wind-resistant setup.
Step 10: Place and charge your mushrooms
Put your mushroom solar lights where they’ll get plenty of sunideally 6–8 hours of direct sunlight for best brightness. Avoid spots shaded by shrubs, fences, or the one tree that suddenly decides to grow faster the moment you start gardening.
Design Tips for Next-Level Results
Make them look intentional (not like “a bowl happened”)
- Vary heights: Build a small, medium, and tall mushroom cluster.
- Repeat colors: Pick 2–3 colors and repeat them so it looks styled.
- Hide the stake: Sink it deeper into soil or nestle it behind plants.
- Create a path: Place mushrooms every few feet along a walkway for a storybook effect.
Boost diffusion without blocking charging
If the light is too harsh under the cap, add a light mist coat of translucent paint on the underside of the bowl (not near the panel). This softens hotspots while keeping the top clear for charging.
Weatherproofing & Longevity Checklist
- Use outdoor-rated adhesive (craft glue that’s not waterproof will eventually give up)
- Vent/drain holes to reduce condensation
- Clear topcoat to help resist fading/chipping
- Keep the panel clean (dust and pollen reduce charging)
- Plan for battery replacement (many solar lights use replaceable rechargeable batteries)
Troubleshooting: When Your Mushroom Isn’t Glowing
Problem: It doesn’t turn on at night
- Make sure the switch is in the ON position (it’s often hidden underneath).
- Charge it in direct sun for a full day, then test it in complete darkness.
- Move it away from bright porch lightssome solar lights won’t turn on if nearby lighting “tricks” the sensor.
Problem: It’s dim
- Relocate to a sunnier spot (shade = weak charge).
- Wipe the solar panel with a damp cloth.
- Consider swapping the rechargeable battery if it’s older (battery performance can drop over time).
Problem: Paint is peeling or scratching
- Next time: sand + clean first, use paint made for plastic, and apply thin coats.
- Add a compatible outdoor clear coat (and let it cure fully).
Cost & Time: What to Expect
- Cost per mushroom: typically lowbowls + solar light + a bit of paint/adhesive
- Hands-on time: about 20–40 minutes each (plus drying/curing time)
- Skill level: beginner, with “intermediate confidence” if you hate drills
of Real-World “What It’s Like” (Without the Fairy Dust)
Here’s the part most tutorials skip: the experience of making these is 50% crafting, 30% waiting for paint to dry, and 20% standing in your yard at night whispering, “Please work, please work,” like you’re auditioning for a gardening reality show.
What most DIYers notice first is how forgiving this project is. If your center hole is slightly off, the mushroom doesn’t become trashit becomes “handmade character.” If your paint job isn’t perfect, congratulations: you’ve invented a rare woodland species. And if you accidentally make one mushroom taller than the others, it looks intentional the second you cluster them together. Landscaping is basically optical illusions with plants and confidence.
The biggest “aha” moment tends to happen after the first night. Solar lights often look okay in daylight and then surprisingly magical once they glow. The bowl diffuses the LED so the light feels softer and more decorative than a normal stake light. You’ll probably walk outside a few extra times just to admire it. You may also start planning “Phase Two,” which is how every garden project begins (and how storage sheds fill up).
Weather is where the learning curve shows up. If you skip surface prep, paint can chipespecially on slick plastic. If you use the wrong glue, the cap can loosen after a few hot days or rainy nights. That’s why the prep steps matter: scuff sanding, cleaning, thin coats, and giving adhesives enough cure time. Outdoor crafts are basically a relationship with patience. Rush it, and it will ghost you.
Charging is the other real-world variable. The same mushroom can glow bright in July and a little softer in cloudy seasons. That’s normal for solar. The “pro move” is placement: a spot with consistent sun beats the perfect spot aesthetically that gets shaded at 3 p.m. by a bush with big dreams. Also, keeping the solar panel clean makes more difference than people expectpollen and dust act like tiny sunglasses for your panel.
Finally, the fun part: these mushrooms invite personality. People name them. Kids move them. Guests point them out. You’ll probably catch someone saying, “Wait… is that a bowl?” and then immediately asking how you made it. That’s the sweet spot of DIY: it looks clever, costs little, and makes your outdoor space feel like it has a sense of humorkind of like you.
Conclusion
DIY mushroom solar lights made from dollar store bowls are the perfect mix of budget-friendly and ridiculously charming. With a little paint, a solid outdoor adhesive, and smart placement for charging, you’ll get garden lights that feel customwithout paying “boutique garden decor” prices. Make one, and you’ll want a whole mushroom neighborhood. (And honestly? Your yard deserves that.)


