Table of Contents >> Show >> Hide
- What You’re Actually Watching (and Why It Looks So Wild)
- Bondo, Spot Putty, and Sprayable Filler: Same Family, Different Jobs
- Why Spraying Filler on 3D Prints Works So Well
- Best Use Cases (Where This Looks Like a Superpower)
- Compatibility: PLA, PETG, ABS, Resin PrintsWhat to Know
- A Practical Workflow (High-Level, Maker-Friendly, and Not a Chemistry Class)
- Safety Reality Check (Especially Important)
- Common Mistakes That Make Prints Look Worse (Yes, It Happens)
- If You Don’t Have Spray Equipment: The “Still Smooth” Alternatives
- FAQ: Quick Answers for Curious Finishers
- Real-World Experiences: The Spray-Fill Learning Curve (500+ Words)
- Conclusion
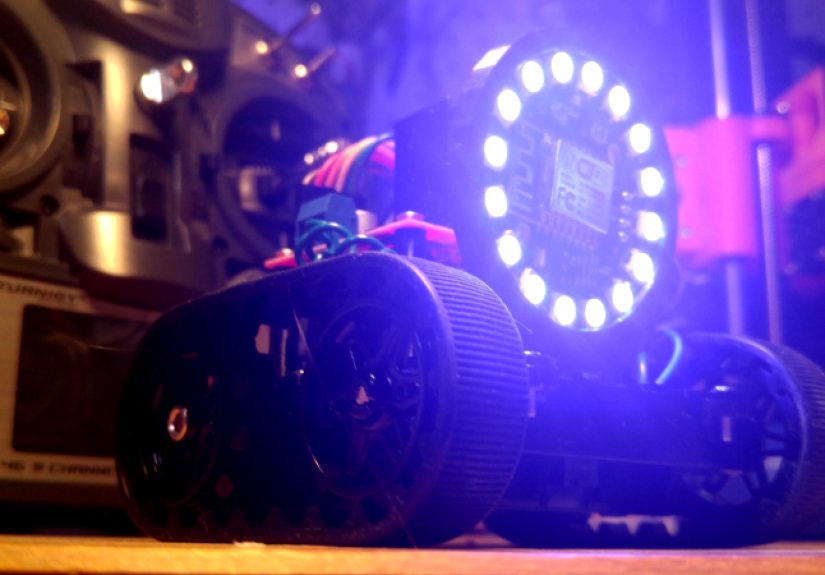
If you’ve ever held a freshly printed PLA helmet up to the light and thought, “Wow, I can count every single layer like rings on a tree,” congratulations:
you’ve met the final boss of FDM printingsurface finishing.
Now imagine skipping a bunch of the “sand for two hours, cry a little, sand again” routine and instead spraying a thick, sandable putty-like coating over the print,
letting it cure, and then knocking it smooth like you’re shaping a surfboard (but with fewer beach vibes and more dust).
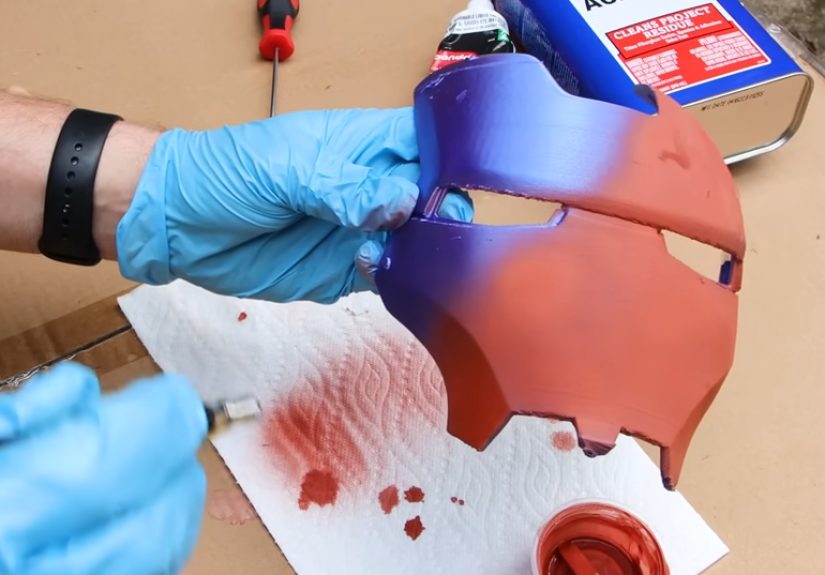
That’s the oddly satisfying magic behind watching “Bondo putty” (or, more accurately, sprayable polyester filler/primer surfacer) get laid onto 3D prints.
What You’re Actually Watching (and Why It Looks So Wild)
The mesmerizing part is the contrast: a rigid plastic print with visible layer lines gets coated in a wet, high-build material that lands like a uniform blanket.
Where a normal rattle-can primer looks like a thin fog, sprayable filler looks more like liquid bodywork.
It’s designed to fill small voids, pinholes, scratches, and textureexactly the same kind of tiny imperfections 3D prints love to collect.
The “sprayed putty” category exists in the automotive refinishing world for smoothing panels and repairs.
In maker-world terms, it’s a shortcut for turning a print that screams “I was made on a printer” into something that whispers “I was manufactured on purpose.”
Bondo, Spot Putty, and Sprayable Filler: Same Family, Different Jobs
Let’s clear up the naming confusion, because the internet loves calling everything “Bondo” the way people call every tissue a Kleenex.
Bondo is a well-known brand, but the finishing tools you’ll hear about usually fall into three buckets:
1) Traditional body filler (the classic “mix-and-spread” stuff)
This is the familiar two-part polyester filler used for shaping and rebuilding surfaces. It’s fantastic for big gaps, seams, and reshaping edges
like fixing the seam line on a cosplay helmet where you glued multiple print sections together.
It sands nicely when cured, but it’s applied by spreading, not spraying.
2) Glazing & spot putty (the “tiny defect assassin”)
Spot putty is meant for scratches, pinholes, and small low spots. It’s quicker and finer than body filler, and it’s popular in 3D printing
because prints often have tiny surface defects that don’t justify a full-on body filler session.
Many versions are one-part and sandable relatively fastperfect for chasing little flaws after priming.
3) Sprayable polyester filler / high-build polyester primer surfacer (the star of the show)
This is the “sprayed putty” look: a high-solids, high-build coating designed to be sprayed with proper equipment and then sanded smooth.
It’s commonly marketed as a polyester primer surfacer or sprayable polyester filler, and it’s often labeled for professional use.
The maker advantage is simple: it can cover broad surfaces evenlyexactly what big prints need.
Why Spraying Filler on 3D Prints Works So Well
FDM prints aren’t “damaged”they’re just textured. Layer lines are consistent ridges.
If you try to sand raw PLA aggressively, it can feel gummy and inconsistent, especially on curved surfaces.
A high-build coating changes the game by giving you a uniform material to sand.
- It fills micro-voids (like tiny pits and seam porosity) instead of making you hunt them one-by-one.
- It creates a consistent sanding surface, which helps you avoid wavy “over-sanded” spots on plastic.
- It speeds up big builds where brushing filler would be slow and uneven.
Think of it like icing a cake. You can carve the cake (the print), but icing gives you the smooth, pretty outer layer people actually see.
And yesif you spray it too heavy, it can also drip like icing. The universe demands balance.
Best Use Cases (Where This Looks Like a Superpower)
Large cosplay or prop parts
Helmets, chest plates, sci-fi armor panels, and big prop shells usually have:
big curved surfaces + visible layer lines + glued seams. Sprayable filler is ideal when you need uniform smoothing
before you do detail work and paint.
Display pieces that need a “factory” finish
If you’re painting a model to look injection-molded (like a collectible figurine or a replica gadget), the surface quality matters.
Sprayed filler helps you reach that “I can’t tell how it was made” lookespecially under glossy paint, which highlights every flaw.
Restoration-style projects
Sprayable polyester primers are commonly used for filling imperfections and building a sandable base during refinishing work.
That same logic maps cleanly onto prints: fill texture, sand smooth, then paint.
Compatibility: PLA, PETG, ABS, Resin PrintsWhat to Know
Most prints can be finished successfully, but the “right” approach depends on the material and the goal.
- PLA: Often benefits from a coating-first approach because sanding raw PLA can be frustrating. A high-build layer gives you something nicer to sand.
- PETG: Can be slippery and heat-sensitive when sanded aggressively; a primer/filler layer helps create a consistent surface.
- ABS: Sands more predictably than PLA, and you may combine sanding with other smoothing techniques depending on your setup and safety considerations.
- Resin prints (SLA/MSLA): Usually start smoother, but still show support marks and tiny surface defects. Priming highlights imperfections and helps you spot-fill cleanly.
No matter what you printed with, the core idea is the same: build a uniform surface, then refine it.
A Practical Workflow (High-Level, Maker-Friendly, and Not a Chemistry Class)
Here’s the overall rhythm most successful finishers followespecially for big prints:
Step 1: Prep the print
Remove supports, knock down obvious blobs, and make sure the surface is clean and dry. Oils from hands, dust, and residue can interfere with coatings.
This is also where people fix major seams (like glued joints) so the coating doesn’t just “highlight” the problem later.
Step 2: Build the surface
This is where sprayed filler shines: it’s used to fill shallow texture and create a sandable base coat.
Many high-build primers and sprayable polyester fillers are engineered specifically for filling imperfections and creating film build.
(Translation: they’re made to do exactly what layer lines are begging for.)
Step 3: Sand, inspect, repeat (the sacred loop)
Sanding isn’t punishmentit’s just “leveling.” The coating makes it faster because you’re sanding a uniform layer instead of fighting plastic.
A primer layer can also help you see low spots and scratches, because neutral primers highlight imperfections.
Step 4: Spot-fill the stubborn flaws
Once you’re close, glazing/spot putty becomes your best friend for pinholes, tiny pits, and that one seam line that refuses to stop being noticed.
The goal is targeted perfection without burying your details under a mountain of filler.
Step 5: Prime and paint
When the surface looks consistent under primer, paint becomes dramatically easier.
Thin color coats look better over a smooth base, and you’ll spend less time trying to “paint over texture” (which basically never works).
Safety Reality Check (Especially Important)
Sprayable fillers and many automotive-style coatings can involve strong fumes and fine particulates when sanded.
Always follow the product’s instructions and safety documentation, and work in a properly ventilated area.
If you’re a teen, do this kind of chemical spraying and sanding only with adult supervision and appropriate protective equipment.
Also: sanding dust is not a snack, no matter how much it looks like Parmesan.
Use a good mask/respirator suited for the materials you’re using, protect your eyes, and keep the workspace clean.
Common Mistakes That Make Prints Look Worse (Yes, It Happens)
Overbuilding until details disappear
Thick coatings can soften sharp edges and bury fine texture. If the print has crisp panel lines or engraved lettering,
heavy filler can turn “high detail” into “mysterious blob artifact.”
Skipping inspection coats
Primer is like a detective flashlightit reveals everything. If you only inspect with your bare plastic color,
you’ll miss low spots until paint makes them obvious.
Assuming one pass is enough
The best finishes usually come from multiple controlled cycles: build, sand, check, spot-fill, repeat.
The “spray it once and you’re done” fantasy is adorable, but it’s also how you end up with ripples, scratches, and weird texture.
Sanding too aggressively in one area
Especially on curved surfaces, it’s easy to create flat spots if you focus too hard in one place.
A consistent sanding approach helps keep curves looking like curvesnot like someone sat on them.
If You Don’t Have Spray Equipment: The “Still Smooth” Alternatives
Not everyone has the setup for professional sprayable polyester fillers, and that’s okay.
Many makers get excellent results with:
- High-build filler primer in a spray can for broad coverage and easier sanding
- Brush-on smoothing coatings designed for 3D prints (useful when you want self-leveling behavior)
- Spot putty for defects after primer reveals them
- Smart print settings (smaller layer height, tuned temperature, better extrusion) to reduce finishing work in the first place
The “right” method depends on your budget, your space, and your patience threshold.
If your finishing process makes you hate your hobby, it’s not a workflowit’s a cry for help.
FAQ: Quick Answers for Curious Finishers
Is it really “Bondo” being sprayed?
Sometimes people say “Bondo” as shorthand, but the spray-on look usually comes from products designed to be sprayed:
polyester primer surfacers or sprayable polyester fillers.
Traditional body filler is typically spread, not sprayed.
Will it make my print look injection-molded?
It can get you much closer, especially when combined with careful sanding and a good primer/paint system.
The biggest improvement is consistencyonce the surface is uniform, paint looks dramatically more professional.
Does this work on flexible prints?
Generally, high-build rigid coatings are best for rigid parts. Flexible materials bend, and rigid coatings don’t love being bent.
For flexible parts, consider finishes designed to move with the material.
Real-World Experiences: The Spray-Fill Learning Curve (500+ Words)
The first time you see sprayable filler hit a 3D print, it feels like cheating. You go from “I can see every layer line from across the room” to
“Wait… that actually looks smooth” in a matter of minutes. But the real experiencewhat makers learn after a few projectsis that spray-fill doesn’t
remove the finishing process; it rearranges it. You’re trading a lot of early sanding on raw plastic for a more predictable, repeatable cycle
on a sanding-friendly surface.
On big prop parts, the biggest emotional win is speed. A helmet dome is the classic example: sanding a dome while trying to keep the curve perfect
can feel like sculpting a basketball with sandpaper. When you build a high-fill layer first, the sanding becomes less about “destroy the plastic ridges”
and more about “level this uniform coat.” That difference matters because it reduces the chance of digging trenches into your print.
Many makers describe it as moving from “random struggle” to “controlled refinement.”
Another common experience: you suddenly start noticing flaws you didn’t know you had. A high-build coat is incredibly honest.
It highlights seam lines, reveals pinholes, and makes small texture changes obvious under light. The upside is that you can now fix those flaws
deliberately. The downside is psychologicalyour print looked “fine” before, and now you can see every imperfection like it’s been outlined in neon.
That moment is normal. It’s not that your print got worse; it’s that your inspection got better.
Makers also learn quickly that “more product” is not the same as “more quality.” It’s tempting to lay down a thick coat and hope it fills everything in one go.
In practice, heavy application is how you end up with runs, soft edges, and lost detailespecially around sharp corners, embossed logos, or panel lines.
The best finishes usually come from patience: building enough to fill texture, sanding to level, then repeating only where needed.
The real flex isn’t “I sprayed it once.” The real flex is “I stopped at the moment it was smooth and still sharp.”
A surprisingly universal experience is learning how light changes everything. Under overhead room light, a surface can look smooth.
Under a side light or bright flashlight, it suddenly looks like a topographic map. Many finishers keep a “harsh light” test as part of their workflow:
tilt the part, skim the light across it, and let shadows reveal what sanding missed. It sounds dramatic, but it works. Once you start doing it,
you’ll wonder how you ever trusted your eyes without it.
Finally, there’s the “finish line” moment: when you put down a primer coat, sand lightly, and realize the print no longer reads as 3D printed.
It reads as a manufactured object. That’s the reward that keeps people coming back, even though sanding dust is basically the glitter of the workshop
(it gets everywhere and shows up when you least expect it). With spray-fill workflows, the end result can be worth it: smoother surfaces, cleaner paint,
and props that look like they came from a movie set instead of a filament spool.
Conclusion
Watching “Bondo putty” get sprayed onto 3D prints is satisfying because it looks like an instant transformationand, in a way, it is.
High-build sprayable fillers and polyester primer surfacers are built for filling imperfections and creating a sandable foundation, which maps perfectly
to the reality of layer lines and tiny print defects.
The real secret isn’t a magic productit’s the workflow: build a uniform surface, sand with intention, spot-fill what remains, and let primer guide your final tweaks.
Do it safely, keep your details crisp, and your prints can jump from “maker project” to “professional finish” faster than you’d think.