Table of Contents >> Show >> Hide
- Why an Antique Blue Hutch Is a Total Game Changer
- Step 1: Choose the Right Hutch (a Quick Buyer’s Checklist)
- Step 2: Pick Your Perfect Antique Blue
- Step 3: Prep Like a Pro (So Your Paint Actually Sticks)
- Step 4: Painting Your Hutch Antique Blue
- Step 5: Seal and Protect Your Antique Blue Finish
- Step 6: Style Your Blue Hutch Like a Designer
- Common Mistakes (and How to Avoid Them)
- Maintenance Tips for Your Antique Blue Hutch
- Real-Life Experiences: What It’s Really Like to Do an Antique Blue Hutch Makeover
- Lesson 1: The “before” is always worse than you remember
- Lesson 2: Color panic is real (but temporary)
- Lesson 3: Hardware upgrades make a huge difference
- Lesson 4: Styling takes longer than you think
- Lesson 5: The makeover changes the whole room, not just the hutch
- Lesson 6: Imperfections become part of the story
- Lesson 7: You’ll want to paint everything now
- Final Thoughts
Every home has that one piece of furniture that’s… politely “vintage,” but realistically
just tired. Maybe it’s a hand-me-down hutch that’s seen more family dinners than your
dishwasher. The lines are pretty, the storage is great, but the finish screams
“1990s orange oak” or “mysterious beige from a landlord special.”
Enter the antique blue hutch makeovera budget-friendly, weekend-sized
project that can completely transform a room. A coat (or two) of soft, antique blue paint,
a little distressing, and some thoughtful styling can turn a forgotten piece into the star
of your dining room, kitchen, or entryway.
In true Hometalk spirit, this guide walks you through everything: from choosing the right
hutch and paint, to prepping, painting, distressing, and decorating. Along the way, you’ll
get practical tips, real-life examples, and a few “don’t do what I did” cautionary tales
so your project ends up looking charmingly antique, not accidentally abandoned.
Why an Antique Blue Hutch Is a Total Game Changer
Color with character (without shouting)
Blue is one of those magical colors that works in almost every style:
farmhouse, cottage, coastal, traditional, even modern. An antique blue hutch
adds personality without overwhelming the room. It’s bold enough to stand out, but soft
enough to play nicely with wood tones, whites, and neutrals.
Antique blue typically leans a bit gray or dustythink “well-loved French cupboard”
rather than “bright beach ball.” That muted undertone is what makes it feel timeless
and easy to live with day after day.
A built-in focal point (no renovation needed)
A hutch naturally draws the eye upward and gives you vertical storage and display space.
When you paint it antique blue, it becomes a focal point the way a fireplace
or built-in bookshelf mightwithout needing a contractor, a permit, or a second mortgage.
You can use it to:
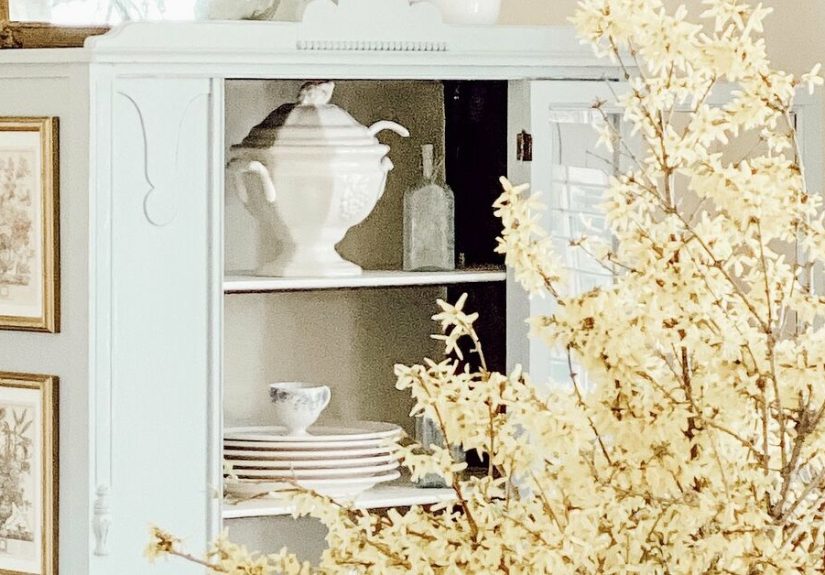
- Display white dishes, glassware, or vintage ironstone for a farmhouse look
- Show off colorful pottery, cookbooks, or collections
- Hide clutter in lower cabinets while styling the upper shelves like a curated shop
Budget-friendly, eco-friendly, and sentimental
Instead of buying a brand-new cabinet, you’re rescuing an older piece of furniture.
That’s good for your wallet, the planet, and your sentimental side. Maybe the hutch
came from a grandparent, a thrift store adventure, or a neighbor’s “free” Facebook post.
A makeover lets you honor its history while making it work for your life now.
Step 1: Choose the Right Hutch (a Quick Buyer’s Checklist)
You don’t need a designer piece to end up with something beautiful. In fact, the
“before” can look surprisingly rough. When you’re shopping Facebook Marketplace,
thrift stores, antique malls, or your own garage, look for:
-
Solid structure: The doors should open and close, shelves should sit level,
and the piece shouldn’t wobble like a barstool at closing time. -
Real wood if possible: Veneer can be painted too, but solid wood is more
forgiving if you plan to sand or distress. -
Pretty bones: Curved doors, crown molding, paneling, or glass-front doors
all look amazing with an antique finish. -
Manageable size: Remember this will live in your house, not in your imagination.
Measure wall, ceiling height, and doorways before you buy.
A hutch with glass doors on top and cabinets or drawers on the bottom is ideal.
It gives you display space up high and hidden storage down lowexactly what
a busy home needs.
Step 2: Pick Your Perfect Antique Blue
The phrase “antique blue” covers quite a range, from moody slate to cheerful
robin’s-egg. Before you buy a gallon, think about:
Undertone matters
-
Gray-blue: Great for modern farmhouse, coastal, and minimal spaces.
Softer and more neutral. -
Green-blue (teal-ish): Feels a bit French country or cottage.
Cozy and romantic when lightly distressed. - Dusty sky blue: Perfect for bright, airy kitchens and vintage cottage vibes.
Finish and paint type
For a vintage hutch, chalk-style paint or mineral paint is popular because:
- It adheres well, usually with minimal sanding or priming
- It’s easy to distress for an aged look
- It dries fast, making a weekend makeover realistic
If your hutch will get heavy use (kids, pets, keys, mail, snack attacks),
you can still use chalk paintjust be diligent about sealing it with wax or clear
topcoat for durability.
Step 3: Prep Like a Pro (So Your Paint Actually Sticks)
Prep isn’t glamorous, but it’s the difference between “wow, this looks custom”
and “why is the paint peeling off in sheets?”
1. Empty, remove, and label
- Remove all items from the hutch (yes, even that random candlestick and holiday platter).
- Take off doors, drawers, hardware, and glass if possible.
- Label hinges and screws in small bags so you remember what goes where later.
2. Clean like you mean it
Years of furniture polish, cooking grease, and fingerprints can keep paint from
bonding properly. Wipe everything down with a mild degreaser or a mix of warm
water and a few drops of dish soap. Rinse with clean water and let it dry.
3. Light sanding (or spot-sanding)
Even if you’re using a no- or low-prep paint, a light scuff sand with
120–220 grit sandpaper on glossy surfaces helps the paint grip better.
Focus on shiny areas, edges, and spots where there’s chipping varnish
or flaking finish.
If the hutch is very dark or has heavy stain bleed-through, consider a
stain-blocking primer on problem areas before painting. It adds an extra step
but can save you from mysterious yellow or pink “ghosts” later.
Step 4: Painting Your Hutch Antique Blue
Now for the fun partthe actual antique blue hutch makeover.
Set up in a well-ventilated area, protect your floor with drop cloths,
and get your brushes and rollers ready.
1. Cut in corners and details first
Use a good-quality angled brush to:
- Paint inside corners and detailed trim
- Cut along edges where a roller can’t reach
- Get into any grooves, carvings, or panel profiles
Don’t panic if the first coat looks streaky or patchy. That’s normal.
You’re building color, not frosting a cupcake in one swipe.
2. Roll the flat areas
A small foam or microfiber roller gives you a smooth finish on:
- Door fronts
- Side panels
- Large flat shelves
Roll in thin, even coats. Thick paint can crack, drip, or take forever to dry.
Two to three thin coats are safer than one heavy one.
3. Let it dry between coats
Follow the dry time on your paint can, but generally:
- Chalk-style paint: 30–90 minutes between coats, depending on humidity
- Latex or enamel: often longercheck the label
Lightly sand with a fine-grit sanding sponge between coats if you feel
any roughness. Wipe away dust with a tack cloth or a barely damp rag
before the next coat.
4. Add gentle distressing (optional but gorgeous)
To get that “old but cared-for” look:
- Wait until the paint is fully dry.
- Use 220–320 grit sandpaper to gently rub edges, corners, and raised details.
- Focus on spots that would naturally wear over timearound knobs, corners, and trim.
Go slowly. It’s easier to distress more than to put paint back where you
removed it. If you go overboard, you can always touch up with a small brush.
Step 5: Seal and Protect Your Antique Blue Finish
Once you love the color and level of distressing, it’s time to protect your work.
Choosing a topcoat
-
Furniture wax: Classic for chalk paint. It gives a soft sheen and
a hand-rubbed feel. Great for low- to moderate-traffic pieces. -
Clear water-based topcoat: More durable, ideal if kids,
pets, or very enthusiastic houseguests are involved.
Apply according to the product directions, usually with a brush or lint-free cloth.
Work in thin layers and avoid overworking the surface. Let it cure fully before
loading up shelves with heavy dishes.
Don’t forget hardware and interiors
While your topcoat dries, tackle the details:
-
Hardware: Clean existing knobs and pulls or swap them for new ones
in black, brushed brass, or antique pewter. -
Back panel: Consider painting or wallpapering the back of the hutch
interior for contrast. Soft white, warm cream, or a subtle patterned paper
looks beautiful against antique blue. -
Shelves: You can leave wood shelves natural (sealed) for a
two-tone look or paint them the same blue or a complementary neutral.
Step 6: Style Your Blue Hutch Like a Designer
The paint has dried, the hardware is back on, and you’re ready for the fun
final step: styling. This is where your antique blue hutch makeover
really comes to life.
Start with a simple color palette
To keep your hutch from looking cluttered:
- Choose 2–3 main colors (for example: white, wood, and greenery).
- Let the antique blue count as one of your “colors.”
- Repeat those tones on each shelf so the whole piece feels cohesive.
Layer items with height and depth
Think in terms of layers:
- Lean plates or art at the back.
- Place stacked bowls or books in front.
- Add small vases, candles, or canisters as the final layer.
Vary heights so your eye travels around the shelf instead of landing on
one flat row of objects. And leave a little breathing roomnegative space
is your friend.
Mix old and new
An antique blue hutch looks best when it tells a story:
- Mix thrifted ironstone with modern glassware.
- Add vintage cookbooks next to a new plant in a simple terracotta pot.
- Tuck in a framed family photo or a small piece of art.
The goal is “collected over time,” not “I bought everything in one trip
because the internet told me to.”
Common Mistakes (and How to Avoid Them)
Mistake 1: Skipping cleaning and light sanding
If you paint over dust, grease, or glossy finish, you risk chipping, peeling,
and streaking. Even if your paint claims “no prep,” consider minimal prep
like cleaning and a quick scuff sand. It takes a little time now and saves
you rework later.
Mistake 2: Choosing the wrong blue
A color that looked perfect on your phone screen may look too bright or too
dark in your dining room. Always test a sample on the actual hutch in your
actual lighting. View it in morning, afternoon, and evening light before
committing.
Mistake 3: Over-distressing
Distressing is like seasoning food: you can always add more, but it’s hard
to take it back. Start small. Focus on natural wear zones and keep some areas
fully painted so the piece doesn’t look artificially “scraped up.”
Mistake 4: Overloading shelves
If every inch of shelf space is covered, your beautiful antique blue backdrop
disappears. Edit. Then edit again. Display your favorite pieces, not every
dish you own.
Maintenance Tips for Your Antique Blue Hutch
Good news: once sealed properly, your hutch doesn’t need much special care.
- Dust with a soft, dry cloth regularly.
- Wipe spills promptly with a slightly damp cloth and dry immediately.
- Avoid harsh cleaners, magic erasers, or abrasive pads that can dull the finish.
- If a spot gets scuffed, touch up with a tiny bit of leftover paint and reseal if needed.
Over time, a few small nicks can actually add to the antique charmas long
as they look intentional rather than like a paint failure.
Real-Life Experiences: What It’s Really Like to Do an Antique Blue Hutch Makeover
Guides and tutorials are helpful, but nothing beats honest, lived-through-it
experience. Here’s what the process actually feels like, based on many DIYers
who’ve tackled similar projectsand the little “aha” moments they usually
mention afterward.
Lesson 1: The “before” is always worse than you remember
The funny thing about furniture makeovers is that once you pull the hutch
away from the wall, empty it, and remove the doors, it usually looks worse.
There’s dust bunnies, forgotten crumbs, and maybe an old birthday napkin
from 2014 hiding in the back.
Don’t let that discourage you. That messy middle is actually the turning
point: you’re already in transformation mode. Take a quick “before” photo
future you will be very pleased you did.
Lesson 2: Color panic is real (but temporary)
Almost everyone hits a moment where they think,
“Did I pick the wrong blue?” Usually it happens after the first coat,
when the paint is drying unevenly and the old color is still peeking through.
The trick is to trust the process:
- Wait until the second or even third coat before judging.
- Check the color at different times of day.
- Compare it to your inspiration photosnot just your memory.
In most cases, once the paint is fully dry and the hardware is back on,
that initial panic turns into “oh wow, this is actually gorgeous.”
Lesson 3: Hardware upgrades make a huge difference
Many DIYers say they underestimated the power of hardware. Swapping dated,
curvy brass pulls for simple black knobs or classic cup pulls can instantly
modernize the hutch. If you’re on a tight budget, you can spray paint
existing hardware in a cohesive finish (matte black, brushed gold, or
antique bronze) and still get that elevated look.
Pro tip: Before buying all new hardware, test one or two pieces on the doors.
The shape and scale matter as much as the color.
Lesson 4: Styling takes longer than you think
Painting might be done in a day, but styling? That’s where time magically
evaporates. You’ll try a row of dishes, then move them. You’ll test a stack
of bowls, then swap them for books. You’ll add greenery, then take it away.
The good news is that shelf styling is flexible. Once the “bones” of your
arrangement are in placelarger pieces in the back, medium in the middle,
small in frontyou can tweak seasonally without needing to repaint anything.
Lesson 5: The makeover changes the whole room, not just the hutch
One of the best parts of an antique blue hutch makeover is how it elevates
everything else around it. Walls you never noticed suddenly look fresher.
A simple table and chairs feel more intentional. Even everyday dishes look
like part of a curated collection when they’re styled against that blue backdrop.
Many people end up rearranging artwork, swapping out curtains, or adding a
new rug once the hutch is done. It’s like the hutch quietly raises the
standard for the whole space.
Lesson 6: Imperfections become part of the story
Maybe your distressing is a little uneven. Maybe there’s a small drip on
the back leg that only you know about. Maybe one shelf isn’t perfectly
smooth because you rushed the sanding. Here’s the secret: no one else will
see those things the way you do.
In an antique-style makeover, minor imperfections can actually add charm.
They remind you that this isn’t mass-produced furnitureit’s a piece you
rescued and customized with your own hands. That story is worth far more
than a factory-perfect finish.
Lesson 7: You’ll want to paint everything now
Fair warning: once you see the transformation of your antique blue hutch,
you may suddenly start eyeing other pieces in your home. The sideboard.
The coffee table. The sad little nightstand in the guest room.
That’s not a bad thingjust pace yourself. Start a list of future projects,
keep your leftover paint labeled and sealed, and enjoy the satisfaction of
slowly turning your home into a place full of meaningful, customized pieces
instead of generic furniture.
Final Thoughts
An antique blue hutch makeover is one of those projects that punches way
above its weight. With a bit of prep, the right paint, and thoughtful styling,
you can transform a dated cabinet into a showpiece that looks like it’s always
belonged in your home.
Whether you’re drawn to farmhouse, cottage, or classic traditional style,
a blue hutch can bridge the gap between old and new, practical and beautiful.
And every time you walk past it, you’ll get that quiet little thrill of
remembering: “I did that.”


