Table of Contents >> Show >> Hide
- Why Add Beadboard to the Back of Open Shelving?
- Where Beadboard Behind Shelves Works Best
- Choosing the Right Beadboard Material
- Tools and Supplies You Will Likely Need
- How to Add Beadboard to the Back of Open Shelving
- Best Paint Colors and Finishes for Beadboard Shelving Backs
- Design Tips That Make the Project Look More Expensive
- Mistakes to Avoid
- Is Beadboard Behind Open Shelves Easy to Maintain?
- Is This Project Worth It?
- Extra Real-World Experience: What This Project Actually Feels Like in Daily Life
- Final Thoughts
Note: This article is written in original, web-ready American English and is intended for homeowners, renters tackling removable upgrades, and DIYers who want open shelving to look custom instead of “I got tired halfway through the remodel.”
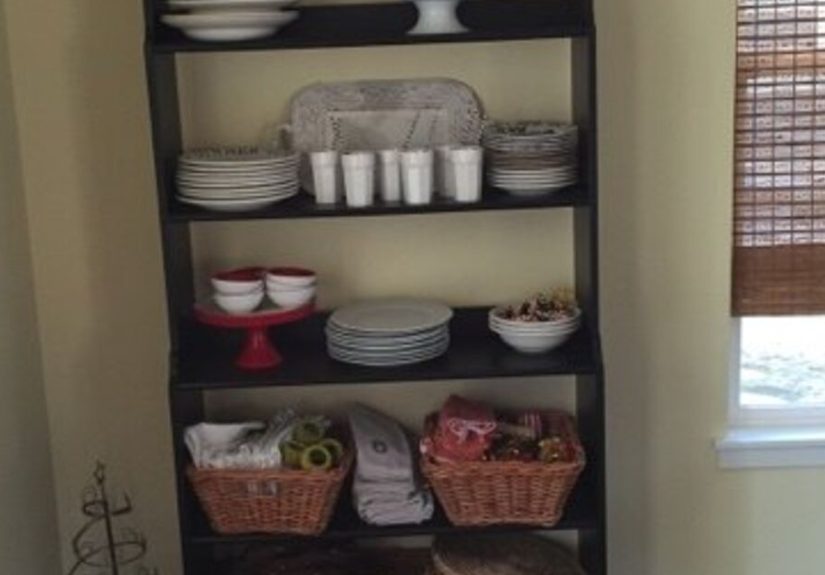
Open shelving can be charming, airy, and surprisingly useful. It can also look a little unfinished if the wall behind it is just standing there like plain toast. That is where beadboard comes in. Adding beadboard to the back of open shelving is one of those rare home projects that feels fancy without demanding a trust fund, a contractor, or a spiritual awakening in the power tool aisle.
Whether you are updating kitchen shelves, a pantry nook, a coffee station, a mudroom drop zone, or a bathroom shelf wall, beadboard adds texture, character, and a built-in look. It gives your shelves a backdrop that feels intentional. Suddenly, your cereal jars and mixing bowls are not just sitting on boards. They are being displayed. With purpose. With style. With a little less “garage storage” energy.
In this guide, we will walk through why beadboard works so well behind open shelves, what materials to choose, how to install it cleanly, how to paint it so it survives real life, and what mistakes to avoid if you would prefer not to create a decorative regret wall.
Why Add Beadboard to the Back of Open Shelving?
The biggest reason is visual texture. Open shelving can feel flat when the wall behind it is plain drywall. Beadboard creates vertical lines that make the space feel more finished and more architectural. It is especially useful in farmhouse, cottage, coastal, traditional, transitional, and vintage-inspired interiors, but it can also work in modern spaces if the color palette is simple and the shelf styling is restrained.
There is also a practical benefit. Behind shelves in a kitchen or pantry, beadboard can provide a more wipeable, durable-looking surface than bare wall paint alone when it is properly primed and finished. In small spaces, this detail can make a big difference because every visible surface matters. When shelves are open to the room, the backdrop is always on display. If it looks good, the whole setup looks better.
Beadboard also helps shelves feel integrated rather than floating awkwardly on a wall. Think of it as the difference between a basic sandwich and a sandwich with toasted bread, good pickles, and a suspicious amount of confidence. Same idea. Better presentation.
Where Beadboard Behind Shelves Works Best
This project is popular in kitchens, but it is hardly limited to them. You can use beadboard behind open shelving in:
- Kitchen coffee bars
- Pantries and butler’s pantries
- Laundry rooms
- Mudrooms
- Bathrooms
- Reading nooks
- Craft rooms
- Built-in bookcases
- Closets with decorative shelving
It is especially effective when the shelves themselves are simple. A plain wood shelf or painted board looks instantly more custom when backed by beadboard. If your shelving is already detailed or rustic, beadboard can still work, but you will want to keep the finish calm so the space does not become visually noisy.
Choosing the Right Beadboard Material
MDF Beadboard Panels
MDF beadboard is a common choice because it is smooth, easy to paint, and often budget-friendly. It is a solid option for dry areas like dining nooks, living spaces, and decorative built-ins. If you are installing it in a kitchen, laundry room, or bathroom, make sure the product is appropriate for that space and that the edges are well sealed before painting.
Wood Beadboard
Wood beadboard has a classic look and can be beautiful if you want stain-grade character or a more traditional finish. It can also be a little more temperamental, especially if your walls are less than perfect. Real wood moves with humidity, so prep and acclimation matter.
PVC Beadboard
PVC beadboard is useful in damp or high-splash zones because it is easy to clean and low-maintenance. It is not always the most traditional-looking option, but it can be a smart pick for laundry spaces, bathrooms, and some utility areas.
Full Panels vs. Individual Planks
For most open shelving projects, full beadboard panels are easier and faster than installing individual tongue-and-groove planks. Panels are also helpful when you want a flat, continuous backdrop behind several shelves. Planks can look beautiful, but they require more measuring, more alignment, and more patience. If patience is not currently one of your strongest emotional support tools, panels are your friend.
Tools and Supplies You Will Likely Need
- Beadboard panel or planks
- Tape measure
- Level
- Stud finder
- Pencil
- Circular saw, jigsaw, or table saw
- Construction or panel adhesive
- Brad nailer or paneling nails
- Caulk and caulk gun
- Wood filler or spackling compound
- Sandpaper
- Primer
- Paint
- Paint brush and small roller
- Safety glasses and dust protection
If the shelves are already installed, you may also need painter’s tape, a flexible putty knife, and a healthy willingness to work in awkward corners like a determined raccoon with a trim brush.
How to Add Beadboard to the Back of Open Shelving
1. Measure the Back Wall Carefully
Measure the full area behind the shelves, including height, width, and any interruptions such as outlets, brackets, pipes, or trim. If the shelves are already mounted, measure each visible section separately. Walls are often not perfectly square, so measure in more than one place before cutting. It is much easier to shave off a little material than to explain to yourself why the panel is suddenly one inch too narrow.
2. Let the Material Adjust to the Room
Before installation, let the beadboard sit in the room for a bit so it can adjust to the space. This is one of those boring adult steps that feels skippable until it is not. Giving the material time to acclimate can help reduce future movement issues, especially with wood-based products.
3. Prep the Surface
Clean the wall thoroughly. In kitchens and pantries, remove dust, grease, and residue before you do anything else. If the wall is rough, patch major defects and sand high spots. Mark stud locations above the install area so they stay visible once the panel goes up. If existing trim is in the way and you want a cleaner fit, remove or undercut it before installation.
4. Cut the Beadboard to Fit
Transfer your measurements carefully and cut the panel. Dry-fit it before reaching for adhesive. If the shelving includes supports or brackets, you may need a jigsaw or oscillating tool to make precise notches. Take your time here. Good cutting makes the whole project look custom. Bad cutting makes caulk work overtime and question its life choices.
5. Dry-Fit the Panel Behind the Shelves
Slide the panel into place and check for level, snug edges, and clean alignment with the shelf lines. The grooves in the beadboard should read straight and intentional. If they look slightly off, fix it now. Vertical lines are very honest. They will absolutely report your mistakes to every person who enters the room.
6. Attach It with Adhesive and Nails
Apply panel adhesive to the back according to the product directions. Press the beadboard into place, then secure it with a brad nailer or panel nails where appropriate, ideally into studs when possible. The adhesive helps create full contact, while the nails hold everything steady during curing and add security. For many shelf-back projects, this combination gives the cleanest, most reliable result.
If the project is renter-friendly or temporary, your approach may differ, but for a lasting built-in look, adhesive plus discreet fasteners is the standard move.
7. Add Trim if You Want a More Finished Look
You can stop with the panel alone, or you can frame the edges with small trim pieces for a polished result. Trim is especially helpful if the edges of the panel are visible, if the shelves do not fully cover the perimeter, or if you want the installation to look more furniture-like. A thin top rail, side trim, or a small ledge detail can elevate the whole thing from simple upgrade to “wait, was this always here?”
8. Fill, Sand, and Caulk
Once the panel is secure, fill nail holes with wood filler or spackling compound. When it dries, sand smooth. Then caulk the seams where the beadboard meets walls, trim, or shelf supports. This step is what makes the installation look built-in instead of merely attached. Skip it, and the project may still look fine. Do it well, and the project looks finished.
9. Prime and Paint
Prime the beadboard, especially if you are using raw wood, MDF, patched areas, or a slick prefinished surface that needs better adhesion. In kitchens and high-use zones, a durable satin or semi-gloss finish is often the sweet spot. It is easier to wipe clean than flatter finishes and usually stands up better to everyday mess, shelf styling adjustments, and the occasional sauce splatter that somehow traveled farther than physics should allow.
Best Paint Colors and Finishes for Beadboard Shelving Backs
White is the classic choice because it keeps open shelving airy and bright. It works beautifully with wood shelves, painted shelves, brass hardware, black brackets, and natural baskets. Soft off-whites, warm creams, muted sage, dusty blue, pale gray, and greige also work well depending on the room.
If you want a bold look, paint the beadboard and shelves the same color for a cohesive built-in effect. If you want contrast, pair painted beadboard with stained wood shelves. That combination gives you texture, warmth, and depth without needing a whole parade of decorative objects to make the shelves interesting.
For kitchens, pantries, mudrooms, and laundry rooms, prioritize washability as much as color. Beautiful finishes are great, but so is not crying over pasta sauce dots.
Design Tips That Make the Project Look More Expensive
Match the Shelf Depth to the Space
Very deep shelves with delicate beadboard can feel bulky. Very shallow shelves can look decorative but not useful. Aim for a depth that suits what you actually plan to store, whether that is mugs, dishes, pantry jars, books, or bath items.
Use Consistent Spacing
Even shelf spacing makes the beadboard backdrop feel orderly and intentional. Random spacing can work in some eclectic rooms, but symmetry is usually your best friend if you want that custom built-in feel.
Keep Styling Practical
Open shelves already attract the eye, and beadboard gives them even more visual texture. Do not overload the shelves with tiny decorative objects unless dusting is one of your hobbies. Larger functional pieces, baskets, plates, jars, and a few accents go a long way.
Consider the Room’s Existing Trim
If your home already has traditional molding, choose beadboard details that feel related to that architecture. If your room is modern, keep the trim minimal and the color palette clean. The goal is for the beadboard to feel like it belongs, not like it wandered in from a coastal cottage and never left.
Mistakes to Avoid
- Skipping surface prep: Grease, dust, and uneven walls can sabotage both adhesive and paint.
- Not marking studs: If you plan to nail the panel, knowing where the studs are matters.
- Forgetting acclimation: Some materials need time in the room before installation.
- Using the wrong finish: Flat paint behind kitchen shelves is a bold choice in the same way white pants at a spaghetti dinner are a bold choice.
- Ignoring edge details: Raw or exposed edges can make the project look unfinished.
- Overdecorating the shelves: The beadboard is already adding texture, so let it do some of the visual work.
Is Beadboard Behind Open Shelves Easy to Maintain?
Yes, with the right finish and realistic expectations. Open shelving itself tends to collect dust and, in kitchens, some grease over time. Beadboard does not magically stop that, but it can make the backdrop look more intentional and be easier to wipe down when finished properly. Use gentle cleaning methods, microfiber cloths, and non-harsh cleaners that are compatible with your paint finish.
If your shelves are near a cooktop, sink, or coffee maker, expect more frequent cleanup. In lower-splash zones like pantry walls, laundry shelves, and book nooks, maintenance is much easier. In other words, placement matters. Putting open shelving beside active cooking zones and then acting surprised about grease is a bit like wearing suede in a rainstorm and blaming the cloud.
Is This Project Worth It?
Absolutely, if you want a relatively affordable upgrade with a high visual payoff. Adding beadboard to the back of open shelving can make builder-basic shelves feel custom, make a small nook feel styled, and give an ordinary wall more personality. It is one of those details that reads as thoughtful rather than flashy. And because the backdrop is always visible, the improvement keeps working long after the paint dries.
For homeowners planning a larger renovation later, it can also be a smart interim upgrade. For renters, removable versions or framed panels can offer a similar vibe without permanent installation. For anyone staring at plain shelves and thinking, “Something is missing,” beadboard is often the answer.
Extra Real-World Experience: What This Project Actually Feels Like in Daily Life
One of the funniest things about adding beadboard to the back of open shelving is that the project seems almost too simple at first. People often expect a dramatic before-and-after from major demolition, new cabinets, or expensive tile. Then this humble panel shows up, leans against the wall with suspicious innocence, and quietly changes the whole mood of the room.
In real homes, the difference is usually less about square footage and more about personality. A shelf wall that once looked like temporary storage suddenly feels like part of the architecture. Coffee mugs look curated. Pantry jars look intentional. Even a stack of paper towels somehow seems more respectable when it is backed by fresh beadboard and decent paint. Is that irrational? Maybe. Is it also true? Very much so.
Many DIYers discover that this project improves not only how the shelves look, but also how they use them. When the background is finished and attractive, people tend to edit what stays on the shelves. Instead of piling on random items, they keep what is useful, pretty, or both. The shelves become easier to maintain because they stop functioning like a horizontal junk magnet. The beadboard is not doing the cleaning, sadly, but it is quietly encouraging better behavior.
There is also a confidence factor. Installing beadboard behind shelves is a manageable project for many homeowners because it combines measuring, cutting, fastening, caulking, and painting without becoming a full-scale renovation circus. It is the kind of job that can teach useful DIY skills without immediately requiring a second mortgage and a structural engineer. You learn how important straight lines are. You learn that caulk can be either elegant or chaos in a tube. You learn that “just one more quick coat” of paint is almost never quick.
In kitchens, the lived experience usually comes down to balance. Open shelves look lovely, but they do require editing and upkeep. Beadboard makes that setup feel warmer and more deliberate, especially when the shelves hold everyday dishes, glassware, or pantry staples decanted into matching containers. People often say the finished space feels brighter, more layered, and more welcoming. It can also soften the hard edges of a room full of stone, metal, and cabinetry.
In pantries and laundry rooms, the project tends to feel even more rewarding because the upgrade takes a purely functional zone and gives it a little style. Suddenly the detergent shelf feels almost charming. That is not nothing. Domestic tasks are still domestic tasks, but at least the backdrop is pulling its weight aesthetically.
Another common experience is realizing that trim matters more than expected. The beadboard panel alone already looks good, but once the edges are caulked, the nail holes are filled, and the paint dries into an even finish, the whole installation crosses over from DIY project to built-in detail. That last ten percent is where the magic lives. It is annoying, time-consuming, and absolutely worth it.
Then there is the emotional moment every DIYer deserves: stepping back, coffee in hand, and seeing a shelf wall that finally looks finished. Not flashy. Not overdesigned. Just right. The beadboard does not scream for attention. It quietly says, “Yes, someone cared about this corner.” And honestly, that is one of the nicest things a home project can do.
If you are on the fence, this is your sign. Adding beadboard to the back of open shelving is one of those upgrades that punches above its weight. It adds character, polish, and function without requiring a full renovation. It is approachable enough for a weekend project, but stylish enough to look like part of a larger design plan. That is a rare combination, and your shelves will absolutely enjoy the glow-up.
Final Thoughts
Adding beadboard to the back of open shelving is a small design move with a big payoff. It brings texture, charm, and a built-in feel to spaces that might otherwise look flat or unfinished. With the right material, careful prep, a clean installation, and a durable paint finish, you can create shelving that looks polished and works hard in real life. In short, it is practical, pretty, and far less dramatic than tile, which is wonderful news for both your budget and your blood pressure.


