Table of Contents >> Show >> Hide
- Quick Jump
- Why Cedar + Herringbone Works So Well
- Choosing the Right Cedar
- Your Moisture Game Plan (Read This Before Buying a Single Board)
- Tools & Materials
- Step-by-Step: How to Build a Cedar Planked Herringbone Bathroom Wall
- Step 1: Acclimate the cedar
- Step 2: Prep the substrate
- Step 3: Decide your herringbone orientation
- Step 4: Establish a centerline (your pattern’s North Star)
- Step 5: Make a starter “V” template
- Step 6: Pre-finish (seriously consider it)
- Step 7: Install the first row with extra patience
- Step 8: Work outward, checking your pattern frequently
- Step 9: Handle outlets and fixtures cleanly
- Step 10: Finish edges and transitions
- Finishes That Actually Survive Bathrooms
- Design Ideas That Don’t Feel Try-Hard
- Maintenance & Longevity
- FAQ
- Final Thoughts
- of Real-World “Field Notes” From Cedar Herringbone Bathroom Walls
“Herrinbone” or herringbonehowever you spell it, you’re clearly here for the same thing: a bathroom wall that feels like a spa,
looks like a magazine spread, and doesn’t curl up and cry the first time someone takes a lava-hot shower.
A cedar planked herringbone bathroom wall checks all the boxes: warmth, texture, a little rustic swagger, and that
unmistakable cedar vibe that makes your bathroom smell like a fancy cabin (minus the bears).
Why Cedar + Herringbone Works So Well
Let’s start with the obvious: tile is great, but it can also feel a little… dentist-office-adjacent. Wood changes the whole mood. Cedar,
specifically, adds a soft grain pattern and natural color variation that instantly warms up hard bathroom surfaces like porcelain and glass.
Then there’s herringbone. This pattern has movement. It’s a visual “upgrade” button that makes a wall feel customeven if
you built it in your socks on a Saturday. The angled layout catches light differently throughout the day, which is design-speak for:
“People will ask who you hired.”
But waitis cedar in a bathroom a bad idea?
Not automatically. The bathroom is basically a small weather system (steam, condensation, rapid temperature swings). The trick isn’t
avoiding woodit’s using the right wood, prepping the wall correctly, sealing properly, and making ventilation non-negotiable.
Choosing the Right Cedar
“Cedar” isn’t one single thing; it’s a family of woods with different properties. For bathroom walls, you want cedar that’s stable,
naturally durable, and easy to finish.
Best pick: Western Red Cedar (most common for planking)
- Why it works: naturally durable, lightweight, and commonly sold as planks or tongue-and-groove.
- Look: warm tones with a grain that can read modern or rustic depending on finish.
Aromatic cedar: great scent, not always the best plank choice
Aromatic cedar (often used for closets and chests) smells incredible, but it’s not always sold in wall-ready plank profiles. If you find
it milled properly and you love the color, it can workjust make sure it’s dry, straight, and finish-friendly.
Profile matters: tongue-and-groove vs. flat planks
Bathrooms reward tight joinery. If you can, consider tongue-and-groove cedar for cleaner seams and a more “finished”
surface. Flat planks can still work, but you’ll rely more on installation precision and finishing to keep moisture from creeping where it
doesn’t belong.
Your Moisture Game Plan (Read This Before Buying a Single Board)
If your bathroom wall is going to wear cedar, it needs a raincoat, good airflow, and a little common sense. Here’s what “bathroom-safe”
really means in practice.
1) Ventilation is the bouncer at the steam club
A gorgeous cedar accent wall paired with weak ventilation is like bringing a leather jacket into a sauna and acting surprised.
Run a quality exhaust fan and keep it running long enough after showers to clear humidity.
2) Treat the wall behind the wood like it matters (because it does)
Behind-the-scenes prep is where most DIY projects either become heirlooms or cautionary tales. A continuous backing surface (like drywall
or appropriate board) and a smart air/moisture control strategy help prevent humidity from getting trapped behind the planks.
3) Pick the right location
- Great spots: vanity wall, toilet wall, a full accent wall away from direct splash.
- Proceed carefully: near tubs where kids practice “splash-based engineering,” or right next to a frequently used shower.
- Avoid: inside the shower spray zone unless you’re using a system specifically designed for wet areas.
4) Let wood be wood: plan for movement
Bathrooms swing between desert-dry and tropical rainforest. Wood expands and contracts with humidity. Leaving tiny expansion allowances and
using flexible sealant in strategic areas helps your wall stay crisp instead of “wavy farmhouse chic.”
Tools & Materials
Materials
- Cedar planks (milled straight; ideally acclimated)
- Construction adhesive (rated for paneling/wood)
- Brad nails or finish nails (and a nailer if you have one)
- Moisture-resistant primer/paint for the wall behind (optional but smart)
- Finish system for cedar (see finishes section)
- Flexible, paintable caulk (for perimeter transitions)
- Optional: furring strips or plywood backer (if walls are uneven)
Tools
- Stud finder, level, tape measure
- Chalk line or laser level (herringbone loves geometry)
- Miter saw or circular saw + guide
- Sander (or sanding block) and tack cloth
- Brush/roller or sprayer for finish
Step-by-Step: How to Build a Cedar Planked Herringbone Bathroom Wall
The secret to a herringbone wall is starting clean and staying consistent. It’s not hardit’s just picky. (Like your friend who “doesn’t
do cilantro.”)
Step 1: Acclimate the cedar
Bring the planks into the bathroom (or a similar indoor environment) and let them rest so they adjust to temperature and humidity.
This reduces surprise movement after installation.
Step 2: Prep the substrate
- Ensure the wall is clean, dry, and reasonably flat.
- If the wall is wavy, consider a backer layer (thin plywood) or furring strips to create a flatter plane.
- Mark studs if you’ll be nailing into framing.
- Optional but helpful: paint the wall a dark, neutral color so any microscopic seams don’t flash bright white later.
Step 3: Decide your herringbone orientation
Two popular looks:
- Vertical “spine” (classic): the “V” points up and down, great for making ceilings feel taller.
- Diagonal energy: the pattern runs at an angle, which can make small bathrooms feel more dynamic.
Step 4: Establish a centerline (your pattern’s North Star)
Measure the wall width, mark the center, and snap a vertical line. This keeps the pattern symmetrical so you don’t end up with a 1-inch
sliver on one side and a perfect plank on the other (a heartbreak you can’t unsee).
Step 5: Make a starter “V” template
Herringbone is built from repeated “V” shapes. Cut a few test pieces and dry-fit them to confirm your angles and plank length. Once your
“V” looks crisp, everything else becomes a repeatable system.
Step 6: Pre-finish (seriously consider it)
Pre-finishing your cedar planks before installation helps seal all faces and edges. It’s much easier to coat boards on sawhorses than
to become a human pretzel finishing inside corners.
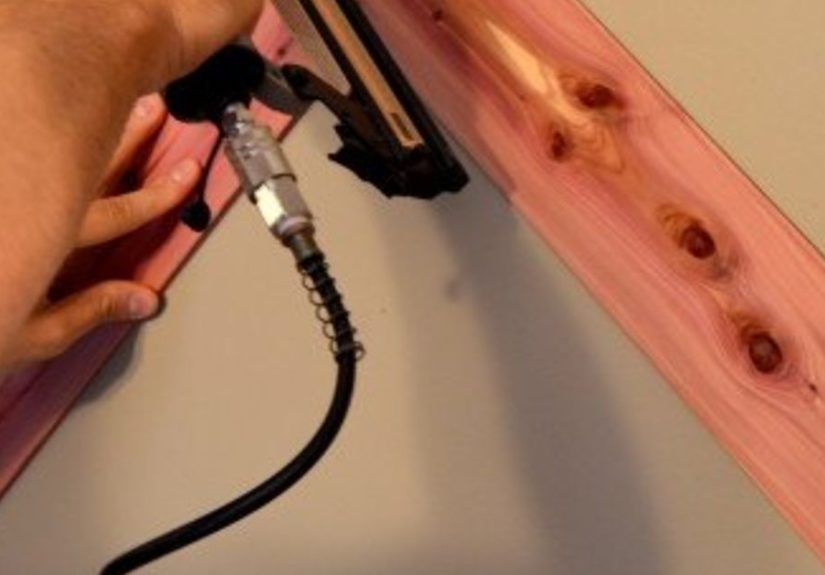
Step 7: Install the first row with extra patience
- Apply adhesive to the back of the first plank (not too close to edges).
- Place it aligned to your centerline.
- Pin it with brads (or finish nails) to hold while the adhesive cures.
- Add the second plank to form the “V.” Check alignment with a level.
Step 8: Work outward, checking your pattern frequently
Build out from the center “spine” in both directions. Every few rows, step back and confirm the pattern stays true. If you catch drift
early, you fix it early. If you catch drift late, you invent new words.
Step 9: Handle outlets and fixtures cleanly
Measure carefully and cut openings before boards go up. If your planks add thickness, you may need box extenders so outlet covers sit
flush and safe.
Step 10: Finish edges and transitions
- Add trim if desired (simple modern casing looks sharp).
- Caulk perimeter gaps lightly where wood meets tile, drywall, or ceiling.
- Avoid sealing every seam like you’re waterproofing a submarinewood needs to move.
Finishes That Actually Survive Bathrooms
Your finish choice decides whether your cedar wall ages gracefully or becomes a science fair exhibit titled “Humidity: The Reckoning.”
Option A: Clear, film-forming finishes (strong moisture barrier)
- Water-based polyurethane: clear look, less ambering, good durability.
- Spar urethane/varnish: built for environments that see moisture and movement; great when you expect humidity swings.
Best for: bathrooms with frequent showers, families, and anyone who wants the “wipeable wall” lifestyle.
Option B: Penetrating oils (natural look, easier spot repair)
- Tung oil / teak oil-style finishes: soak into the wood, enhance grain, easier to refresh.
Best for: powder rooms, lower-steam bathrooms, or people who like a matte, natural wood vibe and don’t mind occasional refresh coats.
Option C: Hybrid approach (the practical middle child)
Many builders seal cedar first (a light sealer coat) and then topcoat for durability. The idea: help stabilize the wood’s surface and
improve consistency before the protective coats go on.
Finish tips that save headaches
- Seal all sides if you canfront, back, and edgesto reduce moisture imbalance.
- Multiple thin coats beat one thick coat (less drips, better cure).
- Mind the cure time: “dry to touch” isn’t the same as “ready for steam.”
Design Ideas That Don’t Feel Try-Hard
1) Modern spa: light cedar + matte black
Pair pale cedar with matte black hardware, simple mirrors, and a clean white vanity. Add warm lighting and your bathroom suddenly feels like
it charges a resort fee.
2) Rustic-clean: cedar + stone + soft whites
Balance cedar’s warmth with stone-look tile and creamy paint. Keep the rest minimal so the herringbone wall is the hero, not part of a
decor shouting match.
3) Coastal calm: cedar + sand tones + brushed nickel
Cedar works beautifully with sandy neutrals and softer metals. Think calm, airy, and “I totally have my life together” energy.
4) Small bathroom trick: put herringbone on one wall only
In a tight space, one bathroom accent wall delivers maximum impact without making the room feel like a sauna inside a log cabin.
Maintenance & Longevity
A cedar planked herringbone bathroom wall is not high-maintenancebut it is “don’t ignore me forever” maintenance. With basic care,
it can look great for years.
Do this
- Run the exhaust fan during showers and after (humidity is the real villain).
- Wipe splashes quickly if the wall is near a sink or tub.
- Clean gently with a damp cloth; avoid harsh chemicals that can dull finishes.
- Inspect yearly around edges/fixtures; refresh caulk where needed.
Watch for this
- Persistent musty smell (can indicate trapped moisture)
- Finish dulling or whitening in spots (time for a touch-up)
- Seams opening slightly (often seasonal; verify ventilation and humidity control)
FAQ
Is cedar naturally mold-proof?
Cedar is naturally more resistant to decay than many woods, but it’s not a magical force field. Mold can still grow on surface dust or soap
residue if humidity stays high. Good ventilation and a proper finish are what keep things healthy and clean.
Can I put cedar planks inside the shower?
If the wall will get direct, repeated water spray, you’re in “wet area system” territory. Many homeowners choose tile or waterproof panels
in the shower and keep cedar as an accent outside the spray zone for the best blend of beauty and durability.
What’s the biggest mistake people make with wood bathroom walls?
Skipping prep and ventilation. The wood gets blamed, but the real culprit is trapped moisture and rushed finishing. Treat humidity like a
real design constraint and you’ll win.
Herrinbone vs. herringbonedoes spelling matter?
The pattern is “herringbone,” but plenty of people type “herrinbone.” If you’re publishing online, it’s fine to include the correct term
prominently and reference the common misspelling once (congratulationsyou just did SEO without making it weird).
Final Thoughts
A cedar planked herringbone bathroom wall is one of those upgrades that feels both bold and timelesslike wearing a great
leather jacket with clean sneakers. Done right, it brings warmth, texture, and personality to a room that’s usually all hard surfaces and
straight lines.
The winning formula is simple: choose quality cedar, plan the pattern carefully, prep your wall like moisture is real (because it is),
seal with intent, and ventilate like you mean it. Then stand back and enjoy your new bathroom wallpreferably while pretending you’re in a
boutique hotel that hands out fluffy towels for free.
of Real-World “Field Notes” From Cedar Herringbone Bathroom Walls
Home projects have a funny way of teaching you things you didn’t know you needed to knowlike how many opinions exist about “the right”
finish, or how a bathroom can produce enough steam to qualify as a small weather event. Cedar herringbone walls are no different: they’re
gorgeous, but they reward the folks who treat the details like part of the design.
One common lesson from real installs: the first two hours decide the whole weekend. The centerline, the starter “V,” and
the first few rows feel slow because you’re checking alignment, measuring twice, and dry-fitting like a cautious scientist. But that early
patience pays off. Once the pattern is true, the rest becomes satisfying assembly-line work. Many DIYers say the “click” moment happens when
they step back after a few rows and the herringbone suddenly looks intentional instead of “abstract geometry experiment.”
Another recurring theme: pre-finishing feels annoying until it feels genius. People who pre-finish planks on sawhorses
tend to love the resultcleaner seams, consistent coverage, less panic-brushing in corners. The folks who skip it often end up doing
gymnastics with a brush, discovering that gravity is not a collaborator. If the wall is near a sink, pre-finishing the edges especially
can help reduce those tiny darkened seams that show up when splashes happen repeatedly.
The bathroom itself also has opinions. In homes where the exhaust fan is underpowered or rarely used, wood walls take the blame for
issues that really start in the air. When humidity hangs around, even a good finish can look tired sooner. But in bathrooms where the fan is
strong and actually used (bonus points if it runs after showers), cedar walls tend to stay crisp and stable. Homeowners often describe the
difference as “night and day”not because cedar is fragile, but because humidity is relentless. A simple routinefan on, door cracked,
quick wipe of obvious splasheskeeps the wall looking like it was installed last month.
There’s also a design lesson: herringbone is the star, so let it be the star. Some of the best-looking bathrooms pair the cedar wall with
simpler supporting cast memberssolid-color paint, clean tile, minimal patterns elsewhere. When everything competes, nothing wins. When cedar
herringbone is the feature, the whole room feels curated instead of cluttered.
Finally, a small but surprisingly emotional moment: the smell. People forget that cedar brings an aroma that reads “fresh” and “calm” in a
way candles can only dream of. Right after installationespecially before the bathroom’s daily life kicks inthere’s often a day or two where
the room smells like a new sauna at a spa. It fades to subtle over time, but it’s a delightful side effect that makes the project feel
extra worth it. If a wall can make you breathe deeper, that’s not just decorthat’s therapy with nails.


