Table of Contents >> Show >> Hide
- Why This Chocolate-Ginger Marble Cookies Recipe Works
- Ingredients
- How to Make Chocolate-Ginger Marble Cookies
- What These Cookies Taste Like
- Pro Tips for the Best Marble Cookie Texture
- Common Mistakes to Avoid
- Storage and Make-Ahead Tips
- Serving Ideas
- Frequently Asked Questions
- Conclusion
- Baker’s Notebook: Real-Life Experiences With Chocolate-Ginger Marble Cookies
Note: Clean HTML body content only, written for direct web publishing and easy copy/paste.
Some cookies whisper. These cookies walk into the room wearing boots.
This Chocolate-Ginger Marble Cookies Recipe is for bakers who want a cookie with drama, depth, and just enough holiday energy to make the kitchen smell like a candle store in the best possible way. You get dark chocolate richness, warm ginger spice, a little molasses moodiness, and a swirled marble look that makes every cookie feel slightly fancy without requiring a culinary degree or a tiny artist’s beret.
The beauty of this recipe is that it delivers both flavor and style. One dough leans into ginger, vanilla, and molasses. The other gets a chocolate upgrade with cocoa and melted dark chocolate. Twist the two together, and you end up with cookies that bake up with crackly tops, chewy middles, and gorgeous swirls. They look bakery-worthy, but the process is refreshingly doable. No need for complicated laminating, rulers, or existential dread.
Because this is written for real life, the method is practical, the ingredients are easy to find, and the tips are built around what actually helps: chilling the dough, using parchment, not overmixing, and resisting the urge to “fix” the marble by blending it into one brown blob. Let the dough do its thing. Your job is mostly to avoid overhelping.
If you have been searching for chocolate ginger cookies, marble cookie recipe, or an easy holiday baking project with major flavor payoff, this one checks every box. It is deeply spiced, deeply chocolatey, and deeply committed to disappearing from the cooling rack faster than you can say, “I only had one.”
Why This Chocolate-Ginger Marble Cookies Recipe Works
Great marble cookies need contrast in both flavor and appearance. Here, the ginger dough stays warm, fragrant, and slightly caramel-like thanks to brown sugar and molasses. The chocolate dough adds cocoa depth and a smooth bittersweet finish. Together, they create a balanced cookie that tastes more interesting than plain ginger cookies and more nuanced than basic chocolate cookies.
The chill time matters too. Chilled dough is easier to handle, spreads less in the oven, and gives the flavors a chance to settle in together. That means sharper ginger notes, deeper molasses flavor, and cookies that hold their swirled shape instead of turning into one large, emotional pancake.
And then there is texture: crisp edges, chewy centers, and the occasional hit of chopped candied ginger if you decide to add it. That little extra chew is not mandatory, but it is delightful. Think of it as the surprise guest who actually improves the party.
Ingredients
For the Base Dough
- 2 1/4 cups all-purpose flour
- 1 teaspoon baking soda
- 1/2 teaspoon baking powder
- 1/2 teaspoon fine sea salt
- 2 teaspoons ground ginger
- 1 teaspoon ground cinnamon
- 1/8 teaspoon ground cloves
- 3/4 cup unsalted butter, softened
- 3/4 cup packed dark brown sugar
- 1/4 cup granulated sugar
- 1 large egg
- 1/4 cup unsulfured molasses
- 1 tablespoon freshly grated ginger
- 2 teaspoons pure vanilla extract
For the Chocolate Half
- 2 tablespoons Dutch-process cocoa powder
- 3 ounces dark or semisweet chocolate, melted and cooled slightly
- 1 tablespoon milk, only if needed to loosen the chocolate dough
Optional Finishing Touches
- 1/3 cup finely chopped candied ginger
- Coarse sugar or sparkling sugar for rolling
- A small pinch of flaky salt after baking
How to Make Chocolate-Ginger Marble Cookies
1. Mix the dry ingredients
In a medium bowl, whisk together the flour, baking soda, baking powder, salt, ground ginger, cinnamon, and cloves. Set the bowl aside. This is your spice cloud of future happiness.
2. Cream the butter and sugars
In a large mixing bowl, beat the softened butter, brown sugar, and granulated sugar until lightened and fluffy, about 2 to 3 minutes. Add the egg, molasses, fresh ginger, and vanilla, and mix until smooth. Scrape down the bowl so nothing gets left behind like a forgotten sitcom side character.
3. Finish the base dough
Add the dry ingredients to the wet ingredients and mix on low speed just until combined. Do not overmix. If using candied ginger, fold it in now.
4. Divide and flavor the doughs
Divide the dough evenly between two bowls. Leave one half as the ginger dough. To the second half, add the cocoa powder and melted chocolate. Mix just until combined. If the chocolate half feels noticeably stiffer than the ginger half, add up to 1 tablespoon of milk, a teaspoon at a time, until the textures feel similar.
5. Chill the dough
Cover both doughs and refrigerate for 1 1/2 to 2 hours, or until firm enough to scoop. If chilling overnight, let the dough sit at room temperature for 10 to 15 minutes before shaping.
6. Heat the oven
Preheat the oven to 350°F. Line two baking sheets with parchment paper.
7. Create the marble effect
Scoop about 1 tablespoon of ginger dough and 1 tablespoon of chocolate dough. Press them lightly together, twist once or twice, then gently roll into a loose ball. You want visible streaks, not perfect blending. Imperfect swirls are the goal here. That is what makes them pretty.
8. Bake
Place the dough balls 3 inches apart on the prepared baking sheets. Roll lightly in coarse sugar first if you want sparkle and extra crackle. Bake for 10 to 12 minutes, until the edges are set and the tops look puffed and slightly crackled. The centers may still seem soft; that is correct. Let the cookies cool on the pan for 5 minutes, then transfer to a wire rack.
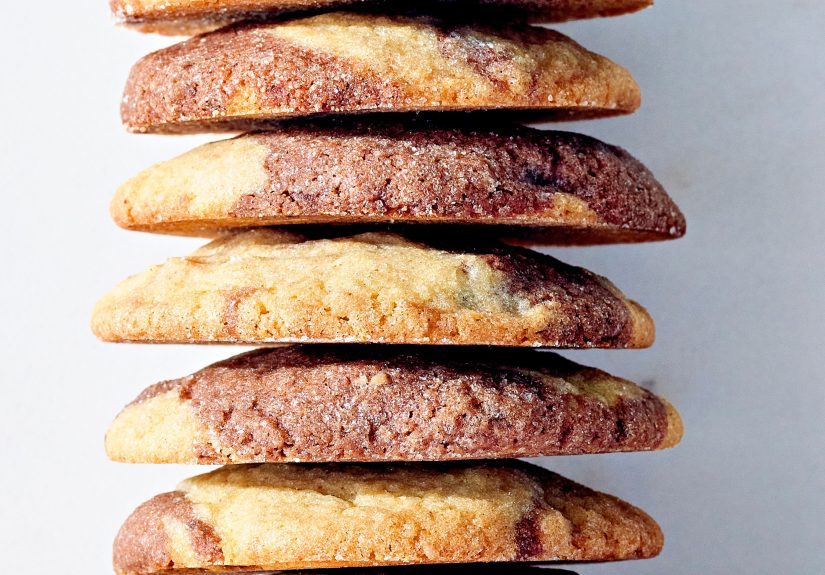
What These Cookies Taste Like
The first bite starts with chocolate, but ginger catches up quickly and refuses to be ignored. The molasses adds a dark sweetness that makes the cookie taste cozy instead of merely sugary. Cinnamon and cloves stay in the background, doing the culinary equivalent of mood lighting. If you add candied ginger, the little chewy pockets bring occasional bursts of heat and sweetness that make each bite slightly different.
This is not a shy cookie. It has layers. It tastes like a chocolate cookie and a ginger molasses cookie decided to stop competing and start a jazz duo.
Pro Tips for the Best Marble Cookie Texture
Use softened butter, not melted butter
Softened butter creams better with sugar and gives the dough structure. Melted butter can work in some cookie recipes, but here it makes marbling harder and spreading more likely.
Chill both doughs equally
If one dough is cold and the other is soft, your swirl will look messy in the wrong way. Matching texture matters more than mathematical precision.
Do not over-swirl
Two quick twists are enough. Overworking the dough turns your beautiful marble into a uniform muddy brown. Delicious, yes. Marbled, no.
Use parchment paper
Parchment helps the cookies bake more evenly and makes cleanup much easier. Nobody needs a dramatic post-cookie scraping session.
Let them cool completely
These cookies improve as they cool. The ginger becomes more defined, the chocolate settles in, and the centers develop that perfect chewy finish.
Common Mistakes to Avoid
Skipping the chill: The dough is softer than it looks. Warm dough spreads fast and loses the marble pattern.
Adding too much flour while shaping: If the dough is sticky, chill it longer rather than dusting heavily with flour. Extra flour can make the cookies dry.
Overbaking: Pull them when the edges are set and the centers still look a touch underdone. They finish on the pan.
Using too much cocoa: It is tempting, but extra cocoa can dry out the chocolate half and reduce contrast.
Making the dough balls too large: Giant cookies are fun, but medium-sized ones keep the swirl more defined and bake more evenly.
Storage and Make-Ahead Tips
Store the baked cookies in an airtight container at room temperature for up to 4 days. They stay chewy, and the spice flavor actually gets a little rounder by day two. If you want to stack them, place parchment between layers so they do not cling together like clingy reality show contestants.
You can refrigerate the dough for up to 48 hours before baking. You can also freeze shaped dough balls for up to 2 months. Bake from frozen with an extra 1 to 2 minutes added to the bake time. That is a beautiful thing because future-you deserves excellent cookies with minimal effort.
Serving Ideas
These cookies are excellent with coffee, black tea, chai, or cold milk. For a holiday dessert tray, pair them with plain shortbread and citrus cookies so their bold flavor has some contrast. They also make a strong argument for becoming the official cookie of winter book clubs, cookie swaps, and late-night kitchen wandering.
If you are feeling extra, sandwich two cookies with a thin layer of chocolate ganache or vanilla buttercream. Is that necessary? Absolutely not. Is it wonderful? Unquestionably.
Frequently Asked Questions
Can I use all ground ginger and skip the fresh ginger?
Yes, but the flavor will be flatter. Fresh ginger gives the cookies a brighter, livelier edge that plays beautifully with chocolate.
Can I use blackstrap molasses?
Not recommended. It is more bitter and intense than regular unsulfured molasses, and it can overpower the chocolate.
Can I make these without candied ginger?
Absolutely. The cookies are still full of flavor. Candied ginger is a bonus, not a requirement.
Why did my cookies lose the swirl?
You probably overmixed the two doughs together or baked them before they were chilled enough. Next round, twist less and chill more.
Can I make smaller cookies?
Yes. Use teaspoon-sized portions of each dough and reduce the bake time to about 8 to 9 minutes. Tiny cookies, same big personality.
Conclusion
This Chocolate-Ginger Marble Cookies Recipe hits the sweet spot between beautiful and practical. It borrows the best ideas from classic ginger cookies, chocolate cookies, and marbled dough techniques, then turns them into one deeply flavorful dessert that looks impressive without making your weekend unnecessarily complicated.
If you want a cookie that feels festive but not fussy, bold but balanced, and special without requiring twelve bowls and an identity crisis, this is the one to bake. The chocolate brings richness, the ginger brings warmth, and the swirl brings that “wait, you made these?” reaction every home baker secretly enjoys. As it should.
Baker’s Notebook: Real-Life Experiences With Chocolate-Ginger Marble Cookies
The first time I made a version of these cookies, I was mostly chasing a smell. Not a philosophical smell, just the very specific aroma of ginger, cocoa, and brown sugar hitting warm air on a cold afternoon. I wanted the kitchen to smell like December without having to drag out every holiday decoration I own, including the crooked wreath I keep pretending is charming. These cookies delivered immediately. Even before the first tray came out, the dough itself smelled like it had excellent life advice.
What surprised me most was how fun the marbling step felt once I stopped trying to make every cookie identical. That is the secret, honestly. The more you try to force perfect spirals, the more the dough rebels. The best batch I ever made looked a little unpredictable going into the oven, but baked up with dramatic swirls and crinkles that felt natural and bakery-style. So if your first few look messy, congratulations: you are probably doing it right.
I have also learned that these cookies are crowd-pleasers across oddly specific personality groups. Chocolate people like them because the cocoa and melted chocolate make the flavor deep instead of decorative. Gingerbread people like them because the spice still comes through clearly and does not get buried. People who claim they “do not usually like ginger” somehow eat two and then start asking suspiciously detailed questions about the recipe. That is a strong sign.
They are excellent for gifting because they look more complicated than they are. Put a dozen in a box with parchment and suddenly everyone assumes you own a stand mixer the size of a motorcycle and casually host cookie exchanges with handwritten labels. In reality, you may just be standing in fuzzy socks, trying to keep one cookie away from the family member who keeps “testing” them for quality control.
Another experience worth noting: these cookies get even better after a few hours. Fresh from the oven, they are soft and fragrant. By later that evening, the ginger tastes rounder, the molasses feels richer, and the chocolate settles into the crumb in a way that makes the whole cookie taste more complete. They are one of those rare bakes that reward patience, even though patience around cookies is an unreasonable ask.
I also think they are ideal for people who want to look like ambitious bakers without signing up for a three-day pastry project. There is enough technique here to feel satisfying, but not so much that you need a spreadsheet. Mix, divide, flavor, chill, twist, bake. That is the rhythm. And when the tray comes out with those dark-and-golden swirls, it really does feel like a little kitchen victory.
So yes, this recipe is delicious. But it is also the kind of bake that makes a regular afternoon feel a little more memorable. It gives you a great-smelling kitchen, a plate of striking cookies, and the deeply satisfying experience of making something that tastes as good as it looks. In baking terms, that is pretty much the jackpot.


