Table of Contents >> Show >> Hide
- What You’ll Learn
- Why Build a DIY Compost Bin?
- Choose the Right DIY Compost Bin Style (Before You Buy Anything)
- Composting Basics (The Stuff That Makes or Breaks Your Pile)
- Build #1: Wire Mesh Compost Bin (The “10-Minute Win”)
- Build #2: Pallet Compost Bin (Upcycled, Sturdy, and Surprisingly Handsome)
- Build #3: Wood-and-Wire Hinged Bin (The “I’m Serious About Compost” Build)
- Build #4: Trash Can / Barrel Batch Composter (Contained and Critter-Resistant)
- Where to Put Your Compost Bin (So You’ll Actually Use It)
- How to Run Your Bin Like a Friendly Microbe Hotel
- Troubleshooting: Smells, Pests, and “Why Is Nothing Happening?”
- When Compost Is Finished (And How to Use It Without Regret)
- DIY Compost Bin Experiences (About of What People Learn Fast)
- Conclusion
If you’ve ever stared at a sad pile of banana peels and thought, “There has to be a more heroic ending for you,” welcome. A DIY compost bin turns everyday kitchen scraps and yard waste into rich, crumbly compostaka “garden gold,” aka “the glow-up your soil deserves.” This guide walks you through several proven compost bin builds (from “10-minute wire ring” to “I own a drill and I’m not afraid to use it”), plus the simple science that keeps your pile from smelling like a swamp creature’s laundry hamper.
Why Build a DIY Compost Bin?
Composting is basically recycling, but for organic stuff. Instead of sending food scraps and yard debris to the trash, you let microbes break them down into a soil amendment that improves structure, water-holding, and overall soil life. The win is big: less waste, healthier soil, and a garden that doesn’t look like it’s living on instant noodles.
- Cleaner yard: Contain leaves, clippings, and trimmings in one place instead of “the wind’s art installation.”
- Better soil: Finished compost helps sandy soils hold water and helps clay soils loosen up.
- Fewer inputs: Compost can reduce how much fertilizer and bagged soil you buy.
- Feel-good factor: Turning “waste” into something useful is genuinely satisfying.
Choose the Right DIY Compost Bin Style (Before You Buy Anything)
The “best” compost bin is the one you’ll actually use. Your ideal build depends on three things: space, materials you generate (mostly leaves? lots of kitchen scraps?), and how tidy you want it to look.
Quick Matchmaker: Which Bin Fits You?
- Wire mesh ring → Best for yard waste, beginners, and anyone who loves “done in 10 minutes.”
- Pallet bin → Best for medium-to-large yards, lots of leaves, and upcycling fans.
- Wood-and-wire hinged bin → Best for durability, airflow, and easy turning/harvesting.
- Trash can / barrel batch composter → Best for pest-prone areas and “keep it contained” households.
- Three-bin system → Best for heavy composters who want a smoother workflow (fresh → active → finished).
One Honest Note About Tumblers
Tumblers are convenient, but they can be tricky to DIY well because the hardware needs to handle weight and rotation. If you want “turning without lifting,” a barrel-style batch composter can get you most of the benefit with fewer mechanical headaches.
Composting Basics (The Stuff That Makes or Breaks Your Pile)
Composting isn’t complicated, but it is picky in the same way a sourdough starter is picky: it wants the right balance, some air, and a reasonable amount of moisture. Give it that, and it rewards you. Ignore it, and it writes angry reviews in the form of odors.
Greens + Browns: The Ratio That Prevents Funk
Compost needs both nitrogen-rich “greens” (food scraps, fresh grass clippings) and carbon-rich “browns” (dry leaves, straw, shredded cardboard). A practical home guideline is about three parts browns to one part greens by volume. This tends to land you near a carbon-to-nitrogen balance compost microbes like.
Examples
- Greens: fruit/veg scraps, coffee grounds, fresh grass, spent flowers
- Browns: dry leaves, shredded paper/cardboard (non-glossy), straw, small wood chips
Moisture: “Wrung-Out Sponge” Is the Whole Secret
Compost should be damp, not drippingthink wrung-out sponge. Too dry and decomposition crawls. Too wet and the pile turns anaerobic (a polite word for “smells bad”). The easiest test: grab a handful from the middle and squeeze. A drop or two is fine; a stream is not.
Airflow + Size: Big Enough to Work, Not So Big It Suffocates
Microbes need oxygen. That’s why good bins have ventilation and why turning helps. For active composting, aim for a compost mass roughly 3 to 5 feet in each direction. Smaller piles struggle to heat up; huge piles can trap moisture and air pockets in all the wrong ways.
What Not to Compost (If You Like Peace)
The most common “my compost is a disaster” stories start with the same ingredients: meat, dairy, grease, and pet waste. These can smell, attract pests, and introduce pathogens. Also avoid diseased plants and weeds that have gone to seed unless you’re confident your pile gets hot enough to kill them.
- Avoid: meat/fish, dairy, oils/grease, pet waste, diseased plants, invasive weeds, seed-heavy weeds
- Use caution: large amounts of citrus/onion/garlic; treated lawn clippings; black walnut debris (can affect plants)
Build #1: Wire Mesh Compost Bin (The “10-Minute Win”)
A wire mesh compost bin is one of the most popular backyard compost bin builds because it’s cheap, breathable, and easy to move. It’s ideal if you generate lots of leaves and garden trimmings.
Materials
- 10–12 feet of 36-inch-wide wire mesh (chicken wire or hardware cloth)
- Heavy-duty wire ties or zip ties
- Gloves + wire cutters (your fingers will thank you)
- (Optional) 3–4 stakes/posts for extra rigidity
Steps
- Pick your spot: level ground with decent drainage and easy access.
- Form the cylinder: curve the wire into a circle about 3 feet across.
- Secure the seam: fasten the ends together with ties every few inches.
- Add posts (optional): stake it in place if your area gets wind or enthusiastic pets.
- Start filling: alternate browns and greens, and keep food scraps buried under browns.
Why This Works
The open sides improve aeration (less odor, faster breakdown). The downside is aestheticswire bins look like composting’s “starter apartment.” If you want something tidier, jump to the wood-and-wire bin.
Build #2: Pallet Compost Bin (Upcycled, Sturdy, and Surprisingly Handsome)
A pallet compost bin is the classic DIY move: inexpensive, roomy, and it holds heat better than a wire ring. It’s great for leaf-heavy seasons and for gardeners who want a bin that stays put.
Materials
- 3–4 heat-treated pallets (look for “HT” stamp; avoid chemically treated wood)
- Exterior screws or heavy-duty zip ties
- Drill/driver
- (Optional) hardware cloth to line the inside (helps with airflow + discourages critters)
- (Optional) a tarp or lid panel to shed rain
Steps
- Create a U-shape: stand three pallets upright for the back and sides.
- Fasten corners: screw the pallets together (ties work, screws are sturdier).
- Add a front: use a fourth pallet as a removable front, or create “slats” you can lift out as compost finishes.
- Line if needed: add hardware cloth along the interior if pests are common in your area.
- Start composting: build your pile in layers, and keep it at wrung-out sponge moisture.
Pro Tips
- Make harvesting easier: a removable front is a small upgrade with a huge quality-of-life payoff.
- Rain happens: if your pile gets soggy, cover the top and add more browns.
- Shred leaves: shredded leaves break down much faster than whole leaves (and are easier to mix).
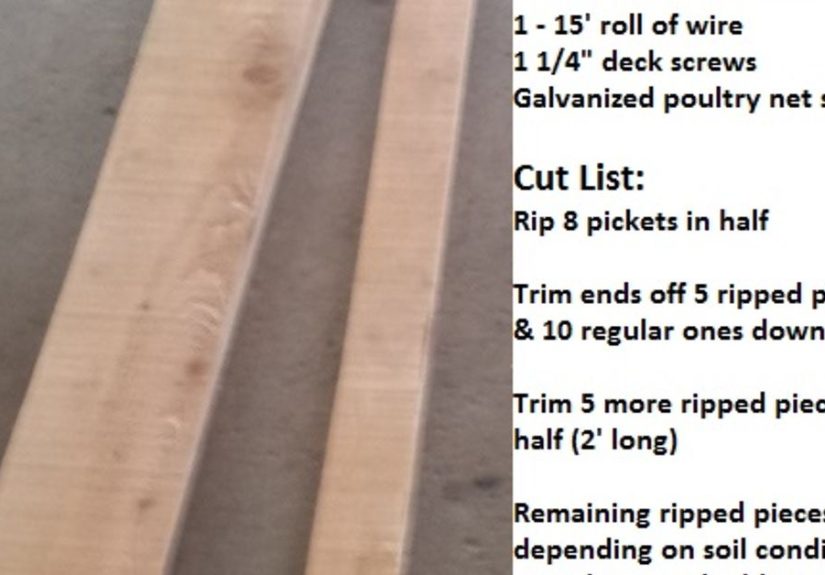
Build #3: Wood-and-Wire Hinged Bin (The “I’m Serious About Compost” Build)
This design uses wooden frames with hardware cloth and hinges so you can open a side to turn or harvest. It’s breathable, sturdy, and feels like the compost bin equivalent of upgrading from a folding chair to a real sofa.
Materials
- 2×4 lumber (enough to build four 3-foot square frames)
- Hardware cloth (wire mesh) cut to match frames
- Staples or fencing nails + hammer/staple gun
- 2–4 sturdy hinges + latch
- Exterior screws
Steps
- Build frames: make four square frames (about 3′ x 3′).
- Attach mesh: stretch hardware cloth tightly across each frame and staple every few inches.
- Hinge panels: connect frames so they fold/openkeep the wire on the inside.
- Add latch: a simple gate latch keeps it closed when full.
- Set on soil: placing it on bare ground allows helpful organisms to move in from below.
Why Gardeners Love It
You get the airflow of wire with the structure of wood. Turning becomes easier, and “finished compost harvesting” stops being a wrestling match.
Build #4: Trash Can / Barrel Batch Composter (Contained and Critter-Resistant)
If your neighborhood includes raccoons with MBA-level problem-solving skills, a contained bin can save your sanity. A trash can composter works best as a batch system: fill it, let it break down, then emptyrather than constantly adding new scraps forever.
Materials
- One heavy-duty plastic trash can with lid (or a food-grade barrel)
- Drill + 1/2″ drill bit
- Bricks/wood blocks (to elevate for drainage)
- (Optional) a short length of PVC pipe with holes (acts like an aeration “chimney”)
Steps
- Ventilate: drill holes on the sides and lid (and a few on the bottom if you can keep it elevated).
- Elevate: set the can on blocks so excess moisture can drain and air can circulate.
- Layer ingredients: browns + greens, finishing each food-scrap layer with browns to reduce odors.
- Keep moisture right: wrung-out sponge textureadd browns if it gets wet.
- Mix occasionally: use a sturdy stick or compost aerator tool to stir down the middle.
Best Use Case
Great for smaller yards, patios, or anyone who wants composting contained. It’s less ideal for “hot composting on hard mode,” but it can absolutely produce solid compost with the right balance and moisture.
Where to Put Your Compost Bin (So You’ll Actually Use It)
- Convenience wins: put it close enough that you’ll use it, far enough that you won’t trip over it.
- Drainage matters: avoid low spots that collect water.
- Access to water: if you never water the pile, it will eventually resemble a dry museum exhibit.
- Partial shade is helpful: full sun can dry a pile out; deep shade can keep it too cool/wet.
- Neighbor diplomacy: keep it tidy, keep it covered with browns, and nobody needs to know you’re running a microbe nightclub.
How to Run Your Bin Like a Friendly Microbe Hotel
Step 1: Start With a “Brown Bed”
Begin with a thick layer of browns (dry leaves, straw, shredded cardboard). This helps airflow and absorbs excess moisture.
Step 2: Alternate Layers (Or MixBoth Work)
Layer greens and browns, or mix them as you add. The goal is consistent balance throughout the pile. If you mostly add kitchen scraps, you’ll need to be extra intentional about browns.
Step 3: Bury Food Scraps
Always cover food scraps with a few inches of browns. This cuts odors and makes pests less interested. Think of it as tucking scraps in for the night.
Step 4: Turn for Speed
Turning introduces oxygen and redistributes moisture and materials. If you want faster compost, turn every 1–2 weeks. If you’re composting casually, turning less often still worksit just takes longer.
Step 5: Watch Moisture Like a Hawk (A Chill Hawk)
If the pile is dry, add water while turning. If it’s too wet, add browns and fluff it for air. The wrung-out sponge rule is your compass.
Troubleshooting: Smells, Pests, and “Why Is Nothing Happening?”
If It Smells Rotten
- Likely cause: too wet or not enough air (anaerobic conditions).
- Fix: add dry browns, turn the pile, and consider covering the top from heavy rain.
If It Smells Like Ammonia
- Likely cause: too many greens (too much nitrogen).
- Fix: add browns (dry leaves, shredded cardboard) and mix thoroughly.
If You Have Flies or Rodents
- Likely cause: food scraps exposed, or unsuitable materials.
- Fix: bury scraps, avoid meat/dairy/oils, keep a thick “brown cap” on top, and consider a rodent-resistant bin.
If It’s Not Heating Up
- Likely causes: pile too small, too dry, or not enough greens.
- Fix: build volume (3’–5′ mass), moisten lightly, and add greens (or a little fresh grass) while mixing.
If It’s Too Dry and Just Sits There
- Fix: add water as you turn, add more greens, and reduce overly woody materials or shred them smaller.
When Compost Is Finished (And How to Use It Without Regret)
Finished compost is typically dark, crumbly, and earthy-smelling. If it still looks like yesterday’s salad and smells like a science fair, it needs more time (and probably a better brown/green balance).
How to Use Finished Compost
- Soil amendment: mix 1–3 inches into garden beds.
- Mulch: spread a thin layer around plants (not piled against stems).
- Potting mixes: use as a component, not the whole mix (compost holds moisture and nutrients but needs structure).
- Topdressing lawns: a light, sifted layer can help soil over time.
Tip: If your compost is “almost there” but still a little raw, let it cure in a separate pile or bin section. Curing helps stabilize it before you add it to beds where young plants might be sensitive.
DIY Compost Bin Experiences (About of What People Learn Fast)
People start composting with big dreams: zero waste, perfect soil, maybe a smug little grin at the trash can. Then reality shows up wearing a raincoat and holding a bag of coffee grounds. Here are common experiences backyard composters reportso you can skip a few beginner potholes.
The “Soggy Lasagna” Phase
Early piles often go too heavy on kitchen scraps because they’re easy. Food scraps are mostly “greens,” and greens are wet. Add a few rainy days and suddenly the compost bin becomes a marsh. The fix almost always feels too simple: add more brownsdry leaves, shredded cardboard, or strawthen turn. Many gardeners keep a dedicated stash of browns nearby (a leaf bag, a tote of shredded cardboard) so the solution is always within arm’s reach.
Banana Peel Archaeology
Some materials break down quickly (coffee grounds, soft veggie scraps). Others take their sweet time. People are frequently surprised when they turn a pile and discover recognizable bits from weeks ago: avocado skins, corn cobs, woody stems. This doesn’t mean composting “failed.” It means those items need more time, smaller pieces, more heat, or a stronger mix. Chopping scraps, shredding leaves, and keeping the pile large enough to warm up can make a dramatic difference.
Turning: The “It’s a Workout, But It Works” Moment
Most composters notice a pattern: the more consistently they turn (even just every other week), the faster the pile transforms and the less it smells. Turning also becomes a diagnostic tool: you learn to recognize when the pile is too dry, too wet, too dense, or too green-heavy. It’s basically the compost version of checking your car’s oilunexciting, but it prevents drama.
Seasonal Surprises
In fall, people discover they have an absurd amount of browns (leaves) and not enough greens. In summer, it flips: kitchen scraps and grass clippings pour in, and browns become precious. Experienced composters “bank” brownsbag leaves in autumn, store shredded cardboard year-round so they can balance the pile no matter the season.
The Pest Lesson (Usually Learned Once)
Many households can compost kitchen scraps safely, but pests become a problem when food is left exposed or when meats/dairy/oils enter the picture. The experienced move is consistent: bury scraps and cap with browns. If rodents are common where you live, a contained bin (like a ventilated trash can or a wood-and-wire bin with tighter mesh) keeps composting peaceful and prevents a midnight raccoon buffet.
The Best Part: The First “Finished Compost” Moment
The first time someone opens a bin and finds dark, crumbly compost that smells like a forest floor, it clicks: this isn’t grossit’s transformation. Gardeners often describe using that first batch around tomatoes, peppers, herbs, or flower beds as a confidence boost. Composting stops being a chore and becomes a systemone that quietly improves everything you grow.


