Table of Contents >> Show >> Hide
- Why Use Inside Cabinet Door Storage Shelves?
- Plan Your DIY Inside Cabinet Door Shelves
- Tools and Materials You’ll Need
- How to Build DIY Inside Cabinet Door Storage Shelves
- Smart Ways to Use Your Inside Cabinet Door Shelves
- Design Variations and Renter-Friendly Options
- Common Mistakes to Avoid With Inside Cabinet Door Shelves
- Real-Life Experiences & Pro Tips With DIY Inside Cabinet Door Shelves
- Conclusion: Small Shelves, Big Impact
If your kitchen cabinets explode like confetti every time you open them, it’s not a sign you own too much stuff
it’s usually a sign you’re not using all your space wisely. Professional organizers love to remind us that most
kitchens don’t actually lack storage; they just use it inefficiently, especially the backs of cabinet doors.
That’s where DIY inside cabinet door storage shelves come in. With a few boards, basic tools, and a free afternoon,
you can turn that blank door into a custom mini-pantry, spice station, or cleaning caddy. It looks clever, feels
expensive, and costs way less than those fancy boutique organizers.
In this guide, we’ll walk through how to plan, build, and install DIY inside cabinet door shelves inspired by the
clever projects you see on Hometalk and similar home DIY sites. Along the way, you’ll get pro tips, real-life
examples, and extra ideas for using every inch of your kitchen, bathroom, or laundry room doors.
Why Use Inside Cabinet Door Storage Shelves?
1. You Instantly Add Hidden Storage
The back of a cabinet door is prime real estate. Better Homes & Gardens and other organizing experts often
highlight behind-the-door storage as one of the easiest ways to add capacity without taking up a single extra inch
of floor or wall space.
A slim shelf system lets you store:
- Spice jars and cooking oils
- Foil, plastic wrap, and parchment paper
- Snack bars and baking essentials
- Cleaning sprays, sponges, and rubber gloves
- Bathroom products like hair spray, lotions, and extra soap
2. You Improve Visibility and Cut Down on Clutter
When items are lined up on shallow shelves at eye level, you can actually see what you own. Magazine features on
kitchen cabinet organization emphasize that poor visibility is one of the top reasons people over-buy and end up
with cluttered, chaotic cabinets.
Inside cabinet door storage shelves make it easy to:
- Group like items together (all spices, all baking sprinkles, all snacks)
- Do quick “inventory checks” before grocery runs
- Keep prime cabinet shelf space free for dishes and cookware
3. You Can Customize to Your Kitchen and Your Stuff
Unlike store-bought racks, DIY shelves are fully customizable. Many DIY plans for cabinet door spice racks and
organizers offer simple cut lists and layouts that you can adjust for jar height, door size, and hinge placement.
You’re not stuck with “one-size-fits-kind-of-nobody.” You can build a rack that fits precisely:
- Your favorite spice jars or hot sauce bottles
- The narrow door of a small pantry or bathroom cabinet
- Specialty items like tall spray bottles or cutting boards
Plan Your DIY Inside Cabinet Door Shelves
Before you touch a saw, you’ll want a quick plan. This is the part many people skipand it’s exactly how you end up
with shelves that bang into stored items or keep your cabinet from closing.
Step 1: Decide What You’ll Store
Measure the tallest and widest items you want on the door. A spice-rack style build typically needs shelves about
2–3 inches deep. For oils or spray bottles, you might go up to 3.5–4 inches deep, but experts warn against going too
deepyour shelves should still clear everything inside the cabinet.
Step 2: Check Door Clearance
Open the cabinet and look at what’s stored on the interior shelves. Measure from the inside of the door to the
closest item inside the cabinet. Subtract at least half an inch for clearance. That number is your maximum shelf
depth for the door organizer.
Also note:
- Where hinges sit (you don’t want screws hitting them)
- Any existing door hardware
- Whether the door is solid or hollow (you’ll choose anchors accordingly)
Step 3: Sketch Your Layout
Use a simple sketchnothing fancyto plan:
- Number of shelves (most people use 2–4)
- Shelf spacing (leave at least 1–1.5 inches of space above your tallest item)
- Rack width (leave at least 1–1.5 inches from each side of the door so it doesn’t catch on the cabinet frame)
Many DIY tutorials suggest shelf spacing of about 6 inches for spice racks and smaller bottles, which is a good
baseline you can tweak.
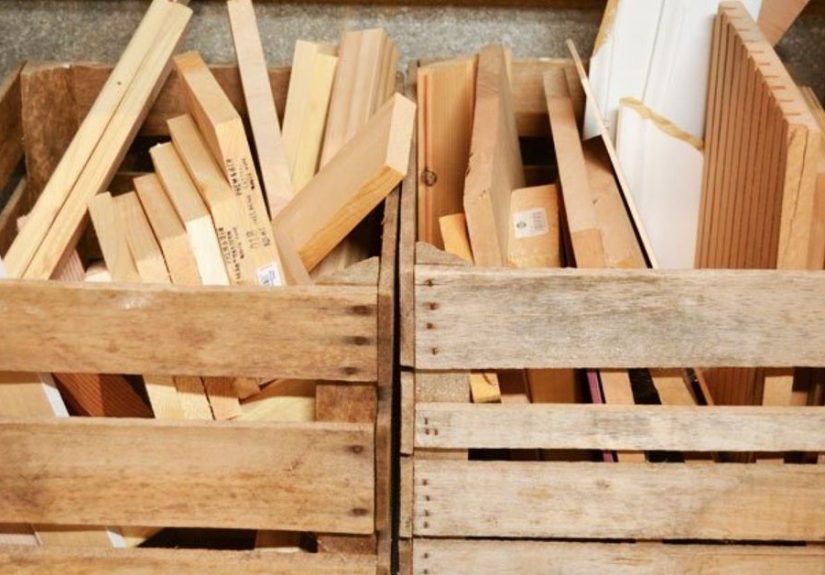
Tools and Materials You’ll Need
Here’s a basic list for a simple wooden inside cabinet door storage rack with dowel rails:
- 1×3 or 1×4 pine or poplar boards (for sides, top, bottom, and shelves)
- 1/4-inch or 3/8-inch wooden dowels (for front rails)
- Wood screws or brad nails
- Wood glue
- Sandpaper (120–220 grit)
- Paint or stain and sealer (optional but recommended)
- Drill with bit set
- Level and tape measure
- Stud finder (for solid doors or side mounting)
- Hollow-core door anchors if your cabinet doors are hollow
If you’re more of a “Dollar Store and done” person, DIYers have also used inexpensive wire cooling racks and small
bins to create budget-friendly door organizers that still look surprisingly polished.
How to Build DIY Inside Cabinet Door Storage Shelves
Step 1: Cut Your Side Pieces, Top, and Bottom
Cut two side pieces to your planned height (for example, 24–26 inches for a standard cabinet door). Cut a top and
bottom piece to your desired widthusually 10–14 inches for a kitchen cabinet door.
Dry-fit these pieces on the door to make sure you like the proportions and that the rack doesn’t interfere with
hinges or the cabinet frame.
Step 2: Cut and Place the Shelves
Cut your shelves to fit between the sides. Builders who share spice rack plans often use 3 shelves on a 24–26-inch
rack, spaced 6–7 inches apart vertically.
Mark the positions on the side boards where each shelf will go. You can:
- Attach the shelves with pocket screws or brad nails, or
- Cut shallow dadoes (grooves) for a stronger, more built-in look
Step 3: Add Front Rails to Keep Items Secure
To keep jars and bottles from flying off when you open the door (don’t ask how we know), add dowel rails to the
front of each shelf:
- Drill small holes in the side pieces, about 1–1.5 inches above each shelf
- Cut dowels to length and glue them into place
You can use one higher rail for tall bottles or two lower rails for shorter spice jars. Some DIYers use narrow trim
boards instead of dowels if they prefer a more solid front.
Step 4: Assemble and Sand
Assemble the frame: attach the top and bottom to the sides, then attach the shelves and dowel rails. Use wood glue
and screws or nails, wiping away excess glue.
Sand everything smooth, rounding over any sharp edges. This isn’t just about lookssoftened edges are friendlier to
hands and labels.
Step 5: Finish the Shelves
Apply paint or stain plus a clear topcoat if you’re storing food items or anything that might leak. Many kitchen
organization experts recommend light colors inside cabinets because they reflect more light and make items easier to
see.
Step 6: Mount the Rack to the Cabinet Door
This is where accuracy matters:
- Hold the rack against the inside of the door where you want it.
- Use a level to ensure it’s straight.
- Mark screw locations at the top and bottom rails.
- Pre-drill holes to avoid splitting the rack or door.
- Use appropriate screws and anchors (hollow-core or wood screws into solid panels).
Some DIY tutorials recommend first screwing through the rack so the screw tips poke out the back slightly; you then
press the rack against the door to create tiny indent marks that show exactly where to install anchorsa neat trick
to get everything perfectly aligned.
Step 7: Load, Label, and Adjust
Once installed, load your shelves and close the door slowly to ensure nothing hits the interior shelves. Shift
items around until everything clears smoothly.
For maximum organization, many pros recommend:
- Using identical jars for spices with clear, simple labels
- Grouping items by categorybaking, savory spices, teas, snacks
- Storing frequently used items on the middle shelves, at eye level
Smart Ways to Use Your Inside Cabinet Door Shelves
1. Spice and Seasoning Central
The most popular use for inside cabinet door storage shelves is spice organization. Free project plans from tool and
DIY brands highlight how a slim multi-shelf rack can hold dozens of spice jars, opening up entire cabinet shelves
elsewhere.
Try:
- Alphabetizing spices if you cook a lot
- Grouping by cuisine (Italian, Mexican, baking, grilling)
- Keeping salt, pepper, and everyday spices on the easiest-to-reach shelf
2. Foil, Wrap, and Baggie Station
Organizing guides often show cabinet door racks holding foil, parchment, plastic wrap, and zipper bags.
Narrow shelves or wire racks are perfect for these boxed items and free up a full drawer or shelf.
3. Cleaning Caddy on the Inside of the Sink Cabinet
Many people install inside cabinet door storage shelves under the kitchen or bathroom sink. Use them for:
- Dish soap and hand soap refills
- All-purpose cleaner and disinfectant wipes
- Sponges, scrub brushes, and gloves
Just make sure to use a sealed or moisture-resistant finish on the wood here, as the area under sinks can be humid
or occasionally damp.
4. Kids’ Snack or Coffee Station
Want a secret snack spot or a mini coffee bar? Use inside cabinet door shelves to store:
- Granola bars, fruit pouches, or small snack bags
- Coffee pods, tea bags, and sugar packets
- Small syrups or flavored creamers (sealed and upright)
This is a great way to create “zones” inside your cabinets, something pro organizers repeatedly recommend for
keeping kitchens tidy and user-friendly.
5. Bathroom, Laundry, and Garage Uses
While most people think of kitchen cabinets first, inside-door shelves are fantastic in:
- Bathrooms for hair products, lotions, and shaving supplies
- Laundry rooms for stain removers, dryer sheets, and small tools
- Garages for spray paint, garden gloves, and cleaning rags
Behind-the-door storage roundups often show this concept in closets, bathrooms, and utility spacesit’s truly a
whole-house organizing strategy.
Design Variations and Renter-Friendly Options
1. Dollar Store and Wire Rack Hacks
If you’re not ready to build from scratch, wire cooling racks or inexpensive wire shelves can be mounted to the
door to hold spices or small bottles, as seen in many budget-friendly DIY tutorials.
Pair them with small bins for packets, seasoning mixes, or drink sachets. It’s a low-commitment, low-cost way to
test the layout before you invest in a permanent wooden build.
2. Magnetic and Hook-Based Storage
Some cabinet door storage ideas rely on magnetic strips, adhesive hooks, or over-the-door hangers to avoid drilling
entirelyperfect for renters. Organizing articles show these being used for:
- Metal spice tins
- Scissors and small kitchen tools
- Paper towel holders or trash bag dispensers
3. Adjustable Shelving Systems
If you like to rearrange frequently, consider a simple rail with adjustable shelves that hook or screw into place.
This mimics store-bought cabinet door organizers but with custom sizes and finishes.
Common Mistakes to Avoid With Inside Cabinet Door Shelves
- Making shelves too deep. They should clear everything inside the cabinet even when the door is fully closed.
- Ignoring weight limits. Cabinet doors aren’t designed to hold bowling balls. Stick to lighter items like spices and small bottles.
- Mounting too close to hinges. This can prevent smooth operation or strain the hardware over time.
- Skipping a protective finish. Especially in kitchens and bathrooms, sealed wood will last longer and be easier to clean.
- Not zoning or labeling. Without simple “systems,” even the best storage solution will eventually get messy again.
Real-Life Experiences & Pro Tips With DIY Inside Cabinet Door Shelves
Inside cabinet door storage shelves look simple, but once you live with them for a while, you learn a few things
that don’t always show up in glossy photos. Here are some experience-based insights that can help you get an even
better result from your project.
Start With Your Most Annoying Cabinet
Don’t overthink where to begingo with the cabinet that frustrates you the most. For many people, that’s either the
spice cabinet or the one under the sink. That “problem cabinet” is where you’ll feel the biggest impact, which makes
the project feel instantly worth the effort.
For example, imagine a narrow cabinet next to the stove packed with spices stacked three jars deep. Every dinner
starts with a mini excavation. After installing a slim three-shelf rack on the inside of that door, those same
spices are now in a single layer, labels facing forward. The main shelf inside is freed up for oils and vinegars,
and you’ve just cut your cooking prep time and your eye-rolls in half.
Test With Temporary Solutions Before You Commit
Many seasoned DIYers recommend trying a temporary solution before building a permanent wooden rack. That might mean:
- Using adhesive hooks and small baskets
- Clipping on a lightweight wire rack
- Hanging a fabric organizer behind the door
Live with that setup for a couple of weeks. You’ll quickly notice if the shelves would work better higher or lower,
if you actually use the items you stored there, and whether the door still opens comfortably in tight spaces.
Balance Function With Noise (and Door Slamming)
Here’s a small but underrated detail: add soft-close bumpers or felt pads. When jars clink every time the door
closes, it can get annoying fast. A few stick-on bumpers at the corners of the door help absorb impact and protect
both the rack and the cabinet frame.
Also, if you share your home with kids, teens, or enthusiastic door-slammer roommates, keep heavier glass bottles on
lower shelves and lighter items up high. It’s safer and less stressful.
Adjust as Your Habits Change
Your first layout doesn’t have to be your forever layout. Over time, you might notice:
- You’re always reaching around one specific bottle to grab another.
- Some spices never get used and just collect dust at eye level.
- Certain snacks mysteriously disappear faster when they’re at kid-height.
Treat your inside cabinet door shelves as flexible, living storage. Rotate rarely used items upward or to less
convenient spots. Bring daily essentials down to the most accessible shelf. If you built adjustable shelves or used
modular containers, reconfiguring is quick and painless.
Think Beyond the Kitchen
Once people build one set of inside cabinet door shelves, they often start eyeing other doors in the house. The same
design works brilliantly for:
- Bathroom vanities for hair tools, skincare, and dental supplies
- Hall closets for lint rollers, flashlights, dog leashes, and umbrellas
- Craft cabinets for paints, glues, and small jars of hardware
Over-the-door and inside-door storage solutions are frequently recommended in organizing articles because they let
you turn otherwise wasted vertical surfaces into functional workhorses. Once you see how much smoother your daily
routines become, it’s hard to go back.
Keep Maintenance Easy
One of the best “pro tips” is simply to design shelves that are easy to wipe down. Smooth painted or sealed wood,
rounded corners, and a little extra clearance between shelves make it faster to swipe away dust, splatters, or
spilled spices. If cleaning the shelves feels like a hassle, you’re more likely to ignore themeventually turning
your shiny new organizer into one more clutter hotspot.
A quick monthly resetwipe shelves, toss expired products, and re-group itemskeeps your DIY inside cabinet door
storage working like a mini built-in organizer system for the long haul.
Conclusion: Small Shelves, Big Impact
DIY inside cabinet door storage shelves are one of those rare projects that are beginner-friendly, budget-conscious,
and genuinely life-improving. You’re using space that already exists, customizing it to fit your exact jars and
bottles, and creating a more organized, efficient kitchen (or bathroom, or laundry room) in the process.
Whether you build a full wooden rack with dowel rails or start with a few clever wire and bin hacks, the idea is the
same: make your cabinet doors work as hard as the rest of your storage. Once you’ve lived with inside cabinet door
shelves for a while, you may wonder how you ever functioned without them.


