Table of Contents >> Show >> Hide
- Why a DIY Rope and Wood Nautical Shelf Works So Well
- Best Materials for a Rope and Wood Shelf
- How to Build a DIY Rope and Wood Nautical Shelf
- How to Style a Nautical Shelf Without Overdoing It
- Common Mistakes to Avoid
- Where This Shelf Looks Best
- My Experience With a DIY Rope and Wood Nautical Shelf
- Final Thoughts
Note: This project works best as a decorative or light-duty shelf unless you upgrade the wood thickness, rope, and mounting hardware for heavier loads.
Some DIY projects whisper, “I am practical.” This one struts into the room wearing boat shoes and smelling faintly of sawdust and sea breeze. A DIY rope and wood nautical shelf is one of those rare home projects that feels both useful and stylish. It stores your favorite little things, fills an awkward wall, and somehow makes the room look like it has its life together. Even if the junk drawer five feet away is telling a very different story.
The charm is simple: wood adds warmth, rope brings texture, and the hanging design gives the piece a relaxed coastal feel without turning your home into a seafood restaurant. Whether you want a compact shelf for candles and framed photos or a longer statement piece for a bathroom, bedroom, entryway, or reading nook, this is a beginner-friendly project that can look surprisingly custom.
What makes a rope shelf so appealing is that it lands right in the sweet spot between rustic and polished. It can look beachy, bohemian, vintage, farmhouse, or modern coastal depending on the wood, stain, rope color, and hardware you choose. In other words, it is the decorating equivalent of that one friend who somehow looks good in every outfit and never seems stressed in photos.
Why a DIY Rope and Wood Nautical Shelf Works So Well
A hanging shelf does more than hold stuff. It adds movement and texture to a wall, which is why it often feels more interesting than a standard bracket shelf. Rope introduces a soft, handmade element, while wood keeps the design grounded. Together, they create a shelf that feels casual but still intentional.
This kind of shelf also saves visual space. Because it hangs rather than sits on bulky brackets, it can make a small room feel lighter. That is one reason hanging shelves keep showing up in compact bedrooms, bathrooms, reading corners, and apartments where every inch matters. If your home has one of those sad empty walls that says, “Please help, I have no personality,” this project is a very affordable intervention.
Another reason it works is flexibility. You can make a single shelf, a stacked multi-tier shelf, or even a ceiling-mounted rope bookshelf. You can use new lumber for a cleaner finish or reclaimed wood for extra character. You can stain it dark for a richer nautical look or leave it lighter for a breezy coastal style. The bones of the project stay simple while the final look becomes your own.
Best Materials for a Rope and Wood Shelf
The Wood
The shelf board is the star of the show, so choose it wisely. Pine is budget-friendly and easy to work with, which makes it great for beginners. Oak and maple feel a bit more refined and resist dents better. Reclaimed wood adds instant age and personality, though it may need more prep. If you want a soft, sandy, beach-house look, lighter woods or pale stain colors work beautifully. If you want that old-ship-cabin mood, go darker and more dramatic.
Try to pick a board that feels sturdy rather than flimsy. A rope shelf loaded with heavy books on a long, thin board can sag over time, so heavier-duty versions need thicker stock and smarter load planning. For lighter styling items, a simpler board is usually fine. Think candles, small plants, folded hand towels, jars, framed art, or a few decorative books instead of an entire encyclopedia collection from 1994.
The Rope
Cotton rope gives a softer, cleaner, indoor look. Manila or jute rope leans more nautical and rustic. Sisal has texture and character, but it can feel rougher in the hand. Pick a rope diameter that looks substantial with your board. Skinny rope on a chunky shelf can look timid. Oversized rope on a tiny shelf can look like the shelf lost a fight with a dock line.
Color matters too. Natural tan tones feel classic and coastal. White rope looks crisp and airy. Black rope creates a sharper, more modern contrast. There is no law saying nautical decor has to look like it came from a lighthouse gift shop.
Hardware and Finishing Supplies
You will likely need a drill, sandpaper, a measuring tape, a pencil, a level, and mounting hardware suited to your wall or ceiling. If you are hanging from studs or joists, that is usually the strongest option. If you must mount into drywall, use anchors specifically rated for the load and follow the hardware instructions carefully.
For the finish, stain and clear sealer are a classic combination. A painted board can also work, especially in white, navy, weathered gray, or driftwood-inspired tones. Whatever finish you choose, test it on a scrap first. That tiny step can save you from discovering too late that your “coastal oak” stain looks more like “sad orange pumpkin.”
How to Build a DIY Rope and Wood Nautical Shelf
Step 1: Plan the Size and Location
Before cutting, drilling, or pretending you know where the tape measure went, decide where the shelf will live. A bathroom shelf may need to be narrow and moisture-aware. An entryway shelf may need enough depth for keys, sunglasses, and the random mail you swear you are going to sort later. A bedroom shelf might be mostly decorative.
Also think about how the shelf will be mounted. A wall-mounted hanging shelf and a ceiling-suspended shelf look similar, but they behave differently. A shelf hanging from the ceiling can swing if it is not anchored securely and balanced well. A wall-mounted version feels more controlled and is often easier for beginners.
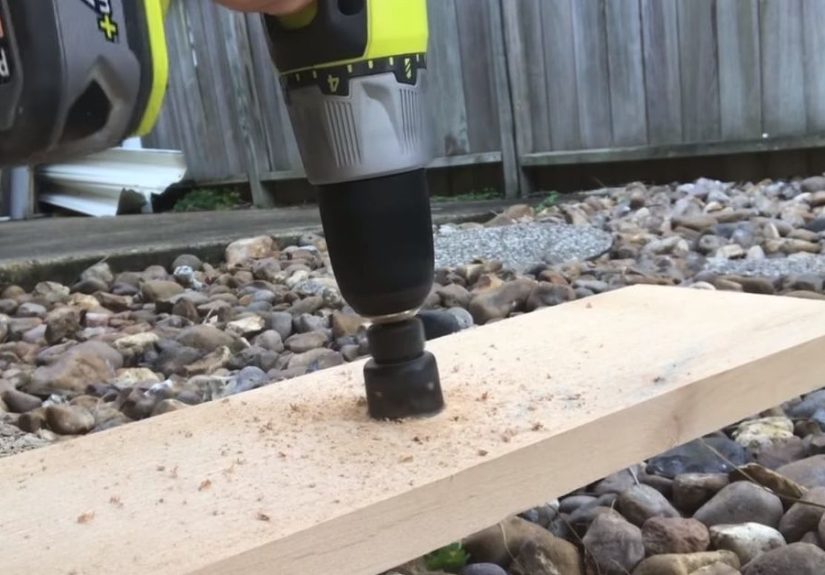
Step 2: Cut and Prep the Wood
Cut your board to size, or have it cut at the store if you want to skip the power-tool drama. Once cut, sand the board smooth, including the edges and the areas around the future rope holes. This matters more than people think. Smooth edges feel better, finish better, and look more professional. They also help prevent rope wear over time.
Wipe away dust before staining or sealing. If you are using a softer wood like pine, taking your time during prep and finishing usually pays off. Good sanding is not glamorous, but neither is a shelf that looks like it was finished during a power outage.
Step 3: Mark and Drill the Rope Holes
Most rope shelf builds use a hole near each corner. Keep the spacing even so the shelf hangs straight and looks balanced. Drill carefully and use a scrap board underneath if needed to reduce tear-out. After drilling, sand the holes so they feel smooth and do not leave rough edges rubbing against the rope.
If you are making a multi-tier shelf, repeat the hole pattern on each board so the ropes line up neatly. This is where patience matters. A shelf can absolutely have a charming handmade look. It should not, however, look like it was measured by a squirrel on espresso.
Step 4: Thread the Rope
Feed the rope through the holes and tie knots below the shelf to support it. For multi-tier designs, tie another set of knots between shelves to create spacing. Adjust slowly and check for level often. It is much easier to fix a lopsided shelf now than after you have already styled it with candles, shells, and your favorite framed quote about living by the sea.
Some people add washers or beads for visual detail, but the main goal is support and even tension. Make sure both sides match in height. A rope shelf that tilts dramatically can turn decor into gravity’s personal playground.
Step 5: Mount It Securely
This is the part where style pauses and common sense takes the wheel. If you are attaching the shelf to a wall or ceiling, find studs or joists whenever possible. They provide stronger support than drywall alone. If you do use drywall anchors, choose the right type for the weight and your wall surface, and do not assume every anchor can hold the same load. Read the packaging. Yes, really.
Use a level before final tightening. If the shelf is ceiling-mounted, double-check that the hanging points are secure and evenly placed. For lighter installations, ceiling hooks may work when installed properly into solid framing. For anything heavier, choose hardware specifically rated for the job and the surface. Decorative shelves are fun. Surprise physics lessons are not.
How to Style a Nautical Shelf Without Overdoing It
The easiest mistake with a nautical shelf is going full pirate museum. Resist that urge unless your design goal is “captain’s quarters, but make it confusing.” The best versions of this look use a light touch.
Start with a few natural materials. Think glass, woven baskets, small plants, ceramics, driftwood tones, and framed prints. Add one or two coastal nods such as a coral-shaped object, a shell, a weathered lantern, or a navy-and-white accent. Then stop. A shelf looks more expensive when it has breathing room.
Here are a few style directions that work especially well:
Coastal Calm
Use pale wood, light rope, white ceramics, blue glass, and one plant. Clean, airy, and easy to live with.
Rustic Nautical
Use a darker stain, rougher rope, antique brass or black hardware, old books, and vintage finds. This look feels more weathered and moody.
Boho Beach
Pair the shelf with woven accents, candles, natural linen, and small trailing plants. It still feels coastal, but softer and more relaxed.
Common Mistakes to Avoid
The first big mistake is treating a rope shelf like a heavy-duty storage system when it is really better suited to decorative or light-to-medium use unless upgraded carefully. If you plan to display heavier items, build accordingly from the start with thicker wood, stronger rope, better hardware, and secure mounting.
The second mistake is skipping the sanding around the holes. Rough edges can make even a nicely built shelf feel unfinished, and they are not great for the rope either.
The third mistake is rushing the leveling process. A crooked hanging shelf is one of those things people may not mention out loud, but they will absolutely notice. Quietly. While pretending to admire your candle holder.
The fourth mistake is ignoring the wall or ceiling structure. Never guess what is behind the surface if you are drilling overhead or into drywall. Know where studs or joists are, use the proper anchors when needed, and match the hardware to the load.
The fifth mistake is overdecorating it. A good nautical shelf should feel curated, not like it swallowed a beach gift store whole.
Where This Shelf Looks Best
A DIY rope and wood nautical shelf works beautifully in a bathroom for rolled towels, jars, and small decor. It also shines in a bedroom as a light floating nightstand alternative, in an entryway for keys and small essentials, or in a living room for layered decor and framed art. In a study or reading corner, it can hold a few favorite books and instantly make the space feel more thoughtful.
It is also renter-friendly in spirit, even if the installation method varies. The design feels custom without requiring a full built-in shelving project. That makes it especially appealing for people who want something charming, useful, and budget-conscious. In other words, it is perfect for anyone who wants their space to look like they have excellent taste and a mild understanding of rope.
My Experience With a DIY Rope and Wood Nautical Shelf
The first time I made a rope and wood shelf, I was convinced it would be one of those quick afternoon projects people brag about online. You know the type: “I threw this together in no time!” Then three hours later they are still in the garage, negotiating with a drill and questioning their life choices. That was me. Deeply, spiritually, unmistakably me.
I started with a simple board, natural rope, and a very optimistic attitude. The wood looked great at the store. Back home, under real light, it looked less “coastal charm” and more “piece of lumber with trust issues.” Still, I kept going. I measured the holes, remeasured them, and then remeasured them again because I know myself. When I finally drilled them, I felt wildly accomplished for about twelve seconds, right up until I realized one hole was just enough off to annoy me forever if I ignored it.
That project taught me the first big lesson: precision matters most in the boring parts. The cutting, sanding, marking, drilling, and leveling are not the flashy stages, but they decide whether the shelf looks handmade in a charming way or handmade in a “should we be worried?” way. Once I slowed down and treated each step like it actually mattered, the shelf started looking far more intentional.
The second lesson was that rope has a personality. It is not just decorative spaghetti. Some rope is soft and cooperative. Some rope acts like it has unresolved anger. The first rope I bought looked amazing but shed fibers everywhere and fought every knot like it had a lawyer present. The next one was easier to work with and instantly made the shelf feel cleaner and more finished. Since then, I have paid much more attention to the rope texture, color, and flexibility before buying it.
I also learned that the finish changes everything. On one version, I used a medium stain that brought out the wood grain and made the whole piece feel warmer and more expensive. On another, I used a lighter natural finish, and the shelf suddenly looked airy and beachy without being too themed. That was the moment I really understood why people love this project. The structure stays simple, but the personality can shift dramatically depending on the details.
The biggest surprise, though, was how much styling affected the final result. The first time I loaded the shelf up, I put way too much on it. A candle, a lantern, three shells, two books, a tiny plant, a jar, a framed print, and what I can only describe as decorative chaos. It looked like a coastal flea market had exploded. Once I edited it down to just a few pieces, the shelf finally looked calm, elevated, and worth the effort.
Since then, I have used rope shelves in more than one room, and each version taught me something different. In a bathroom, I learned to keep the styling light and useful. In an entryway, I learned that function matters just as much as looks. In a bedroom, I learned that a shelf can make the whole room feel softer if the materials are right. And in every case, I learned that a good DIY project is not really about copying a photo perfectly. It is about understanding why the design works and adjusting it for your space, your needs, and your own slightly stubborn taste.
That is why I still love this project. It is approachable, attractive, and just challenging enough to feel satisfying. It does not require a full workshop or advanced carpentry skills, but it rewards care and patience. And when it is done well, it looks like something you would proudly point to when someone visits and casually say, “Oh, that old thing? I made it.” Then you wait for compliments like the humble craft legend you were always meant to be.
Final Thoughts
A DIY rope and wood nautical shelf is one of the smartest small decor projects you can make. It is affordable, flexible, stylish, and functional. It brings together the warmth of wood, the texture of rope, and the easygoing character of coastal design in one tidy piece. Best of all, it can be customized for nearly any room and any style, from breezy beach house to rustic cabin with ocean dreams.
If you build it with care, mount it properly, and style it with restraint, you end up with more than a shelf. You end up with a conversation piece that looks custom, feels personal, and proves that yes, you absolutely can build something beautiful with a board, some rope, and a little patience.


