Table of Contents >> Show >> Hide
- Why Make a Spring Wreath With Pipe Cleaners?
- Supplies You Will Need
- Choosing the Best Colors for a Spring Pipe Cleaner Wreath
- How Many Pipe Cleaners Do You Need?
- Step-by-Step: DIY Spring Wreath From Pipe Cleaners
- Design Ideas for Your Pipe Cleaner Spring Wreath
- Tips for Making the Wreath Look Full and Professional
- Common Mistakes to Avoid
- Where to Display Your DIY Spring Wreath
- Budget-Friendly Variations
- How to Make It Kid-Friendly
- Personal Experience: What I Learned Making a DIY Spring Wreath From Pipe Cleaners
- Conclusion
Spring decorating has a funny way of sneaking up on us. One minute you are wearing thick socks and pretending the gray sky has “character,” and the next minute you are eyeing your front door like it personally owes you tulips. That is where this DIY spring wreath from pipe cleaners comes in: cheerful, inexpensive, beginner-friendly, and delightfully forgiving. If you can twist, bend, fluff, and occasionally say, “Hmm, close enough,” you can make this wreath.
Pipe cleaners, also called chenille stems, are one of the most underrated craft supplies in the drawer. They are flexible, fuzzy, colorful, lightweight, and easy to shape into petals, leaves, spirals, vines, bows, butterflies, and little spring accents. Unlike fresh flowers, they do not wilt. Unlike some faux flowers, they do not require wire cutters strong enough to qualify as gym equipment. And unlike glitter, they will not haunt your home until the next presidential election.
This guide walks you through how to make a colorful pipe cleaner spring wreath using simple supplies, practical design tips, and realistic steps that work for adults, teens, families, classrooms, craft nights, and anyone who wants a bright seasonal decoration without spending a boutique-wreath amount of money.
Why Make a Spring Wreath With Pipe Cleaners?
A pipe cleaner wreath is a smart DIY project because it hits the sweet spot between easy and impressive. The materials are affordable, the tools are minimal, and the finished wreath can look surprisingly full when you layer the stems correctly. You can create a farmhouse-style wreath with soft pastels, a bold rainbow wreath for a playful door, or a garden-inspired design with pipe cleaner flowers and curly vines.
The biggest advantage is control. With store-bought wreaths, you get whatever color palette the designer chose. With a homemade spring wreath, you decide whether your door is whispering “soft garden brunch” or shouting “confetti parade with bees.” Both are valid. Spring is generous like that.
Supplies You Will Need
You do not need a craft room that looks like a small warehouse. Start with the basics and add embellishments only if you want extra detail.
Basic Materials
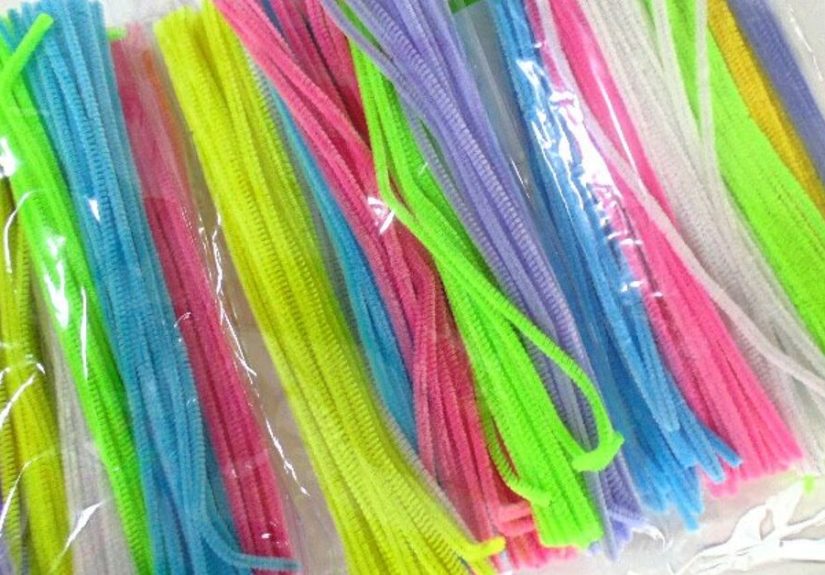
- 80 to 150 pipe cleaners or chenille stems in spring colors
- One metal wreath frame, foam wreath form, grapevine wreath, or cardboard ring
- Floral wire or extra pipe cleaners for securing sections
- Scissors or wire cutters
- Ribbon for hanging or making a bow
- Optional: pom-poms, faux eggs, felt butterflies, small wooden signs, beads, or mini faux flowers
- Optional: low-temperature glue gun for attaching decorations
For most beginners, a 10-inch to 14-inch wreath form is easiest. A metal wreath frame gives the wreath a crisp round shape, while a foam form provides a thicker base. A cardboard ring works well for a budget version, especially if the wreath will hang indoors.
Choosing the Best Colors for a Spring Pipe Cleaner Wreath
Color is where this project becomes fun. Spring wreaths usually look best when the palette feels fresh, bright, and not too heavy. Pastel pink, lavender, mint green, butter yellow, sky blue, and white are classic choices. For a more modern look, try coral, sage, cream, and soft peach. If you want a bold Easter-inspired wreath, use rainbow colors and add small egg-shaped accents.
A simple rule: choose three main colors and two accent colors. For example, you might use pink, yellow, and lavender as the main colors, then add green leaves and white flowers. This keeps the wreath lively without making it look like the craft drawer exploded in a very festive way.
How Many Pipe Cleaners Do You Need?
The number depends on the size of your wreath and how full you want it to look. For a small 8-inch wreath, 50 to 70 pipe cleaners may be enough. For a fuller 12-inch wreath, plan on 100 to 125. For a large front-door wreath, 150 or more can create a plush, blooming effect.
Do not worry if you run short. Pipe cleaner wreaths are easy to adjust. You can fill bare spots with flowers, loops, ribbons, or curled stems. In fact, some of the best-looking wreaths happen because someone ran out of one color and had to “make an artistic decision.” That is craft language for improvising with confidence.
Step-by-Step: DIY Spring Wreath From Pipe Cleaners
Step 1: Prepare Your Wreath Base
Place your wreath form on a flat surface. If you are using a metal wreath frame, decide whether you want to cover the entire frame or leave some open space for a lighter, airy look. If you are using foam or cardboard, you may want to wrap the base with ribbon, fabric strips, or green pipe cleaners first so the background color does not show through.
For a clean spring look, wrap the base in green, white, or burlap-colored ribbon. This creates a neat foundation and makes the wreath look intentional even before the flowers are added.
Step 2: Make Pipe Cleaner Loops
One of the easiest ways to build fullness is by making loops. Take one pipe cleaner, fold it into a U shape, then twist the two ends together at the bottom. Attach the twisted end to the wreath frame by wrapping it around the wire or securing it with another pipe cleaner. Repeat this process around the wreath.
Angle the loops in different directions so the wreath looks fluffy instead of flat. You can make all loops the same size for a neat design, or vary the sizes for a wildflower effect. The varied version is especially good if you enjoy crafts that do not demand military-level symmetry.
Step 3: Create Pipe Cleaner Flowers
Pipe cleaner flowers are the star of this wreath. To make a basic flower, take one pipe cleaner and fold it back and forth into five or six petal loops. Twist the center to hold the shape. Add a small yellow or white pom-pom in the middle, or coil a short piece of pipe cleaner into a spiral for the flower center.
For daisies, use white petals and a yellow center. For tulip-inspired flowers, fold three rounded petals upward like a cup. For roses, coil one pipe cleaner into a spiral and gently pull the outer edge outward to create a blooming shape. None of these flowers need to be botanically perfect. Real gardens are full of personality, too.
Step 4: Add Leaves and Vines
Green pipe cleaners are perfect for leaves and curling vines. To make leaves, fold a green stem into a narrow oval and twist the bottom. Pinch the top slightly for a leaf shape. To make vines, wrap a pipe cleaner around a pencil, marker, or wooden skewer, then slide it off gently. You will get a springy curl that adds movement to the wreath.
Place leaves behind flowers and curls around the edges. This gives the wreath depth and makes it look more like a cheerful garden rather than a flat circle of fuzzy noodles.
Step 5: Attach the Flowers to the Wreath
Attach each flower by twisting its stem around the wreath frame. If your flowers do not have stems, use a small piece of pipe cleaner or floral wire to secure them. A low-temperature glue gun can help attach pom-poms, mini signs, or lightweight embellishments, but twisting is usually enough for most pipe cleaner pieces.
If children are helping, let them handle the bending, twisting, and color arranging. An adult or older helper should manage hot glue if it is used. Many wreaths can be made without glue at all, which keeps the project cleaner and easier to redo.
Step 6: Fill Bare Spots
Hold the wreath upright and step back. This is the official “squint test.” Look for empty spaces, uneven color patches, or sections that need more texture. Add small curls, extra leaves, mini flowers, or short pipe cleaner bursts wherever the wreath looks thin.
Do not pack everything too tightly. A little space helps the design breathe. The goal is full, not frantic.
Step 7: Add a Bow or Hanger
Finish the wreath with a ribbon hanger or bow. A gingham ribbon gives a farmhouse feel. Satin ribbon looks soft and polished. Jute twine adds rustic charm. You can place the bow at the top, bottom, or slightly off-center. Off-center bows often look more modern and relaxed.
To hang the wreath, loop ribbon around the frame and tie it securely. If the wreath will go on a door, make sure the hanger is strong enough and that the wreath does not get crushed when the door opens.
Design Ideas for Your Pipe Cleaner Spring Wreath
Pastel Garden Wreath
Use soft pink, lavender, pale yellow, mint, and white pipe cleaners. Add daisy-style flowers, tiny curls, and green leaves. This version is sweet, bright, and perfect for Easter, baby showers, spring birthdays, or a cheerful bedroom door.
Rainbow Spring Wreath
Arrange pipe cleaners in rainbow sections around the wreath. Start with pink or red, move into orange, yellow, green, blue, and purple. Keep the flowers simple so the color arrangement stays the focus. This style is excellent for kids’ rooms, classrooms, and craft fairs.
Minimal Floral Wreath
Wrap the wreath base with neutral ribbon, then add flowers only to one side. Use cream, blush, sage, and light yellow for a clean design. This version works well if you like handmade decor but do not want the front door to look like it joined a parade without telling you.
Easter-Inspired Wreath
Add small faux eggs, bunny ears made from pipe cleaners, or a tiny “Happy Spring” sign. Keep the color palette pastel and playful. If you want the wreath to last beyond Easter, make the holiday pieces removable so you can switch them out later.
Tips for Making the Wreath Look Full and Professional
The secret to a polished pipe cleaner wreath is layering. Start with background loops or wrapped stems, then add flowers, then leaves, then curls and accents. This order creates dimension. If you attach all the big flowers first, the wreath may look crowded in some places and empty in others.
Another tip is to repeat colors evenly. If you use lavender on the upper left, place a little lavender somewhere on the lower right. Repetition helps the eye travel around the wreath and makes the design feel balanced.
Finally, fluff the stems. Pipe cleaners can flatten while you work. Bend loops outward, lift petals, curl vines, and separate crowded pieces. This small step can transform the wreath from “cute craft” to “wait, you made that?”
Common Mistakes to Avoid
The first mistake is using too few pipe cleaners. A sparse wreath can look unfinished unless you are intentionally going for a minimalist design. Buy more than you think you need, especially if you are making a large wreath.
The second mistake is ignoring the back. You do not need to decorate the back, but you should tuck sharp wire ends inward so they do not scratch doors, walls, or fingers. Pipe cleaners are soft, but the inner wire can poke if cut roughly.
The third mistake is using heavy decorations. Pipe cleaner wreaths are lightweight, so large wooden signs, thick ornaments, or bulky plastic pieces can pull the wreath out of shape. Stick with light accents unless your base is sturdy.
Where to Display Your DIY Spring Wreath
This wreath looks charming on a front door, but it also works indoors. Hang it above a mantel, on a pantry door, in a child’s room, on a classroom wall, or as part of a spring party backdrop. For outdoor use, choose a covered porch or sheltered entry. Pipe cleaners can handle a little seasonal display time, but rain and strong sunlight may fade or flatten them.
If you want to reuse the wreath next year, store it in a shallow box rather than squishing it into a bag. Add tissue paper around the flowers to help them keep their shape. Future-you will be grateful, and future-you deserves nice things.
Budget-Friendly Variations
You can make this spring wreath even more affordable by using a cardboard base cut from a shipping box. Trace two circles, cut out the ring, and wrap it with ribbon or yarn. Another option is to repurpose an old wreath by removing tired decorations and covering the frame with fresh pipe cleaner flowers.
For group crafting, buy pipe cleaners in bulk and set up color stations. One table can make flowers, another can make leaves, and another can assemble wreaths. This turns the project into a fun activity for classrooms, parties, senior centers, or family weekends.
How to Make It Kid-Friendly
A pipe cleaner spring wreath is a great family craft because it builds fine motor skills, encourages color planning, and allows plenty of creative freedom. Younger crafters can make simple loops, curls, and leaves. Older kids and teens can design flowers, plan the pattern, and assemble the wreath.
Skip hot glue for younger children and use twisting instead. Pre-cut sharp ends if needed, and show kids how to tuck wire tips safely into the wreath. The project should feel relaxed, not like a craft exam. If a flower has seven petals, congratulations: it is a rare botanical discovery.
Personal Experience: What I Learned Making a DIY Spring Wreath From Pipe Cleaners
The first time I made a pipe cleaner spring wreath, I underestimated two things: how many pipe cleaners I would use and how emotionally attached I would become to tiny fuzzy flowers. I started with a small pile of pastel stems and thought, “This will be plenty.” It was not plenty. It was the craft equivalent of bringing one cupcake to a block party. The wreath looked cute in one corner and suspiciously bald everywhere else.
That first attempt taught me that fullness matters. Pipe cleaners are thin individually, but they become impressive when layered. The best sections were not the ones where I made perfect flowers. They were the ones where I mixed loops, leaves, spirals, and little bursts of color. The texture made the wreath feel alive. It had movement, like a spring garden caught mid-wiggle.
I also learned that color planning saves time. At first, I grabbed colors randomly because spring is supposed to be cheerful, right? Unfortunately, cheerful can quickly become chaotic. Once I limited myself to pink, yellow, lavender, green, and white, everything looked more intentional. The wreath still felt playful, but it no longer looked like it had been assembled during a confetti emergency.
Another useful lesson was to attach pieces loosely at first. When I twisted every flower tightly into place immediately, rearranging became annoying. On the next wreath, I placed the big flowers first, gave them a gentle twist, checked the layout, and only tightened everything once I liked the balance. That one habit made the project calmer and much easier to adjust.
Pipe cleaner curls became my favorite filler. They are ridiculously simple: wrap a stem around a pencil, slide it off, and suddenly you have a spring vine. Those curls saved every awkward gap. They also made the wreath look more whimsical, which is helpful when your handmade daisy looks less like a daisy and more like a cheerful fried egg.
One experience worth mentioning is that handmade wreaths look different from store-bought wreaths, and that is a good thing. A pipe cleaner wreath has personality. It shows the maker’s choices, little adjustments, and happy accidents. Maybe one flower leans left. Maybe one vine curls more dramatically than the others. Those details make it charming.
I found that this project works best when you treat it as a slow, enjoyable craft rather than a race. Put on music, sort the colors, make a few flowers, take a break, and come back to fluff everything. The wreath improves each time you look at it with fresh eyes. Sometimes the perfect final touch is not another flower but simply bending a few petals outward.
In the end, a DIY spring wreath from pipe cleaners is more than a seasonal decoration. It is a small, affordable way to refresh your space and welcome a brighter mood. It is also proof that humble craft supplies can do big things when you give them color, shape, and a little patience. Plus, unlike fresh flowers, this wreath will not dramatically collapse after three days. That alone deserves applause.
Conclusion
A DIY spring wreath from pipe cleaners is easy, affordable, colorful, and endlessly customizable. Whether you make pastel flowers, rainbow loops, curly vines, or a simple modern wreath with a few handmade blooms, the project gives you a fresh decoration without requiring advanced crafting skills. Pipe cleaners are flexible enough for beginners and versatile enough for creative makers who want to experiment with texture, color, and shape.
The best part is that there is no single correct version. Your wreath can be soft and elegant, bright and silly, tiny and sweet, or big enough to make your front door look like it is hosting spring personally. Gather your chenille stems, choose your colors, twist a few flowers, and let your wreath bloom one fuzzy little stem at a time.
Note: This article is written for web publication and synthesizes practical, real-world DIY wreath-making methods, common chenille stem craft techniques, and seasonal decorating best practices into original content.


