Table of Contents >> Show >> Hide
- What “Perfect Landing Zone” Really Means (and Why Your Entryway Needs One)
- Plan First: Measure, Decide, and Save Yourself From Regret
- Tools and Materials
- The Build: A Simple, Strong Mudroom Bench With Cubbies
- Step 1: Measure your space and locate studs
- Step 2: Build the base platform (and toe-kick)
- Step 3: Cut plywood parts (example for a 60-inch bench)
- Step 4: Assemble the carcass (the “box with brains”)
- Step 5: Add a back support (cleats or a panel)
- Step 6: Install the bench onto the base platform
- Step 7: Face frame and trim (where it starts looking expensive)
- Step 8: Build the seat top (hard top or cushioned)
- Add the “Mudroom” Part: Hooks, Backboard, and Shelf
- Optional Upgrades That Make a Big Difference
- Finishing for Real Life: Paint, Stain, and Protection
- Troubleshooting: Fix the Common “Oops” Moments
- Wrap-Up: Your Entryway, But Actually Functional
- Real-World Experiences: What People Learn After Building a Mudroom Bench (So You Don’t Have To)
A mudroom bench is the unsung hero of an organized home. It’s where shoes come off, backpacks get “temporarily” dropped, and wet dog leashes go to drip in peace instead of baptizing your hardwood floors. Done right, it becomes a landing zone a predictable place where chaos checks in at the door and (mostly) stays there.
This guide combines proven design and build best practices from well-known U.S. home improvement and woodworking publishers and retailers (think: the folks who build things for a living, then write about it so the rest of us can stop reinventing the wheel). You’ll get a solid plan, smart dimensions, and a build approach that’s beginner-friendly but sturdy enough for real life.
What “Perfect Landing Zone” Really Means (and Why Your Entryway Needs One)
The difference between a mudroom bench and a random bench you found on sale is intention. A true landing zone does three jobs:
- Seating: A comfortable perch to tie shoes without performing a one-legged yoga pose.
- Storage: Cubbies, baskets, drawers, or all threeso shoes and gear have a home that isn’t “the floor.”
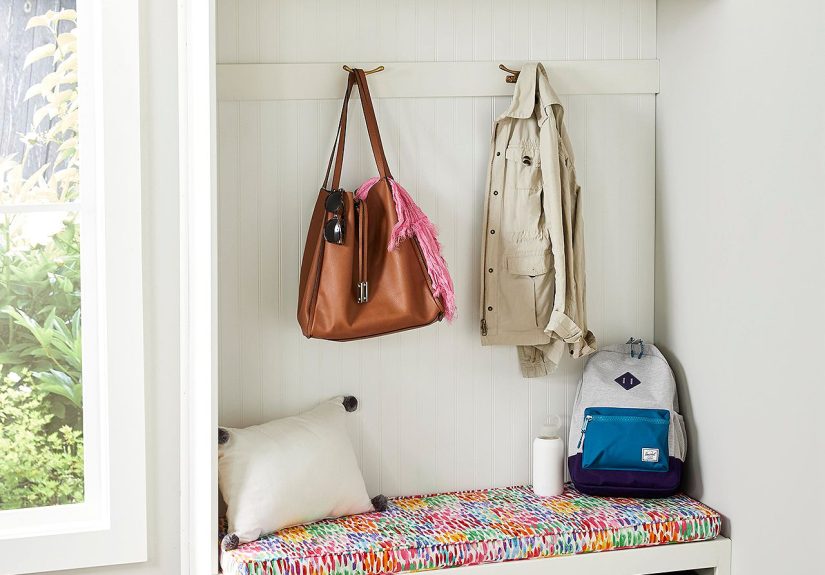
- Staging: Hooks and a shelf (optional but glorious) to keep coats and bags off chairs and doorknobs.
If your household includes kids, pets, sports equipment, or just one person who believes “putting it down” counts as “putting it away,” a landing zone pays for itself in fewer daily scavenger hunts.
Plan First: Measure, Decide, and Save Yourself From Regret
Step 1: Choose built-in vs. freestanding
Freestanding benches are quicker and renter-friendly. Built-ins look custom, maximize space, and won’t scoot across the floor when someone sits down like they’re auditioning for a slapstick routine.
If you’re building into a niche or corner, a built-in is usually worth it: you can fit wall-to-wall, hide gaps with trim, and anchor it so it feels like real cabinetry.
Step 2: Pick your storage style
- Open cubbies: Great for shoes and baskets. Fast access. Also fast to get messy.
- Drawers: Cleaner look, better for small items (gloves, dog stuff, mystery keys).
- Baskets in cubbies: The sweet spoteasy, flexible, and “organized-looking” even when it’s not.
- Lockers above (optional): Hooks + vertical dividers for each person = fewer arguments.
Step 3: Use comfortable, real-world dimensions
You can customize everything, but these ranges keep the bench comfortable and functional:
- Seat height: 17–19 inches is typical and comfortable for most adults.
- Seat depth: 15–18 inches is a practical range for sitting and shoe-tying.
- Bench length: 40–60 inches works well for two adults; go wider if you have space.
- Toe-kick (recommended): About 3 inches tall and 2–3 inches deepyour shins will thank you.
- Cubby height: 10–14 inches fits most shoes; make one taller bay if your home contains boots.
If you’re building wall-to-wall, subtract about 1/4 inch from the opening width so you can slide the unit in without turning it into an entryway ship-in-a-bottle situation.
Tools and Materials
Tools (the practical list)
- Tape measure, pencil, level, stud finder
- Circular saw with a straightedge guide (or table saw)
- Drill/driver + bits (including countersink bit)
- Pocket-hole jig (optional but very helpful)
- Brad nailer (optional, for trim) or finish nails + hammer
- Sander + sandpaper (80/120/180/220 grits)
- Clamps (more is always the correct number)
Materials (solid, budget-friendly, and strong)
- 3/4-inch plywood (birch/maple for paint-grade or stain-grade, depending on your finish)
- 2x4s (for a sturdy base platform, if desired)
- 1×2 or 1×3 (for face frame/trim, or use pre-primed trim boards)
- Wood glue
- 1-1/4 inch pocket-hole screws (or cabinet screws) + 2 inch screws for anchoring
- Wood filler/putty, caulk (painted builds), edge banding (optional)
- Primer + paint or stain + protective topcoat (polyurethane/waterborne finish)
- Hooks, knobs/pulls (if drawers), baskets/bins (optional)
- Seat cushion foam + upholstery fabric (optional)
The Build: A Simple, Strong Mudroom Bench With Cubbies
This approach builds a plywood “carcass” (like a cabinet) sitting on a base platform with an optional toe-kick. It’s sturdy, looks clean, and scales easily from a small entryway bench to a full wall of cubbies.
Step 1: Measure your space and locate studs
- Measure the width, height, and depth you can spare without blocking doors or walkways.
- Mark studs on the wall with painter’s tape. You’ll anchor to these later.
- Check for baseboards and trim. Decide whether you’ll remove baseboard behind the bench or notch around it.
Pro tip: walls are rarely square. If your bench is built-in, plan for a little scribing or trim to hide gaps.
Step 2: Build the base platform (and toe-kick)
A base platform does two things: it levels the bench and creates that comfortable toe-kick recess.
- Cut 2x4s to make a rectangular frame slightly smaller than the bench footprint.
- Add cross supports every 16–24 inches.
- Set it in place, level it with shims if needed, and screw it into the floor (if appropriate) and/or wall studs.
- For the toe-kick recess, set the platform back from the front edge by 2–3 inches.
If you don’t want a 2×4 base, you can build a plywood plinth insteadsame idea, just cleaner if you’re avoiding dimensional lumber.
Step 3: Cut plywood parts (example for a 60-inch bench)
Here’s a concrete example you can scale up or down. Let’s say your target finished bench is 60" W x 18" H x 16" D (with a 3/4" top and a 3-1/2" base platform).
- Top: 60" x 16" (3/4" plywood)
- Bottom: 60" x 16" (3/4" plywood)
- Sides (2): (bench carcass height) x 16"
- Dividers: same height as sides, quantity based on cubbies (4 dividers = 5 cubbies)
- Back (optional): 1/4" plywood panel, or skip and use wall cleats
If you want baskets, measure the baskets first and design cubbies to fit them. The basket is the boss here.
Step 4: Assemble the carcass (the “box with brains”)
You have a few joinery optionspocket holes, screws + glue, or dadoes/rabbets if you want to get fancy. The goal is square, strong, and repeatable.
- Mark divider locations on the bottom panel. Space them evenly or to fit baskets.
- Pre-drill (and countersink) screw holes to prevent splitting and keep screw heads flush.
- Glue + fasten dividers to the bottom panel. Use a square so each divider sits 90 degrees.
- Add the top panel with glue and screws, checking for square as you go.
- Add side panels last. Clamp, square, and fasten.
If you’re using pocket holes, keep them on the inside where they won’t show. If you’re painting, no one will know your secrets anyway.
Step 5: Add a back support (cleats or a panel)
For a built-in bench, add structure that lets you anchor safely:
- Cleats method: screw 1×2 cleats across the back inside the bench (top and middle), then anchor those to studs.
- Back panel method: attach 1/4" plywood to the back, then anchor through it into studs.
Cleats are great if the wall is wavy and you want more forgiving alignment.
Step 6: Install the bench onto the base platform
- Set the carcass on the platform.
- Check level front-to-back and side-to-side; shim if needed.
- Screw down through the bottom into the platform framing.
- Anchor the bench to studs through the back cleats/panel. This prevents tipping and adds a rock-solid feel.
Step 7: Face frame and trim (where it starts looking expensive)
A face frame hides plywood edges and makes the bench look like built-in cabinetry.
- Cut 1×2 (or similar) for the front rails and stiles.
- Dry fit first so openings remain square and consistent.
- Glue and nail (or clamp and screw from inside).
- Optional: add trim around the perimeter to meet the wall cleanly.
If you’re staining instead of painting, consider edge banding or hardwood edging so the plywood layers don’t steal the spotlight.
Step 8: Build the seat top (hard top or cushioned)
A hard top is easiest: sand the plywood top smooth and finish it well. If you want the “comfy landing zone” vibe:
- Cut foam to match the top.
- Wrap with batting and fabric, staple underneath.
- Attach with Velcro strips or a few discreet screws from below (so you can remove it later).
Choose a durable fabric. Mudrooms are not gentle places. They are the thunderdome of household traffic.
Add the “Mudroom” Part: Hooks, Backboard, and Shelf
If you want this bench to behave like a true landing zone, give it vertical support:
- Backboard: beadboard, shiplap, or a painted plywood panel behind hooks keeps the wall cleaner.
- Hooks: one per person (minimum). Two per person if you live with coat layerers.
- Upper shelf: for hats, mail sorter, baskets, or a “charging station” tray.
If you’re adding power for charging, follow local electrical code and consider hiring a licensed electrician. The goal is “organized,” not “sparks included.”
Optional Upgrades That Make a Big Difference
Upgrade 1: Drawers instead of open cubbies
Drawers keep visual clutter down. Use quality slides and build square drawer boxes. Full-extension slides are a favorite because you can actually reach your stuff (what a concept).
Upgrade 2: A tall boot bay + drip control
Give one cubby extra height for boots. Add a removable boot tray or a waterproof mat under the bench area so winter slush doesn’t become an art installation.
Upgrade 3: Ventilation for stinky shoes
If your cubbies will hold athletic shoes, consider leaving the back open (cleats method) or drilling a few ventilation holes in the back panel. Your future self will appreciate the reduced “locker room bouquet.”
Upgrade 4: Labels and zones
Baskets labeled by person (or activity) turn your bench into a system, not just furniture. “One basket per human” is a simple rule that prevents the bench from becoming a communal pile.
Finishing for Real Life: Paint, Stain, and Protection
Mudroom benches take abuse: grit, moisture, shoe soles, and the occasional dramatic backpack toss. A good finish matters.
- Painted bench: prime first, use a durable trim/cabinet paint, and caulk seams for a clean built-in look.
- Stained bench: use a protective topcoat (polyurethane or waterborne finish) for durability.
- Between coats: lightly sand with fine grit (commonly around 220) and remove dust for a smooth finish.
If you’re painting, you can keep it simple: sand smooth, fill, prime, paint, and topcoat if needed. If you’re staining, test on scrapbecause stain has a sense of humor and loves to surprise people.
Troubleshooting: Fix the Common “Oops” Moments
The bench doesn’t fit the opening
If it’s too tight, don’t force it and damage drywall. Plane/sand the sides slightly, or reduce trim thickness. If it’s too loose, use scribe molding or a trim board to cover the gap cleanly.
The bench rocks or feels uneven
Floors are often uneven. Shim the base platform until level, then secure it. A bench that wobbles will turn shoe-tying into a trust fall.
Edges look rough
Face frame, edge banding, or hardwood edging solves most plywood-edge problems. Also: sanding is not optional if you want “finished” instead of “splinter chic.”
Wrap-Up: Your Entryway, But Actually Functional
A mudroom bench is one of those projects that feels “small” until you live with itthen you wonder why you didn’t build it sooner. Once shoes, coats, and bags have a home, your whole entryway gets calmer. Not perfect. But calmer.
Build it sturdy, size it smart, finish it like it’s going to be used (because it will), and you’ll have a landing zone that makes your daily comings-and-goings feel a little more put-togethereven if the rest of the house is doing its best.
Real-World Experiences: What People Learn After Building a Mudroom Bench (So You Don’t Have To)
You can plan a mudroom bench down to the last screw, and real life will still show up wearing muddy boots and carrying three sports bags. The good news: most “bench regrets” are predictable. Here are the most common lessons DIYers share after the buildplus how to bake those wins into your project from the start.
1) The bench height feels “off” if you chase looks instead of comfort. Slim, modern benches look great online, but if the seat is too low, adults crouch like they’re trying to pet a nervous cat. If it’s too high, kids’ feet dangle and they slide off like a sitcom gag. That’s why the classic 17–19-inch seat height range keeps showing up: it’s the sweet spot for the widest range of bodies, shoes, and daily habits. If your household is mostly kids, lean slightly lower. If you’ve got tall adults or mobility needs, don’t be shy about staying at the comfortable end of that range.
2) Open cubbies are fast… and they get messy fast. Cubbies are wonderful until someone shoves wet sneakers into a cubby already occupied by one lonely flip-flop and a pinecone. The fix isn’t ditching cubbiesit’s making them “container-friendly.” Many homeowners end up adding baskets later because baskets are basically cheat codes for visual calm. If you plan for baskets upfront, the bench stays flexible: shoes in summer, gloves and hats in winter, and random kid gear whenever the universe delivers it.
3) Toe-kicks are not a luxury feature; they’re a shin-saving device. People who skip toe-kicks often say the same thing later: “Why does standing at this bench feel awkward?” Without a recess, your toes hit the front, your body leans forward, and the bench becomes a low-key obstacle course. A simple 2–3-inch recess makes the bench feel like real built-in cabinetry and keeps the base from getting scuffed into oblivion.
4) Hooks multiply. Always. If you plan one hook per person, you’ll quickly discover coats travel in herds. One hook becomes “coat + backpack + dog leash + hat + mystery hoodie.” Many people end up adding a second row or double hooks. The easiest way to avoid re-drilling later is to plan a slightly longer hook rail, even if you don’t install every hook on day one.
5) The best landing zones have a “drop shelf” or tray. A small shelf above hooks (or even a dedicated tray on the bench top) catches sunglasses, keys, and mail before they migrate to the kitchen counter. People who add a shelf often say it’s the feature they use every day. People who don’t add a shelf often say, “We should add a shelf.” It’s a pattern.
6) Finish matters more than you think. In real households, the bench is a high-touch, high-scuff zone. Builders commonly report that a tougher paint or a protective clear coat saves the bench from looking tired after one season. A small habitlightly sanding between coats and cleaning off dustmakes a big difference in how smooth (and durable) that finish feels.
Bottom line: the “perfect” mudroom bench isn’t the fanciest one. It’s the one that matches how your household actually moves. Build for comfort, add containment (baskets!), respect your shins (toe-kick!), and give small items a home (shelf/tray). Do that, and your landing zone won’t just look goodit’ll keep working long after the new-project glow fades.


