Table of Contents >> Show >> Hide
- Why Cabinet Hinges Get So Dirty
- Before You Start: Know Your Cabinet Hinge Type
- Supplies You Will Need
- How to Clean Cabinet Hinges: 13 Steps
- Step 1: Inspect the Hinges and Cabinet Doors
- Step 2: Protect the Cabinet Surface
- Step 3: Take Photos Before Removing Anything
- Step 4: Label Doors and Hinges
- Step 5: Remove the Cabinet Hinges Carefully
- Step 6: Wipe Away Loose Dust and Crumbs
- Step 7: Soak Hinges in Warm Soapy Water
- Step 8: Add Vinegar for Greasy Buildup
- Step 9: Scrub Gently With a Soft Brush
- Step 10: Use Baking Soda Paste for Stubborn Grime
- Step 11: Rinse and Dry Completely
- Step 12: Lubricate Moving Parts If Needed
- Step 13: Reinstall and Adjust the Hinges
- How to Clean Cabinet Hinges Without Removing Them
- How Often Should You Clean Cabinet Hinges?
- Common Mistakes to Avoid
- When to Replace Cabinet Hinges Instead of Cleaning Them
- Best Cleaners for Cabinet Hinges
- Extra Experience-Based Tips for Cleaning Cabinet Hinges
- Conclusion
Cabinet hinges are the tiny backstage crew of your kitchen. They work every day, never ask for applause, and quietly collect grease, dust, crumbs, cooking oil, fingerprints, and the occasional mystery splatter that nobody in the house will admit to causing. When they get dirty, cabinet doors can squeak, stick, close unevenly, or simply look older than they really are.
The good news? Learning how to clean cabinet hinges is a simple DIY job that usually requires warm water, mild dish soap, a soft brush, microfiber cloths, and a little patience. You do not need a toolbox the size of a small car or harsh chemicals that smell like a science experiment gone sideways. In most cases, a gentle cleaning method is safer for cabinet hardware, wood finishes, painted doors, and your peace of mind.
This guide walks you through 13 practical steps to clean cabinet hinges properly, from identifying the hinge type to removing grease, drying the hardware, lubricating moving parts, and preventing buildup in the future. Whether your hinges are exposed, concealed, painted, brass, nickel, stainless steel, or “I have no idea, they came with the house,” this article will help you clean them without damaging the cabinet door or finish.
Why Cabinet Hinges Get So Dirty
Kitchen cabinet hinges live in one of the hardest-working areas of the home. Cooking grease floats through the air, steam carries tiny particles, and dust sticks to oily residue like it has found its forever home. Hinges near the stove, sink, trash cabinet, or coffee station usually get dirty faster because they are exposed to moisture, splatter, and frequent handling.
Bathroom cabinet hinges can also collect grime from humidity, hair products, toothpaste residue, and general moisture. Laundry room hinges may gather lint and detergent film. Even in a spotless home, hinges are easy to overlook because they are small and often partially hidden. Unfortunately, when grime sits too long, it can harden around screws, hinge pins, springs, and moving joints.
Cleaning cabinet hinges improves more than appearance. It can help doors open smoothly, reduce squeaks, prevent sticky buildup, and extend the life of the hardware. Regular cleaning also makes it easier to spot loose screws, rust, worn springs, or hinges that may need adjustment or replacement.
Before You Start: Know Your Cabinet Hinge Type
Before grabbing a screwdriver, take a close look at your hinges. Different hinge styles need slightly different cleaning approaches.
Exposed Hinges
Exposed hinges are visible from the outside of the cabinet. They are common on traditional, vintage, farmhouse, and face-frame cabinets. Since they are visible, they often collect more dust and grease on the surface.
Concealed Hinges
Concealed hinges, also called European hinges, are hidden inside the cabinet. They often have cups, arms, adjustment screws, and sometimes soft-close mechanisms. These should be cleaned carefully because too much liquid can get trapped in moving parts.
Painted Hinges
Painted hinges need extra care. Scrubbing too hard or using strong cleaners can chip or stain the paint. If the hinge was painted over during a previous cabinet makeover, avoid soaking it unless you are comfortable with the possibility of loosening old paint.
Brass, Bronze, Nickel, or Stainless Hardware
Metal finishes respond differently to cleaners. Mild dish soap and warm water are usually the safest starting point. Vinegar can help with grease and mineral residue, but it should be used cautiously on specialty finishes. When in doubt, test a small hidden area first.
Supplies You Will Need
Gather your supplies before you start so you are not standing in the kitchen holding a greasy hinge and wondering where the toothbrush went. For most cabinet hinge cleaning jobs, you will need:
- Mild dish soap
- Warm water
- White vinegar, optional for greasy buildup
- Baking soda, optional for stubborn grime
- Microfiber cloths
- Soft-bristle toothbrush or small cleaning brush
- Small bowl or bucket
- Screwdriver or drill with low torque setting
- Painter’s tape or small labels
- Towel for drying
- Cotton swabs or toothpicks for tight crevices
- Silicone spray or light household lubricant, if needed
- Drop cloth or old towel to protect the counter
Avoid steel wool, harsh abrasive pads, bleach, strong degreasers not made for cabinet finishes, and soaking any hinge with electrical, soft-close, or specialty mechanical components unless the manufacturer says it is safe. Cabinet hinges are tough, but they are not invincible little robots.
How to Clean Cabinet Hinges: 13 Steps
Step 1: Inspect the Hinges and Cabinet Doors
Start by opening each cabinet door and inspecting the hinges. Look for grease, dust, rust, loose screws, squeaking, sticking, and uneven door alignment. Notice whether the grime is light surface dirt or thick, sticky buildup. This quick inspection helps you decide whether you can clean the hinges in place or should remove them for a deeper soak.
If the hinges are only dusty or lightly greasy, cleaning them while attached may be enough. If they are sticky, coated in old cooking oil, or crusted around the hinge pin, removal is usually more effective.
Step 2: Protect the Cabinet Surface
Place an old towel, drop cloth, or paper towels under the cabinet area. This protects counters, flooring, and cabinet surfaces from drips. If your cabinets are wood or painted, avoid spraying cleaner directly onto the hinge. Instead, apply cleaner to a cloth or brush first. Too much moisture can seep into wood seams or painted edges and cause swelling, dullness, or finish damage.
Step 3: Take Photos Before Removing Anything
Before removing hinges, take a quick photo of each door and hinge placement with your phone. This is one of those tiny steps that feels unnecessary until you are holding six screws and whispering, “Where did this one come from?” Photos help you reinstall the hinges correctly, especially if you have adjustable concealed hinges.
Step 4: Label Doors and Hinges
If you are cleaning several cabinet hinges at once, label each door and hinge with painter’s tape. Write simple labels such as “upper left,” “sink door,” or “pantry top hinge.” Keep screws with their matching hinge in a small cup, resealable bag, or labeled container. Cabinet doors can look similar, but hinge placement may vary slightly after years of use.
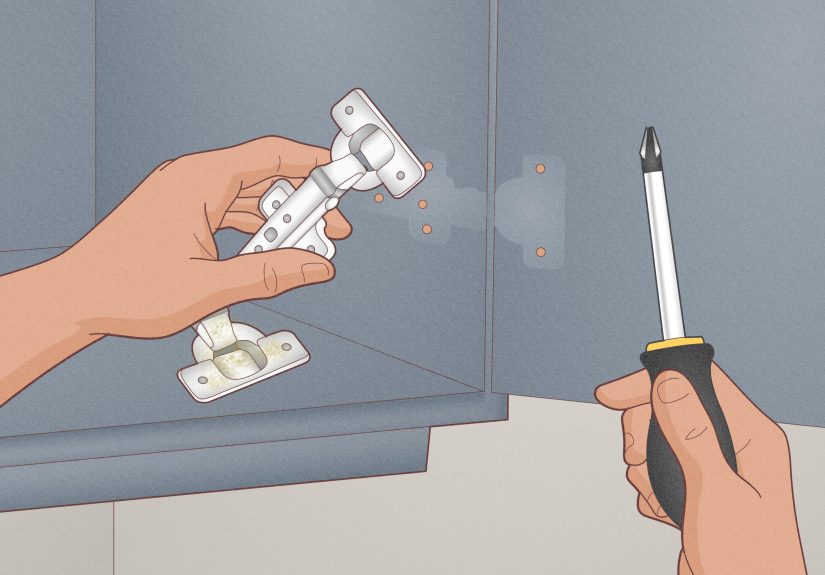
Step 5: Remove the Cabinet Hinges Carefully
Use a screwdriver to remove the hinge screws. If using a drill, choose a low torque setting so you do not strip the screws or damage the cabinet frame. Support the cabinet door with one hand as you remove the last screws. For large doors, ask someone to hold the door steady. No one wants a cabinet door dramatically exiting the scene.
If screws are stuck, do not force them aggressively. Press firmly, use the correct screwdriver size, and work slowly. For painted-over screws, carefully score around the screw head with a utility knife before turning.
Step 6: Wipe Away Loose Dust and Crumbs
Before soaking or scrubbing, wipe the hinges with a dry microfiber cloth. This removes loose dust, crumbs, and dry debris. Use a cotton swab or soft brush to clear dirt from screw holes, hinge folds, and corners. Removing dry grime first keeps your cleaning water from turning into a cloudy soup of regret.
Step 7: Soak Hinges in Warm Soapy Water
Fill a bowl or bucket with warm water and a few drops of mild dish soap. Place removable metal hinges in the solution and let them soak for about 15 to 30 minutes. Warm, soapy water helps loosen grease and everyday grime without being too harsh for most metal finishes.
Do not soak hinges with soft-close mechanisms for too long unless you know they are safe to immerse. For concealed soft-close hinges, it is often better to clean with a damp cloth and brush instead of fully submerging them.
Step 8: Add Vinegar for Greasy Buildup
If the hinges are greasy, add a small amount of white vinegar to the warm soapy water. A simple mixture of warm water, mild dish soap, and a splash of vinegar can help cut through kitchen grease. This is especially useful for hinges near the stove, where cooking oil tends to settle into tight spaces.
Use vinegar carefully on plated, antique, lacquered, painted, or specialty hardware. Acidic cleaners may dull or damage certain finishes if used too strongly or left on too long. Always test first when cleaning valuable or delicate cabinet hardware.
Step 9: Scrub Gently With a Soft Brush
After soaking, scrub each hinge with a soft-bristle toothbrush or small cleaning brush. Focus on corners, screw holes, hinge pins, and moving joints. Use light pressure. If grime does not lift right away, soak for a few more minutes rather than attacking it like you are trying to remove barnacles from a pirate ship.
For tight crevices, use cotton swabs or toothpicks wrapped in a thin cloth. Avoid metal picks that can scratch the finish.
Step 10: Use Baking Soda Paste for Stubborn Grime
For stubborn spots, mix baking soda with a little water to make a soft paste. Apply it to greasy or sticky areas and let it sit briefly. Then scrub gently with a soft brush and rinse thoroughly. Baking soda is mildly abrasive, so use it with care, especially on polished, painted, or plated hinges.
Do not leave baking soda paste on hardware for a long time. A short contact time is usually enough. The goal is to loosen grime, not audition the hinge for a survival show.
Step 11: Rinse and Dry Completely
Rinse the hinges with clean warm water to remove soap, vinegar, and baking soda residue. Then dry them immediately and thoroughly with a microfiber cloth or towel. Pay attention to screw holes, folds, and hinge pins where water can hide.
This step matters because leftover moisture can encourage rust, water spots, or squeaking. If needed, let the hinges air-dry on a towel for 30 minutes before reinstalling. For extra care, gently move the hinge back and forth while drying to release trapped water.
Step 12: Lubricate Moving Parts If Needed
If the hinges squeak or feel stiff after cleaning, apply a tiny amount of silicone spray or light household lubricant to the moving joint. Use very little. Wipe away excess immediately so it does not attract dust and grime. Avoid spraying lubricant directly near painted cabinet surfaces because some products can stain or leave residue.
For soft-close hinges, check the hinge manufacturer’s guidance when possible. Some mechanisms do not need added lubricant, and too much product can interfere with smooth operation.
Step 13: Reinstall and Adjust the Hinges
Reinstall each hinge in its original position using your labels and photos. Tighten screws until snug, but do not over-tighten. Over-tightening can strip the screw holes or pull the hinge out of alignment. Open and close the cabinet door several times to test the movement.
If the door sits unevenly, adjust the hinge screws gradually. Concealed hinges often have adjustment screws that move the door up, down, left, right, in, or out. Make small changes and test the door after each adjustment. Once everything lines up, admire your work. Your cabinet hinges may not throw a parade, but they will open and close with quiet dignity.
How to Clean Cabinet Hinges Without Removing Them
Sometimes you do not want to remove cabinet hinges, and that is perfectly reasonable. Maybe you are short on time, maybe the hinges are not very dirty, or maybe you have a healthy respect for tiny screws that disappear into another dimension.
To clean hinges in place, mix warm water with a few drops of mild dish soap. Dip a microfiber cloth into the solution, wring it out well, and wipe the hinge surface. Use a soft toothbrush for crevices, then wipe again with a clean damp cloth. Dry the hinge immediately with a clean towel.
For greasy hinges, dampen the cloth with a mild vinegar-and-water solution, then wipe the hinge carefully. Never soak the cabinet surface. Keep moisture away from raw wood edges, veneer seams, painted chips, and screw holes.
How Often Should You Clean Cabinet Hinges?
For most kitchens, cleaning cabinet hinges every three to six months is enough. Hinges near the stove, sink, trash pullout, or spice cabinet may need monthly attention. Bathroom and laundry room hinges may also benefit from more frequent cleaning because of humidity.
A quick wipe during regular cabinet cleaning can prevent heavy buildup. Deep cleaning is only necessary when hinges become sticky, noisy, visibly dirty, or difficult to move.
Common Mistakes to Avoid
Using Too Much Water
Water is helpful for cleaning, but too much can damage wood cabinets, painted surfaces, and some metal finishes. Always use damp cloths, not dripping ones, and dry everything thoroughly.
Scrubbing With Abrasive Tools
Steel wool and rough scouring pads can scratch hinges and cabinet finishes. Use microfiber cloths, soft brushes, and gentle pressure instead.
Mixing Cleaning Products
Do not mix random cleaners together. Combining products can create unsafe fumes or leave damaging residue. Mild dish soap, warm water, vinegar, and baking soda should be used thoughtfully and separately when needed.
Skipping the Drying Step
Leaving water inside hinge joints can lead to rust or squeaking. Drying is not optional; it is the quiet hero of the entire project.
Over-Lubricating
More lubricant does not mean better performance. Excess oil or spray can collect dust and create a sticky mess. Use a tiny amount and wipe off the extra.
When to Replace Cabinet Hinges Instead of Cleaning Them
Cleaning can solve many hinge problems, but not all of them. Replace cabinet hinges if they are badly rusted, bent, cracked, broken, missing screws, or no longer holding the door level. Hinges that squeak immediately after cleaning and lubrication may be worn out. Soft-close hinges that slam shut or no longer catch properly may also need replacement.
If your cabinet doors wobble, sag, rub against neighboring doors, or refuse to close, inspect the hinge and screw holes. Sometimes the hinge is fine, but the screw hole is stripped. In that case, a simple screw-hole repair may solve the problem.
Best Cleaners for Cabinet Hinges
The best cleaner for cabinet hinges is usually the simplest one: warm water and mild dish soap. This combination removes everyday dirt and light grease without being overly aggressive. For heavier kitchen grease, a small amount of white vinegar can help. For stubborn grime, baking soda paste can be used carefully.
Commercial metal polish may be useful for certain brass or specialty metal hinges, but it should match the material and finish. Always read the product label and test first. If your hinges are antique, lacquered, painted, or part of custom cabinetry, choose the gentlest method first.
Extra Experience-Based Tips for Cleaning Cabinet Hinges
After cleaning plenty of cabinet hardware, one lesson becomes obvious: hinges are small, but they have big opinions. If you rush the job, they will punish you with missing screws, crooked doors, or one mysterious squeak that appears only when guests are over.
The first practical tip is to clean one door at a time if you are new to removing hinges. It may seem efficient to remove every cabinet door in the kitchen at once, but that can turn your floor into a confusing cabinet-door puzzle. Cleaning one or two doors at a time keeps the project manageable and reduces the chance of mixing up hinges.
Another helpful experience is to use a muffin tin, egg carton, or small labeled cups for screws. Each hinge should stay with its own screws when possible. Older cabinets often have screws that have settled into specific holes over time. Swapping them around may not seem like a big deal, but it can affect how tightly they fit.
If you are cleaning hinges in a rental home, avoid aggressive methods. Stick with warm soapy water, a soft cloth, and careful drying. Do not strip paint, polish antique finishes, or replace hardware without permission. A hinge that looks “vintage” to one person may look “do not touch that, it matches the lease agreement” to the property owner.
For busy kitchens, hinges near the stove deserve extra attention. Grease does not politely stay in the pan. It travels, floats, lands, and slowly builds a sticky layer on nearby cabinet hardware. A quick monthly wipe with a damp microfiber cloth can prevent the kind of buildup that later requires soaking and scrubbing.
One surprisingly useful habit is to wipe hinges after big cooking days. If you fry food, roast meat, make sauces, or cook with lots of oil, check the cabinet doors near the stove after the kitchen cools down. A two-minute wipe can save you from a thick grease film later.
When drying hinges, do not rely only on air drying. Water can hide inside hinge barrels and screw holes. Move the hinge open and closed while wiping it with a towel. This helps release trapped moisture. If you live in a humid climate, give the hinges extra drying time before reinstalling them.
If a hinge still squeaks after cleaning, do not panic. Cleaning may remove old grime that was masking friction. Add a tiny amount of lubricant to the moving point, open and close the hinge several times, then wipe away extra product. The wiping step is important because excess lubricant attracts dust and can make the hinge dirty again faster.
Painted hinges require the gentlest hand. If old paint is already peeling, cleaning can loosen more of it. In that case, decide whether you want to preserve the current look, remove the hinges and refinish them, or replace them. Sometimes cleaning reveals that the hardware is simply past its prime, and that is not failure. That is your cabinet politely requesting retirement benefits.
For concealed hinges, pay attention to adjustment screws before cleaning. If doors were aligned before, take photos from multiple angles. After reinstalling, make tiny adjustments. A quarter-turn can make a visible difference. Do not keep turning screws randomly, unless your design goal is “cabinet door with abstract personality.”
Finally, make hinge cleaning part of a larger cabinet care routine. Wipe cabinet fronts, handles, pulls, and hinge areas together. Clean spills quickly, especially around the sink and trash cabinet. Keep harsh cleaners away from wood finishes. The cleaner your cabinet surfaces stay, the less grime migrates into the hinges.
Clean cabinet hinges may not transform your kitchen the way new countertops would, but they make cabinets feel fresher, quieter, and better cared for. It is one of those small home maintenance tasks that gives you a satisfying result without requiring a renovation budget. In other words, it is the rare household chore that is cheap, useful, and unlikely to ruin your weekend.
Conclusion
Cleaning cabinet hinges is a simple but worthwhile task that keeps your cabinets looking better and working smoothly. Start with the gentlest method: warm water, mild dish soap, a soft brush, and a microfiber cloth. Remove hinges for deep cleaning when grease is heavy, but clean them in place when buildup is light. Use vinegar carefully for grease, baking soda sparingly for stubborn grime, and always dry the hinges completely before reinstalling them.
The best approach is regular maintenance. A quick wipe every month or two can prevent sticky buildup, squeaks, rust, and unnecessary hardware replacement. With the 13 steps above, you can clean cabinet hinges safely, protect your cabinet finish, and enjoy doors that open and close like they remember their manners.


