Table of Contents >> Show >> Hide
- What Is a Crochet Scalloped Edge?
- Before You Start: Materials and Terms
- How to Crochet Scalloped Edges: 12 Steps
- Step 1: Choose the Right Project Edge
- Step 2: Pick a Yarn That Matches the Mood
- Step 3: Use a Hook That Controls the Edge
- Step 4: Add a Single Crochet Foundation Round
- Step 5: Treat Corners Like VIP Guests
- Step 6: Count Your Stitches Before the Scallop Round
- Step 7: Join Your Yarn and Start in a Low-Visibility Spot
- Step 8: Make the First Scallop
- Step 9: Continue the Repeat Across the Edge
- Step 10: Shape the Corners Smoothly
- Step 11: Join the Final Scallop Cleanly
- Step 12: Weave In Ends and Block the Border
- Easy Scalloped Edge Pattern for Beginners
- Scalloped Edge Variations
- Common Mistakes and How to Fix Them
- Best Projects for Crochet Scalloped Edges
- Helpful Experience: What I Learned from Crocheting Scalloped Edges
- Conclusion
Few crochet finishing techniques have the magical ability to make a plain project look suddenly gift-shop-worthy quite like a scalloped edge. One minute you have a simple blanket, washcloth, scarf, cardigan hem, or baby item. The next minutepoofit has a charming, rounded border that says, “Yes, I absolutely planned this level of cuteness.”
Learning how to crochet scalloped edges is beginner-friendly because the basic version uses familiar stitches: chain, single crochet, slip stitch, and double crochet. The secret is not complicated wizardry. It is simply placing several taller stitches into one stitch to create a fan or shell shape, then anchoring that shell with shorter stitches. Once you understand the rhythm, scalloped edging becomes one of those techniques you will want to add to everything. Your blanket? Scallops. Your scarf? Scallops. Your dish towel? Scallops. Your grocery list? Please resist, but emotionally, yes.
This guide walks you through a classic 12-step method for crocheting scalloped edges, plus practical tips for stitch counts, corners, yarn choices, tension, blocking, and troubleshooting. The instructions use U.S. crochet terminology and focus on a simple shell-style scallop border that works beautifully on blankets, scarves, shawls, pillow covers, placemats, baby items, and many flat crochet projects.
What Is a Crochet Scalloped Edge?
A crochet scalloped edge is a decorative border made of repeated curved shapes. These curves are usually formed by working multiple stitchesoften five double crochet stitchesinto the same base stitch. The result looks like a row of little shells, waves, petals, or tiny yarn smiles sitting along the edge of your project.
The most common beginner-friendly scallop repeat looks like this: single crochet, skip stitches, five double crochets in one stitch, skip stitches, single crochet. The single crochet stitches act like anchors, while the group of double crochets creates the rounded shell. This simple combination is why scalloped crochet borders are popular for baby blankets, afghans, scarves, shawls, sleeves, hems, and handmade gifts.
Before You Start: Materials and Terms
Materials You Need
- Finished crochet, knit, or fabric project ready for edging
- Yarn in the same weight or a compatible weight
- Crochet hook recommended for your yarn, or one size smaller for a tighter edge
- Scissors
- Yarn needle for weaving in ends
- Stitch markers, especially for corners
- Measuring tape, optional but helpful
U.S. Crochet Abbreviations Used
- ch = chain
- sc = single crochet
- dc = double crochet
- sl st = slip stitch
- st = stitch
- sk = skip
- sp = space
How to Crochet Scalloped Edges: 12 Steps
Step 1: Choose the Right Project Edge
Scalloped edges work best on a stable edge. If your project already has neat stitches along the side, you can often crochet directly into them. If the edge is uneven, loose, curly, or made from row ends, add a foundation round of single crochet first. This gives your scallops a clean path to follow, like putting a sidewalk under a parade.
Good projects for scalloped edging include baby blankets, granny square blankets, washcloths, scarves, shawls, cardigans, pillow covers, table runners, and crochet bags. For very thick items, use larger scallops. For delicate items, use smaller shells with fewer stitches or a lighter yarn.
Step 2: Pick a Yarn That Matches the Mood
Your border yarn does not have to be identical to the main project, but it should behave politely with it. If your blanket is worsted weight, a worsted weight border is usually the easiest choice. If you use a much thicker yarn, the edge may ripple. If you use a much thinner yarn, the scallops may look delicate but less structured.
For a subtle look, choose the same color as the project. For a picture-frame effect, choose a contrasting color. White, cream, navy, blush, soft gray, and sage green are popular border colors because they play nicely with many palettes. Variegated yarn can also be fun, but on small scallops it may create color changes in unexpected placessometimes charming, sometimes “the yarn made its own decisions.”
Step 3: Use a Hook That Controls the Edge
Hook size matters because scalloped edges can become wavy if the stitches are too loose or tight if the hook is too small. Start with the hook size recommended on your yarn label. If your shells flare dramatically or look floppy, go down half a millimeter or one hook size. If the edge pulls inward, go up a hook size.
For borders, many crocheters prefer a slightly smaller hook than the one used for the main project. This can make the edging crisp and tidy. However, do not go so small that your border starts squeezing the project like a belt after Thanksgiving dinner.
Step 4: Add a Single Crochet Foundation Round
A single crochet foundation round is the secret to a professional-looking scalloped border. Work one single crochet into each stitch around the top and bottom edges. Along side edges, where you are working into row ends, place stitches evenly rather than forcing one stitch into every tiny gap.
For most double crochet row ends, try placing two single crochet stitches along the side of each double crochet row. For single crochet row ends, one stitch per row often works well. The goal is simple: the border should lie flat. If it ruffles, you have too many stitches. If it cups or pulls inward, you have too few.
Step 5: Treat Corners Like VIP Guests
Corners need extra stitches so the border can turn without puckering. In a basic single crochet foundation round, work three single crochet stitches into each corner. Place a stitch marker in the center stitch of each corner group so you can find it later. Corners have a funny way of disappearing when you are counting, especially if you are crocheting while watching a show and pretending you are “just listening.”
When you reach the scallop round, you may place a shell directly into the marked corner stitch, or you may adjust the stitches before the corner so the shell lands neatly there. A corner shell often looks best when it has extra fullness, such as seven double crochets instead of five.
Step 6: Count Your Stitches Before the Scallop Round
The classic scalloped edge repeat often works over a multiple of four stitches: single crochet, skip one, five double crochet in the next stitch, skip one. Another common version uses a wider repeat: single crochet, skip two, five double crochet in the next stitch, skip two. Both create lovely scallops, but they require different spacing.
If you do not have the perfect stitch count, do not panic. Crochet is flexible, not a courtroom. You can adjust by skipping one extra stitch before a shell, skipping one fewer stitch near the end of a side, or adding a small chain space where needed. The adjustment should be spread out quietly, not dumped all in one place like a suspicious lump in a rug.
Step 7: Join Your Yarn and Start in a Low-Visibility Spot
Join your border yarn with a slip stitch in a corner or near a side seam. If your project has a “back” or less visible side, start there. Chain one, then work your first single crochet into the same stitch or next stitch, depending on the pattern repeat you choose.
Starting in a corner can be convenient because corners give you room to hide the join. Starting along a side can make it easier to control the first full scallop. Either option works. The best starting point is the one that makes your finished join least noticeable.
Step 8: Make the First Scallop
For a classic small scallop, use this repeat: sc in next st, sk 1 st, 5 dc in next st, sk 1 st. The five double crochet stitches worked into one stitch will fan out into a rounded shell. The single crochet anchors the dip between shells.
Work slowly on the first few scallops. After two or three repeats, lay the project flat and check the edge. The shells should sit smoothly without bunching. If they are crowded, increase the number of skipped stitches between shells. If they look stretched apart, reduce the skips.
Step 9: Continue the Repeat Across the Edge
Once the pattern is established, repeat it across the side: single crochet, skip, shell, skip. This rhythm becomes wonderfully relaxing. It is the crochet equivalent of a gentle rocking chair, except you get a decorative border instead of accidentally falling asleep with yarn in your lap.
Keep your tension even. Loose double crochets can make the shells look droopy. Tight single crochets can pinch the dips between scallops. Try to let the double crochet stitches open naturally while keeping the anchor stitches firm but not harsh.
Step 10: Shape the Corners Smoothly
When you approach a corner, check how many stitches remain before the marked corner stitch. Adjust the skips slightly so a shell lands in the corner. A simple corner option is to work seven double crochet stitches into the marked corner stitch. This gives the border enough fullness to turn the corner gracefully.
Another option is to work 3 dc, ch 1, 3 dc into the corner stitch. This creates a sharper corner with a tiny point. For a softer rounded corner, use seven double crochet stitches. For a square blanket, the seven-double-crochet corner is usually easy and attractive.
Step 11: Join the Final Scallop Cleanly
As you return to the beginning, look at the spacing between your last full scallop and your first stitch. If the count is not perfect, adjust gently. You may skip one fewer stitch or one extra stitch before the final anchor. The goal is for the last scallop to look balanced with the first one.
Join with a slip stitch to the first single crochet or starting stitch. Cut the yarn, leaving a tail of about six inches. Pull the tail through and tighten gently. Do not yank it like you are starting a lawn mower; a tight knot can distort the edge.
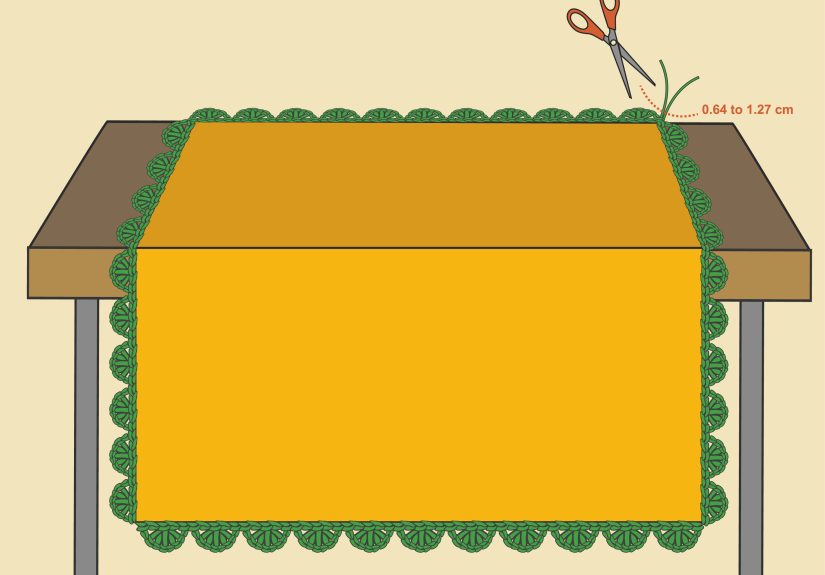
Step 12: Weave In Ends and Block the Border
Use a yarn needle to weave the ends back and forth through nearby stitches. Avoid weaving only in one direction, because the tail may sneak out later like it has a tiny escape plan. Trim the excess yarn after the end is secure.
Blocking helps scalloped edges shine. For acrylic yarn, gentle steam blocking can relax the stitches, but do not press the iron directly onto the yarn. For wool or cotton, wet blocking can shape the scallops beautifully. Pin each scallop evenly if you want a polished look. Let the project dry fully before removing pins.
Easy Scalloped Edge Pattern for Beginners
Here is a simple written pattern you can adapt to many projects:
This version creates a neat, rounded shell border. For wider scallops, use seven double crochets in each shell and skip two stitches on each side. For smaller scallops, use three double crochets and skip one stitch on each side.
Scalloped Edge Variations
Soft Baby Blanket Scallop
Use five double crochets per shell with a soft yarn and relaxed tension. Add one or two rounds of single crochet before the scallop round to create a sturdy frame. This works especially well for baby blankets because the edge looks sweet without becoming too frilly.
Picot Scallop
For a daintier look, work five double crochets into the shell stitch, but add a small picot at the top of the middle double crochet. This creates a tiny point at the crown of each scallop. It is lovely on washcloths, hand towels, and delicate shawls.
Two-Color Scalloped Border
Work the foundation round in one color and the scallop round in another. This creates a crisp outline and makes the scallops pop. It is especially attractive when the main project is neutral and the scallop color is bold.
Lacy Scalloped Edge
For a more open border, use a shell such as 2 dc, ch 1, 2 dc in the same stitch. The chain space opens the shell and gives the edging a lighter, airier feel. This is a good choice for shawls and summer garments.
Common Mistakes and How to Fix Them
The Edge Is Ruffling
Ruffling usually means there are too many stitches or the shells are too close together. Try skipping more stitches between shells, using a smaller shell, or going down a hook size. If the foundation round is the problem, remove it and work fewer single crochets along the edge.
The Edge Is Pulling Inward
If the project curls or cups, the border is too tight. Use a larger hook, add more stitches to the foundation round, or reduce the number of skipped stitches between shells. Blocking can help mild tightness, but it cannot perform miracles. Yarn is talented, not supernatural.
The Corners Look Bulky
Bulky corners happen when too many stitches pile into the same spot. Try using five double crochets instead of seven, or use 3 dc, ch 1, 3 dc for a more controlled turn. Also check that your corner foundation stitches are not already crowded.
The Scallops Look Uneven
Uneven scallops usually come from inconsistent tension or irregular stitch spacing. Count your repeats, use stitch markers, and smooth the edge flat every few inches. Blocking can even out small differences, but careful spacing gives the best result.
Best Projects for Crochet Scalloped Edges
Scalloped edges are wonderfully versatile. On baby blankets, they add softness and charm. On scarves, they create a finished boutique-style edge. On shawls, they bring movement and elegance. On dishcloths and washcloths, they make practical items look like thoughtful handmade gifts. On cardigans or sleeves, they can create a feminine hem without needing complicated shaping.
One useful rule: match the scallop size to the project size. A huge shell border can overwhelm a small washcloth, while tiny scallops may disappear on a chunky blanket. Let the project tell you what it wants. Sometimes it whispers. Sometimes it yells, “Please do not put lace on this bulky afghan.”
Helpful Experience: What I Learned from Crocheting Scalloped Edges
The first lesson from crocheting scalloped edges is that the foundation round matters more than beginners expect. It is tempting to jump straight into the pretty shells, because they are the fun part. However, a neat single crochet round is what makes the final edging look intentional instead of improvised during a power outage. When the foundation stitches are evenly spaced, the scallops sit naturally. When they are crowded or sparse, the shells announce every mistake with impressive confidence.
Another useful experience is to test the repeat before committing to the entire border. On a large blanket, crochet six to eight scallops, then stop and check the fabric. Lay it flat on a table. Do not judge it while it is bunched up in your lap, because almost every border looks suspicious in lap form. If the edge waves, adjust early. Pulling out eight scallops is mildly annoying. Pulling out four sides of a queen-size blanket is a character-building event nobody requested.
Stitch markers are also more helpful than they look. Marking the corners keeps the border organized, especially when the project has soft or fuzzy yarn. It is easy to lose track of the exact corner stitch, and placing the corner shell one stitch too early can make the entire corner lean. A stitch marker is basically a tiny traffic cone for your crochet hook: “Turn here, friend.”
Yarn texture changes the personality of scalloped edging. Cotton gives crisp, clean shells that look beautiful on kitchen items and summer accessories. Acrylic is forgiving and works well for blankets, especially when lightly blocked. Wool has lovely memory and can block into elegant curves. Chenille and plush yarns create soft scallops, but the stitch definition may be less visible. If you are using fuzzy yarn, choose a simple border because complex details may vanish into the fluff.
Color choice can completely change the finished project. A matching border looks calm and polished. A contrast border makes the scallops stand out. A soft pastel edge can make a baby blanket look tender and classic, while a dark border can frame a colorful blanket beautifully. If the main project already has many colors, a simple neutral scallop often looks best. If the project is plain, the border is your chance to add a little drama without turning the whole piece into a yarn opera.
Finally, blocking is worth the patience. Even a basic scalloped edge can look more refined after gentle shaping. Pinning every shell may seem fussy, but the result can be surprisingly professional. For gifts, photos, or items you plan to sell, blocking helps the scallops look even and deliberate. For everyday items, a quick steam or light smoothing may be enough. The goal is not perfection; it is giving your stitches a polite suggestion about where to sit.
Conclusion
Learning how to crochet scalloped edges is one of the easiest ways to upgrade a handmade project. With a simple foundation round, a steady shell repeat, and a little attention to corners, you can turn plain edges into soft, decorative curves. The classic scallop border uses basic stitches, but the finished effect looks elegant, cheerful, and far more complicated than it really iswhich is one of crochet’s best little tricks.
Start with a small project if you are new to borders. Practice on a washcloth, scarf end, or sample square before edging a large blanket. Once the rhythm clicks, you will be able to adjust shell size, spacing, color, and corner style with confidence. And yes, you may suddenly want to scallop every edge in your house. That is normal. Probably.
Note: This article is written as original, publication-ready content based on widely used crochet techniques, standard U.S. crochet terminology, and practical edging methods used by experienced crocheters.


