Table of Contents >> Show >> Hide
- Before You Start: Know What You’re Dealing With
- How to Get Wood Stain Out of Clothes in 11 Steps
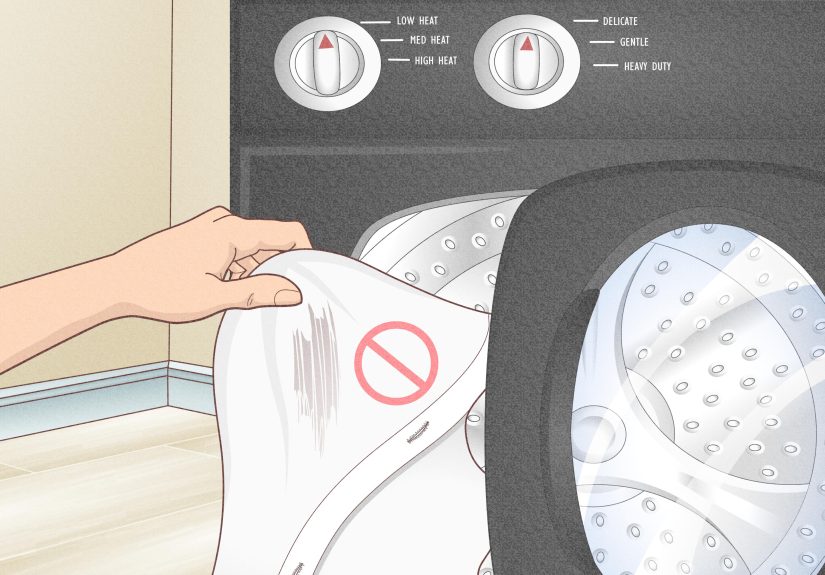
- Step 1: Check the care label before you play laundry hero
- Step 2: Blot the stain, don’t rub it like you’re mad at it
- Step 3: Put a towel behind the stain
- Step 4: Test your cleaner on a hidden seam
- Step 5: Pretreat oily residue with dish soap or liquid detergent
- Step 6: For stubborn oil-based wood stain, dab with mineral spirits
- Step 7: Rinse thoroughly before washing
- Step 8: Soak the garment if the stain is still hanging on
- Step 9: Gently brush the stain again
- Step 10: Wash in the warmest water safe for the fabric
- Step 11: Air-dry and inspect before the dryer gets involved
- What If the Wood Stain Is Water-Based?
- What If the Stain Is Already Dry?
- Best Tips for Specific Fabrics
- Mistakes That Make Wood Stains Worse
- When to Give Up and Call a Professional
- Real-Life Experiences and Lessons From Wood Stain Mishaps
- Conclusion
Wood stain and clean clothes have the same relationship as glitter and black carpet: they should never meet, yet somehow they always do. One second you are bravely refinishing a table, staining a fence, or “just doing one quick touch-up,” and the next second your favorite shirt looks like it lost a wrestling match with a walnut-colored puddle.
The good news? A wood stain disaster does not always mean your clothes are doomed to become “painting clothes” forever. If you act fast, use the right products, and avoid the classic mistake of panic-rubbing like you are trying to start a campfire, you have a solid chance of saving the fabric.
This guide walks through exactly how to get wood stain out of clothes in 11 practical steps. It also covers what to do with fresh stains, dried stains, delicate fabrics, and those stubborn oily spots that love to cling like they pay rent.
Before You Start: Know What You’re Dealing With
Most wood stains behave a lot like oil-based messes, which is why grease-fighting methods often help. Fresh stain is easier than dried stain. Washable cotton is easier than silk or rayon. And “machine-washable” is a much more cheerful label than “dry clean only.” Before you begin, check the care label, gather a few supplies, and promise yourself one thing: no dryer until the stain is truly gone.
What you may need
- Clean white cloths or paper towels
- Liquid laundry detergent
- Clear dish soap
- A soft toothbrush
- Mineral spirits for stubborn oil-based stain residue
- Oxygen-based stain remover, optional
- A bowl, sink, or bucket for soaking
How to Get Wood Stain Out of Clothes in 11 Steps
Step 1: Check the care label before you play laundry hero
Start with the garment’s care tag. If the item says dry clean only, stop right there and let a professional handle it. The same caution goes for fragile fabrics like silk, acetate blends, heavily sized fabrics, suede, leather, or anything that looks expensive enough to ruin your week if you guess wrong.
If the clothing is washable, move on. If it is washable-but-delicate, proceed gently and lower your expectations just enough to stay emotionally stable.
Step 2: Blot the stain, don’t rub it like you’re mad at it
If the stain is fresh, blot immediately with a clean white cloth or paper towel. The goal is to lift off as much wet stain as possible before it sinks deeper into the fibers. Rubbing spreads the stain, grinds it in, and generally behaves like a bad friend. Blotting is the move.
If there is thick residue on top of the fabric, gently lift it away first with the edge of a spoon, dull knife, or paper towel. Think “remove excess,” not “scrub the shirt into another dimension.”
Step 3: Put a towel behind the stain
Before applying any cleaner, place a folded white towel or several paper towels behind the stained area. This gives the stain somewhere to go instead of letting it travel through the fabric and create a bonus stain on the other side. It is a small trick, but it saves a lot of regret.
When you work on the spot, start at the outside edge and move toward the center. That keeps the stain from spreading into a larger halo.
Step 4: Test your cleaner on a hidden seam
Yes, this step is boring. Yes, you still need to do it. Whether you plan to use detergent, dish soap, a stain remover, or mineral spirits, test it first on an inside seam or another hidden area. Wait a few minutes and check for dye loss, fading, or weird fabric drama.
This matters even more with dark colors, bright prints, rayon, acetate, and blended fabrics. A stain is annoying. A bleached-out patch in the middle of your shirt is performance art.
Step 5: Pretreat oily residue with dish soap or liquid detergent
Because many wood stains leave behind an oily binder, a grease-cutting pretreatment is often the best first attack. Apply a small amount of clear dish soap or liquid laundry detergent directly to the stain. Use your fingers or a soft toothbrush to work it in gently.
Let it sit for about 10 minutes. This gives the surfactants time to loosen the oily residue that plain water usually ignores. If the stain is fresh and light, this step alone may do most of the heavy lifting.
Step 6: For stubborn oil-based wood stain, dab with mineral spirits
If detergent does not budge the stain, especially when you know the product was oil-based wood stain, step up to mineral spirits. Dampen a clean white cloth or cotton swab with a small amount and blot the stained area gently. Work from the outside in, switch to a clean section of cloth as the color transfers, and stay patient.
Do not pour solvent directly onto the garment like you are marinating it. Less is more. You want control, not chaos.
If the stain is older and dried, this step may be the one that finally loosens it. Just remember that solvents need caution. Work in a well-ventilated area, keep them away from heat or flame, and do not use them casually on delicate fibers.
Step 7: Rinse thoroughly before washing
Once you have lifted as much stain as possible, rinse the treated area well. If you used dish soap, rinse out the suds. If you used mineral spirits, rinse and let the area air out before the garment goes anywhere near the washer.
This step is easy to skip when you are feeling victorious, but do not skip it. Leftover product can interfere with washing, leave residue, or create a bigger mess than the original stain.
Step 8: Soak the garment if the stain is still hanging on
Still seeing a shadow? Soak the item in warm water mixed with liquid detergent or an oxygen-based stain remover, as long as the care label allows it. Thirty minutes is a good starting point for washable fabrics.
For a dried or set-in wood stain, soaking helps soften what is left after pretreatment. This is especially helpful on sturdy fabrics like cotton tees, work shirts, canvas aprons, and old jeans that have seen things.
Step 9: Gently brush the stain again
After soaking, use a soft toothbrush to lightly work over the stained area. You are not sanding a deck. Gentle brushing is enough to help lift loosened residue from the fibers. If you notice improvement, great. If not, repeat the pretreatment instead of getting aggressive.
Too much scrubbing can rough up the fabric, fade the color, or leave the area looking worn even after the stain is gone. That would be a very annoying plot twist.
Step 10: Wash in the warmest water safe for the fabric
Machine-wash the garment using your regular detergent and the warmest water the care label allows. Warm or hot water can help with oily residue on washable fabrics, but the label gets the final say. If the care instructions say cool or cold, listen to the tag. Clothing labels may not be fun, but they usually know what they’re talking about.
For white, sturdy fabrics, an oxygen-based booster may help with any lingering dinginess. For colored fabrics, use color-safe products only unless you enjoy surprise tie-dye effects.
Step 11: Air-dry and inspect before the dryer gets involved
This is the step that saves garments. Air-dry the item completely and inspect it in good light. If you still see any trace of wood stain, repeat the treatment. Do not put the garment in the dryer until the stain is fully gone.
Dryer heat can lock the stain into the fabric and turn a rescue mission into a memorial service. Line dry first, celebrate later.
What If the Wood Stain Is Water-Based?
Water-based wood stain is usually easier to remove than oil-based stain. In many cases, quick blotting, liquid detergent, a short soak, and a normal wash are enough. You may never need mineral spirits at all. That said, do not assume “water-based” means “harmless.” It can still discolor fabric if it sits too long, so treat it quickly.
What If the Stain Is Already Dry?
Dried wood stain is tougher, but not impossible. Start by blotting with a cloth dampened in mineral spirits if the fabric can handle it and you have already spot-tested. Then move through the same rinse, soak, wash, and air-dry cycle. It may take more than one round. Fresh stains are polite; dried stains are stubborn little goblins.
Best Tips for Specific Fabrics
Cotton and polyester
These are usually the easiest to treat at home. Dish soap, liquid detergent, soaking, and rewashing often work well.
Denim and canvas
Tough fabrics can handle a little more soaking and gentle brushing. They are often the most forgiving when you are dealing with old stain splatters from DIY projects.
Wool, knits, and delicates
Use a mild detergent, minimal rubbing, and lots of caution. When in doubt, call in the dry cleaner instead of improvising a chemistry experiment at your kitchen sink.
Silk, acetate, rayon, and dry-clean-only items
Do not freelance. These fabrics are more likely to bleed, warp, or react badly to solvents and aggressive stain treatment. Professional cleaning is usually the smarter move.
Mistakes That Make Wood Stains Worse
- Rubbing instead of blotting
- Skipping the colorfastness test
- Using too much solvent
- Tossing the garment straight into the washer without pretreating
- Putting the item in the dryer before checking the stain
- Using strong products on delicate fabric without reading the label
- Mixing stain-removal chemicals together because the internet said “trust the process”
When to Give Up and Call a Professional
Sometimes the most efficient step is admitting defeat with dignity. Take the item to a dry cleaner if:
- The care label says dry clean only
- The garment is silk, rayon, acetate, suede, or leather
- The stain is large and fully dried
- You already tried a home treatment and nothing happened
- The clothing is expensive, sentimental, or borrowed from someone who would absolutely notice
Real-Life Experiences and Lessons From Wood Stain Mishaps
Anyone who has worked with wood stain long enough has a story. Usually it begins with confidence and ends with someone holding a paper towel, saying, “Well, that’s not ideal.” In real life, wood stain rarely lands in one neat little dot. It splashes. It brushes against your sleeve. It mysteriously appears on your jeans even though you are almost certain your jeans were nowhere near the project. Wood stain has a talent for finding fabric like it has GPS.
One of the most common experiences is underestimating how fast stain spreads. A person wipes what looks like a tiny mark, only to discover that rubbing turns it into a larger brown cloud. That is why blotting matters so much. People who save their clothes usually do one thing right early: they stop smearing the mess around and start lifting it off instead.
Another common lesson is that “I’ll deal with it later” is not a winning strategy. A shirt stained at 10 a.m. looks a lot more cooperative than that same shirt at 10 p.m. after the stain has dried, oxidized, and settled into the fibers like it signed a lease. Fresh stain is a problem. Old stain is a project.
There is also the classic moment when someone assumes regular washing will magically erase everything. It does not. In fact, washing without pretreating often leaves behind a faint ghost of the stain, and drying it can make that ghost permanent. Plenty of people learn this the hard way after pulling a clean-looking-but-not-really clean shirt out of the dryer and spotting the brown outline in sunlight. Nothing humbles a DIY enthusiast faster.
Experienced painters, woodworkers, and weekend furniture flippers tend to keep a small stain-response routine. They use old clothes when possible, keep paper towels nearby, and treat accidents immediately. Some even keep dish soap in the laundry room and workshop because oily stains respond so much better when treated on the spot. That habit is not glamorous, but it is effective.
There is also a practical emotional lesson here: not every garment can be saved perfectly, and that does not mean you failed. Sometimes you can turn a disaster into a work shirt, a painting apron, or a dedicated “messy project” outfit. Honestly, every home improver eventually earns one. It is like a badge of honor, except the badge is on your left thigh and suspiciously mahogany-colored.
The people who get the best results are usually not the ones using the fanciest product. They are the ones who stay calm, read the care label, test first, use just enough cleaner, and repeat the process patiently. Wood stain removal is less about brute force and more about good timing and smarter steps. So if you are standing over a stained shirt right now, take heart: this is annoying, but it is not automatically the end of the road for your clothes.
Conclusion
If you want to know how to get wood stain out of clothes, the formula is simple: act fast, blot instead of rub, pretreat the oily residue, use mineral spirits carefully for stubborn oil-based stain, wash according to the care label, and always air-dry before using the dryer. The process is not glamorous, but it works. And if all else fails, there is no shame in calling a professional cleaner before your favorite shirt becomes workshop folklore.


