Table of Contents >> Show >> Hide
- What a Glow Stick Really Is
- What You’ll Need
- How to Make a Glowstick: 14 Steps
- Step 1: Choose the kind of glow you want
- Step 2: Pick a clear container
- Step 3: Wash and dry the container
- Step 4: Add a little water
- Step 5: Add glow paint or glow glue
- Step 6: Stir in clear glue for a slower swirl
- Step 7: Add glitter or tiny decorations
- Step 8: Test the color balance
- Step 9: Seal the container tightly
- Step 10: Shake well
- Step 11: Charge it or place it under UV light
- Step 12: Check the glow in a dark room
- Step 13: Decorate the outside
- Step 14: Store and reuse
- Why This Version Is Smarter Than Trying to Copy a Real Glow Stick
- Best Ways to Use DIY Glow Sticks
- Troubleshooting Tips
- DIY Glow Stick Variations to Try
- Frequently Asked Questions
- Final Thoughts
- Glow Stick Experiences: What Making Them Is Really Like
Note: This article teaches a safe DIY glow-stick-style craft rather than a homemade chemical glow stick.
Let’s clear up the glow-in-the-dark elephant in the room: a real store-bought glow stick is a factory-made little science wand. It is not the kind of thing you casually whip up between a snack break and a streaming binge. But a DIY glowstick-style craft? That you can absolutely make at home without turning your kitchen into a suspicious laboratory.
This guide shows you how to make a safe, bright, fun version that looks like a glow stick, works beautifully for parties, bedroom decor, sensory play, and nighttime fun, and does not require you to mess with the sealed chemical reaction used in commercial products. In other words, we are going for “cool glowing tube” energy, not “accidental villain origin story.”
If you searched for how to make a glowstick, you are probably hoping for something colorful, simple, and actually doable. Good news: this version uses easy craft materials, can be customized in about a dozen different ways, and still gives you that satisfying neon vibe. Better news: it is much easier to explain to your family than why there is mysterious glowing liquid on the counter.
What a Glow Stick Really Is
Before we get to the DIY, it helps to know why commercial glow sticks glow so well. A real glow stick uses chemiluminescence, which means light is produced by a chemical reaction. When the inner capsule breaks, the chemicals mix and the tube lights up. That is why real glow sticks feel like instant magic. They are basically a sealed one-time light show.
Your homemade version will use one of two safer approaches:
1. Glow-in-the-dark materials
These “charge” under natural or artificial light and then glow in the dark later. Think of them as tiny overachievers that store light and give it back when the room gets dark.
2. Blacklight-reactive materials
These glow dramatically when placed under a UV or black light. If you want the boldest, brightest party look, this option is a crowd-pleaser.
So yes, your DIY version is different from a commercial glow stick, but it can still look fantastic, last longer in many cases, and be reused instead of tossed after one night.
What You’ll Need
- 1 clear plastic tube, bottle, or capped craft vial
- Glow-in-the-dark paint, glow glue, or blacklight-reactive craft paint
- Water
- Clear school glue or clear gel glue (optional, for a thicker swirl effect)
- Fine glitter or iridescent glitter (optional)
- Small beads or sequins (optional)
- Mini funnel or rolled paper funnel
- Measuring spoon
- Paper towels
- Strong tape or a tight-fitting cap
- Labels, stickers, or ribbon for decoration
- A bright lamp, sunlight, or a black light for activation
Pick a container that seals well. That matters more than people expect. A glowing mess is still a mess, even if it is beautiful for three seconds.
How to Make a Glowstick: 14 Steps
Step 1: Choose the kind of glow you want
Decide whether you want a charge-and-glow stick or a blacklight glow stick. If you want something that glows after sitting under a lamp, use glow-in-the-dark paint or glow glue. If you want intense color at a party or in a bedroom with UV lighting, use blacklight-reactive paint.
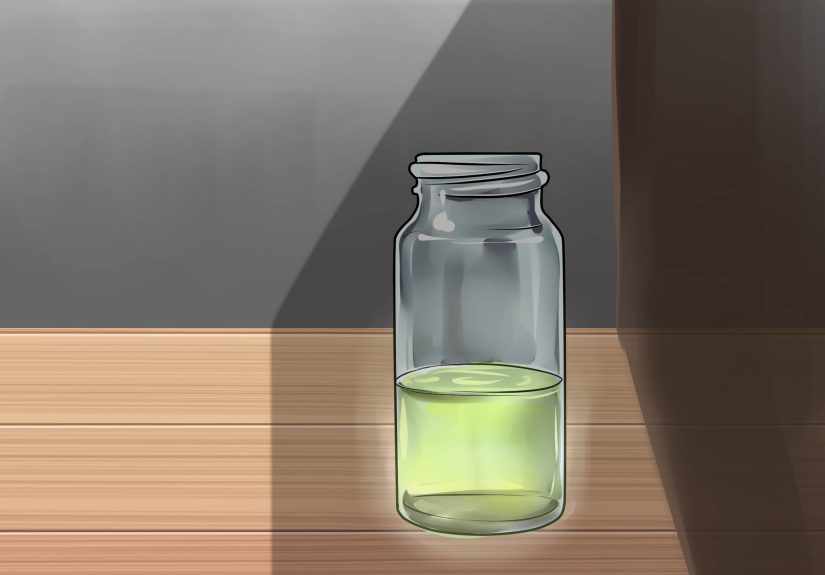
Step 2: Pick a clear container
Use a clear plastic tube, capped test tube, travel-size bottle, or slender craft vial. Transparent containers work best because they let the glow show through from every angle. A long narrow shape gives the most classic glow-stick look.
Step 3: Wash and dry the container
Even a little dust or leftover residue can dull the final effect. Rinse the container, let it dry fully, and wipe the outside so it is crystal clear. Your future glow deserves a clean stage.
Step 4: Add a little water
Pour in enough water to fill the container about two-thirds to three-quarters full. This gives you room to shake the mixture later. Distilled water is nice if you have it, but regular tap water is usually fine for a simple craft.
Step 5: Add glow paint or glow glue
Use a funnel and add a few teaspoons of glow-in-the-dark paint or glow glue. Start small. You can always add more, but you cannot un-add a neon blob once it is in there living its best life. If you want a brighter finish, use more product and less water.
Step 6: Stir in clear glue for a slower swirl
This step is optional, but it makes the liquid move more slowly and gives your glow stick a dreamy floating effect. Add a spoonful of clear school glue or clear gel glue and gently stir or shake. It is like upgrading from “glow tube” to “tiny glowing galaxy.”
Step 7: Add glitter or tiny decorations
Want more sparkle? Add a pinch of fine glitter or a few mini sequins. Keep it light. Too much glitter can block the glow instead of enhancing it. This is one of those rare life situations where restraint really is stylish.
Step 8: Test the color balance
Before sealing the container, hold it up under strong light or a black light. If the color looks too pale, add more paint. If it looks too thick and cloudy, add a little more water. This is the easiest moment to adjust your mixture, so do not skip it.
Step 9: Seal the container tightly
Put the cap on firmly. If the lid feels even slightly questionable, wrap the seam with strong clear tape. The goal is a craft you can shake, carry, and wave around dramatically while saying, “Behold.”
Step 10: Shake well
Shake until the mixture looks smooth and evenly combined. If you used paint, there should not be heavy clumps stuck at the bottom. If you used glue, a few slow-moving ribbons are fine and can actually look pretty cool.
Step 11: Charge it or place it under UV light
If you used glow-in-the-dark materials, place the tube under a bright lamp or in sunlight for several minutes. If you used blacklight-reactive paint, switch on a UV light and watch the magic happen instantly. This is the moment where everyone suddenly becomes very interested in your craft skills.
Step 12: Check the glow in a dark room
Turn off the lights and test your glow stick. If it is not bright enough, recharge it longer or add another small amount of glow product. White or pale backgrounds often make glow effects appear stronger, so using lighter-toned materials can help.
Step 13: Decorate the outside
Add labels, washi tape, glow stickers, or ribbon around the cap. Keep the middle mostly clear so the light can shine through. If you are making several, color-code them for parties, holiday buckets, camp-themed gifts, or room decor.
Step 14: Store and reuse
One of the best things about this DIY version is that it can be reused. Keep it capped and store it out of direct heat. Recharge glow-in-the-dark versions whenever needed, or bring them back under black light for another round of neon drama.
Why This Version Is Smarter Than Trying to Copy a Real Glow Stick
If you have ever wondered whether you can make a true chemical glow stick from scratch, the honest answer is that it is not a great home project. Commercial glow sticks are designed as sealed products, and part of what makes them work is the controlled separation of their contents until activation. That is not the kind of setup most people need to recreate at home.
A craft glow stick gives you plenty of the visual fun without the hassle, without one-time-only use, and without treating your workspace like a chemistry final exam. It is also easier to personalize. You can make pastel glow sticks, spooky Halloween glow sticks, rainbow party glow sticks, or sensory bottles that double as decorations.
Best Ways to Use DIY Glow Sticks
- Birthday party table decor
- Sleepover room lights
- Halloween treat-bag extras
- Photo booth props
- Classroom craft displays
- Sensory calm-down tools
- Nighttime treasure hunts
- Camping-themed decorations
They are especially fun when made in a batch. A single glow stick is cute. Twelve glow sticks in different colors? Suddenly you are the unofficial event planner.
Troubleshooting Tips
If the glow is too weak
Add more glow paint or glow glue, recharge it longer, or use a darker room. For blacklight versions, move the UV light closer or switch to brighter fluorescent colors.
If the mixture looks muddy
You may have combined too many colors. Neon crafts love a simple palette. Try one bold color per tube or stick to shades that play nicely together, like green and blue.
If the glitter sinks fast
Add a little clear glue to thicken the liquid so the glitter drifts more slowly.
If the cap leaks
Empty the container, dry the threads, reseal it, and reinforce with tape. Leak prevention is much less annoying than leak cleanup.
DIY Glow Stick Variations to Try
Galaxy Glow Stick
Use blue glow paint, silver glitter, and star-shaped sequins.
Monster Slime Glow Stick
Use green glow glue and a thicker clear glue blend for a gooier look.
Princess Glow Wand Tube
Use pink or purple blacklight paint and decorate the outside with metallic ribbon.
Science Fair Version
Make several tubes with different paint-to-water ratios and compare which one glows best. Suddenly your craft turned educational. Sneaky and effective.
Frequently Asked Questions
Can I make a real glow stick at home?
Not in the same way commercial glow sticks are made. This article focuses on a safer, practical DIY alternative that gives you a similar glowing look.
How long will a DIY glow stick last?
A glow-in-the-dark version can be recharged and reused many times. A blacklight version will glow strongly whenever UV light is on it.
What is the brightest option?
Blacklight-reactive paints usually look the brightest under UV light, while charged glow paints are better if you want a standalone glow after the lights go out.
Can I use food coloring?
Food coloring adds color, but it does not create glow. For that, you need glow-in-the-dark or UV-reactive craft materials.
Final Thoughts
Making a DIY glow stick is one of those projects that checks a lot of boxes at once: simple, customizable, inexpensive, and just sciencey enough to feel impressive. Best of all, it gives you the fun of a glowing tube without trying to recreate a sealed commercial product that was never meant to be a casual at-home chemistry project.
So if you want something bright for a party, cool for a bedroom, or fun for a rainy afternoon craft session, this version is the way to go. It is colorful, reusable, and easy to personalize. Also, it makes you look wildly prepared when someone says, “Does anybody have something fun we can do tonight?”
Yes. Yes, you do. And it glows.
Glow Stick Experiences: What Making Them Is Really Like
The first time most people try a glow-stick-style craft, they expect instant movie magic. They imagine one dramatic shake, one heroic dimming of the lights, and boom: a perfect neon beam worthy of a dance floor. Real life is usually a little funnier. The first attempt often involves adding too much water, not enough glow paint, and then standing in a dark room squinting at a bottle while insisting, “No, wait, I think it’s glowing a little.” That is part of the experience, and honestly, part of the charm.
Once you get the mixture right, the project becomes surprisingly satisfying. There is something oddly relaxing about testing colors, adjusting thickness, and watching glitter drift through a glowing liquid. It feels part craft, part science, part tiny home decor experiment. People who love sensory projects usually end up hooked because the tube is not just pretty to look at; it is fun to hold, shake, and watch settle.
Another common experience is learning that “glow” is not one-size-fits-all. Some people prefer a soft, eerie afterglow that charges under a lamp and fades gently in a dark room. Others want the loud, dramatic, club-style brightness that only really pops under a black light. Neither is wrong. It just depends on whether your personal aesthetic leans more “cozy enchanted bedroom” or “tiny rave in a bottle.”
Making these in groups is a whole event by itself. Kids love choosing colors and decorations. Teens tend to compete over whose tube looks the brightest. Adults pretend they are helping, then get deeply invested in glitter choices and whether blue or green looks more “official.” By the end, a simple craft table somehow turns into a design studio with opinions, experiments, and at least one person declaring themselves the Glow Director.
There is also the moment of revelation that reusable glow crafts can be more fun than disposable ones. A store-bought glow stick is exciting, sure, but once it fades, it is basically retired. A homemade version can come back again and again. Recharge it. Re-shake it. Restyle it. Rename it something ridiculous. It is the craft that refuses to quit, which is more than can be said for many trendy projects people abandon after one weekend.
Some of the best experiences happen when the craft is tied to a memory. A batch made for a birthday party becomes part of the photos. A few made during summer break end up living on a bedroom shelf for months. A Halloween version turns into the surprise favorite decoration because it glows better than half the store-bought stuff. These projects are simple, but they stick in your memory because they feel interactive and personal.
And then there is the universal final experience: turning off the lights, holding up your finished glow stick, and feeling just a little too proud of it. As well you should. You took a clever idea, made it safer, made it reusable, made it your own, and created something that is equal parts practical and playful. That is a pretty great result for a project that started with a clear tube, some craft supplies, and a perfectly reasonable desire to make something glow.


