Table of Contents >> Show >> Hide
- Quick Navigation
- Materials
- Before You Launch: A 30-Second Safety Brief
- How to Make a Paper Rocket: 14 Steps
- Choose your launch space (and claim it like a space agency)
- Cut your paper into a rocket-sized rectangle
- Wrap the rectangle around a pencil to form the body tube
- Tape the seam (but don’t tape the tube to the pencil)
- Slide the tube off the pencil and test-fit it on the straw
- Pick a “nose style”: pinch-and-seal or twist-into-a-cone
- Measure (or at least notice) your nose cone length
- Create fins (your rocket’s built-in “please fly straight” system)
- Attach fins evenly near the base
- Bend and align the fins so they match
- Add a tiny bit of nose weight (optional, but often magical)
- Decorate like an astronaut with limited cargo space
- Load the rocket onto the straw and set your launch angle
- Launch, measure, and record your results
- How to Make Your Paper Rocket Fly Farther (Without Cheating and Throwing It)
- Troubleshooting: When Your Rocket Gets Attitude
- Fun Variations (Because One Rocket Is Never Enough)
- Final Countdown
- of Paper-Rocket Experience From the Launch Pad
- SEO Tags (JSON)
Want rocket science without the rocket fuel, permits, or a dramatic news headline? Perfect. A paper rocket is the sweet spot:
cheap, fast, surprisingly “science-y,” and extremely satisfying when it actually flies straight instead of doing a confused
cartwheel into a couch.
In this guide, you’ll learn how to make a paper rocket in 14 steps using simple supplies and a straw launcher.
Then we’ll get a little nerdy (in a fun way) with design tweaks to help your rocket fly farther and straighterbecause the only thing
better than “launch!” is “launch… and wow, that went far.”
Materials
Most paper rocket designs work because they’re simple: a tube, a sealed nose, and fins for stability. Here’s what you’ll need:
- Paper (printer paper works great; cardstock can work for fins)
- Scissors
- Tape (clear tape is ideal; masking tape works too)
- Pencil (for forming the body tube and shaping the nose)
- Drinking straw (your launcherplastic, paper, or reusable)
- Ruler or measuring tape (optional, but excellent for “science mode”)
- Markers (optional, for decoratingjust don’t turn it into a heavy mural)
- Paper clips (optional, for tiny nose weight adjustments)
Before You Launch: A 30-Second Safety Brief
- Do not aim at people or pets. This is a rocket. A tiny, paper rocket. Still a rocket.
- Pick an open launch zone (hallway, gym, yard on a calm day).
- Watch overhead obstacles (lights, ceiling fans, shelves, tree branches).
- Don’t run with the straw or poke anything with it. Mission Control prefers “fun” over “ER visit.”
How to Make a Paper Rocket: 14 Steps
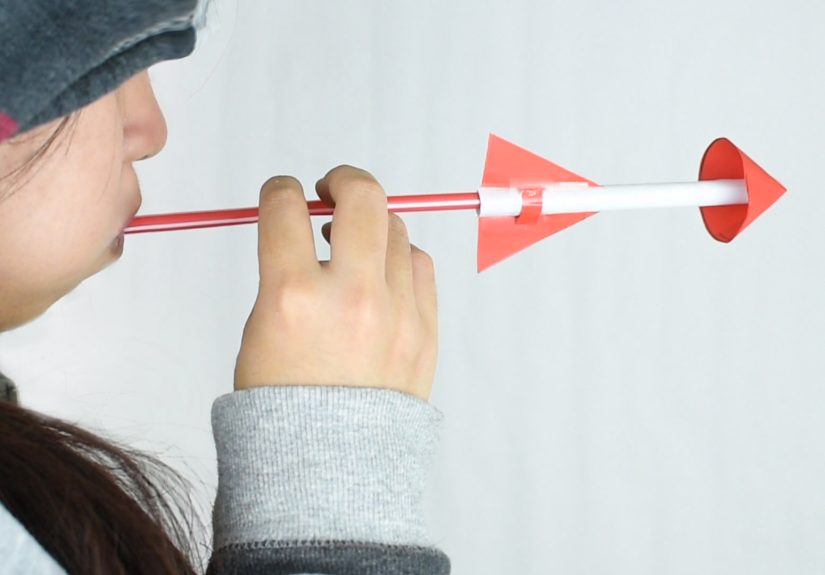
This version is a classic straw rocket: you slide the paper rocket onto a straw and launch it by blowing.
It’s easy, repeatable, and perfect for experimenting with fins, nose shapes, and rocket length.
-
Choose your launch space (and claim it like a space agency)
Find a clear area at least 10–20 feet long. Indoors is great because wind won’t sabotage your flight like a tiny invisible villain.
Outdoors works toojust pick a calm day. -
Cut your paper into a rocket-sized rectangle
A simple starting size is one-quarter of a standard sheet (cut a letter-size sheet in half lengthwise, then in half again).
Smaller rockets are lighter and can be fast; larger rockets can be more stable. We’ll start “medium.” -
Wrap the rectangle around a pencil to form the body tube
Lay the paper rectangle lengthwise along the pencil and roll it into a tube. The goal is a tube that’s smooth and fairly snuglike a
jacket that fits, not a jacket you can’t breathe in. -
Tape the seam (but don’t tape the tube to the pencil)
Add tape along the long edge so the tube holds its shape. Use only as much tape as neededextra tape adds weight, and rockets are
famously anti-weight. -
Slide the tube off the pencil and test-fit it on the straw
The tube should slide onto the straw smoothly. If it’s too tight, reroll slightly looser. If it’s too loose, reroll tighter or add a tiny strip of tape
to snug it up. Fit matters because escaping air means less thrust. -
Pick a “nose style”: pinch-and-seal or twist-into-a-cone
You have two great options:
- Pinch-and-seal: Flatten one end of the tube and tape it shut so no air leaks out.
- Twist cone: Gently twist the closed end around the pencil tip to form a cone, then tape it closed.
Either way, the nose must be airtight. If air leaks out the front, your rocket basically becomes a sad paper whistle.
-
Measure (or at least notice) your nose cone length
If you want to experiment later, measure the nose cone length from base to tip and write it down. Changing nose cone length can affect
stability and distanceyour future self will thank you for the data. -
Create fins (your rocket’s built-in “please fly straight” system)
Cut two right triangles from paper (or cardstock for sturdier fins). A good starting point is triangles with long sides around a few inches.
You can fold each triangle to create two finsgiving you four fins total. -
Attach fins evenly near the base
Tape fins close to the open end of the rocket (the end that goes on the straw). Space them evenly around the tube. If the fins are crooked,
your rocket will show you its interpretive-dance routine instead of flying straight. -
Bend and align the fins so they match
Aim for symmetry. If you look at the rocket from the back, evenly spaced fins can form a “plus sign” look. Small differences in fin angle
can cause big differences in flight pathpaper rockets are dramatic like that. -
Add a tiny bit of nose weight (optional, but often magical)
If your rocket wobbles or flips, add a small paper clip near the nose. Not three paper clips. Not a binder clip. Just a tiny amount.
A little extra mass up front can improve stability by shifting the center of mass forward. -
Decorate like an astronaut with limited cargo space
Draw windows, flames, mission patches, or the face of your favorite planet (Pluto fans, this is your moment). Keep decorations lightheavy ink,
extra tape layers, or glued-on extras will reduce distance. -
Load the rocket onto the straw and set your launch angle
Slide the rocket onto the straw until it sits securely. Aim slightly upward (around 30–45 degrees is a good starting angle).
If you want maximum height, aim higher. If you want distance, experiment. -
Launch, measure, and record your results
Blow into the straw with one strong, steady push of air. Watch the flight. Measure how far it went. Record it. Congratulationsyou are now doing
the engineering design process in your socks.
How to Make Your Paper Rocket Fly Farther (Without Cheating and Throwing It)
Once you know how to make a paper rocket, the fun part begins: changing one thing at a time and seeing what happens. That’s not just play
that’s experimentation.
The four forces (the reason your rocket behaves like it has opinions)
- Thrust: The push from your breath through the straw.
- Drag: Air resistance trying to slow the rocket down.
- Gravity: Earth doing Earth things.
- Lift/Stability effects: The way airflow and fins help the rocket stay oriented.
Stability: center of mass vs. center of pressure (the secret sauce)
A stable rocket usually has its center of mass (where weight is concentrated) in front of its center of pressure
(where air “pushes” the rocket the most). If your rocket keeps flipping, it may be too tail-heavytry a slightly longer nose cone, a tiny nose weight,
or smaller/lighter fins.
Variables worth testing (pick one, test it, then change only that)
- Nose cone length: Try short, medium, and long cones; record distance over 5 launches each.
- Fin size: Bigger fins can improve stability but add drag and weight.
- Fin shape: Triangles, trapezoids, swept-back “shark fins”all valid.
- Fin angle: Small changes can steer the rocket (sometimes on purpose, often not).
- Body length: Longer bodies can be more stable; too long adds weight and friction.
- Rocket fit on the straw: Too tight = friction; too loose = air leaks and weak thrust.
- Launch angle: Try 20°, 35°, 45°, and 60° and compare distance.
A simple “real science” example experiment
Build three rockets that are identical except for nose cone length:
2 cm, 4 cm, and 6 cm. Launch each rocket 5 times at the same angle
from the same spot. Record distances and calculate an average. You’ll probably see a patternmaybe one cone length is more stable,
or maybe your best cone depends on fin size. That’s normal. Engineering is basically “it depends,” but with clipboards.
Troubleshooting: When Your Rocket Gets Attitude
-
Problem: Rocket won’t launch (or barely moves).
Fix: The tube may be too tight on the straw. Reroll slightly looser or reduce tape bulk on the inside seam. -
Problem: Rocket spins wildly or veers hard left/right.
Fix: Fins are uneven or crooked. Reattach fins so they’re symmetrical. Also check that the nose is centered and sealed. -
Problem: Rocket flips backward.
Fix: Add a tiny nose weight (one small paper clip) or reduce fin size/weight. Make sure the nose is sealed and not leaking. -
Problem: Rocket flies, but not far.
Fix: Reduce weight (less tape, lighter paper), improve straw fit, and try a slightly different launch angle. Also ensure the nose is airtight. -
Problem: Rocket “puffs” off the straw early.
Fix: Tube may be too loose. Reroll tighter or add a narrow tape strip to tighten the tube slightly.
Fun Variations (Because One Rocket Is Never Enough)
1) The “No-Fin” challenge
Build one rocket with no fins and another with fins. Launch both and compare. You’ll learn very quickly why fins exist.
2) The “Mission Patch” weight test
Add one tiny paper clip to the nose and compare flights. Then remove it. Then try half a paper clip’s worth of weight (okay, not literally
just try a smaller clip). Record results. You’re learning optimization.
3) Upgrade to a stomp launcher (adult help recommended)
If you want bigger launches, a stomp-style launcher (often made with PVC pipe and a 2-liter bottle) can send paper rockets much higher and farther.
The paper rocket principles are similarairtight nose, stable fins, good fitjust with more dramatic liftoff.
Final Countdown
You now have a reliable way to make a paper rocket, launch it, and improve it like an engineer. The real win isn’t just the flight distance
it’s learning how small design choices (fin shape, nose cone length, weight, and fit) change the outcome. That’s the heart of STEM:
build, test, learn, redesign… and celebrate the occasional accidental victory.
of Paper-Rocket Experience From the Launch Pad
The first time you launch a paper rocket, you expect a clean, cinematic arcsomething that would make a space documentary narrator whisper,
“And in that moment, humanity reached for the stars.” What you often get instead is a paper tube that shoots out, immediately wobbles like it forgot
its purpose, and gently faceplants into a chair leg. And honestly? That’s part of the charm.
After a few launches, you start noticing patterns. The rockets that go nowhere usually have the same problem: the tube is too tight on the straw.
You blow, your cheeks inflate, your dignity evaporates, and the rocket barely budges. The fix is almost always mechanical, not emotional:
reroll the body slightly looser, reduce tape bulk, and make sure the rocket slides smoothly. Once you feel that “just right” fit, launches suddenly
become consistentand consistency is where the fun experimentation lives.
Next comes the “why is it spinning like a tiny paper tornado?” phase. This is where fins teach you humility. One fin slightly higher than the others,
or one fin angled differently, can turn a straight flight into a dramatic curve. If you want a simple rule from the field: symmetry wins.
When all fins match in size and angle, your rocket stops improvising and starts behaving. You don’t need perfect measurementsjust make the fins
as identical as you reasonably can and place them evenly around the base.
Then there’s the nose: the underrated hero. A nose that leaks air is basically a built-in performance limiter. If you pinch the nose shut but leave a tiny gap,
air escapes forward and steals thrust from the launch. Taping the nose so it’s airtight often adds more distance than adding bigger fins ever will.
And if your rocket keeps flipping, a single small paper clip near the nose can feel like a cheat codebecause shifting the center of mass forward
can turn a chaotic tumble into a stable glide-like flight. The key is restraint: too much weight and your rocket becomes a short-range brick with dreams.
One of the best “experience hacks” is to treat your launches like a mini competition against yourself. Give each rocket a name (serious or ridiculous),
run three to five trials, and average the distance. You’ll quickly learn that one lucky flight doesn’t mean your design is great; it might mean your launch
angle was perfect for that one moment. Averaging makes your results feel realand makes improvements feel earned.
Finally, the most satisfying part: the redesign moment. You’ll start with a basic rocket, then tweak one variablejust oneand watch the effect.
Longer nose cone? Straighter flight. Smaller fins? Less drag, sometimes more distance. Slightly different angle? Different trajectory. It feels like magic
until you realize it’s not magicit’s feedback. Your paper rocket is basically a tiny, flying science report that gives you instant results.
And when you finally build one that shoots cleanly across the room like it meant to do that all along, you’ll understand why people keep making them.
It’s not just a craft. It’s a launch you can repeat until it’s great.


