Table of Contents >> Show >> Hide
- What Is a Totem Pole?
- Materials You Will Need
- How to Make a Totem Pole: 11 Steps
- Step 1: Learn Before You Create
- Step 2: Choose the Type of Totem Pole Craft
- Step 3: Plan Your Story
- Step 4: Sketch the Layout
- Step 5: Prepare the Base
- Step 6: Cover or Paint the Tube
- Step 7: Create the Main Figures
- Step 8: Add Bold Lines and Patterns
- Step 9: Add Wings, Ears, Beaks, and 3D Details
- Step 10: Write a Meaning Card
- Step 11: Seal, Display, and Share
- Respectful Design Tips
- Creative Variations
- Common Mistakes to Avoid
- Experience Notes: What Making a Totem Pole Craft Teaches You
- Conclusion
Learning how to make a totem pole can be a colorful, hands-on way to explore storytelling, symbolism, and art. But before the glue sticks start rolling across the table like tiny escape artists, there is one important thing to understand: traditional totem poles are not random decorations. They are meaningful works of Northwest Coast Indigenous art, often connected to family history, clan identity, important events, ancestors, and community stories.
That means this project should be approached with respect. Unless you are working directly with an Indigenous artist, teacher, or community, your goal is not to copy a real clan crest, sacred image, or ceremonial pole. Instead, this tutorial will help you create a totem pole-inspired storytelling craft using your own symbols, values, family memories, animals, colors, and creative ideas. Think of it as a personal story towernot a pretend cultural artifact.
This guide is perfect for classrooms, homeschool projects, family craft nights, art lessons, and anyone who wants a meaningful recycled craft project. You can make it from cardboard tubes, paper towel rolls, poster board, lightweight wood, foam board, or even stacked boxes. The result can be simple enough for kids or detailed enough for older students and adults who enjoy patient cutting, painting, and “where did I put the black marker?” moments.
What Is a Totem Pole?
A traditional totem pole is a tall carved pole associated especially with Indigenous peoples of the Pacific Northwest Coast, including communities in what is now Alaska, British Columbia, and Washington. Many poles are carved from cedar and feature stacked figures such as animals, people, supernatural beings, or symbolic forms. These figures are not just “cute animals in a vertical lineup.” They often tell stories, honor ancestors, display family crests, commemorate events, or welcome visitors.
For a modern craft project, the best approach is to focus on the broad idea of visual storytelling. Your project can represent your family, your class, your favorite values, a personal journey, or a fictional story. For example, a student might choose an owl for learning, a salmon for persistence, a bear for courage, and a sun for hope. A family might create a pole showing a dog, a book, a garden, and a mountain to represent shared memories. That is meaningful, personal, and respectful.
Materials You Will Need
You do not need a cedar log, a master carver’s workshop, or a dramatic soundtrack. A simple homemade totem pole can be made with supplies you probably already have hiding in drawers, closets, and that mysterious craft box nobody fully understands.
Basic Supplies
- One paper towel roll, mailing tube, poster board tube, or cardboard column
- Construction paper, cardstock, or thin craft foam
- Pencil and eraser
- Markers, crayons, colored pencils, or acrylic paint
- Scissors
- Glue stick, school glue, or craft glue
- Ruler
- Scrap cardboard for the base
- Tape or hot glue for stronger assembly
- Optional: feathers made from paper, yarn, buttons, beads, craft sticks, or recycled packaging
Safety Tip
If children are making this craft, use child-safe scissors and washable supplies. Hot glue, craft knives, and spray sealants should be handled only by adults or older makers with supervision. A beautiful craft is great; a dramatic glue burn is not part of the lesson plan.
How to Make a Totem Pole: 11 Steps
Step 1: Learn Before You Create
Start by learning what totem poles are and where they come from. This step matters because it keeps the project respectful and more interesting. Explain that traditional poles belong to specific cultures and communities, and many designs carry meanings that are not ours to copy. Avoid tracing real totem pole images from museums, copying clan crests, or using sacred stories as decoration.
Instead, ask: “What story do I want my project to tell?” Your homemade pole might represent your personal strengths, your family history, a favorite adventure, a classroom theme, or values such as courage, kindness, patience, creativity, and humor. Yes, humor counts. A raccoon figure can absolutely represent “resourcefulness,” especially if it also represents your talent for finding snacks at midnight.
Step 2: Choose the Type of Totem Pole Craft
Decide what kind of project you want to make. A cardboard tube totem pole is the easiest and most popular version. It stands upright, is lightweight, and works well for kids. A flat poster version is better for large classroom displays. A stacked box version works nicely for group projects because each student can decorate one section. A wooden version is best for older makers who want a long-lasting decorative piece.
For beginners, use a paper towel roll or mailing tube. It gives you the tall shape without complicated construction. If you want a larger display, tape several tubes together or roll poster board into a cylinder. Keep the size manageable. A six-foot craft pole sounds impressive until it falls over during lunch.
Step 3: Plan Your Story
Before drawing anything, write a simple story plan. A totem pole-inspired craft usually works best with three to five stacked sections. Each section should represent one idea. For example:
- Top figure: Eagle for vision and big dreams
- Second figure: Bear for courage and protection
- Third figure: Salmon for persistence
- Bottom figure: Tree for family roots and growth
You can also create a non-animal version. A book might stand for learning, a house for belonging, a wave for change, a star for hope, and a paintbrush for creativity. The symbols do not have to be traditional. In fact, making your own symbols is the point. Your pole should tell your story, not borrow someone else’s.
Step 4: Sketch the Layout
Use a pencil to divide your cardboard tube into equal sections. If you have four symbols, divide the tube into four parts. A ruler helps keep everything neat, although slightly wobbly lines can be forgiven in the name of artistic spirit.
Sketch each figure lightly. Traditional Northwest Coast art often uses strong shapes, bold outlines, and repeated design elements such as ovals, U-shapes, and curved forms. For your craft, you can use bold geometric shapes without copying real designs. Draw large eyes, strong eyebrows, wings, paws, fins, beaks, or patterns that make each section easy to recognize.
Keep your drawing simple at first. Tiny details may disappear once you paint or color. Large shapes look better from a distance and make the finished craft feel more dramatic.
Step 5: Prepare the Base
A totem pole craft needs a stable base, especially if you want it to stand on a desk, shelf, or classroom table. Cut a square or circle from thick cardboard. The base should be wider than the tube. For a paper towel roll, a base about six to eight inches wide usually works well.
Stand the tube in the center of the base and trace around it. Glue the tube in place. For extra strength, add tape around the bottom or use small folded cardboard tabs. If using hot glue, let an adult handle this part. Hold the tube upright until the glue sets. Nobody wants a leaning tower of symbolism unless leaning is part of the story.
Step 6: Cover or Paint the Tube
You can paint the tube brown, black, red, or another background color. You can also wrap it with construction paper. If wrapping, cut a piece of paper the same height as the tube and wide enough to go around it with a small overlap. Glue or tape the seam at the back.
Brown gives the project a wood-like appearance. Black creates a bold background. White or tan makes marker colors stand out. If you are making the craft with young children, paper wrapping is cleaner than paint. If you enjoy paint and have accepted the possibility of finding blue fingerprints on your elbow later, acrylic or tempera paint works well.
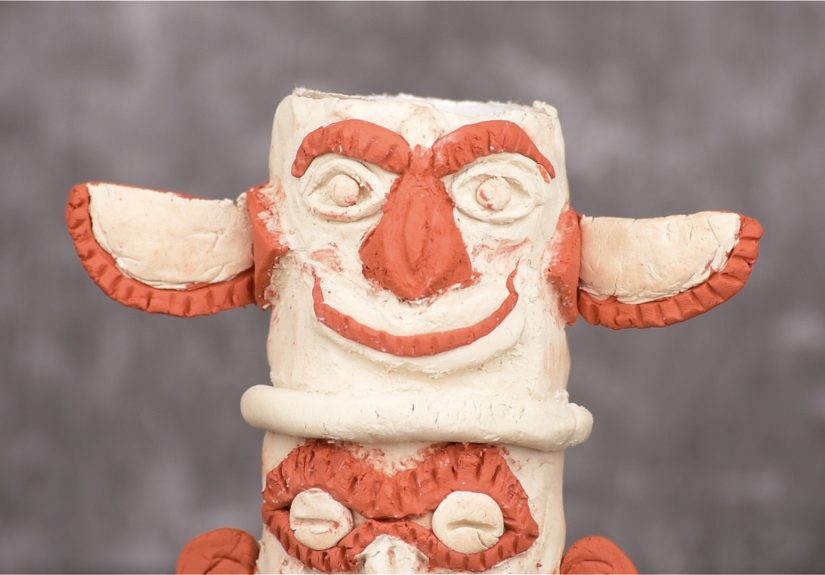
Step 7: Create the Main Figures
Now create the faces, animals, or symbols for each section. You can draw directly on the tube, or you can cut shapes from colored paper and glue them on. Paper pieces add dimension and make the project look layered.
For an eagle, cut a curved beak, sharp eyes, and wing shapes. For a bear, use round ears, a wide nose, and strong paws. For a salmon, add fins, scales, and a flowing body. For a tree, use a trunk, branches, leaves, or roots. If your symbol is “creativity,” you might use a paintbrush, spiral, light bulb, or bright burst shape.
Stack the figures from top to bottom in the order that best tells your story. The top can represent a guiding idea, while the bottom can represent a foundation. For example, “family” might go at the bottom because it supports everything else.
Step 8: Add Bold Lines and Patterns
Bold outlines help your totem pole craft look polished. Use a black marker, dark paint pen, or thin brush to outline eyes, mouths, wings, paws, fins, and borders. Add repeated patterns such as dots, stripes, triangles, curves, or blocks of color.
Limit your palette to a few strong colors so the design does not become visual confetti. Red, black, white, blue-green, brown, and yellow are common choices in many Northwest Coast-inspired classroom projects, but you can use colors that fit your own story. A family memory pole might use favorite family colors. A nature-themed pole might use forest greens, water blues, and warm sunset tones.
Do not worry about making the lines perfect. Handmade art should look alive. A slightly uneven line is not a mistake; it is proof that a real human made it, probably while trying not to glue their sleeve to the table.
Step 9: Add Wings, Ears, Beaks, and 3D Details
Three-dimensional details make the craft more exciting. Cut wings from cardstock and glue them behind an eagle or bird figure. Add paper ears to a bear or wolf. Use folded paper for a beak. Add yarn for hair, cardboard strips for arms, or layered paper for feathers.
Keep the pieces balanced. If one side is much heavier than the other, the pole may tip. If you add large wings, attach them near the upper middle and make sure the base is wide enough. For a classroom project, remind students that “more decorations” does not always mean “better design.” Sometimes the best detail is one strong shape placed exactly where it belongs.
Step 10: Write a Meaning Card
This step turns the craft from a decoration into a storytelling project. Create a small card that explains what each figure means. You can tape it to the base, display it beside the pole, or glue it to the back.
Here is an example:
My Story Pole: The eagle represents my goal to see new possibilities. The bear represents courage when I feel nervous. The salmon represents working hard even when something is difficult. The tree represents my family and the people who help me grow.
This explanation helps viewers understand your choices. It also reinforces the idea that symbols should carry meaning. A totem pole-inspired craft is strongest when it tells a story clearly.
Step 11: Seal, Display, and Share
Once everything is dry, decide how to display your finished piece. If you used markers and paper, no sealant is necessary. If you painted the pole and want it to last longer, an adult can apply a clear craft sealant in a well-ventilated area.
Display the project on a shelf, classroom table, art board, or cultural learning station. If this is a group activity, let each maker briefly explain their symbols. Sharing the story is part of the experience. It also prevents the classic classroom problem where twenty projects are admired only with “Cool!” and nobody knows what any of them mean.
Respectful Design Tips
When making a totem pole-inspired craft, respectful choices matter. Do not copy a specific Indigenous family crest, museum object, ceremonial image, or sacred figure. Do not present your craft as an authentic Native American totem pole. Do not treat all Native American cultures as if they are the same. Totem poles are especially connected to Northwest Coast cultures, not every Indigenous nation.
Better choices include creating personal symbols, using fictional animals, focusing on values, or designing a family story pole. Teachers can add a short research component so students learn where traditional poles come from and why they matter. If possible, include Indigenous-authored resources, museum materials, or videos featuring Northwest Coast artists speaking about their own work.
Creative Variations
Classroom Community Pole
Give each student one small box or tube section. Ask them to design a symbol for one shared classroom value, such as curiosity, respect, teamwork, kindness, or courage. Stack the sections into one tall classroom story pole.
Family Memory Pole
Ask each family member to choose one symbol that represents a favorite memory or personality trait. Combine them into one display piece. This makes a thoughtful family craft and a great conversation starter.
Nature Story Pole
Choose symbols from a local ecosystem: river, tree, owl, fox, deer, mountain, moon, or sun. Use the project to tell a story about protecting nature or appreciating the outdoors.
Mini Desk Pole
Use a toilet paper tube for a small version. This is ideal for younger children or quick art lessons. Add a cardboard base and three simple symbols.
Common Mistakes to Avoid
The first common mistake is starting without a story. Random animals can look fun, but a meaningful plan makes the craft stronger. The second mistake is using too many tiny details. Large, bold shapes work better on a vertical tube. The third mistake is making the base too small. A top-heavy pole will wobble like it has had too much coffee.
Another mistake is copying real Indigenous designs without context or permission. This is not necessary for a successful project. Your own symbols will make the finished craft more personal and more respectful. Finally, do not rush the drying time. Wet glue and upright cardboard have a complicated relationship, and it rarely ends well.
Experience Notes: What Making a Totem Pole Craft Teaches You
One of the best things about making a totem pole-inspired craft is that it slows the creative process down in a useful way. Many crafts begin with “cut this, glue that, congratulations, you made a thing.” This project asks for more thought. You have to decide what matters, how to represent it, and how each symbol connects to the next. That extra planning turns a simple cardboard tube into a small visual autobiography.
In classroom settings, this project often works best when students talk before they draw. Ask them what animal, object, or shape could represent bravery. Some will say lion, bear, or eagle. Others may choose a tiny ant because ants carry heavy things and never seem to complain. That is a wonderful answer. The point is not to force one “correct” meaning but to help each maker connect image and idea.
Another useful experience is learning that simple designs usually win. The first draft may include five animals, three suns, lightning bolts, mountains, waves, stars, and a mysterious shape that was supposed to be a wolf but now looks like a potato with ears. After some editing, the final version becomes clearer. A strong bear face, a bold salmon shape, and a clean tree symbol can say more than a crowded design with too much happening.
Working with tubes also teaches patience. Curved surfaces are trickier than flat paper. Markers may slip. Glue may need extra pressure. Paper wings may try to peel off. These small frustrations are part of the craft. They teach problem-solving: hold the seam longer, use thicker paper, reinforce the base, or draw the design on flat paper before wrapping it around the tube. Every wobble has a lesson hiding inside it.
The most meaningful moment usually comes when the maker explains the finished pole. A child might say the owl is for their grandmother because she reads stories. A teen might use a wave to represent moving to a new city. An adult might choose a mountain because it reminds them of a challenge they overcame. Suddenly, the craft is not just paper and glue. It becomes a story someone cared enough to build by hand.
That is why this project is worth doing carefully. It encourages research, respect, symbolism, design, and storytelling all at once. It also gives makers a chance to think about identity without needing a perfect drawing or expensive supplies. A cardboard tube may not look impressive at first, but with thoughtful symbols and bold colors, it can become a small tower of memory, meaning, and creativity. Not bad for something that once held paper towels.
Conclusion
Making a totem pole-inspired craft is a fun, meaningful way to combine art and storytelling. The key is to approach the project with respect: learn about traditional Northwest Coast totem poles, avoid copying sacred or clan-specific designs, and create symbols that belong to your own story. With a cardboard tube, paper, markers, glue, and a little patience, you can build a colorful project that represents values, memories, goals, or family identity.
The best homemade totem pole is not the tallest, fanciest, or most perfectly painted. It is the one that tells a clear story. Choose your symbols carefully, keep your design bold, build a sturdy base, and share the meaning behind each figure. That is how a simple craft becomes something people actually stop to look atand maybe even ask about before the glue is fully dry.


