Table of Contents >> Show >> Hide
- Why DIY Ghost Candles from Yogurt Bottles Are a Brilliant Idea
- Supplies You’ll Need for DIY Ghost Candles
- Step-by-Step: How to Make Cute DIY Ghost Candles
- Fun Ways to Display Your Yogurt Bottle Ghost Candles
- Safety Tips for DIY Ghost Candles
- Common Problems & Easy Fixes
- Creative Variations on Yogurt Bottle Ghost Candles
- Real-Life Experiences & Extra Tips for Making DIY Ghost Candles
- Start with a “test ghost” before going into mass production
- Let kids design the faces (but handle cutting and sealing yourself)
- Batch your steps like a mini assembly line
- Don’t skip the “weight in the bottom” step
- Store them carefully so they live to haunt another year
- Use them beyond Halloween
- Turn it into a yearly tradition
- Use them as a gentle reminder about sustainability
- Final Thoughts
If your recycling bin is overflowing with little yogurt drink bottles, good news: you’re just a few steps away from some ridiculously cute DIY ghost candles. Think of this project as the love child of Halloween decor and eco-friendly crafting. It’s budget-friendly, beginner-friendly, and “wow-is-that-really-a-yogurt-bottle?” friendly.
Inspired by popular upcycled Halloween crafts like milk jug ghosts, DIY ghost lanterns, and glowing luminaries made from jars and recycled bottles, this tutorial adapts those ideas specifically for small yogurt drink bottles. These little bottles are the perfect ghost shape alreadyyou just add paint, a spooky-cute face, and a faux candle to bring them to life.
Why DIY Ghost Candles from Yogurt Bottles Are a Brilliant Idea
1. You’re upcycling instead of tossing
Many crafters are turning to recycled containerslike milk jugs, yogurt tubs, and glass jarsto make Halloween luminaries and ghost lanterns that glow. Yogurt drink bottles (think Yakult, Actimel, Danimals, or other probiotic shots) are small, sturdy, and usually white or light-colored, which makes them ideal for mini ghosts.
2. They’re safe to light with kids and pets around
Most modern ghost candle tutorials rely on battery-operated tealights, fairy lights, or LED candles instead of open flames. That means your ghost candles are safe to line a staircase, decorate a kids’ party table, or sit in a window without worrying about melted plastic or singed curtains.
3. They’re quick, easy, and very forgiving
This is one of those crafts where “slightly wonky” actually makes it cuter. Uneven eyes? Your ghost is just surprised. Crooked mouth? That’s obviously a spooky smirk. You don’t need fancy tools, an art degree, or endless patiencejust a handful of supplies and maybe a podcast or playlist in the background.
Supplies You’ll Need for DIY Ghost Candles
Here’s a basic supplies list, inspired by common ghost lantern and luminary tutorials that use recycled containers and LED lights.
Core materials
- Clean, empty yogurt drink bottles (1–12 or more, depending on how many ghosts you want)
- White acrylic paint or white spray paint (if your bottles aren’t already white)
- Black permanent marker or black acrylic paint for the ghost faces
- Battery-operated tealights or mini LED candles (one per bottle)
Helpful extras (optional but fun)
- Fine-grit sandpaper (to lightly scuff slippery plastic so paint sticks better)
- Rubbing alcohol or dish soap (for cleaning and de-greasing)
- Clear sealer spray or Mod Podge (to protect your paint and keep faces from rubbing off)
- Cheesecloth or scrap white fabric (to drape over groups of bottles for a layered ghosty look, inspired by ghost lantern tutorials)
- Hot glue gun (if you want to attach bottles to a tray or base)
- Small pebbles or sand (to weigh down the bottles for outdoor displays)
Step-by-Step: How to Make Cute DIY Ghost Candles
Step 1: Clean and prep the yogurt bottles
First, rescue your bottles from the recycling bin. Peel off the labels and adhesivesoaking them briefly in warm soapy water helps. For stubborn sticky residue, rub with a little oil and baking soda or a commercial adhesive remover, similar to how crafters remove labels on milk jugs for ghost luminaries.
Once labels are off, wash the bottles thoroughly with dish soap and let them dry. For best paint adhesion, wipe each bottle with rubbing alcohol and lightly sand the surface with fine-grit sandpaper.
Step 2: Paint your ghost bodies
If your yogurt drink bottles are already opaque white, you may only need a light coat of paint to even out the color. Otherwise:
- Spread newspaper or a drop cloth over your workspace.
- Use white spray paint designed for plastic for fast, even coverage; or
- Brush on two thin coats of white acrylic paint, letting each coat dry fully.
This step is similar to upcycled Halloween bottle crafts and mini yogurt bottle vasesthin, layered coats give a smoother finish and help avoid drips.
Step 3: Add the ghost faces
Now for the personality! Once the paint is completely dry, grab your black marker or a small brush and black acrylic paint.
Try a mix of expressions to keep things playful:
- Classic ghost: Two oval eyes and a long “O” mouth
- Happy ghost: Crescent-shaped eyes and a wide smile
- Spooked ghost: One big eye, one small eye, and a squiggly mouth
- Sleepy ghost: Half-moon eyes and a tiny round mouth
Many ghost crafts use nothing more than a simple marker-drawn face on white containersmilk jugs, jars, and bottlesso don’t overthink it. Imperfection is part of the charm.
Step 4: Create an opening for the LED candle
There are two easy ways to add your light source:
- Top-loading: If the bottle opening is wide enough, simply drop an LED tealight or tiny LED candle into the top. Turn it on first, then gently set the bottle over it like a ghosty lampshade.
- Back hatch: If the opening is too narrow, carefully cut a small door in the back or bottom using a craft knifesimilar to milk jug and bottle ghost tutorials where a hole is cut for string lights. Insert your LED from the back.
Important: Use only battery-operated lights with plastic bottles. No real flamessave those for glass jars or regular candle holders.
Step 5: Add weight if needed
If your ghost candles will sit outside or near wiggly kids or pets, add a tablespoon or two of sand, pebbles, or dry rice inside the bottom of the bottle before inserting your candle. This trick is borrowed from outdoor ghost luminary projects and keeps your ghosts from tipping in the wind.
Step 6: Seal and protect (optional)
To keep the faces from smudging, especially if you used markers, lightly spray the bottles with a clear acrylic sealer or brush on a thin layer of Mod Podge. Upcycled yogurt bottle vases and other painted bottle crafts often use this step to boost durability.
Fun Ways to Display Your Yogurt Bottle Ghost Candles
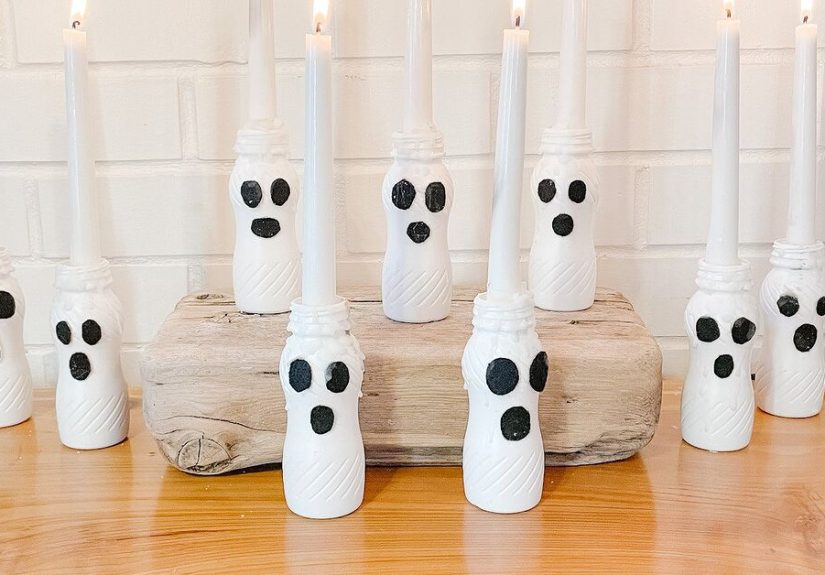
Create a mini ghost army
Line up a dozen little ghosts along a mantel, shelf, or windowsill. Vary the heights by placing some bottles on small boxes or stacked books. This mimics the ghost lantern groupings used as centerpieces and mantle decor.
Light up your front steps or walkway
Cluster ghost candles on the porch, steps, or along a path leading to your door. Because you’re using LED lights, they’re safer than real candles and easy to move around. Just remember to weigh them down so they don’t blow over.
Make a spooky tray display
Arrange ghosts on a tray with faux spiderwebs, mini pumpkins, and plastic spiders. This makes a great Halloween table centerpiece or sideboard display. Many Halloween luminary roundups show how a simple tray or crate instantly makes small lights look intentional and styled.
Mix and match with other recycled ghost crafts
Combine your yogurt bottle ghosts with larger milk jug ghosts, ghost lanterns made from mason jars, or fabric ghosts draped over jars. The variety of shapes and sizes creates a layered, whimsical look.
Safety Tips for DIY Ghost Candles
Even though these are “candles,” think of them more like glowing props. Most modern ghost and luminary tutorials strongly recommend flameless options. Keep these basics in mind:
- Use LED only: Do not use real tealights or tapers inside plastic yogurt bottles. The heat can melt plastic or release fumes.
- Indoor use only (for plastic): If you display them outdoors, bring them in during heavy rain or strong wind to avoid damage.
- Check batteries regularly: Replace worn-out batteries in LED lights to avoid leakage, especially if you store the ghosts until next year.
- Keep cords safe: If you use string lights instead of individual LEDs, tape or secure the cords to avoid tripping hazards.
Common Problems & Easy Fixes
“My paint keeps peeling or scratching off.”
This is a classic slippery-plastic issue. Try lightly sanding the bottles, wiping them with rubbing alcohol, then applying a primer or a paint specifically made for plastic before your main coat. Many upcycled bottle and jar projects recommend this extra prep step for a longer-lasting finish.
“The ghost faces look crooked or weird.”
Lean into it! Ghosts are supposed to be a little odd. But if you really want a neater look, sketch the face lightly with pencil first, use small circle stickers as stencils, or cut eyes and mouths from black vinyl or felt and glue them onsimilar to how ghost lantern tutorials use felt features.
“The bottles keep tipping over.”
Make the bottles bottom-heavy by adding sand, gravel, or dry beans. For extra security, you can hot-glue the bottoms onto a scrap of wood or a tray so you can move them as a group.
“They don’t glow as much as I expected.”
Use brighter LED tealights or tiny fairy lights placed directly under or inside the bottle. Some crafters use warm white lights for a cozy glow, while others choose cool white or even color-changing LEDs for a more dramatic effect.
Creative Variations on Yogurt Bottle Ghost Candles
Glow-in-the-dark ghosts
Swap your regular white paint for glow-in-the-dark paint or topcoat. This idea is borrowed from glow-in-the-dark ghost crafts and makes your bottles glow even when the LEDs are off.
“BOOttles” with costumes
Inspired by branded yogurt bottle Halloween campaigns that turn bottles into “BOOttles,” you can wrap cheesecloth or gauze around each bottle like a mummy, or tie tiny scarves and bows around their “necks.”
Ghost family with names
Make a ghost for each family member and add their names on the back or base. This works especially well for kids’ parties or classroom displays. Each child can design their own ghost face and choose a favorite LED color.
Pastel or metallic ghosts
Who says ghosts have to be plain white? Pastel ghost bottles look adorable for “cute & cozy” Halloween decor, while metallic finishes (silver, rose gold) give you a more modern, stylish look that pairs well with neutral home decor trends.
Real-Life Experiences & Extra Tips for Making DIY Ghost Candles
Once you’ve made one or two yogurt bottle ghost candles, you’ll notice something: they’re surprisingly addictive. Here are some experience-based tips and stories that can help you get even better results and have more fun with the process.
Start with a “test ghost” before going into mass production
It’s tempting to line up twenty bottles and paint them all at once, but doing a single test ghost first is a game-changer. You can experiment with how thick your paint should be, whether spray or brush works better in your space, and how big you want the facial features. Once you’ve dialed in your favorite look, the rest go faster and come out more consistent.
Let kids design the faces (but handle cutting and sealing yourself)
If you’re crafting with children, let them draw ghost faces on plain paper first. This “face rehearsal” helps them play with expressions and makes the final faces on the bottles more intentional. When it’s time to draw on the bottles, they’ll be more confident. For safety, an adult should handle any utility knife cuts and spray sealing outdoors or in a well-ventilated area.
Batch your steps like a mini assembly line
Think of your kitchen table as a tiny, seasonal candle factory:
- Clean and de-label all bottles at once.
- Paint all fronts, then all backs, instead of finishing one bottle at a time.
- While one coat dries, sketch face ideas or prep LEDs and weights.
Batching keeps things from feeling tedious, and it’s the same strategy many crafters use when making sets of luminaries, ghost jars, or yogurt bottle vases for events or markets.
Don’t skip the “weight in the bottom” step
From experience, this little detail can save your sanity. Lightweight plastic ghosts + running kids + curious pets = toppled ghosts and maybe cracked LEDs. A spoonful of sand, tiny stones, or even a few coins inside the bottle makes them feel solid and less fragile. For porch displays, this is almost non-negotiablewind loves a cute, hollow ghost.
Store them carefully so they live to haunt another year
When Halloween is over, you don’t have to toss your ghost candles. Wrap them loosely in tissue paper or reuse the original yogurt drink carton as a storage tray. Keep them in a cool, dry place (like a closet or bin) to prevent paint from sticking or faces from rubbing against each other. If you used good primer and sealer, they’ll emerge next year ready to glow again with maybe just a tiny touch-up.
Use them beyond Halloween
Believe it or not, these little ghosts aren’t limited to October. You can rebrand them as “friendly spirits” for movie nights, sleepovers, or even a kid’s birthday party with a spooky theme. Swap the spooky accessories for stars, clouds, or pastel decorations, and suddenly they look more whimsical than scary.
Turn it into a yearly tradition
Many families build annual traditions around simple craftslike carving pumpkins or making cookie housesand ghost luminaries made from recycled containers fit perfectly into that category. Each year, you can add a new “series” of yogurt bottle ghosts: maybe one year they’re classic, the next year they glow in the dark, and the year after that they’re wearing tiny hats. Over time, you’ll build a little ghost collection with its own history.
Use them as a gentle reminder about sustainability
These ghost candles are a subtle, kid-friendly way to talk about waste and recycling. Instead of just tossing the bottles, you’re giving them a second life as decor. That idea mirrors a lot of sustainable craft projects that encourage using what you already havemilk jugs, jars, yogurt bottles, tin cansinstead of buying new plastic decorations every year.
By the time you’ve made a batch, you’ll probably find yourself eyeing other containers around the house, wondering, “Could this be a ghost too?” (Short answer: yes, almost anything can be a ghost if you add big eyes and a tiny “O” mouth.)
Final Thoughts
Making cute DIY ghost candles out of yogurt drink bottles is the perfect mix of crafty, thrifty, and fun. You’re turning something that would normally hit the recycling bin into a customized Halloween decoration that fits your stylewhether you prefer spooky, silly, or gently glowing and minimalist.
With a few basic supplies and a little imagination, you can create a ghostly glow on your mantel, porch, or party table, all while upcycling and making memories. And if anyone asks where you bought those adorable ghost candles, you can just smile and say, “Oh, these? They used to be yogurt.”


